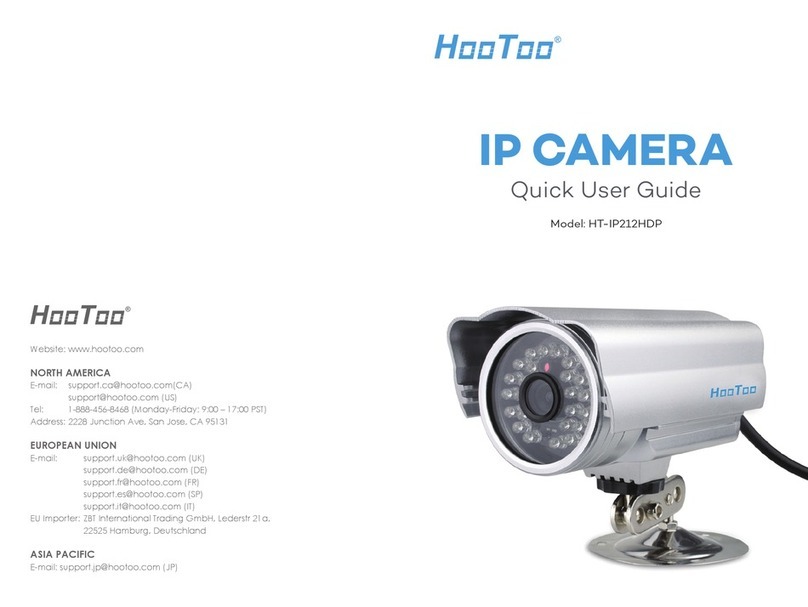
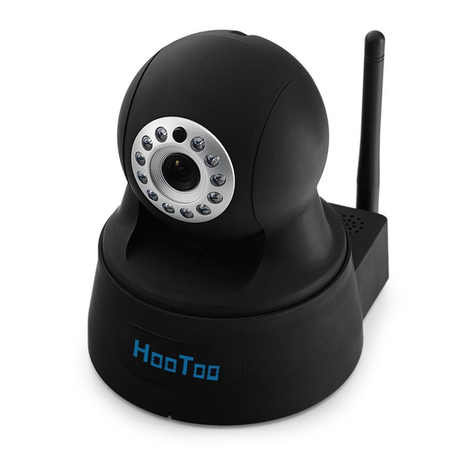
Hootoo HT-IP212HDP User manual

IP CAMERA
Model: HT-IP212HDP
Advanced User Manual
For MAC

For MAC
1.Access the IP Camera
1.1 Wired Mode
1) Please find the IPCamSearch software in the Resource CD, and
copy it to your local drive.
2) Make sure the camera is connected to your router via network cable
3) Open IPCamSearch from your local drive
4) Locate your camera’s IP address:
5) Select the IP address and double click on it. This will lead you
to HT-IP212HDP web setting page
6) Login with default Username “admin” and Password “admin”
7) Once logged in, you should be able to see the live video at home page.
1.2 Wireless Mode
1) After login the web setting page, click on “ ” at the
top of the page
2) Click “Network Settings”, then click “Wireless” to scan nearby
wireless network
3) Select the wireless network you wish to connect to. Enter the
password, and then click “Save”
4) After the progress bar finish, wait about 60 seconds for device
to restart
5) Once restart finished, pull out the network cable from the
connected camera
6) Open the Search IPCam Tool software again. It may take up to 10
seconds for searching the result.
7) Double click on the new IP address. This will lead you to the login
page of the HT-IP212HDP web setting page in your default browser.
8) Use the default username and password “admin” to login
9) If a WebCMS add-in pops up, please allow the computer to run it:
10) Now you have setup the camera in Wi-Fi mode
Note:
•When you fill in Wi-Fi password, please note that there should be no
special characters ( such as < > ‘ ’)
• If you fail to find the camera’s IP address while other IP addresses
show normally after searching, please fill in the SSID manually
• If the camera gets offline once you unplug the network cable, please
open your router’s webpage and then make proper settings.
2. Control and Settings
2.1 Home Page
At home page, you can view camera live video.
2.1.1 Video Settings
Switch between Main Stream and Sub Stream settings according
to your network bandwidth. The following are recommended
parameters for each setting.
2.2 Network Settings
2.2.1 LAN Settings
Two different IP address allocation options are available:
DHCP: Camera gets an IP address from router automatically;
Fixed IP: Assign IP address, Mask, Gateway, and DNS manually.
Notes:
• If you do not tick the “DHCP Enable” box, you have choose “Fixed IP”
• If you want to set a fixed IP for the camera, please keep the camera
in the same subnet of your router or computer.
2.2.2 Email
If the camera is triggered by motion detection, you can get an
email sent to your specified email address. Please test the email
setting to make sure it works.
• SMTP server: Please refer to the email service provider website or Google it
• To: Your email account to receive alerts
• From: your email account used for send out alerts
Note:
• Please remember to enable motion detection to get email alert
2.2.3 DDNS
This feature is used for port forwarding that enables you to view camera
via Internet or external network.
1) Register a private DDNS account from assigned provider. Since
there is no built-in DDNS account for the camera, please go to
the third party DDNS website (such as www.dyndns.org) to apply
a new DDNS account.
2) Go to your router’s configuration page →port forwarding →input
your camera’s IP address and the HTTP port number.
Once DDNS connection and port forwarding is finished, you
will be able to view the camera remotely through the URL
http://yourdomain.Dyndns.org:port.
Notes:
•If the DDNS connection fails, please double check if you have
input the correct hostname, user name, and password, and try
to redo the settings
• The DDNS default status is off
2.2.4 P2P
Here you can get your UUID code. With this code, you can add and
view camera remotely from internet or external network. You will need
to use the UUID code when “Add Camera” on smart phone app or on
HooToo IPCamClient software in another computer (Windows / Mac)
2.3 System
2.3.1 System Info
You can change the Device Name and system language. You can also
check other system information.
2.3.2 System Time
You can set the system time manually or to be the same as NTP service /
local computer.
2.3.3 User Manage
You can create up to 2 guest accounts. Each guest account user can
use all functions in the home page of the camera, and check camera’s
device info. However guest account cannot access parameters setting
page or change other system settings.
Notes:
•P2P password is required when accessing the camera via P2P software
•The username for administrator is fixed as admin, but you can
change the password
2.3.4 System Log
In this log page, you can search all operation record of this camera.
01/02

For MAC
1.Access the IP Camera
1.1 Wired Mode
1) Please find the IPCamSearch software in the Resource CD, and
copy it to your local drive.
2) Make sure the camera is connected to your router via network cable
3) Open IPCamSearch from your local drive
4) Locate your camera’s IP address:
5) Select the IP address and double click on it. This will lead you
to HT-IP212HDP web setting page
6) Login with default Username “admin” and Password “admin”
7) Once logged in, you should be able to see the live video at home page.
1.2 Wireless Mode
1) After login the web setting page, click on “ ” at the
top of the page
2) Click “Network Settings”, then click “Wireless” to scan nearby
wireless network
3) Select the wireless network you wish to connect to. Enter the
password, and then click “Save”
4) After the progress bar finish, wait about 60 seconds for device
to restart
5) Once restart finished, pull out the network cable from the
connected camera
6) Open the Search IPCam Tool software again. It may take up to 10
seconds for searching the result.
7) Double click on the new IP address. This will lead you to the login
page of the HT-IP212HDP web setting page in your default browser.
8) Use the default username and password “admin” to login
9) If a WebCMS add-in pops up, please allow the computer to run it:
10) Now you have setup the camera in Wi-Fi mode
Note:
•When you fill in Wi-Fi password, please note that there should be no
special characters ( such as < > ‘ ’)
• If you fail to find the camera’s IP address while other IP addresses
show normally after searching, please fill in the SSID manually
• If the camera gets offline once you unplug the network cable, please
open your router’s webpage and then make proper settings.
2. Control and Settings
2.1 Home Page
At home page, you can view camera live video.
2.1.1 Video Settings
Switch between Main Stream and Sub Stream settings according
to your network bandwidth. The following are recommended
parameters for each setting.
2.2 Network Settings
2.2.1 LAN Settings
Two different IP address allocation options are available:
DHCP: Camera gets an IP address from router automatically;
Fixed IP: Assign IP address, Mask, Gateway, and DNS manually.
Notes:
• If you do not tick the “DHCP Enable” box, you have choose “Fixed IP”
• If you want to set a fixed IP for the camera, please keep the camera
in the same subnet of your router or computer.
2.2.2 Email
If the camera is triggered by motion detection, you can get an
email sent to your specified email address. Please test the email
setting to make sure it works.
• SMTP server: Please refer to the email service provider website or Google it
• To: Your email account to receive alerts
• From: your email account used for send out alerts
Note:
• Please remember to enable motion detection to get email alert
2.2.3 DDNS
This feature is used for port forwarding that enables you to view camera
via Internet or external network.
1) Register a private DDNS account from assigned provider. Since
there is no built-in DDNS account for the camera, please go to
the third party DDNS website (such as www.dyndns.org) to apply
a new DDNS account.
2) Go to your router’s configuration page →port forwarding →input
your camera’s IP address and the HTTP port number.
Once DDNS connection and port forwarding is finished, you
will be able to view the camera remotely through the URL
http://yourdomain.Dyndns.org:port.
Notes:
•If the DDNS connection fails, please double check if you have
input the correct hostname, user name, and password, and try
to redo the settings
• The DDNS default status is off
2.2.4 P2P
Here you can get your UUID code. With this code, you can add and
view camera remotely from internet or external network. You will need
to use the UUID code when “Add Camera” on smart phone app or on
HooToo IPCamClient software in another computer (Windows / Mac)
2.3 System
2.3.1 System Info
You can change the Device Name and system language. You can also
check other system information.
2.3.2 System Time
You can set the system time manually or to be the same as NTP service /
local computer.
2.3.3 User Manage
You can create up to 2 guest accounts. Each guest account user can
use all functions in the home page of the camera, and check camera’s
device info. However guest account cannot access parameters setting
page or change other system settings.
Notes:
•P2P password is required when accessing the camera via P2P software
•The username for administrator is fixed as admin, but you can
change the password
2.3.4 System Log
In this log page, you can search all operation record of this camera.
03/04

For MAC
1.Access the IP Camera
1.1 Wired Mode
1) Please find the IPCamSearch software in the Resource CD, and
copy it to your local drive.
2) Make sure the camera is connected to your router via network cable
3) Open IPCamSearch from your local drive
4) Locate your camera’s IP address:
5) Select the IP address and double click on it. This will lead you
to HT-IP212HDP web setting page
6) Login with default Username “admin” and Password “admin”
7) Once logged in, you should be able to see the live video at home page.
1.2 Wireless Mode
1) After login the web setting page, click on “ ” at the
top of the page
2) Click “Network Settings”, then click “Wireless” to scan nearby
wireless network
3) Select the wireless network you wish to connect to. Enter the
password, and then click “Save”
4) After the progress bar finish, wait about 60 seconds for device
to restart
5) Once restart finished, pull out the network cable from the
connected camera
6) Open the Search IPCam Tool software again. It may take up to 10
seconds for searching the result.
7) Double click on the new IP address. This will lead you to the login
page of the HT-IP212HDP web setting page in your default browser.
8) Use the default username and password “admin” to login
9) If a WebCMS add-in pops up, please allow the computer to run it:
10) Now you have setup the camera in Wi-Fi mode
Note:
•When you fill in Wi-Fi password, please note that there should be no
special characters ( such as < > ‘ ’)
• If you fail to find the camera’s IP address while other IP addresses
show normally after searching, please fill in the SSID manually
• If the camera gets offline once you unplug the network cable, please
open your router’s webpage and then make proper settings.
2. Control and Settings
2.1 Home Page
At home page, you can view camera live video.
2.1.1 Video Settings
Switch between Main Stream and Sub Stream settings according
to your network bandwidth. The following are recommended
parameters for each setting.
2.2 Network Settings
2.2.1 LAN Settings
Two different IP address allocation options are available:
DHCP: Camera gets an IP address from router automatically;
Fixed IP: Assign IP address, Mask, Gateway, and DNS manually.
Notes:
• If you do not tick the “DHCP Enable” box, you have choose “Fixed IP”
• If you want to set a fixed IP for the camera, please keep the camera
in the same subnet of your router or computer.
2.2.2 Email
If the camera is triggered by motion detection, you can get an
email sent to your specified email address. Please test the email
setting to make sure it works.
• SMTP server: Please refer to the email service provider website or Google it
• To: Your email account to receive alerts
• From: your email account used for send out alerts
Note:
• Please remember to enable motion detection to get email alert
2.2.3 DDNS
This feature is used for port forwarding that enables you to view camera
via Internet or external network.
1) Register a private DDNS account from assigned provider. Since
there is no built-in DDNS account for the camera, please go to
the third party DDNS website (such as www.dyndns.org) to apply
a new DDNS account.
2) Go to your router’s configuration page →port forwarding →input
your camera’s IP address and the HTTP port number.
Once DDNS connection and port forwarding is finished, you
will be able to view the camera remotely through the URL
http://yourdomain.Dyndns.org:port.
Notes:
•If the DDNS connection fails, please double check if you have
input the correct hostname, user name, and password, and try
to redo the settings
• The DDNS default status is off
2.2.4 P2P
Here you can get your UUID code. With this code, you can add and
view camera remotely from internet or external network. You will need
to use the UUID code when “Add Camera” on smart phone app or on
HooToo IPCamClient software in another computer (Windows / Mac)
2.3 System
2.3.1 System Info
You can change the Device Name and system language. You can also
check other system information.
2.3.2 System Time
You can set the system time manually or to be the same as NTP service /
local computer.
2.3.3 User Manage
You can create up to 2 guest accounts. Each guest account user can
use all functions in the home page of the camera, and check camera’s
device info. However guest account cannot access parameters setting
page or change other system settings.
Notes:
•P2P password is required when accessing the camera via P2P software
•The username for administrator is fixed as admin, but you can
change the password
2.3.4 System Log
In this log page, you can search all operation record of this camera.
05/06

For MAC
1.Access the IP Camera
1.1 Wired Mode
1) Please find the IPCamSearch software in the Resource CD, and
copy it to your local drive.
2) Make sure the camera is connected to your router via network cable
3) Open IPCamSearch from your local drive
4) Locate your camera’s IP address:
5) Select the IP address and double click on it. This will lead you
to HT-IP212HDP web setting page
6) Login with default Username “admin” and Password “admin”
7) Once logged in, you should be able to see the live video at home page.
1.2 Wireless Mode
1) After login the web setting page, click on “ ” at the
top of the page
2) Click “Network Settings”, then click “Wireless” to scan nearby
wireless network
3) Select the wireless network you wish to connect to. Enter the
password, and then click “Save”
4) After the progress bar finish, wait about 60 seconds for device
to restart
5) Once restart finished, pull out the network cable from the
connected camera
6) Open the Search IPCam Tool software again. It may take up to 10
seconds for searching the result.
7) Double click on the new IP address. This will lead you to the login
page of the HT-IP212HDP web setting page in your default browser.
8) Use the default username and password “admin” to login
9) If a WebCMS add-in pops up, please allow the computer to run it:
10) Now you have setup the camera in Wi-Fi mode
Note:
•When you fill in Wi-Fi password, please note that there should be no
special characters ( such as < > ‘ ’)
• If you fail to find the camera’s IP address while other IP addresses
show normally after searching, please fill in the SSID manually
• If the camera gets offline once you unplug the network cable, please
open your router’s webpage and then make proper settings.
2. Control and Settings
2.1 Home Page
At home page, you can view camera live video.
2.1.1 Video Settings
Switch between Main Stream and Sub Stream settings according
to your network bandwidth. The following are recommended
parameters for each setting.
2.2 Network Settings
2.2.1 LAN Settings
Two different IP address allocation options are available:
DHCP: Camera gets an IP address from router automatically;
Fixed IP: Assign IP address, Mask, Gateway, and DNS manually.
Notes:
• If you do not tick the “DHCP Enable” box, you have choose “Fixed IP”
• If you want to set a fixed IP for the camera, please keep the camera
in the same subnet of your router or computer.
2.2.2 Email
If the camera is triggered by motion detection, you can get an
email sent to your specified email address. Please test the email
setting to make sure it works.
• SMTP server: Please refer to the email service provider website or Google it
• To: Your email account to receive alerts
• From: your email account used for send out alerts
Note:
• Please remember to enable motion detection to get email alert
2.2.3 DDNS
This feature is used for port forwarding that enables you to view camera
via Internet or external network.
1) Register a private DDNS account from assigned provider. Since
there is no built-in DDNS account for the camera, please go to
the third party DDNS website (such as www.dyndns.org) to apply
a new DDNS account.
2) Go to your router’s configuration page →port forwarding →input
your camera’s IP address and the HTTP port number.
Once DDNS connection and port forwarding is finished, you
will be able to view the camera remotely through the URL
http://yourdomain.Dyndns.org:port.
Notes:
•If the DDNS connection fails, please double check if you have
input the correct hostname, user name, and password, and try
to redo the settings
• The DDNS default status is off
2.2.4 P2P
Here you can get your UUID code. With this code, you can add and
view camera remotely from internet or external network. You will need
to use the UUID code when “Add Camera” on smart phone app or on
HooToo IPCamClient software in another computer (Windows / Mac)
2.3 System
2.3.1 System Info
You can change the Device Name and system language. You can also
check other system information.
2.3.2 System Time
You can set the system time manually or to be the same as NTP service /
local computer.
2.3.3 User Manage
You can create up to 2 guest accounts. Each guest account user can
use all functions in the home page of the camera, and check camera’s
device info. However guest account cannot access parameters setting
page or change other system settings.
Notes:
•P2P password is required when accessing the camera via P2P software
•The username for administrator is fixed as admin, but you can
change the password
2.3.4 System Log
In this log page, you can search all operation record of this camera.
07/08

For MAC
1.Access the IP Camera
1.1 Wired Mode
1) Please find the IPCamSearch software in the Resource CD, and
copy it to your local drive.
2) Make sure the camera is connected to your router via network cable
3) Open IPCamSearch from your local drive
4) Locate your camera’s IP address:
5) Select the IP address and double click on it. This will lead you
to HT-IP212HDP web setting page
6) Login with default Username “admin” and Password “admin”
7) Once logged in, you should be able to see the live video at home page.
1.2 Wireless Mode
1) After login the web setting page, click on “ ” at the
top of the page
2) Click “Network Settings”, then click “Wireless” to scan nearby
wireless network
3) Select the wireless network you wish to connect to. Enter the
password, and then click “Save”
4) After the progress bar finish, wait about 60 seconds for device
to restart
5) Once restart finished, pull out the network cable from the
connected camera
6) Open the Search IPCam Tool software again. It may take up to 10
seconds for searching the result.
7) Double click on the new IP address. This will lead you to the login
page of the HT-IP212HDP web setting page in your default browser.
8) Use the default username and password “admin” to login
9) If a WebCMS add-in pops up, please allow the computer to run it:
10) Now you have setup the camera in Wi-Fi mode
Note:
•When you fill in Wi-Fi password, please note that there should be no
special characters ( such as < > ‘ ’)
• If you fail to find the camera’s IP address while other IP addresses
show normally after searching, please fill in the SSID manually
• If the camera gets offline once you unplug the network cable, please
open your router’s webpage and then make proper settings.
2. Control and Settings
2.1 Home Page
At home page, you can view camera live video.
2.1.1 Video Settings
Switch between Main Stream and Sub Stream settings according
to your network bandwidth. The following are recommended
parameters for each setting.
2.2 Network Settings
2.2.1 LAN Settings
Two different IP address allocation options are available:
DHCP: Camera gets an IP address from router automatically;
Fixed IP: Assign IP address, Mask, Gateway, and DNS manually.
Notes:
• If you do not tick the “DHCP Enable” box, you have choose “Fixed IP”
• If you want to set a fixed IP for the camera, please keep the camera
in the same subnet of your router or computer.
2.2.2 Email
If the camera is triggered by motion detection, you can get an
email sent to your specified email address. Please test the email
setting to make sure it works.
• SMTP server: Please refer to the email service provider website or Google it
• To: Your email account to receive alerts
• From: your email account used for send out alerts
Note:
• Please remember to enable motion detection to get email alert
2.2.3 DDNS
This feature is used for port forwarding that enables you to view camera
via Internet or external network.
1) Register a private DDNS account from assigned provider. Since
there is no built-in DDNS account for the camera, please go to
the third party DDNS website (such as www.dyndns.org) to apply
a new DDNS account.
2) Go to your router’s configuration page →port forwarding →input
your camera’s IP address and the HTTP port number.
Once DDNS connection and port forwarding is finished, you
will be able to view the camera remotely through the URL
http://yourdomain.Dyndns.org:port.
Notes:
•If the DDNS connection fails, please double check if you have
input the correct hostname, user name, and password, and try
to redo the settings
• The DDNS default status is off
2.2.4 P2P
Here you can get your UUID code. With this code, you can add and
view camera remotely from internet or external network. You will need
to use the UUID code when “Add Camera” on smart phone app or on
HooToo IPCamClient software in another computer (Windows / Mac)
2.3 System
2.3.1 System Info
You can change the Device Name and system language. You can also
check other system information.
2.3.2 System Time
You can set the system time manually or to be the same as NTP service /
local computer.
2.3.3 User Manage
You can create up to 2 guest accounts. Each guest account user can
use all functions in the home page of the camera, and check camera’s
device info. However guest account cannot access parameters setting
page or change other system settings.
Notes:
•P2P password is required when accessing the camera via P2P software
•The username for administrator is fixed as admin, but you can
change the password
2.3.4 System Log
In this log page, you can search all operation record of this camera.
09/10
FUTURE NETWORK FOR TODAY

Website: www.hootoo.com
NORTH AMERICA
E-mail: [email protected](CA)
Tel: 1-888-456-8468
(Monday-Friday: 9:00 – 17:00 PST)
Address: 2228 Junction Ave, San Jose, CA 95131
EUROPEAN UNION
EU Importer: ZBT International Trading GmbH,
Lederstr 21a, 22525 Hamburg,
Deutschland
ASIA PACIFIC
Other manuals for HT-IP212HDP
2
Table of contents
Other Hootoo IP Camera manuals

Hootoo
Hootoo HT-IP210P User manual

Hootoo
Hootoo HT-IP210F User manual

Hootoo
Hootoo HT-IP210P User manual

Hootoo
Hootoo HT-IP210P User manual

Hootoo
Hootoo HT-IP211HDP User manual

Hootoo
Hootoo HT-IP009HDP User manual

Hootoo
Hootoo HT-IP210P User manual

Hootoo
Hootoo HT-IP006N Product guide

Hootoo
Hootoo HT-IP211HDP Assembly instructions

Hootoo
Hootoo HT-IP212HDP Instruction manual