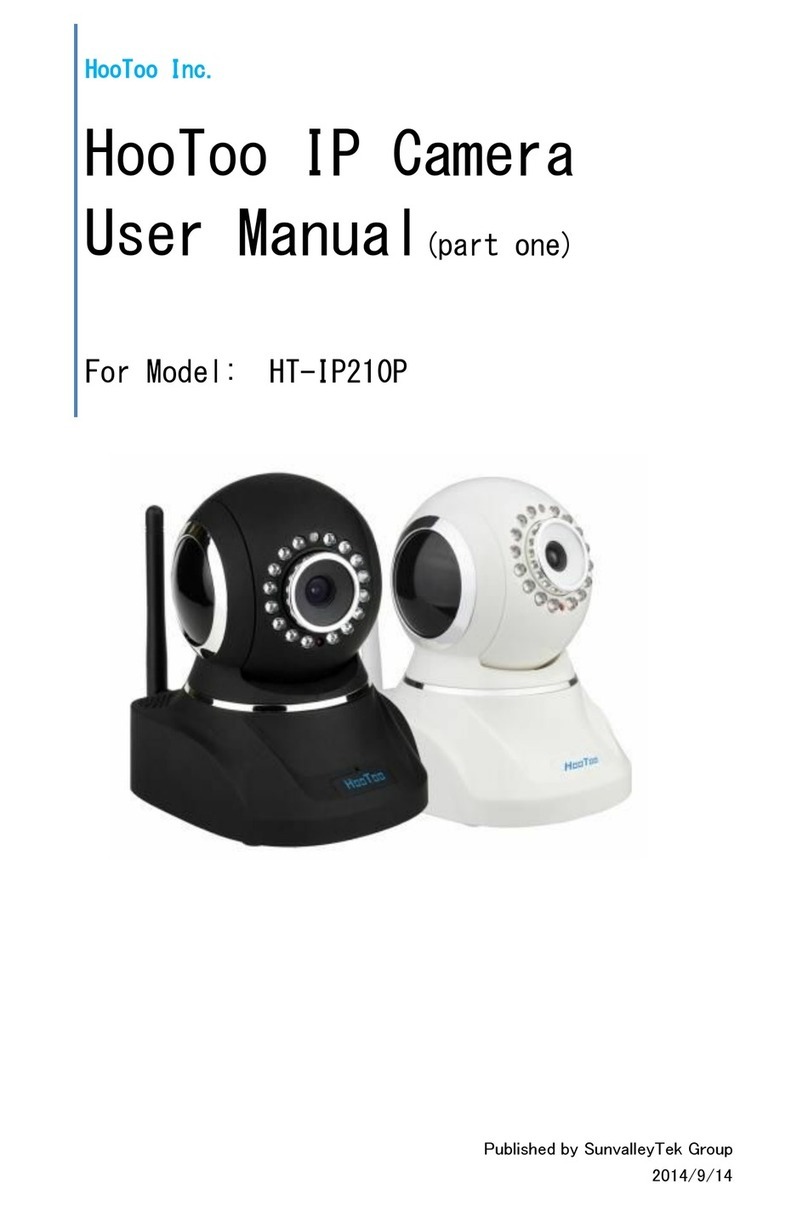
Hootoo HT-IP212HDP Instruction manual

Website: www.hootoo.com
NORTH AMERICA
E-mail: [email protected](CA)
Tel: 1-888-456-8468 (Monday-Friday: 9:00 – 17:00 PST)
Address: 2228 Junction Ave, San Jose, CA 95131
EUROPEAN UNION
EU Importer: ZBT International Trading GmbH, Lederstr 21a,
22525 Hamburg, Deutschland
ASIA PACIFIC
IP CAMERA
Model: HT-IP212HDP
Quick User Guide

1. Overview - - - - - - - - - - - - - - - - - - - - - - - - - - - - - - - - - - - - - - - - 01
1.1 Package Includes - - - - - - - - - - - - - - - - - - - - - - - - - - - - - - - 01
1.2 Product Diagram - - - - - - - - - - - - - - - - - - - - - - - - - - - - - - - - 02
2. Windows PC - - - - - - - - - - - - - - - - - - - - - - - - - - - - - - - - - - - - - 02
2.1 Wired mode - - - - - - - - - - - - - - - - - - - - - - - - - - - - - - - - - - - - 02
2.2 Wireless mode - - - - - - - - - - - - - - - - - - - - - - - - - - - - - - - - - - 06
2.3 Home Page - - - - - - - - - - - - - - - - - - - - - - - - - - - - - - - - - - - - - 08
2.4 Local Configuration - - - - - - - - - - - - - - - - - - - - - - - - - - - - - - 09
2.5 Network Settings- - - - - - - - - - - - - - - - - - - - - - - - - - - - - - - - - 09
2.5.1 Email - - - - - - - - - - - - - - - - - - - - - - - - - - - - - - - - - - - - - - - 09
2.5.2 FTP - - - - - - - - - - - - - - - - - - - - - - - - - - - - - - - - - - - - - - - - - 10
2.6 Alarm Settings- - - - - - - - - - - - - - - - - - - - - - - - - - - - - - - - - - - 11
2.6.1 Motion Detect - - - - - - - - - - - - - - - - - - - - - - - - - - - - - - - - 11
2.7 System - - - - - - - - - - - - - - - - - - - - - - - - - - - - - - - - - - - - - - - - - 11
2.7.1 User Management - - - - - - - - - - - - - - - - - - - - - - - - - - - - - 11
3. MAC Computer - - - - - - - - - - - - - - - - - - - - - - - - - - - - - - - - - 12
3.1 Wired Mode - - - - - - - - - - - - - - - - - - - - - - - - - - - - - - - - - - - - 12
3.2 Wireless Mode - - - - - - - - - - - - - - - - - - - - - - - - - - - - - - - - - - 13
4. iOS and Android Devices- - - - - - - - - - - - - - - - - - - - - - - 15
4.1 LAN View on smart phone - - - - - - - - - - - - - - - - - - - - - - - - 15
4.2 Remote view on smart phone via P2P (scan QR code) - - 16
4.3 Remote Viewing on a Windows PC - - - - - - - - - - - - - - - - - - 18
5. Warranty and Support - - - - - - - - - - - - - - - - - - - - - - - - - - 19
5.1 HooToo Warranty - - - - - - - - - - - - - - - - - - - - - - - - - - - - - - - - 19
5.2 Support Contact- - - - - - - - - - - - - - - - - - - - - - - - - - - - - - - - - 19
CONTENTS
SKU:88-36409-001
尺寸:100*150mm
材质:封面,182g铜版纸
内页,105g铜板纸
装订方式:骑马钉
此页不做应刷

1. Overview
Thank you for purchasing HooToo IP Camera. Please read this manual
carefully and keep it in a safe place for future reference. If you need
any further assistance, please contact our customer support team or
1.1 Package Includes
1.2 Product Diagram
2. Windows PC
2.1Wired mode
1) Assemble the camera and its antenna; connect camera and your
router with a network cable (the same router that connects to
your windows PC)
2) Find the Search IPCam Tool from the Installation CD, copy and
paste it to your PC.
Notes:
• You can download the Search IPCam Tool software from
www.hootoo.com
• For FireFox or Chrome browser, in order to view live video, please
download and install “VLC media player” first. You can download
from: http://www.videolan.org/vlc/index.html
• For IE browser, in order to view live video, please install
“download ActiveX”. You can download it on login page
by clicking “download ActiveX”.
• We suggest you use IE browser for better performance
3) Double click on Search IPCam Tool to open it. Make sure camera has
connected with your router.
4) Click “Search” to find your camera’s IP address:
5) Select the IP address and double click on it. This will lead you to the
login page of the HT-IP212HDP web login page. Click “download
ActiveX” to install camera plug-in for future use:
6) Then login with default username &password.
Username: admin
Password: admin
Note:
•If you fail to find the camera’s IP address or fail to login after clicking
the IP address, please refer to advanced user manual or FAQ on our
official website www.hootoo.com
2.2 Wireless mode
Note:
Before setting the camera to wireless mode, please make sure you have
followed the previous instruction to set the wired mode.
1) After login the web setting page, click on “ ” at the top
of the page
2) Click “Network Settings”, then click “Wireless” to scan nearby
wireless network
3) Select the wireless network you wish to connect to. Enter the
password, and then click “Save”
4) After the progress bar finish, wait about 60 seconds for the camera to
restart. When restarting finished, pull out the network cable from the
connected camera.
5) Open the Search IPCam Tool software again. Click “Search” to find
the camera. It may take up to 10 seconds for the result to show.
6) Double click on the new IP address. This will lead you to the login
page of the HT-IP212HDP web setting page in your default browser.
7) Use the default username and password “admin” to login
8) If a WebCMS add-in pops up, please allow the computer to run it:
9) Now you have setup the camera in Wi-Fi mode
Note:
•When you fill in Wi-Fi password, please note that there should be no
special characters ( such as <>“”)
•If you fail to find the camera’s IP address while other IP addresses
show normally after searching, please fill in the SSID manually
•If the camera gets offline once you unplug the network cable,
please open your router’s webpage and then make proper
settings. For more details, please check Advanced User Manual
or FAQ in www.hootoo.com
2.3 Home Page
At home page, you can view camera live video, make records,
take snapshots, etc.
Notes:
•For Windows PC users, we recommend using IE browser to view the
video for more functions. Some features are not available on FireFox
and Chrome browser, such as video recording, snapshot, etc
•All features mentioned above, such as video recording, snapshot are
not available for Mac Computer
2.4 Local Configuration
In this page, you can select a record and snapshot saving path
to save the file.
2.5 Network Settings
2.5.1 Email
If the camera is triggered by motion detection, you can get an email
sent to your specified email address. Please test the email setting to
make sure it works.
• SMTP server: Please refer to the email service provider website
or Google it
• To: Your email account to receive alerts
• From: your email account used for send out alerts
Ethernet Cable Resource CD
Wi-Fi Antenna
IP CAMERA
Model: HT-IP212HDP
Quick User Guide
Quick User Guide
Power Adapter
HT-IP212HDP
IP Camera
Base
Screws & Tool
WI-FI Antenna
Waterproof and
protective shell
Light sensor
Fixed focus Lens
Night vision LEDs
Note:
• If the email you set failed to test, please try to use some popular
email servers, like Gmail or hotmail
• Please remember to enable motion detection to get email alert
2.5.2 FTP
FTP server is used to upload camera snapshot captured by motion
detection to your assigned FTP address. Test after all FTP parameters filled in.
Note:
• When connection to Main Server fails, the camera will attempt to
save at Sub Server and its specified path.
2.6 Alarm Settingsz
2.6.1 Motion Detect
To activate motion detection:
1) Click on “Motion area set”
2) Select motion area on live screen by dragging you mouse
3) Make the “Enable” and “Time1” ticked, then you can select the time
to activate motion detection
4) Sensor can only be triggered by movements within the set motion
detection area
2.7 System
2.7.1 User Management
You can create up to 2 guest accounts. Each guest account user can
use all functions in the home page of the camera, and check camera’s
device info. However guest account cannot access parameters setting
page or change other system settings.
Notes:
• P2P password is required when accessing the camera via P2P software
• The username for administrator is fixed as admin, but you can
change the password
3. MAC Computer
3.1 Wired Mode
1) Please find the IPCamSearch software in the Resource CD:
2) Make sure the camera is connected to your router via network cable
3) Open IPCamSearch from your local drive
4) Locate your camera’s IP address:
5) Select the IP address and double click on it. This will lead you to
HT-IP212HDP web setting page.
6) Login with default Username “admin” and default password “admin”
7) Once logged in, you should be able to see the live video at home page.
Note:
If you are not able to find the camera from IPCameraSearch, please
check the advanced user manual or FAQ in www.hootoo.com
3.2 Wireless Mode
1) After login the web setting page, click on “ ” at the top
of the page
2) Click “Network Settings”, then click “Wireless” to scan nearby
wireless network
3) Select the wireless network you wish to connect to. Enter the password,
and then click “Save”
4) After the progress bar finish, wait about 60 seconds for device restarting,
then pull out the network cable from the connected camera.
5) Open the Search IPCam Tool software again. It may take up to 10
seconds for searching the result.
6) Double click on the new IP address. This will lead you to the login
page of the HT-IP212HDP web setting page in your default browser.
7) Use the default username and password “admin” to login
8) If a WebCMS add-in pops up, please allow the computer to run it:
9) Now you have setup the camera in Wi-Fi mode
Note:
• When you fill in Wi-Fi password, please note that there should be no
special characters ( such as <>“”)
• If you fail to find the camera’s IP address while other IP addresses
show normally after searching, please fill in the SSID manually
• If the camera gets offline once you unplug the network cable,
please open your router’s webpage and then make proper
settings. For more details, please check Advanced User Manual
or FAQ in www.hootoo.com
4. iOS and Android Devices
4.1 LAN View on smart phone
1) From your smart phone or tablet, download and install “HooToo
MyCam Pro” APP from either Apple app store or Google Play store.
2) Setup the camera so it is in the same network that connects to
your phone / tablet
3) Open HooToo MyCam Pro app on your device.
4) Click “Add camera”, you will see the camera’s UUID code along with
its IP address. Select it, enter the security code (default: admin), and
press “OK”. You will see “Add camera successfully”
5) Go back to home page, press “Cameras List”. You will see the added
camera shows up. Click the” ” to see live video
4.2 Remote view on smart phone via P2P (scan QR code)
When you are out for travel or business, you can view your camera via
Internet remotely. To do so, please follow the following tips:
1) Download “HooToo MyCam Pro” app, and install it
2) Open the app, press “Add Camera” →“Add” →enter you camera’s
UUID code, Username & Password →“OK”
(Or you can scan your camera’s QR code to add it in your smart
phone camera list before leaving, and then you can view it
elsewhere via Internet)
3)Go back to home page, press “Cameras List”. You will see the
added camera shows up. Click the” ” to see live video
Note:
If you want to view the camera in LAN via your phone, simply search
camera UUID and fill in password to sign in.
4.3 Remote Viewing on a Windows PC
1) Go to www.hootoo.com, download the “IPCamClient” software and
install it on your windows PC.
2) Open it, click “Add”
3) Enter the UUID code of your camera manually, and fill in other blanks,
click “Next”then “Finish”
4) Select your camera, click “Play”, and then you can view the live video.
5. Warranty and Support
5.1 HooToo Warranty
This HooToo IP Camera is covered with 12 months limited product
warranty from date of its original purchase. If it becomes defective
during its warranty period, please contact HooToo or your seller for
warranty cover. The following are not covered by our warranty:
• 2nd hand purchase or purchase from a non-authorized seller/distributor
• Damages resulted from abuse, fire, poison and moisture
• Damages resulted from natural disaster
• Product been dismantled
Notes:Z
• Successful product registration at www.hootoo.com/productregistration
will add an additional 6 month of warranty cover, making a total of
18 months warranty cover from the date of original purchase.
• Please do not return the product without contacting HooToo first
• We can only provide warranty cover for products sold by HooToo
authorized distributor
5.2 Support Contact
For any inquiries or comment concerning our products, please contact
us via below methods. If you have an order number, please include it as
reference. We will try to respond to your inquiry as quick as possible.
01/02

1. Overview
Thank you for purchasing HooToo IP Camera. Please read this manual
carefully and keep it in a safe place for future reference. If you need
any further assistance, please contact our customer support team or
1.1 Package Includes
1.2 Product Diagram
2. Windows PC
2.1Wired mode
1) Assemble the camera and its antenna; connect camera and your
router with a network cable (the same router that connects to
your windows PC)
2) Find the Search IPCam Tool from the Installation CD, copy and
paste it to your PC.
Notes:
• You can download the Search IPCam Tool software from
www.hootoo.com
• For FireFox or Chrome browser, in order to view live video, please
download and install “VLC media player” first. You can download
from: http://www.videolan.org/vlc/index.html
• For IE browser, in order to view live video, please install
“download ActiveX”. You can download it on login page
by clicking “download ActiveX”.
• We suggest you use IE browser for better performance
3) Double click on Search IPCam Tool to open it. Make sure camera has
connected with your router.
4) Click “Search” to find your camera’s IP address:
5) Select the IP address and double click on it. This will lead you to the
login page of the HT-IP212HDP web login page. Click “download
ActiveX” to install camera plug-in for future use:
6) Then login with default username &password.
Username: admin
Password: admin
Note:
•If you fail to find the camera’s IP address or fail to login after clicking
the IP address, please refer to advanced user manual or FAQ on our
official website www.hootoo.com
2.2 Wireless mode
Note:
Before setting the camera to wireless mode, please make sure you have
followed the previous instruction to set the wired mode.
1) After login the web setting page, click on “ ” at the top
of the page
2) Click “Network Settings”, then click “Wireless” to scan nearby
wireless network
3) Select the wireless network you wish to connect to. Enter the
password, and then click “Save”
4) After the progress bar finish, wait about 60 seconds for the camera to
restart. When restarting finished, pull out the network cable from the
connected camera.
5) Open the Search IPCam Tool software again. Click “Search” to find
the camera. It may take up to 10 seconds for the result to show.
6) Double click on the new IP address. This will lead you to the login
page of the HT-IP212HDP web setting page in your default browser.
7) Use the default username and password “admin” to login
8) If a WebCMS add-in pops up, please allow the computer to run it:
9) Now you have setup the camera in Wi-Fi mode
Note:
•When you fill in Wi-Fi password, please note that there should be no
special characters ( such as <>“”)
•If you fail to find the camera’s IP address while other IP addresses
show normally after searching, please fill in the SSID manually
•If the camera gets offline once you unplug the network cable,
please open your router’s webpage and then make proper
settings. For more details, please check Advanced User Manual
or FAQ in www.hootoo.com
2.3 Home Page
At home page, you can view camera live video, make records,
take snapshots, etc.
Notes:
•For Windows PC users, we recommend using IE browser to view the
video for more functions. Some features are not available on FireFox
and Chrome browser, such as video recording, snapshot, etc
•All features mentioned above, such as video recording, snapshot are
not available for Mac Computer
2.4 Local Configuration
In this page, you can select a record and snapshot saving path
to save the file.
2.5 Network Settings
2.5.1 Email
If the camera is triggered by motion detection, you can get an email
sent to your specified email address. Please test the email setting to
make sure it works.
• SMTP server: Please refer to the email service provider website
or Google it
• To: Your email account to receive alerts
• From: your email account used for send out alerts
Note:
• If the email you set failed to test, please try to use some popular
email servers, like Gmail or hotmail
• Please remember to enable motion detection to get email alert
2.5.2 FTP
FTP server is used to upload camera snapshot captured by motion
detection to your assigned FTP address. Test after all FTP parameters filled in.
Note:
• When connection to Main Server fails, the camera will attempt to
save at Sub Server and its specified path.
2.6 Alarm Settingsz
2.6.1 Motion Detect
To activate motion detection:
1) Click on “Motion area set”
2) Select motion area on live screen by dragging you mouse
3) Make the “Enable” and “Time1” ticked, then you can select the time
to activate motion detection
4) Sensor can only be triggered by movements within the set motion
detection area
2.7 System
2.7.1 User Management
You can create up to 2 guest accounts. Each guest account user can
use all functions in the home page of the camera, and check camera’s
device info. However guest account cannot access parameters setting
page or change other system settings.
Notes:
• P2P password is required when accessing the camera via P2P software
• The username for administrator is fixed as admin, but you can
change the password
3. MAC Computer
3.1 Wired Mode
1) Please find the IPCamSearch software in the Resource CD:
2) Make sure the camera is connected to your router via network cable
3) Open IPCamSearch from your local drive
4) Locate your camera’s IP address:
5) Select the IP address and double click on it. This will lead you to
HT-IP212HDP web setting page.
6) Login with default Username “admin” and default password “admin”
7) Once logged in, you should be able to see the live video at home page.
Note:
If you are not able to find the camera from IPCameraSearch, please
check the advanced user manual or FAQ in www.hootoo.com
3.2 Wireless Mode
1) After login the web setting page, click on “ ” at the top
of the page
2) Click “Network Settings”, then click “Wireless” to scan nearby
wireless network
3) Select the wireless network you wish to connect to. Enter the password,
and then click “Save”
4) After the progress bar finish, wait about 60 seconds for device restarting,
then pull out the network cable from the connected camera.
5) Open the Search IPCam Tool software again. It may take up to 10
seconds for searching the result.
6) Double click on the new IP address. This will lead you to the login
page of the HT-IP212HDP web setting page in your default browser.
7) Use the default username and password “admin” to login
8) If a WebCMS add-in pops up, please allow the computer to run it:
9) Now you have setup the camera in Wi-Fi mode
Note:
• When you fill in Wi-Fi password, please note that there should be no
special characters ( such as <>“”)
• If you fail to find the camera’s IP address while other IP addresses
show normally after searching, please fill in the SSID manually
• If the camera gets offline once you unplug the network cable,
please open your router’s webpage and then make proper
settings. For more details, please check Advanced User Manual
or FAQ in www.hootoo.com
4. iOS and Android Devices
4.1 LAN View on smart phone
1) From your smart phone or tablet, download and install “HooToo
MyCam Pro” APP from either Apple app store or Google Play store.
2) Setup the camera so it is in the same network that connects to
your phone / tablet
3) Open HooToo MyCam Pro app on your device.
4) Click “Add camera”, you will see the camera’s UUID code along with
its IP address. Select it, enter the security code (default: admin), and
press “OK”. You will see “Add camera successfully”
5) Go back to home page, press “Cameras List”. You will see the added
camera shows up. Click the” ” to see live video
4.2 Remote view on smart phone via P2P (scan QR code)
When you are out for travel or business, you can view your camera via
Internet remotely. To do so, please follow the following tips:
1) Download “HooToo MyCam Pro” app, and install it
2) Open the app, press “Add Camera” →“Add” →enter you camera’s
UUID code, Username & Password →“OK”
(Or you can scan your camera’s QR code to add it in your smart
phone camera list before leaving, and then you can view it
elsewhere via Internet)
3)Go back to home page, press “Cameras List”. You will see the
added camera shows up. Click the” ” to see live video
Note:
If you want to view the camera in LAN via your phone, simply search
camera UUID and fill in password to sign in.
4.3 Remote Viewing on a Windows PC
1) Go to www.hootoo.com, download the “IPCamClient” software and
install it on your windows PC.
2) Open it, click “Add”
3) Enter the UUID code of your camera manually, and fill in other blanks,
click “Next”then “Finish”
4) Select your camera, click “Play”, and then you can view the live video.
5. Warranty and Support
5.1 HooToo Warranty
This HooToo IP Camera is covered with 12 months limited product
warranty from date of its original purchase. If it becomes defective
during its warranty period, please contact HooToo or your seller for
warranty cover. The following are not covered by our warranty:
• 2nd hand purchase or purchase from a non-authorized seller/distributor
• Damages resulted from abuse, fire, poison and moisture
• Damages resulted from natural disaster
• Product been dismantled
Notes:Z
• Successful product registration at www.hootoo.com/productregistration
will add an additional 6 month of warranty cover, making a total of
18 months warranty cover from the date of original purchase.
• Please do not return the product without contacting HooToo first
• We can only provide warranty cover for products sold by HooToo
authorized distributor
5.2 Support Contact
For any inquiries or comment concerning our products, please contact
us via below methods. If you have an order number, please include it as
reference. We will try to respond to your inquiry as quick as possible.
03/04

1. Overview
Thank you for purchasing HooToo IP Camera. Please read this manual
carefully and keep it in a safe place for future reference. If you need
any further assistance, please contact our customer support team or
1.1 Package Includes
1.2 Product Diagram
2. Windows PC
2.1Wired mode
1) Assemble the camera and its antenna; connect camera and your
router with a network cable (the same router that connects to
your windows PC)
2) Find the Search IPCam Tool from the Installation CD, copy and
paste it to your PC.
Notes:
• You can download the Search IPCam Tool software from
www.hootoo.com
• For FireFox or Chrome browser, in order to view live video, please
download and install “VLC media player” first. You can download
from: http://www.videolan.org/vlc/index.html
• For IE browser, in order to view live video, please install
“download ActiveX”. You can download it on login page
by clicking “download ActiveX”.
• We suggest you use IE browser for better performance
3) Double click on Search IPCam Tool to open it. Make sure camera has
connected with your router.
4) Click “Search” to find your camera’s IP address:
5) Select the IP address and double click on it. This will lead you to the
login page of the HT-IP212HDP web login page. Click “download
ActiveX” to install camera plug-in for future use:
6) Then login with default username &password.
Username: admin
Password: admin
Note:
•If you fail to find the camera’s IP address or fail to login after clicking
the IP address, please refer to advanced user manual or FAQ on our
official website www.hootoo.com
2.2 Wireless mode
Note:
Before setting the camera to wireless mode, please make sure you have
followed the previous instruction to set the wired mode.
1) After login the web setting page, click on “ ” at the top
of the page
2) Click “Network Settings”, then click “Wireless” to scan nearby
wireless network
3) Select the wireless network you wish to connect to. Enter the
password, and then click “Save”
4) After the progress bar finish, wait about 60 seconds for the camera to
restart. When restarting finished, pull out the network cable from the
connected camera.
5) Open the Search IPCam Tool software again. Click “Search” to find
the camera. It may take up to 10 seconds for the result to show.
6) Double click on the new IP address. This will lead you to the login
page of the HT-IP212HDP web setting page in your default browser.
7) Use the default username and password “admin” to login
8) If a WebCMS add-in pops up, please allow the computer to run it:
9) Now you have setup the camera in Wi-Fi mode
Note:
•When you fill in Wi-Fi password, please note that there should be no
special characters ( such as <>“”)
•If you fail to find the camera’s IP address while other IP addresses
show normally after searching, please fill in the SSID manually
•If the camera gets offline once you unplug the network cable,
please open your router’s webpage and then make proper
settings. For more details, please check Advanced User Manual
or FAQ in www.hootoo.com
2.3 Home Page
At home page, you can view camera live video, make records,
take snapshots, etc.
Notes:
•For Windows PC users, we recommend using IE browser to view the
video for more functions. Some features are not available on FireFox
and Chrome browser, such as video recording, snapshot, etc
•All features mentioned above, such as video recording, snapshot are
not available for Mac Computer
2.4 Local Configuration
In this page, you can select a record and snapshot saving path
to save the file.
2.5 Network Settings
2.5.1 Email
If the camera is triggered by motion detection, you can get an email
sent to your specified email address. Please test the email setting to
make sure it works.
• SMTP server: Please refer to the email service provider website
or Google it
• To: Your email account to receive alerts
• From: your email account used for send out alerts
Note:
• If the email you set failed to test, please try to use some popular
email servers, like Gmail or hotmail
• Please remember to enable motion detection to get email alert
2.5.2 FTP
FTP server is used to upload camera snapshot captured by motion
detection to your assigned FTP address. Test after all FTP parameters filled in.
Note:
• When connection to Main Server fails, the camera will attempt to
save at Sub Server and its specified path.
2.6 Alarm Settingsz
2.6.1 Motion Detect
To activate motion detection:
1) Click on “Motion area set”
2) Select motion area on live screen by dragging you mouse
3) Make the “Enable” and “Time1” ticked, then you can select the time
to activate motion detection
4) Sensor can only be triggered by movements within the set motion
detection area
2.7 System
2.7.1 User Management
You can create up to 2 guest accounts. Each guest account user can
use all functions in the home page of the camera, and check camera’s
device info. However guest account cannot access parameters setting
page or change other system settings.
Notes:
• P2P password is required when accessing the camera via P2P software
• The username for administrator is fixed as admin, but you can
change the password
3. MAC Computer
3.1 Wired Mode
1) Please find the IPCamSearch software in the Resource CD:
2) Make sure the camera is connected to your router via network cable
3) Open IPCamSearch from your local drive
4) Locate your camera’s IP address:
5) Select the IP address and double click on it. This will lead you to
HT-IP212HDP web setting page.
6) Login with default Username “admin” and default password “admin”
7) Once logged in, you should be able to see the live video at home page.
Note:
If you are not able to find the camera from IPCameraSearch, please
check the advanced user manual or FAQ in www.hootoo.com
3.2 Wireless Mode
1) After login the web setting page, click on “ ” at the top
of the page
2) Click “Network Settings”, then click “Wireless” to scan nearby
wireless network
3) Select the wireless network you wish to connect to. Enter the password,
and then click “Save”
4) After the progress bar finish, wait about 60 seconds for device restarting,
then pull out the network cable from the connected camera.
5) Open the Search IPCam Tool software again. It may take up to 10
seconds for searching the result.
6) Double click on the new IP address. This will lead you to the login
page of the HT-IP212HDP web setting page in your default browser.
7) Use the default username and password “admin” to login
8) If a WebCMS add-in pops up, please allow the computer to run it:
9) Now you have setup the camera in Wi-Fi mode
Note:
• When you fill in Wi-Fi password, please note that there should be no
special characters ( such as <>“”)
• If you fail to find the camera’s IP address while other IP addresses
show normally after searching, please fill in the SSID manually
• If the camera gets offline once you unplug the network cable,
please open your router’s webpage and then make proper
settings. For more details, please check Advanced User Manual
or FAQ in www.hootoo.com
4. iOS and Android Devices
4.1 LAN View on smart phone
1) From your smart phone or tablet, download and install “HooToo
MyCam Pro” APP from either Apple app store or Google Play store.
2) Setup the camera so it is in the same network that connects to
your phone / tablet
3) Open HooToo MyCam Pro app on your device.
4) Click “Add camera”, you will see the camera’s UUID code along with
its IP address. Select it, enter the security code (default: admin), and
press “OK”. You will see “Add camera successfully”
5) Go back to home page, press “Cameras List”. You will see the added
camera shows up. Click the” ” to see live video
4.2 Remote view on smart phone via P2P (scan QR code)
When you are out for travel or business, you can view your camera via
Internet remotely. To do so, please follow the following tips:
1) Download “HooToo MyCam Pro” app, and install it
2) Open the app, press “Add Camera” →“Add” →enter you camera’s
UUID code, Username & Password →“OK”
(Or you can scan your camera’s QR code to add it in your smart
phone camera list before leaving, and then you can view it
elsewhere via Internet)
3)Go back to home page, press “Cameras List”. You will see the
added camera shows up. Click the” ” to see live video
Note:
If you want to view the camera in LAN via your phone, simply search
camera UUID and fill in password to sign in.
4.3 Remote Viewing on a Windows PC
1) Go to www.hootoo.com, download the “IPCamClient” software and
install it on your windows PC.
2) Open it, click “Add”
3) Enter the UUID code of your camera manually, and fill in other blanks,
click “Next”then “Finish”
4) Select your camera, click “Play”, and then you can view the live video.
5. Warranty and Support
5.1 HooToo Warranty
This HooToo IP Camera is covered with 12 months limited product
warranty from date of its original purchase. If it becomes defective
during its warranty period, please contact HooToo or your seller for
warranty cover. The following are not covered by our warranty:
• 2nd hand purchase or purchase from a non-authorized seller/distributor
• Damages resulted from abuse, fire, poison and moisture
• Damages resulted from natural disaster
• Product been dismantled
Notes:Z
• Successful product registration at www.hootoo.com/productregistration
will add an additional 6 month of warranty cover, making a total of
18 months warranty cover from the date of original purchase.
• Please do not return the product without contacting HooToo first
• We can only provide warranty cover for products sold by HooToo
authorized distributor
5.2 Support Contact
For any inquiries or comment concerning our products, please contact
us via below methods. If you have an order number, please include it as
reference. We will try to respond to your inquiry as quick as possible.
05/06

1. Overview
Thank you for purchasing HooToo IP Camera. Please read this manual
carefully and keep it in a safe place for future reference. If you need
any further assistance, please contact our customer support team or
1.1 Package Includes
1.2 Product Diagram
2. Windows PC
2.1Wired mode
1) Assemble the camera and its antenna; connect camera and your
router with a network cable (the same router that connects to
your windows PC)
2) Find the Search IPCam Tool from the Installation CD, copy and
paste it to your PC.
Notes:
• You can download the Search IPCam Tool software from
www.hootoo.com
• For FireFox or Chrome browser, in order to view live video, please
download and install “VLC media player” first. You can download
from: http://www.videolan.org/vlc/index.html
• For IE browser, in order to view live video, please install
“download ActiveX”. You can download it on login page
by clicking “download ActiveX”.
• We suggest you use IE browser for better performance
3) Double click on Search IPCam Tool to open it. Make sure camera has
connected with your router.
4) Click “Search” to find your camera’s IP address:
5) Select the IP address and double click on it. This will lead you to the
login page of the HT-IP212HDP web login page. Click “download
ActiveX” to install camera plug-in for future use:
6) Then login with default username &password.
Username: admin
Password: admin
Note:
•If you fail to find the camera’s IP address or fail to login after clicking
the IP address, please refer to advanced user manual or FAQ on our
official website www.hootoo.com
2.2 Wireless mode
Note:
Before setting the camera to wireless mode, please make sure you have
followed the previous instruction to set the wired mode.
1) After login the web setting page, click on “ ” at the top
of the page
2) Click “Network Settings”, then click “Wireless” to scan nearby
wireless network
3) Select the wireless network you wish to connect to. Enter the
password, and then click “Save”
4) After the progress bar finish, wait about 60 seconds for the camera to
restart. When restarting finished, pull out the network cable from the
connected camera.
5) Open the Search IPCam Tool software again. Click “Search” to find
the camera. It may take up to 10 seconds for the result to show.
6) Double click on the new IP address. This will lead you to the login
page of the HT-IP212HDP web setting page in your default browser.
7) Use the default username and password “admin” to login
8) If a WebCMS add-in pops up, please allow the computer to run it:
9) Now you have setup the camera in Wi-Fi mode
Note:
•When you fill in Wi-Fi password, please note that there should be no
special characters ( such as <>“”)
•If you fail to find the camera’s IP address while other IP addresses
show normally after searching, please fill in the SSID manually
•If the camera gets offline once you unplug the network cable,
please open your router’s webpage and then make proper
settings. For more details, please check Advanced User Manual
or FAQ in www.hootoo.com
2.3 Home Page
At home page, you can view camera live video, make records,
take snapshots, etc.
Notes:
•For Windows PC users, we recommend using IE browser to view the
video for more functions. Some features are not available on FireFox
and Chrome browser, such as video recording, snapshot, etc
•All features mentioned above, such as video recording, snapshot are
not available for Mac Computer
2.4 Local Configuration
In this page, you can select a record and snapshot saving path
to save the file.
2.5 Network Settings
2.5.1 Email
If the camera is triggered by motion detection, you can get an email
sent to your specified email address. Please test the email setting to
make sure it works.
• SMTP server: Please refer to the email service provider website
or Google it
• To: Your email account to receive alerts
• From: your email account used for send out alerts
Note:
• If the email you set failed to test, please try to use some popular
email servers, like Gmail or hotmail
• Please remember to enable motion detection to get email alert
2.5.2 FTP
FTP server is used to upload camera snapshot captured by motion
detection to your assigned FTP address. Test after all FTP parameters filled in.
Note:
• When connection to Main Server fails, the camera will attempt to
save at Sub Server and its specified path.
2.6 Alarm Settingsz
2.6.1 Motion Detect
To activate motion detection:
1) Click on “Motion area set”
2) Select motion area on live screen by dragging you mouse
3) Make the “Enable” and “Time1” ticked, then you can select the time
to activate motion detection
4) Sensor can only be triggered by movements within the set motion
detection area
2.7 System
2.7.1 User Management
You can create up to 2 guest accounts. Each guest account user can
use all functions in the home page of the camera, and check camera’s
device info. However guest account cannot access parameters setting
page or change other system settings.
Notes:
• P2P password is required when accessing the camera via P2P software
• The username for administrator is fixed as admin, but you can
change the password
3. MAC Computer
3.1 Wired Mode
1) Please find the IPCamSearch software in the Resource CD:
2) Make sure the camera is connected to your router via network cable
3) Open IPCamSearch from your local drive
4) Locate your camera’s IP address:
5) Select the IP address and double click on it. This will lead you to
HT-IP212HDP web setting page.
6) Login with default Username “admin” and default password “admin”
7) Once logged in, you should be able to see the live video at home page.
Note:
If you are not able to find the camera from IPCameraSearch, please
check the advanced user manual or FAQ in www.hootoo.com
3.2 Wireless Mode
1) After login the web setting page, click on “ ” at the top
of the page
2) Click “Network Settings”, then click “Wireless” to scan nearby
wireless network
3) Select the wireless network you wish to connect to. Enter the password,
and then click “Save”
4) After the progress bar finish, wait about 60 seconds for device restarting,
then pull out the network cable from the connected camera.
5) Open the Search IPCam Tool software again. It may take up to 10
seconds for searching the result.
6) Double click on the new IP address. This will lead you to the login
page of the HT-IP212HDP web setting page in your default browser.
7) Use the default username and password “admin” to login
8) If a WebCMS add-in pops up, please allow the computer to run it:
9) Now you have setup the camera in Wi-Fi mode
Note:
• When you fill in Wi-Fi password, please note that there should be no
special characters ( such as <>“”)
• If you fail to find the camera’s IP address while other IP addresses
show normally after searching, please fill in the SSID manually
• If the camera gets offline once you unplug the network cable,
please open your router’s webpage and then make proper
settings. For more details, please check Advanced User Manual
or FAQ in www.hootoo.com
4. iOS and Android Devices
4.1 LAN View on smart phone
1) From your smart phone or tablet, download and install “HooToo
MyCam Pro” APP from either Apple app store or Google Play store.
2) Setup the camera so it is in the same network that connects to
your phone / tablet
3) Open HooToo MyCam Pro app on your device.
4) Click “Add camera”, you will see the camera’s UUID code along with
its IP address. Select it, enter the security code (default: admin), and
press “OK”. You will see “Add camera successfully”
5) Go back to home page, press “Cameras List”. You will see the added
camera shows up. Click the” ” to see live video
4.2 Remote view on smart phone via P2P (scan QR code)
When you are out for travel or business, you can view your camera via
Internet remotely. To do so, please follow the following tips:
1) Download “HooToo MyCam Pro” app, and install it
2) Open the app, press “Add Camera” →“Add” →enter you camera’s
UUID code, Username & Password →“OK”
(Or you can scan your camera’s QR code to add it in your smart
phone camera list before leaving, and then you can view it
elsewhere via Internet)
3)Go back to home page, press “Cameras List”. You will see the
added camera shows up. Click the” ” to see live video
Note:
If you want to view the camera in LAN via your phone, simply search
camera UUID and fill in password to sign in.
4.3 Remote Viewing on a Windows PC
1) Go to www.hootoo.com, download the “IPCamClient” software and
install it on your windows PC.
2) Open it, click “Add”
3) Enter the UUID code of your camera manually, and fill in other blanks,
click “Next”then “Finish”
4) Select your camera, click “Play”, and then you can view the live video.
5. Warranty and Support
5.1 HooToo Warranty
This HooToo IP Camera is covered with 12 months limited product
warranty from date of its original purchase. If it becomes defective
during its warranty period, please contact HooToo or your seller for
warranty cover. The following are not covered by our warranty:
• 2nd hand purchase or purchase from a non-authorized seller/distributor
• Damages resulted from abuse, fire, poison and moisture
• Damages resulted from natural disaster
• Product been dismantled
Notes:Z
• Successful product registration at www.hootoo.com/productregistration
will add an additional 6 month of warranty cover, making a total of
18 months warranty cover from the date of original purchase.
• Please do not return the product without contacting HooToo first
• We can only provide warranty cover for products sold by HooToo
authorized distributor
5.2 Support Contact
For any inquiries or comment concerning our products, please contact
us via below methods. If you have an order number, please include it as
reference. We will try to respond to your inquiry as quick as possible.
07/08

1. Overview
Thank you for purchasing HooToo IP Camera. Please read this manual
carefully and keep it in a safe place for future reference. If you need
any further assistance, please contact our customer support team or
1.1 Package Includes
1.2 Product Diagram
2. Windows PC
2.1Wired mode
1) Assemble the camera and its antenna; connect camera and your
router with a network cable (the same router that connects to
your windows PC)
2) Find the Search IPCam Tool from the Installation CD, copy and
paste it to your PC.
Notes:
• You can download the Search IPCam Tool software from
www.hootoo.com
• For FireFox or Chrome browser, in order to view live video, please
download and install “VLC media player” first. You can download
from: http://www.videolan.org/vlc/index.html
• For IE browser, in order to view live video, please install
“download ActiveX”. You can download it on login page
by clicking “download ActiveX”.
• We suggest you use IE browser for better performance
3) Double click on Search IPCam Tool to open it. Make sure camera has
connected with your router.
4) Click “Search” to find your camera’s IP address:
5) Select the IP address and double click on it. This will lead you to the
login page of the HT-IP212HDP web login page. Click “download
ActiveX” to install camera plug-in for future use:
6) Then login with default username &password.
Username: admin
Password: admin
Note:
•If you fail to find the camera’s IP address or fail to login after clicking
the IP address, please refer to advanced user manual or FAQ on our
official website www.hootoo.com
2.2 Wireless mode
Note:
Before setting the camera to wireless mode, please make sure you have
followed the previous instruction to set the wired mode.
1) After login the web setting page, click on “ ” at the top
of the page
2) Click “Network Settings”, then click “Wireless” to scan nearby
wireless network
3) Select the wireless network you wish to connect to. Enter the
password, and then click “Save”
4) After the progress bar finish, wait about 60 seconds for the camera to
restart. When restarting finished, pull out the network cable from the
connected camera.
5) Open the Search IPCam Tool software again. Click “Search” to find
the camera. It may take up to 10 seconds for the result to show.
6) Double click on the new IP address. This will lead you to the login
page of the HT-IP212HDP web setting page in your default browser.
7) Use the default username and password “admin” to login
8) If a WebCMS add-in pops up, please allow the computer to run it:
9) Now you have setup the camera in Wi-Fi mode
Note:
•When you fill in Wi-Fi password, please note that there should be no
special characters ( such as <>“”)
•If you fail to find the camera’s IP address while other IP addresses
show normally after searching, please fill in the SSID manually
•If the camera gets offline once you unplug the network cable,
please open your router’s webpage and then make proper
settings. For more details, please check Advanced User Manual
or FAQ in www.hootoo.com
2.3 Home Page
At home page, you can view camera live video, make records,
take snapshots, etc.
Notes:
•For Windows PC users, we recommend using IE browser to view the
video for more functions. Some features are not available on FireFox
and Chrome browser, such as video recording, snapshot, etc
•All features mentioned above, such as video recording, snapshot are
not available for Mac Computer
2.4 Local Configuration
In this page, you can select a record and snapshot saving path
to save the file.
2.5 Network Settings
2.5.1 Email
If the camera is triggered by motion detection, you can get an email
sent to your specified email address. Please test the email setting to
make sure it works.
• SMTP server: Please refer to the email service provider website
or Google it
• To: Your email account to receive alerts
• From: your email account used for send out alerts
Note:
• If the email you set failed to test, please try to use some popular
email servers, like Gmail or hotmail
• Please remember to enable motion detection to get email alert
2.5.2 FTP
FTP server is used to upload camera snapshot captured by motion
detection to your assigned FTP address. Test after all FTP parameters filled in.
Note:
• When connection to Main Server fails, the camera will attempt to
save at Sub Server and its specified path.
2.6 Alarm Settingsz
2.6.1 Motion Detect
To activate motion detection:
1) Click on “Motion area set”
2) Select motion area on live screen by dragging you mouse
3) Make the “Enable” and “Time1” ticked, then you can select the time
to activate motion detection
4) Sensor can only be triggered by movements within the set motion
detection area
2.7 System
2.7.1 User Management
You can create up to 2 guest accounts. Each guest account user can
use all functions in the home page of the camera, and check camera’s
device info. However guest account cannot access parameters setting
page or change other system settings.
Notes:
• P2P password is required when accessing the camera via P2P software
• The username for administrator is fixed as admin, but you can
change the password
3. MAC Computer
3.1 Wired Mode
1) Please find the IPCamSearch software in the Resource CD:
2) Make sure the camera is connected to your router via network cable
3) Open IPCamSearch from your local drive
4) Locate your camera’s IP address:
5) Select the IP address and double click on it. This will lead you to
HT-IP212HDP web setting page.
6) Login with default Username “admin” and default password “admin”
7) Once logged in, you should be able to see the live video at home page.
Note:
If you are not able to find the camera from IPCameraSearch, please
check the advanced user manual or FAQ in www.hootoo.com
3.2 Wireless Mode
1) After login the web setting page, click on “ ” at the top
of the page
2) Click “Network Settings”, then click “Wireless” to scan nearby
wireless network
3) Select the wireless network you wish to connect to. Enter the password,
and then click “Save”
4) After the progress bar finish, wait about 60 seconds for device restarting,
then pull out the network cable from the connected camera.
5) Open the Search IPCam Tool software again. It may take up to 10
seconds for searching the result.
6) Double click on the new IP address. This will lead you to the login
page of the HT-IP212HDP web setting page in your default browser.
7) Use the default username and password “admin” to login
8) If a WebCMS add-in pops up, please allow the computer to run it:
9) Now you have setup the camera in Wi-Fi mode
Note:
• When you fill in Wi-Fi password, please note that there should be no
special characters ( such as <>“”)
• If you fail to find the camera’s IP address while other IP addresses
show normally after searching, please fill in the SSID manually
• If the camera gets offline once you unplug the network cable,
please open your router’s webpage and then make proper
settings. For more details, please check Advanced User Manual
or FAQ in www.hootoo.com
4. iOS and Android Devices
4.1 LAN View on smart phone
1) From your smart phone or tablet, download and install “HooToo
MyCam Pro” APP from either Apple app store or Google Play store.
2) Setup the camera so it is in the same network that connects to
your phone / tablet
3) Open HooToo MyCam Pro app on your device.
4) Click “Add camera”, you will see the camera’s UUID code along with
its IP address. Select it, enter the security code (default: admin), and
press “OK”. You will see “Add camera successfully”
5) Go back to home page, press “Cameras List”. You will see the added
camera shows up. Click the” ” to see live video
4.2 Remote view on smart phone via P2P (scan QR code)
When you are out for travel or business, you can view your camera via
Internet remotely. To do so, please follow the following tips:
1) Download “HooToo MyCam Pro” app, and install it
2) Open the app, press “Add Camera” →“Add” →enter you camera’s
UUID code, Username & Password →“OK”
(Or you can scan your camera’s QR code to add it in your smart
phone camera list before leaving, and then you can view it
elsewhere via Internet)
3)Go back to home page, press “Cameras List”. You will see the
added camera shows up. Click the” ” to see live video
Note:
If you want to view the camera in LAN via your phone, simply search
camera UUID and fill in password to sign in.
4.3 Remote Viewing on a Windows PC
1) Go to www.hootoo.com, download the “IPCamClient” software and
install it on your windows PC.
2) Open it, click “Add”
3) Enter the UUID code of your camera manually, and fill in other blanks,
click “Next”then “Finish”
4) Select your camera, click “Play”, and then you can view the live video.
5. Warranty and Support
5.1 HooToo Warranty
This HooToo IP Camera is covered with 12 months limited product
warranty from date of its original purchase. If it becomes defective
during its warranty period, please contact HooToo or your seller for
warranty cover. The following are not covered by our warranty:
• 2nd hand purchase or purchase from a non-authorized seller/distributor
• Damages resulted from abuse, fire, poison and moisture
• Damages resulted from natural disaster
• Product been dismantled
Notes:Z
• Successful product registration at www.hootoo.com/productregistration
will add an additional 6 month of warranty cover, making a total of
18 months warranty cover from the date of original purchase.
• Please do not return the product without contacting HooToo first
• We can only provide warranty cover for products sold by HooToo
authorized distributor
5.2 Support Contact
For any inquiries or comment concerning our products, please contact
us via below methods. If you have an order number, please include it as
reference. We will try to respond to your inquiry as quick as possible.
09/10

1. Overview
Thank you for purchasing HooToo IP Camera. Please read this manual
carefully and keep it in a safe place for future reference. If you need
any further assistance, please contact our customer support team or
1.1 Package Includes
1.2 Product Diagram
2. Windows PC
2.1Wired mode
1) Assemble the camera and its antenna; connect camera and your
router with a network cable (the same router that connects to
your windows PC)
2) Find the Search IPCam Tool from the Installation CD, copy and
paste it to your PC.
Notes:
• You can download the Search IPCam Tool software from
www.hootoo.com
• For FireFox or Chrome browser, in order to view live video, please
download and install “VLC media player” first. You can download
from: http://www.videolan.org/vlc/index.html
• For IE browser, in order to view live video, please install
“download ActiveX”. You can download it on login page
by clicking “download ActiveX”.
• We suggest you use IE browser for better performance
3) Double click on Search IPCam Tool to open it. Make sure camera has
connected with your router.
4) Click “Search” to find your camera’s IP address:
5) Select the IP address and double click on it. This will lead you to the
login page of the HT-IP212HDP web login page. Click “download
ActiveX” to install camera plug-in for future use:
6) Then login with default username &password.
Username: admin
Password: admin
Note:
•If you fail to find the camera’s IP address or fail to login after clicking
the IP address, please refer to advanced user manual or FAQ on our
official website www.hootoo.com
2.2 Wireless mode
Note:
Before setting the camera to wireless mode, please make sure you have
followed the previous instruction to set the wired mode.
1) After login the web setting page, click on “ ” at the top
of the page
2) Click “Network Settings”, then click “Wireless” to scan nearby
wireless network
3) Select the wireless network you wish to connect to. Enter the
password, and then click “Save”
4) After the progress bar finish, wait about 60 seconds for the camera to
restart. When restarting finished, pull out the network cable from the
connected camera.
5) Open the Search IPCam Tool software again. Click “Search” to find
the camera. It may take up to 10 seconds for the result to show.
6) Double click on the new IP address. This will lead you to the login
page of the HT-IP212HDP web setting page in your default browser.
7) Use the default username and password “admin” to login
8) If a WebCMS add-in pops up, please allow the computer to run it:
9) Now you have setup the camera in Wi-Fi mode
Note:
•When you fill in Wi-Fi password, please note that there should be no
special characters ( such as <>“”)
•If you fail to find the camera’s IP address while other IP addresses
show normally after searching, please fill in the SSID manually
•If the camera gets offline once you unplug the network cable,
please open your router’s webpage and then make proper
settings. For more details, please check Advanced User Manual
or FAQ in www.hootoo.com
2.3 Home Page
At home page, you can view camera live video, make records,
take snapshots, etc.
Notes:
•For Windows PC users, we recommend using IE browser to view the
video for more functions. Some features are not available on FireFox
and Chrome browser, such as video recording, snapshot, etc
•All features mentioned above, such as video recording, snapshot are
not available for Mac Computer
2.4 Local Configuration
In this page, you can select a record and snapshot saving path
to save the file.
2.5 Network Settings
2.5.1 Email
If the camera is triggered by motion detection, you can get an email
sent to your specified email address. Please test the email setting to
make sure it works.
• SMTP server: Please refer to the email service provider website
or Google it
• To: Your email account to receive alerts
• From: your email account used for send out alerts
Note:
• If the email you set failed to test, please try to use some popular
email servers, like Gmail or hotmail
• Please remember to enable motion detection to get email alert
2.5.2 FTP
FTP server is used to upload camera snapshot captured by motion
detection to your assigned FTP address. Test after all FTP parameters filled in.
Note:
• When connection to Main Server fails, the camera will attempt to
save at Sub Server and its specified path.
2.6 Alarm Settingsz
2.6.1 Motion Detect
To activate motion detection:
1) Click on “Motion area set”
2) Select motion area on live screen by dragging you mouse
3) Make the “Enable” and “Time1” ticked, then you can select the time
to activate motion detection
4) Sensor can only be triggered by movements within the set motion
detection area
2.7 System
2.7.1 User Management
You can create up to 2 guest accounts. Each guest account user can
use all functions in the home page of the camera, and check camera’s
device info. However guest account cannot access parameters setting
page or change other system settings.
Notes:
• P2P password is required when accessing the camera via P2P software
• The username for administrator is fixed as admin, but you can
change the password
3. MAC Computer
3.1 Wired Mode
1) Please find the IPCamSearch software in the Resource CD:
2) Make sure the camera is connected to your router via network cable
3) Open IPCamSearch from your local drive
4) Locate your camera’s IP address:
5) Select the IP address and double click on it. This will lead you to
HT-IP212HDP web setting page.
6) Login with default Username “admin” and default password “admin”
7) Once logged in, you should be able to see the live video at home page.
Note:
If you are not able to find the camera from IPCameraSearch, please
check the advanced user manual or FAQ in www.hootoo.com
3.2 Wireless Mode
1) After login the web setting page, click on “ ” at the top
of the page
2) Click “Network Settings”, then click “Wireless” to scan nearby
wireless network
3) Select the wireless network you wish to connect to. Enter the password,
and then click “Save”
4) After the progress bar finish, wait about 60 seconds for device restarting,
then pull out the network cable from the connected camera.
5) Open the Search IPCam Tool software again. It may take up to 10
seconds for searching the result.
6) Double click on the new IP address. This will lead you to the login
page of the HT-IP212HDP web setting page in your default browser.
7) Use the default username and password “admin” to login
8) If a WebCMS add-in pops up, please allow the computer to run it:
9) Now you have setup the camera in Wi-Fi mode
Note:
• When you fill in Wi-Fi password, please note that there should be no
special characters ( such as <>“”)
• If you fail to find the camera’s IP address while other IP addresses
show normally after searching, please fill in the SSID manually
• If the camera gets offline once you unplug the network cable,
please open your router’s webpage and then make proper
settings. For more details, please check Advanced User Manual
or FAQ in www.hootoo.com
4. iOS and Android Devices
4.1 LAN View on smart phone
1) From your smart phone or tablet, download and install “HooToo
MyCam Pro” APP from either Apple app store or Google Play store.
2) Setup the camera so it is in the same network that connects to
your phone / tablet
3) Open HooToo MyCam Pro app on your device.
4) Click “Add camera”, you will see the camera’s UUID code along with
its IP address. Select it, enter the security code (default: admin), and
press “OK”. You will see “Add camera successfully”
5) Go back to home page, press “Cameras List”. You will see the added
camera shows up. Click the” ” to see live video
4.2 Remote view on smart phone via P2P (scan QR code)
When you are out for travel or business, you can view your camera via
Internet remotely. To do so, please follow the following tips:
1) Download “HooToo MyCam Pro” app, and install it
2) Open the app, press “Add Camera” →“Add” →enter you camera’s
UUID code, Username & Password →“OK”
(Or you can scan your camera’s QR code to add it in your smart
phone camera list before leaving, and then you can view it
elsewhere via Internet)
3)Go back to home page, press “Cameras List”. You will see the
added camera shows up. Click the” ” to see live video
Note:
If you want to view the camera in LAN via your phone, simply search
camera UUID and fill in password to sign in.
4.3 Remote Viewing on a Windows PC
1) Go to www.hootoo.com, download the “IPCamClient” software and
install it on your windows PC.
2) Open it, click “Add”
3) Enter the UUID code of your camera manually, and fill in other blanks,
click “Next”then “Finish”
4) Select your camera, click “Play”, and then you can view the live video.
5. Warranty and Support
5.1 HooToo Warranty
This HooToo IP Camera is covered with 12 months limited product
warranty from date of its original purchase. If it becomes defective
during its warranty period, please contact HooToo or your seller for
warranty cover. The following are not covered by our warranty:
• 2nd hand purchase or purchase from a non-authorized seller/distributor
• Damages resulted from abuse, fire, poison and moisture
• Damages resulted from natural disaster
• Product been dismantled
Notes:Z
• Successful product registration at www.hootoo.com/productregistration
will add an additional 6 month of warranty cover, making a total of
18 months warranty cover from the date of original purchase.
• Please do not return the product without contacting HooToo first
• We can only provide warranty cover for products sold by HooToo
authorized distributor
5.2 Support Contact
For any inquiries or comment concerning our products, please contact
us via below methods. If you have an order number, please include it as
reference. We will try to respond to your inquiry as quick as possible.
11/12

1. Overview
Thank you for purchasing HooToo IP Camera. Please read this manual
carefully and keep it in a safe place for future reference. If you need
any further assistance, please contact our customer support team or
1.1 Package Includes
1.2 Product Diagram
2. Windows PC
2.1Wired mode
1) Assemble the camera and its antenna; connect camera and your
router with a network cable (the same router that connects to
your windows PC)
2) Find the Search IPCam Tool from the Installation CD, copy and
paste it to your PC.
Notes:
• You can download the Search IPCam Tool software from
www.hootoo.com
• For FireFox or Chrome browser, in order to view live video, please
download and install “VLC media player” first. You can download
from: http://www.videolan.org/vlc/index.html
• For IE browser, in order to view live video, please install
“download ActiveX”. You can download it on login page
by clicking “download ActiveX”.
• We suggest you use IE browser for better performance
3) Double click on Search IPCam Tool to open it. Make sure camera has
connected with your router.
4) Click “Search” to find your camera’s IP address:
5) Select the IP address and double click on it. This will lead you to the
login page of the HT-IP212HDP web login page. Click “download
ActiveX” to install camera plug-in for future use:
6) Then login with default username &password.
Username: admin
Password: admin
Note:
•If you fail to find the camera’s IP address or fail to login after clicking
the IP address, please refer to advanced user manual or FAQ on our
official website www.hootoo.com
2.2 Wireless mode
Note:
Before setting the camera to wireless mode, please make sure you have
followed the previous instruction to set the wired mode.
1) After login the web setting page, click on “ ” at the top
of the page
2) Click “Network Settings”, then click “Wireless” to scan nearby
wireless network
3) Select the wireless network you wish to connect to. Enter the
password, and then click “Save”
4) After the progress bar finish, wait about 60 seconds for the camera to
restart. When restarting finished, pull out the network cable from the
connected camera.
5) Open the Search IPCam Tool software again. Click “Search” to find
the camera. It may take up to 10 seconds for the result to show.
6) Double click on the new IP address. This will lead you to the login
page of the HT-IP212HDP web setting page in your default browser.
7) Use the default username and password “admin” to login
8) If a WebCMS add-in pops up, please allow the computer to run it:
9) Now you have setup the camera in Wi-Fi mode
Note:
•When you fill in Wi-Fi password, please note that there should be no
special characters ( such as <>“”)
•If you fail to find the camera’s IP address while other IP addresses
show normally after searching, please fill in the SSID manually
•If the camera gets offline once you unplug the network cable,
please open your router’s webpage and then make proper
settings. For more details, please check Advanced User Manual
or FAQ in www.hootoo.com
2.3 Home Page
At home page, you can view camera live video, make records,
take snapshots, etc.
Notes:
•For Windows PC users, we recommend using IE browser to view the
video for more functions. Some features are not available on FireFox
and Chrome browser, such as video recording, snapshot, etc
•All features mentioned above, such as video recording, snapshot are
not available for Mac Computer
2.4 Local Configuration
In this page, you can select a record and snapshot saving path
to save the file.
2.5 Network Settings
2.5.1 Email
If the camera is triggered by motion detection, you can get an email
sent to your specified email address. Please test the email setting to
make sure it works.
• SMTP server: Please refer to the email service provider website
or Google it
• To: Your email account to receive alerts
• From: your email account used for send out alerts
Note:
• If the email you set failed to test, please try to use some popular
email servers, like Gmail or hotmail
• Please remember to enable motion detection to get email alert
2.5.2 FTP
FTP server is used to upload camera snapshot captured by motion
detection to your assigned FTP address. Test after all FTP parameters filled in.
Note:
• When connection to Main Server fails, the camera will attempt to
save at Sub Server and its specified path.
2.6 Alarm Settingsz
2.6.1 Motion Detect
To activate motion detection:
1) Click on “Motion area set”
2) Select motion area on live screen by dragging you mouse
3) Make the “Enable” and “Time1” ticked, then you can select the time
to activate motion detection
4) Sensor can only be triggered by movements within the set motion
detection area
2.7 System
2.7.1 User Management
You can create up to 2 guest accounts. Each guest account user can
use all functions in the home page of the camera, and check camera’s
device info. However guest account cannot access parameters setting
page or change other system settings.
Notes:
• P2P password is required when accessing the camera via P2P software
• The username for administrator is fixed as admin, but you can
change the password
3. MAC Computer
3.1 Wired Mode
1) Please find the IPCamSearch software in the Resource CD:
2) Make sure the camera is connected to your router via network cable
3) Open IPCamSearch from your local drive
4) Locate your camera’s IP address:
5) Select the IP address and double click on it. This will lead you to
HT-IP212HDP web setting page.
6) Login with default Username “admin” and default password “admin”
7) Once logged in, you should be able to see the live video at home page.
Note:
If you are not able to find the camera from IPCameraSearch, please
check the advanced user manual or FAQ in www.hootoo.com
3.2 Wireless Mode
1) After login the web setting page, click on “ ” at the top
of the page
2) Click “Network Settings”, then click “Wireless” to scan nearby
wireless network
3) Select the wireless network you wish to connect to. Enter the password,
and then click “Save”
4) After the progress bar finish, wait about 60 seconds for device restarting,
then pull out the network cable from the connected camera.
5) Open the Search IPCam Tool software again. It may take up to 10
seconds for searching the result.
6) Double click on the new IP address. This will lead you to the login
page of the HT-IP212HDP web setting page in your default browser.
7) Use the default username and password “admin” to login
8) If a WebCMS add-in pops up, please allow the computer to run it:
9) Now you have setup the camera in Wi-Fi mode
Note:
• When you fill in Wi-Fi password, please note that there should be no
special characters ( such as <>“”)
• If you fail to find the camera’s IP address while other IP addresses
show normally after searching, please fill in the SSID manually
• If the camera gets offline once you unplug the network cable,
please open your router’s webpage and then make proper
settings. For more details, please check Advanced User Manual
or FAQ in www.hootoo.com
4. iOS and Android Devices
4.1 LAN View on smart phone
1) From your smart phone or tablet, download and install “HooToo
MyCam Pro” APP from either Apple app store or Google Play store.
2) Setup the camera so it is in the same network that connects to
your phone / tablet
3) Open HooToo MyCam Pro app on your device.
4) Click “Add camera”, you will see the camera’s UUID code along with
its IP address. Select it, enter the security code (default: admin), and
press “OK”. You will see “Add camera successfully”
5) Go back to home page, press “Cameras List”. You will see the added
camera shows up. Click the” ” to see live video
4.2 Remote view on smart phone via P2P (scan QR code)
When you are out for travel or business, you can view your camera via
Internet remotely. To do so, please follow the following tips:
1) Download “HooToo MyCam Pro” app, and install it
2) Open the app, press “Add Camera” →“Add” →enter you camera’s
UUID code, Username & Password →“OK”
(Or you can scan your camera’s QR code to add it in your smart
phone camera list before leaving, and then you can view it
elsewhere via Internet)
3)Go back to home page, press “Cameras List”. You will see the
added camera shows up. Click the” ” to see live video
Note:
If you want to view the camera in LAN via your phone, simply search
camera UUID and fill in password to sign in.
4.3 Remote Viewing on a Windows PC
1) Go to www.hootoo.com, download the “IPCamClient” software and
install it on your windows PC.
2) Open it, click “Add”
3) Enter the UUID code of your camera manually, and fill in other blanks,
click “Next”then “Finish”
4) Select your camera, click “Play”, and then you can view the live video.
5. Warranty and Support
5.1 HooToo Warranty
This HooToo IP Camera is covered with 12 months limited product
warranty from date of its original purchase. If it becomes defective
during its warranty period, please contact HooToo or your seller for
warranty cover. The following are not covered by our warranty:
• 2nd hand purchase or purchase from a non-authorized seller/distributor
• Damages resulted from abuse, fire, poison and moisture
• Damages resulted from natural disaster
• Product been dismantled
Notes:Z
• Successful product registration at www.hootoo.com/productregistration
will add an additional 6 month of warranty cover, making a total of
18 months warranty cover from the date of original purchase.
• Please do not return the product without contacting HooToo first
• We can only provide warranty cover for products sold by HooToo
authorized distributor
5.2 Support Contact
For any inquiries or comment concerning our products, please contact
us via below methods. If you have an order number, please include it as
reference. We will try to respond to your inquiry as quick as possible.
13/14

1. Overview
Thank you for purchasing HooToo IP Camera. Please read this manual
carefully and keep it in a safe place for future reference. If you need
any further assistance, please contact our customer support team or
1.1 Package Includes
1.2 Product Diagram
2. Windows PC
2.1Wired mode
1) Assemble the camera and its antenna; connect camera and your
router with a network cable (the same router that connects to
your windows PC)
2) Find the Search IPCam Tool from the Installation CD, copy and
paste it to your PC.
Notes:
• You can download the Search IPCam Tool software from
www.hootoo.com
• For FireFox or Chrome browser, in order to view live video, please
download and install “VLC media player” first. You can download
from: http://www.videolan.org/vlc/index.html
• For IE browser, in order to view live video, please install
“download ActiveX”. You can download it on login page
by clicking “download ActiveX”.
• We suggest you use IE browser for better performance
3) Double click on Search IPCam Tool to open it. Make sure camera has
connected with your router.
4) Click “Search” to find your camera’s IP address:
5) Select the IP address and double click on it. This will lead you to the
login page of the HT-IP212HDP web login page. Click “download
ActiveX” to install camera plug-in for future use:
6) Then login with default username &password.
Username: admin
Password: admin
Note:
•If you fail to find the camera’s IP address or fail to login after clicking
the IP address, please refer to advanced user manual or FAQ on our
official website www.hootoo.com
2.2 Wireless mode
Note:
Before setting the camera to wireless mode, please make sure you have
followed the previous instruction to set the wired mode.
1) After login the web setting page, click on “ ” at the top
of the page
2) Click “Network Settings”, then click “Wireless” to scan nearby
wireless network
3) Select the wireless network you wish to connect to. Enter the
password, and then click “Save”
4) After the progress bar finish, wait about 60 seconds for the camera to
restart. When restarting finished, pull out the network cable from the
connected camera.
5) Open the Search IPCam Tool software again. Click “Search” to find
the camera. It may take up to 10 seconds for the result to show.
6) Double click on the new IP address. This will lead you to the login
page of the HT-IP212HDP web setting page in your default browser.
7) Use the default username and password “admin” to login
8) If a WebCMS add-in pops up, please allow the computer to run it:
9) Now you have setup the camera in Wi-Fi mode
Note:
•When you fill in Wi-Fi password, please note that there should be no
special characters ( such as <>“”)
•If you fail to find the camera’s IP address while other IP addresses
show normally after searching, please fill in the SSID manually
•If the camera gets offline once you unplug the network cable,
please open your router’s webpage and then make proper
settings. For more details, please check Advanced User Manual
or FAQ in www.hootoo.com
2.3 Home Page
At home page, you can view camera live video, make records,
take snapshots, etc.
Notes:
•For Windows PC users, we recommend using IE browser to view the
video for more functions. Some features are not available on FireFox
and Chrome browser, such as video recording, snapshot, etc
•All features mentioned above, such as video recording, snapshot are
not available for Mac Computer
2.4 Local Configuration
In this page, you can select a record and snapshot saving path
to save the file.
2.5 Network Settings
2.5.1 Email
If the camera is triggered by motion detection, you can get an email
sent to your specified email address. Please test the email setting to
make sure it works.
• SMTP server: Please refer to the email service provider website
or Google it
• To: Your email account to receive alerts
• From: your email account used for send out alerts
Note:
• If the email you set failed to test, please try to use some popular
email servers, like Gmail or hotmail
• Please remember to enable motion detection to get email alert
2.5.2 FTP
FTP server is used to upload camera snapshot captured by motion
detection to your assigned FTP address. Test after all FTP parameters filled in.
Note:
• When connection to Main Server fails, the camera will attempt to
save at Sub Server and its specified path.
2.6 Alarm Settingsz
2.6.1 Motion Detect
To activate motion detection:
1) Click on “Motion area set”
2) Select motion area on live screen by dragging you mouse
3) Make the “Enable” and “Time1” ticked, then you can select the time
to activate motion detection
4) Sensor can only be triggered by movements within the set motion
detection area
2.7 System
2.7.1 User Management
You can create up to 2 guest accounts. Each guest account user can
use all functions in the home page of the camera, and check camera’s
device info. However guest account cannot access parameters setting
page or change other system settings.
Notes:
• P2P password is required when accessing the camera via P2P software
• The username for administrator is fixed as admin, but you can
change the password
3. MAC Computer
3.1 Wired Mode
1) Please find the IPCamSearch software in the Resource CD:
2) Make sure the camera is connected to your router via network cable
3) Open IPCamSearch from your local drive
4) Locate your camera’s IP address:
5) Select the IP address and double click on it. This will lead you to
HT-IP212HDP web setting page.
6) Login with default Username “admin” and default password “admin”
7) Once logged in, you should be able to see the live video at home page.
Note:
If you are not able to find the camera from IPCameraSearch, please
check the advanced user manual or FAQ in www.hootoo.com
3.2 Wireless Mode
1) After login the web setting page, click on “ ” at the top
of the page
2) Click “Network Settings”, then click “Wireless” to scan nearby
wireless network
3) Select the wireless network you wish to connect to. Enter the password,
and then click “Save”
4) After the progress bar finish, wait about 60 seconds for device restarting,
then pull out the network cable from the connected camera.
5) Open the Search IPCam Tool software again. It may take up to 10
seconds for searching the result.
6) Double click on the new IP address. This will lead you to the login
page of the HT-IP212HDP web setting page in your default browser.
7) Use the default username and password “admin” to login
8) If a WebCMS add-in pops up, please allow the computer to run it:
9) Now you have setup the camera in Wi-Fi mode
Note:
• When you fill in Wi-Fi password, please note that there should be no
special characters ( such as <>“”)
• If you fail to find the camera’s IP address while other IP addresses
show normally after searching, please fill in the SSID manually
• If the camera gets offline once you unplug the network cable,
please open your router’s webpage and then make proper
settings. For more details, please check Advanced User Manual
or FAQ in www.hootoo.com
4. iOS and Android Devices
4.1 LAN View on smart phone
1) From your smart phone or tablet, download and install “HooToo
MyCam Pro” APP from either Apple app store or Google Play store.
2) Setup the camera so it is in the same network that connects to
your phone / tablet
3) Open HooToo MyCam Pro app on your device.
4) Click “Add camera”, you will see the camera’s UUID code along with
its IP address. Select it, enter the security code (default: admin), and
press “OK”. You will see “Add camera successfully”
5) Go back to home page, press “Cameras List”. You will see the added
camera shows up. Click the” ” to see live video
4.2 Remote view on smart phone via P2P (scan QR code)
When you are out for travel or business, you can view your camera via
Internet remotely. To do so, please follow the following tips:
1) Download “HooToo MyCam Pro” app, and install it
2) Open the app, press “Add Camera” →“Add” →enter you camera’s
UUID code, Username & Password →“OK”
(Or you can scan your camera’s QR code to add it in your smart
phone camera list before leaving, and then you can view it
elsewhere via Internet)
3)Go back to home page, press “Cameras List”. You will see the
added camera shows up. Click the” ” to see live video
Note:
If you want to view the camera in LAN via your phone, simply search
camera UUID and fill in password to sign in.
4.3 Remote Viewing on a Windows PC
1) Go to www.hootoo.com, download the “IPCamClient” software and
install it on your windows PC.
2) Open it, click “Add”
3) Enter the UUID code of your camera manually, and fill in other blanks,
click “Next”then “Finish”
4) Select your camera, click “Play”, and then you can view the live video.
5. Warranty and Support
5.1 HooToo Warranty
This HooToo IP Camera is covered with 12 months limited product
warranty from date of its original purchase. If it becomes defective
during its warranty period, please contact HooToo or your seller for
warranty cover. The following are not covered by our warranty:
• 2nd hand purchase or purchase from a non-authorized seller/distributor
• Damages resulted from abuse, fire, poison and moisture
• Damages resulted from natural disaster
• Product been dismantled
Notes:Z
• Successful product registration at www.hootoo.com/productregistration
will add an additional 6 month of warranty cover, making a total of
18 months warranty cover from the date of original purchase.
• Please do not return the product without contacting HooToo first
• We can only provide warranty cover for products sold by HooToo
authorized distributor
5.2 Support Contact
For any inquiries or comment concerning our products, please contact
us via below methods. If you have an order number, please include it as
reference. We will try to respond to your inquiry as quick as possible.
15/16

1. Overview
Thank you for purchasing HooToo IP Camera. Please read this manual
carefully and keep it in a safe place for future reference. If you need
any further assistance, please contact our customer support team or
1.1 Package Includes
1.2 Product Diagram
2. Windows PC
2.1Wired mode
1) Assemble the camera and its antenna; connect camera and your
router with a network cable (the same router that connects to
your windows PC)
2) Find the Search IPCam Tool from the Installation CD, copy and
paste it to your PC.
Notes:
• You can download the Search IPCam Tool software from
www.hootoo.com
• For FireFox or Chrome browser, in order to view live video, please
download and install “VLC media player” first. You can download
from: http://www.videolan.org/vlc/index.html
• For IE browser, in order to view live video, please install
“download ActiveX”. You can download it on login page
by clicking “download ActiveX”.
• We suggest you use IE browser for better performance
3) Double click on Search IPCam Tool to open it. Make sure camera has
connected with your router.
4) Click “Search” to find your camera’s IP address:
5) Select the IP address and double click on it. This will lead you to the
login page of the HT-IP212HDP web login page. Click “download
ActiveX” to install camera plug-in for future use:
6) Then login with default username &password.
Username: admin
Password: admin
Note:
•If you fail to find the camera’s IP address or fail to login after clicking
the IP address, please refer to advanced user manual or FAQ on our
official website www.hootoo.com
2.2 Wireless mode
Note:
Before setting the camera to wireless mode, please make sure you have
followed the previous instruction to set the wired mode.
1) After login the web setting page, click on “ ” at the top
of the page
2) Click “Network Settings”, then click “Wireless” to scan nearby
wireless network
3) Select the wireless network you wish to connect to. Enter the
password, and then click “Save”
4) After the progress bar finish, wait about 60 seconds for the camera to
restart. When restarting finished, pull out the network cable from the
connected camera.
5) Open the Search IPCam Tool software again. Click “Search” to find
the camera. It may take up to 10 seconds for the result to show.
6) Double click on the new IP address. This will lead you to the login
page of the HT-IP212HDP web setting page in your default browser.
7) Use the default username and password “admin” to login
8) If a WebCMS add-in pops up, please allow the computer to run it:
9) Now you have setup the camera in Wi-Fi mode
Note:
•When you fill in Wi-Fi password, please note that there should be no
special characters ( such as <>“”)
•If you fail to find the camera’s IP address while other IP addresses
show normally after searching, please fill in the SSID manually
•If the camera gets offline once you unplug the network cable,
please open your router’s webpage and then make proper
settings. For more details, please check Advanced User Manual
or FAQ in www.hootoo.com
2.3 Home Page
At home page, you can view camera live video, make records,
take snapshots, etc.
Notes:
•For Windows PC users, we recommend using IE browser to view the
video for more functions. Some features are not available on FireFox
and Chrome browser, such as video recording, snapshot, etc
•All features mentioned above, such as video recording, snapshot are
not available for Mac Computer
2.4 Local Configuration
In this page, you can select a record and snapshot saving path
to save the file.
2.5 Network Settings
2.5.1 Email
If the camera is triggered by motion detection, you can get an email
sent to your specified email address. Please test the email setting to
make sure it works.
• SMTP server: Please refer to the email service provider website
or Google it
• To: Your email account to receive alerts
• From: your email account used for send out alerts
Note:
• If the email you set failed to test, please try to use some popular
email servers, like Gmail or hotmail
• Please remember to enable motion detection to get email alert
2.5.2 FTP
FTP server is used to upload camera snapshot captured by motion
detection to your assigned FTP address. Test after all FTP parameters filled in.
Note:
• When connection to Main Server fails, the camera will attempt to
save at Sub Server and its specified path.
2.6 Alarm Settingsz
2.6.1 Motion Detect
To activate motion detection:
1) Click on “Motion area set”
2) Select motion area on live screen by dragging you mouse
3) Make the “Enable” and “Time1” ticked, then you can select the time
to activate motion detection
4) Sensor can only be triggered by movements within the set motion
detection area
2.7 System
2.7.1 User Management
You can create up to 2 guest accounts. Each guest account user can
use all functions in the home page of the camera, and check camera’s
device info. However guest account cannot access parameters setting
page or change other system settings.
Notes:
• P2P password is required when accessing the camera via P2P software
• The username for administrator is fixed as admin, but you can
change the password
3. MAC Computer
3.1 Wired Mode
1) Please find the IPCamSearch software in the Resource CD:
2) Make sure the camera is connected to your router via network cable
3) Open IPCamSearch from your local drive
4) Locate your camera’s IP address:
5) Select the IP address and double click on it. This will lead you to
HT-IP212HDP web setting page.
6) Login with default Username “admin” and default password “admin”
7) Once logged in, you should be able to see the live video at home page.
Note:
If you are not able to find the camera from IPCameraSearch, please
check the advanced user manual or FAQ in www.hootoo.com
3.2 Wireless Mode
1) After login the web setting page, click on “ ” at the top
of the page
2) Click “Network Settings”, then click “Wireless” to scan nearby
wireless network
3) Select the wireless network you wish to connect to. Enter the password,
and then click “Save”
4) After the progress bar finish, wait about 60 seconds for device restarting,
then pull out the network cable from the connected camera.
5) Open the Search IPCam Tool software again. It may take up to 10
seconds for searching the result.
6) Double click on the new IP address. This will lead you to the login
page of the HT-IP212HDP web setting page in your default browser.
7) Use the default username and password “admin” to login
8) If a WebCMS add-in pops up, please allow the computer to run it:
9) Now you have setup the camera in Wi-Fi mode
Note:
• When you fill in Wi-Fi password, please note that there should be no
special characters ( such as <>“”)
• If you fail to find the camera’s IP address while other IP addresses
show normally after searching, please fill in the SSID manually
• If the camera gets offline once you unplug the network cable,
please open your router’s webpage and then make proper
settings. For more details, please check Advanced User Manual
or FAQ in www.hootoo.com
4. iOS and Android Devices
4.1 LAN View on smart phone
1) From your smart phone or tablet, download and install “HooToo
MyCam Pro” APP from either Apple app store or Google Play store.
2) Setup the camera so it is in the same network that connects to
your phone / tablet
3) Open HooToo MyCam Pro app on your device.
4) Click “Add camera”, you will see the camera’s UUID code along with
its IP address. Select it, enter the security code (default: admin), and
press “OK”. You will see “Add camera successfully”
5) Go back to home page, press “Cameras List”. You will see the added
camera shows up. Click the” ” to see live video
4.2 Remote view on smart phone via P2P (scan QR code)
When you are out for travel or business, you can view your camera via
Internet remotely. To do so, please follow the following tips:
1) Download “HooToo MyCam Pro” app, and install it
2) Open the app, press “Add Camera” →“Add” →enter you camera’s
UUID code, Username & Password →“OK”
(Or you can scan your camera’s QR code to add it in your smart
phone camera list before leaving, and then you can view it
elsewhere via Internet)
3)Go back to home page, press “Cameras List”. You will see the
added camera shows up. Click the” ” to see live video
Note:
If you want to view the camera in LAN via your phone, simply search
camera UUID and fill in password to sign in.
4.3 Remote Viewing on a Windows PC
1) Go to www.hootoo.com, download the “IPCamClient” software and
install it on your windows PC.
2) Open it, click “Add”
3) Enter the UUID code of your camera manually, and fill in other blanks,
click “Next”then “Finish”
4) Select your camera, click “Play”, and then you can view the live video.
5. Warranty and Support
5.1 HooToo Warranty
This HooToo IP Camera is covered with 12 months limited product
warranty from date of its original purchase. If it becomes defective
during its warranty period, please contact HooToo or your seller for
warranty cover. The following are not covered by our warranty:
• 2nd hand purchase or purchase from a non-authorized seller/distributor
• Damages resulted from abuse, fire, poison and moisture
• Damages resulted from natural disaster
• Product been dismantled
Notes:Z
• Successful product registration at www.hootoo.com/productregistration
will add an additional 6 month of warranty cover, making a total of
18 months warranty cover from the date of original purchase.
• Please do not return the product without contacting HooToo first
• We can only provide warranty cover for products sold by HooToo
authorized distributor
5.2 Support Contact
For any inquiries or comment concerning our products, please contact
us via below methods. If you have an order number, please include it as
reference. We will try to respond to your inquiry as quick as possible.
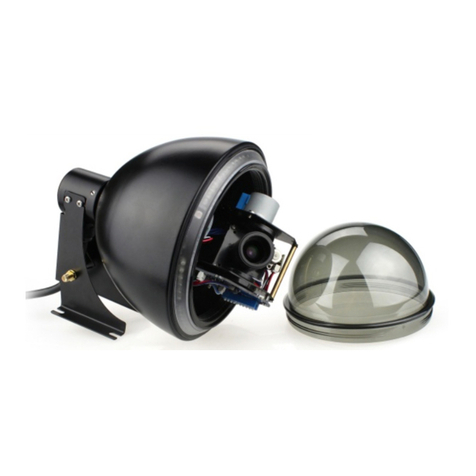
17/18

1. Overview
Thank you for purchasing HooToo IP Camera. Please read this manual
carefully and keep it in a safe place for future reference. If you need
any further assistance, please contact our customer support team or
1.1 Package Includes
1.2 Product Diagram
2. Windows PC
2.1Wired mode
1) Assemble the camera and its antenna; connect camera and your
router with a network cable (the same router that connects to
your windows PC)
2) Find the Search IPCam Tool from the Installation CD, copy and
paste it to your PC.
Notes:
• You can download the Search IPCam Tool software from
www.hootoo.com
• For FireFox or Chrome browser, in order to view live video, please
download and install “VLC media player” first. You can download
from: http://www.videolan.org/vlc/index.html
• For IE browser, in order to view live video, please install
“download ActiveX”. You can download it on login page
by clicking “download ActiveX”.
• We suggest you use IE browser for better performance
3) Double click on Search IPCam Tool to open it. Make sure camera has
connected with your router.
4) Click “Search” to find your camera’s IP address:
5) Select the IP address and double click on it. This will lead you to the
login page of the HT-IP212HDP web login page. Click “download
ActiveX” to install camera plug-in for future use:
6) Then login with default username &password.
Username: admin
Password: admin
Note:
•If you fail to find the camera’s IP address or fail to login after clicking
the IP address, please refer to advanced user manual or FAQ on our
official website www.hootoo.com
2.2 Wireless mode
Note:
Before setting the camera to wireless mode, please make sure you have
followed the previous instruction to set the wired mode.
1) After login the web setting page, click on “ ” at the top
of the page
2) Click “Network Settings”, then click “Wireless” to scan nearby
wireless network
3) Select the wireless network you wish to connect to. Enter the
password, and then click “Save”
4) After the progress bar finish, wait about 60 seconds for the camera to
restart. When restarting finished, pull out the network cable from the
connected camera.
5) Open the Search IPCam Tool software again. Click “Search” to find
the camera. It may take up to 10 seconds for the result to show.
6) Double click on the new IP address. This will lead you to the login
page of the HT-IP212HDP web setting page in your default browser.
7) Use the default username and password “admin” to login
8) If a WebCMS add-in pops up, please allow the computer to run it:
9) Now you have setup the camera in Wi-Fi mode
Note:
•When you fill in Wi-Fi password, please note that there should be no
special characters ( such as <>“”)
•If you fail to find the camera’s IP address while other IP addresses
show normally after searching, please fill in the SSID manually
•If the camera gets offline once you unplug the network cable,
please open your router’s webpage and then make proper
settings. For more details, please check Advanced User Manual
or FAQ in www.hootoo.com
2.3 Home Page
At home page, you can view camera live video, make records,
take snapshots, etc.
Notes:
•For Windows PC users, we recommend using IE browser to view the
video for more functions. Some features are not available on FireFox
and Chrome browser, such as video recording, snapshot, etc
•All features mentioned above, such as video recording, snapshot are
not available for Mac Computer
2.4 Local Configuration
In this page, you can select a record and snapshot saving path
to save the file.
2.5 Network Settings
2.5.1 Email
If the camera is triggered by motion detection, you can get an email
sent to your specified email address. Please test the email setting to
make sure it works.
• SMTP server: Please refer to the email service provider website
or Google it
• To: Your email account to receive alerts
• From: your email account used for send out alerts
Note:
• If the email you set failed to test, please try to use some popular
email servers, like Gmail or hotmail
• Please remember to enable motion detection to get email alert
2.5.2 FTP
FTP server is used to upload camera snapshot captured by motion
detection to your assigned FTP address. Test after all FTP parameters filled in.
Note:
• When connection to Main Server fails, the camera will attempt to
save at Sub Server and its specified path.
2.6 Alarm Settingsz
2.6.1 Motion Detect
To activate motion detection:
1) Click on “Motion area set”
2) Select motion area on live screen by dragging you mouse
3) Make the “Enable” and “Time1” ticked, then you can select the time
to activate motion detection
4) Sensor can only be triggered by movements within the set motion
detection area
2.7 System
2.7.1 User Management
You can create up to 2 guest accounts. Each guest account user can
use all functions in the home page of the camera, and check camera’s
device info. However guest account cannot access parameters setting
page or change other system settings.
Notes:
• P2P password is required when accessing the camera via P2P software
• The username for administrator is fixed as admin, but you can
change the password
3. MAC Computer
3.1 Wired Mode
1) Please find the IPCamSearch software in the Resource CD:
2) Make sure the camera is connected to your router via network cable
3) Open IPCamSearch from your local drive
4) Locate your camera’s IP address:
5) Select the IP address and double click on it. This will lead you to
HT-IP212HDP web setting page.
6) Login with default Username “admin” and default password “admin”
7) Once logged in, you should be able to see the live video at home page.
Note:
If you are not able to find the camera from IPCameraSearch, please
check the advanced user manual or FAQ in www.hootoo.com
3.2 Wireless Mode
1) After login the web setting page, click on “ ” at the top
of the page
2) Click “Network Settings”, then click “Wireless” to scan nearby
wireless network
3) Select the wireless network you wish to connect to. Enter the password,
and then click “Save”
4) After the progress bar finish, wait about 60 seconds for device restarting,
then pull out the network cable from the connected camera.
5) Open the Search IPCam Tool software again. It may take up to 10
seconds for searching the result.
6) Double click on the new IP address. This will lead you to the login
page of the HT-IP212HDP web setting page in your default browser.
7) Use the default username and password “admin” to login
8) If a WebCMS add-in pops up, please allow the computer to run it:
9) Now you have setup the camera in Wi-Fi mode
Note:
• When you fill in Wi-Fi password, please note that there should be no
special characters ( such as <>“”)
• If you fail to find the camera’s IP address while other IP addresses
show normally after searching, please fill in the SSID manually
• If the camera gets offline once you unplug the network cable,
please open your router’s webpage and then make proper
settings. For more details, please check Advanced User Manual
or FAQ in www.hootoo.com
4. iOS and Android Devices
4.1 LAN View on smart phone
1) From your smart phone or tablet, download and install “HooToo
MyCam Pro” APP from either Apple app store or Google Play store.
2) Setup the camera so it is in the same network that connects to
your phone / tablet
3) Open HooToo MyCam Pro app on your device.
4) Click “Add camera”, you will see the camera’s UUID code along with
its IP address. Select it, enter the security code (default: admin), and
press “OK”. You will see “Add camera successfully”
5) Go back to home page, press “Cameras List”. You will see the added
camera shows up. Click the” ” to see live video
4.2 Remote view on smart phone via P2P (scan QR code)
When you are out for travel or business, you can view your camera via
Internet remotely. To do so, please follow the following tips:
1) Download “HooToo MyCam Pro” app, and install it
2) Open the app, press “Add Camera” →“Add” →enter you camera’s
UUID code, Username & Password →“OK”
(Or you can scan your camera’s QR code to add it in your smart
phone camera list before leaving, and then you can view it
elsewhere via Internet)
3)Go back to home page, press “Cameras List”. You will see the
added camera shows up. Click the” ” to see live video
Note:
If you want to view the camera in LAN via your phone, simply search
camera UUID and fill in password to sign in.
4.3 Remote Viewing on a Windows PC
1) Go to www.hootoo.com, download the “IPCamClient” software and
install it on your windows PC.
2) Open it, click “Add”
3) Enter the UUID code of your camera manually, and fill in other blanks,
click “Next”then “Finish”
4) Select your camera, click “Play”, and then you can view the live video.
5. Warranty and Support
5.1 HooToo Warranty
This HooToo IP Camera is covered with 12 months limited product
warranty from date of its original purchase. If it becomes defective
during its warranty period, please contact HooToo or your seller for
warranty cover. The following are not covered by our warranty:
• 2nd hand purchase or purchase from a non-authorized seller/distributor
• Damages resulted from abuse, fire, poison and moisture
• Damages resulted from natural disaster
• Product been dismantled
Notes:Z
• Successful product registration at www.hootoo.com/productregistration
will add an additional 6 month of warranty cover, making a total of
18 months warranty cover from the date of original purchase.
• Please do not return the product without contacting HooToo first
• We can only provide warranty cover for products sold by HooToo
authorized distributor
5.2 Support Contact
For any inquiries or comment concerning our products, please contact
us via below methods. If you have an order number, please include it as
reference. We will try to respond to your inquiry as quick as possible.
19
Other manuals for HT-IP212HDP
2
Table of contents
Other Hootoo IP Camera manuals

Hootoo
Hootoo HT-IP210P User manual

Hootoo
Hootoo HT-IP210F User manual

Hootoo
Hootoo HT-IP210P User manual

Hootoo
Hootoo HT-IP210P User manual

Hootoo
Hootoo HT-IP006N Product guide

Hootoo
Hootoo HT-IP212HDP Assembly instructions

Hootoo
Hootoo HT-IP212HDP User manual

Hootoo
Hootoo HT-IP210P User manual

Hootoo
Hootoo HT-IP009HDP User manual

Hootoo
Hootoo HT-IP211HDP User manual