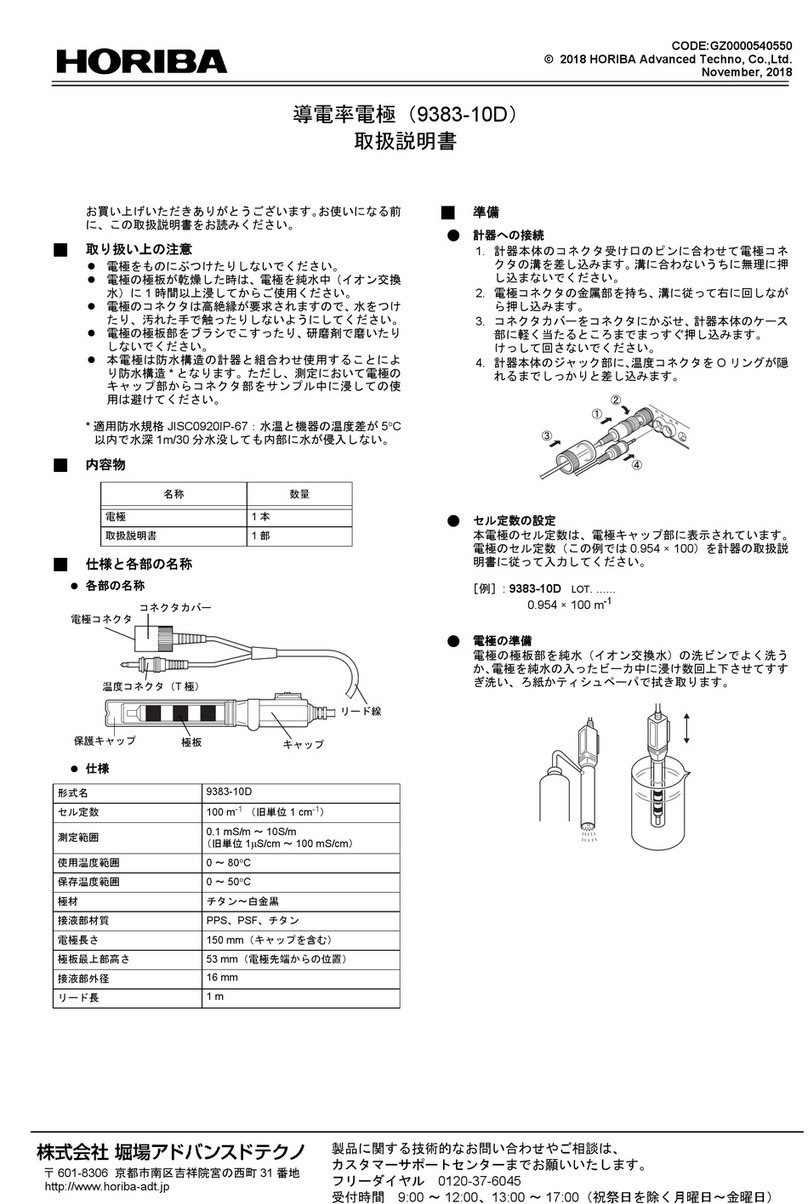
horiba HP-8A User manual

pH detector for pure water measurement
HP-8A
Instruction Manual
CODE:GZ0000406259A

May, 2015 © 2015 HORIBA Advanced Techno, Co., Ltd.
Preface
This manual describes the operation of the pH detector for pure water measurement, HP-8A.
Be sure to read this manual before using the product to ensure proper and safe operation of
the product. Also safely store the manual so it is readily available whenever necessary.
Product specifications and appearance, as well as the contents of this manual are subject to
change without notice.
Warranty and responsibility
HORIBA Advanced Techno, Co., Ltd. warrants that the Product shall be free from defects in
material and workmanship and agrees to repair or replace free of charge, at option of HORIBA
Advanced Techno, Co., Ltd., any malfunctioned or damaged Product attributable to
responsibility of HORIBA Advanced Techno, Co., Ltd. for a period of one (1) year from the
delivery unless otherwise agreed with a written agreement. In any one of the following cases,
none of the warranties set forth herein shall be extended;
Any malfunction or damage attributable to improper operation
Any malfunction attributable to repair or modification by any person not authorized by
HORIBA Advanced Techno, Co., Ltd.
Any malfunction or damage attributable to the use in an environment not specified in this
manual
Any malfunction or damage attributable to violation of the instructions in this manual or
operations in the manner not specified in this manual
Any malfunction or damage attributable to any cause or causes beyond the reasonable
control of HORIBA Advanced Techno, Co., Ltd. such as natural disasters
Any deterioration in appearance attributable to corrosion, rust, and so on
Replacement of consumables
HORIBA Advanced Techno, Co., Ltd. SHALL NOT BE LIABLE FOR ANY DAMAGES
RESULTING FROM ANY MALFUNCTIONS OF THE PRODUCT, ANY ERASURE OF DATA,
OR ANY OTHER USES OF THE PRODUCT.
Trademarks
Company names and brand names are either registered trademarks or trademarks of the
respective companies. (R), (TM) symbols may be omitted in this manual.

For Your Safety
Hazard classification and warning symbols
Warning messages are described in the following manner. Read the messages and follow the
instructions carefully.
Hazard classification
Warning symbols
This indicates an imminently hazardous situation which, if not avoided, will
result in death or serious injury. This is to be limited to the most extreme
situations.
This indicates a potentially hazardous situation which, if not avoided, could
result in death or serious injury.
This indicates a potentially hazardous situation which, if not avoided, may
result in minor or moderate injury. It may also be used to alert against
unsafe practices.
Description of what should be done, or what should be followed
Description of what should never be done, or what is prohibited

Safety precautions
This section provides precautions for using the product safely and correctly and to prevent
injury and damage. The terms of DANGER, WARNING, and CAUTION indicate the degree of
imminency and hazardous situation. Read the precautions carefully as it contains important
safety messages.
WARNING
Electric shock
For prevention of electric shock, the ground resistance should be 100 or less.

Product Handling Information
Operational precautions
Use of the product in a manner not specified by the manufacturer may impair the protection
provided by the product. And it may also reduce product performance.
Exercise the following precautions:
Use this product in the temperature range shown in the specifications.
Do not wet the terminals of the cable or the terminal block, nor stain them with finger
marks or oil. Otherwise, the insulation of the cable is weakened.
Use this product in an environment free from corrosive gas.
Avoid using this product in a location close to equipment using strong electric power (such
as an electric furnace), or near a radio or sound wave source.
Do not give a shock or large vibrations to this product. To move this product to another
location, contact our service or sales office.
Refer to the “ Specifications ” (page 12) to use this product in the sample condition.
Otherwise it may cause wrong measurement, and this product may break.
Disposal of the product
When disposing of the product, follow the related laws and/or regulations of your country.

Manual Information
Description in this manual
Note
This interprets the necessary points for correct operation and notifies the important points for
handling the product.
Reference
This indicates the part where to refer for information.
Tip
This indicates reference information.

Contents
Overview . . . . . . . . . . . . . . . . . . . . . . . . . . . . . . . . . . . . . . . . . . . . . 1
Introduction. . . . . . . . . . . . . . . . . . . . . . . . . . . . . . . . . . . . . . . . . . . . . . . . 1
Unpacking. . . . . . . . . . . . . . . . . . . . . . . . . . . . . . . . . . . . . . . . . . . . . . . . . 1
Construction of the pH detector for pure water measurement . . . . . . . . . . . . . . 1
Breakdown of complete set (standard) . . . . . . . . . . . . . . . . . . . . . . . . . . . . . . . 1
Name of parts . . . . . . . . . . . . . . . . . . . . . . . . . . . . . . . . . . . . . . . . . . . . . . 2
pH detector for pure water measurement . . . . . . . . . . . . . . . . . . . . . . . . . . . . . 2
pH flow cell. . . . . . . . . . . . . . . . . . . . . . . . . . . . . . . . . . . . . . . . . . . . . . . . . . . . . 2
Installation . . . . . . . . . . . . . . . . . . . . . . . . . . . . . . . . . . . . . . . . . . . . 3
Mounting of pH detector for pure water measurement . . . . . . . . . . . . . . . 3
Installation on a pole . . . . . . . . . . . . . . . . . . . . . . . . . . . . . . . . . . . . . . . . . . . . . 3
Installation on a wall. . . . . . . . . . . . . . . . . . . . . . . . . . . . . . . . . . . . . . . . . . . . . . 3
Wiring . . . . . . . . . . . . . . . . . . . . . . . . . . . . . . . . . . . . . . . . . . . . . . . . . . . . 4
Attaching a pH electrode . . . . . . . . . . . . . . . . . . . . . . . . . . . . . . . . . . . . . . . . . . 5
Piping . . . . . . . . . . . . . . . . . . . . . . . . . . . . . . . . . . . . . . . . . . . . . . . . . . . . 6
Selector valve operation. . . . . . . . . . . . . . . . . . . . . . . . . . . . . . . . . 7
Measurement . . . . . . . . . . . . . . . . . . . . . . . . . . . . . . . . . . . . . . . . . . 8
Calibration . . . . . . . . . . . . . . . . . . . . . . . . . . . . . . . . . . . . . . . . . . . . 9
Troubleshooting . . . . . . . . . . . . . . . . . . . . . . . . . . . . . . . . . . . . . . . 11
Check the instrument . . . . . . . . . . . . . . . . . . . . . . . . . . . . . . . . . . . . . . . . 11
Data. . . . . . . . . . . . . . . . . . . . . . . . . . . . . . . . . . . . . . . . . . . . . . . . . . 12
Specifications . . . . . . . . . . . . . . . . . . . . . . . . . . . . . . . . . . . . . . . . . . . . . . 12
Parts list . . . . . . . . . . . . . . . . . . . . . . . . . . . . . . . . . . . . . . . . . . . . . . . . . . 12
Option . . . . . . . . . . . . . . . . . . . . . . . . . . . . . . . . . . . . . . . . . . . . . . . . . . . . . . . . 12
Disposing of the instrument . . . . . . . . . . . . . . . . . . . . . . . . . . . . . . . . . . . 13
pH detector for pure water measurement . . . . . . . . . . . . . . . . . . . . . . . . . . . . . 13
pH flow cell. . . . . . . . . . . . . . . . . . . . . . . . . . . . . . . . . . . . . . . . . . . . . . . . . . . . . 14


Overview
1
Overview
Introduction
This product is a detector for measuring of low conductivity sample. Measuring pH of low
conductivity sample is quite difficult for the ordinary pH meter. It is necessary to reduce the
impedance of the liquid by the neutral solution. The inner solution of the reference electrode
leaks much more than the ordinary pH reference electrode and reduces the impedance of the
sample.
This product can connect to a pH transmitters of on-site industry type or a panel-mount type
pH meters. Refer to the instruction manuals for the key operation or setting of each
transmitter.
Unpacking
Upon delivery of this product, unpack the packing immediately and check the contents of the
packing for incompleteness. In addition, check this product for any damage at the same time.
If you found any failure consult a distributor.
Construction of the pH detector for pure water measurement
pH detector
pH flow cell
Breakdown of complete set (standard)
pH detector for pure water measurement...... 1 set
Accessories
O-ring (P6).............................................. 2
O-ring (P8).............................................. 2
O-ring (P22)............................................ 2
O-ring (P45)............................................ 1
Ceramic junction..................................... 1
Skirt HP................................................... 2
3.33 mol/L KCl solution........................... 250 mL 2
pH electrode............................................ 1
KCl tank................................................... 1
Tank bracket............................................ 1
Nipple (12 mm)...................................... 2
Instructions manual................................. 1

Overview
2
Name of parts
pH detector for pure water measurement
pH flow cell
KCl tank
Case
Funnel
Sample outlet
Temperature sensor
(6.8 k)
pH flow cell
Funnel cover
Hose
Tank bracket
Sample inlet
pH electrode
Selector valve knob
O-ring (P6)
O-ring (P8)
O-ring (P6)
O-ring (P45)
O-ring (P8)
O-ring (P22)
Cap nut C
Holder HP
Liquid junction
Skirt HP

Installation
3
Installation
Mounting of pH detector for pure water measurement
Installation on a pole
Installation on a wall
Temperature sensor cable
(L = 6 m)
(60.5)
(50 A pole)
40
41.5
113
167
(202)
15.6
24
(58) 93
(296)
236
(35)
83 70
: (size) is approximate.
[Unit: mm]
4 - 10
pH electrode cable
(L = 6 m)
(20)(360)
(557)
(330)
93
25
(202)
(557)
(330)
(35)
(20)(360)
4 - 10
83 70
93 93
236
25
(58)
(296)
15.6
113
167
41.5
24
Temperature sensor cable
(L = 6 m)
: (size) is approximate.
[Unit: mm]
pH electrode cable
(L = 6 m)
(Wall)

Installation
4
Wiring
Reference
Refer to the instruction manual of the transmitter for detail.
Connection example
The electrode cable has the following terminals.
As shown in the following diagram, connect the electrode cable to the terminal block being
careful not to make any mistakes in matching between terminals.
Fig. 1 Example of wiring with HP-300 converter
WARNING
Electric shock
For prevention of electric shock, the ground resistance should be 100 or less.
G: Anode terminal
R: Reference electrode terminal
T, T: Temperature compensation terminals
E: Shield wire
G
R
T
Temperature
sensor
pH electrode
EL-6121
Ground resistance
of 100 or less
Load resistance: 600
24 V DC
()
pH detector for pure water
measurement
(HP-8A)
4 mA to 20 mA DC
Converter
(ex: HP-300) (1)
Hold input terminal
ON resistance: 40 (max.)
Open circuit voltage: 1.2 V DC
Closed circuit current: 21 mA (max.)
E
(+)
No. Crimp terminal wire torque
(1) 1.25 mm2/MAX
(AWG16)0.8 N•m
(2) 3.5 mm2/MAX
(AWG12)1.2 N•m
MAX3.2
For M3 MAX6.2
MAX6.5
MAX4.2
For M4 MAX8.5
MAX7.6
1: Connect the short circuit board which is attached to a pH electrode between R and SE.
2: Connection-free (Cap is attached to the terminal.)
2
1
T
(2)
Ground resistance of
100 or less
T
T

Installation
5
Attaching a pH electrode
The pH electrode is packed separately. Pick up the pH electrode and assemble it with
peripheral pats in the flow cell.
1. Loosen the cap nut C and take out the holder HP.
2. Insert the liquid junction into the bottom of the holder HP.
3. Remove the guard nut from the pH electrode.
4. Set the O-ring (P22) on the pH electrode.
5. Insert the pH tip into the pH electrode bottom hole.
6. Remove the cap nut E and lead the pH electrode cable through the cap nut E.
7. Lead the pH electrode into the electrode holder, and fasten the cap nut E.
8. Screw the skirt HP to fasten the liquid junction.
9. Insert the electrode holder into the HP cell and lock it with cap nut C.
10. Connect the KCl delivery hose to the KCl tank inlet fitting of the electrode holder.
Note
The consumption of KCl solution will be 200 mL/month to 400 mL/month. Replenish the KCl solution
every 2 weeks or 3 weeks.
Cap nut C
Holder HP
Liquid junction
Skirt HP
Cap nut E
pH electrode
O-ring (P22)
Plug
pH tip
Assemble unit
pH electrode pH tip Guard nut
KCl tank
Inlet

Installation
6
Piping
Piping of sample inlet/outlet
Note
When connect a soft tube, use the nipple (12 mm) of the accessory.
1. There is Rc1/4 screw on the sample inlet. For the
plumbing, attach a suitable joint.
2. There is Rc1/4 screw on the sample outlet. For the
plumbing, attach a suitable joint. The plumbing should
be atmosphere opening which the tip does not rise.
KCl tank
1. Fill the KCl tank with 3.33 mol/L of KCl solution.
HORIBA #300 KCl solution is available.
2. Loosen the plug to pour the KCI solution in the holder
and fasten it.
Sample inlet
Sample
outlet
Drain
KCl tank

Selector valve operation
7
Selector valve operation
The valve changes the line to the cell to lead and drain the liquid.
Position Specification Image
MEAS Sample comes to the cell and overflows for
measuring pH of sample at MEAS position.
DRAIN DRAIN position drains all the liquid out of the cell.
CAL CAL position shuts the sample line and leads the pH
standard solution into the cell.
Sample inlet Drain Sample outlet

Measurement
8
Measurement
Note
Refer to the “ Specifications ” (page 12) to use this product in the sample condition. Otherwise it may
cause wrong measurement, and this product may break.
Measurement operation
1. Change valve to MEAS, referring to the “ Selector valve operation ” (page 7).
2. Perform measurement, referring to the instruction manual of the transmitter.
Note
The consumption of the KCl solution is 400 mL from 200 mL in one month. Replenish the KCl solution
every 2 weeks or 3 weeks.
Tip
When combining transmitter are HP-200 or HP-300,
It is possible to set a temperature coefficient. Refer to the instruction manual of the transmitter.
In the specification of the pH electrode, glass membrane error and reference electrode error are
not available.

Calibration
9
Calibration
Calibration should be done to secure the data from the instrument.
Fill the space around the pH electrode with the pH7 standard solution, the pH9 standard
solution or the pH4 standard solution to calibrate pH electrode.
Reference
Refer to the instruction manual of the transmitter for the key operation.
Calibration preparation
pH standard solution for calibration
Prepare the pH7 standard solution, the pH9 standard solution or the pH4 standard solution for
500 mL.
Calibration operation
Select the calibration mode in the transmitter.
Drain sample/pure water washing
Prewashing of pH7 standard solution/pure water washing
1. Switch the valve from MEAS to DRAIN position to drain
sample.
2. Turn the valve to CAL position and pour pure water into
the funnel to clean up the cell.
3. Switch the valve from CAL to DRAIN position to drain
pure water.
1. Pour the pH7 standard solution into the funnel and turn the
valve to CAL position and to DRAIN position again to clean
up with the pH7 standard solution.
2. Pour the pH7 standard solution into the funnel and turn the
valve to CAL position and wait a few minute for calibration.
3. Make calibration with the pH7 standard solution referring to
the instruction manual.
4. Turn the valve to DRAIN position to drain out the pH7
standard solution.
5. Turn the valve to CAL position and pour pure water into the
funnel to clean up the cell.
Drain
Clean
Drain
Drain
Clean
Drain
Calibration
Prewashing
pH7

Calibration
10
Prewashing of pH9 standard solution or pH4 standard solution/pure water washing
1. Switch the valve from CAL to DRAIN position to drain pure
water.
2. Pour the pH9 standard solution or the pH4 standard solution
into the funnel and turn the valve to CAL position and to
DRAIN position again to clean up with the pH9 standard
solution or the pH4 standard solution.
3. Pour the pH9 standard solution or the pH4 standard solution
into the funnel and turn the valve to CAL position and wait a
few minute for calibration.
4. Make calibration with the pH9 standard solution or the pH4
standard solution referring to the instruction manual.
5. Turn the valve to DRAIN position to drain out the pH9
standard solution or the pH4 standard solution.
6. Turn the valve to CAL position and pour pure water into the
funnel to clean up the cell.
Drain
Clean
Drain
Calibration
Prewashing
pH9 or pH4
Completed
of calibration

Troubleshooting
11
Troubleshooting
Check the instrument
Give adequate flow rate without bubbling.
Reduce sampling flow rate so that the liquid
impedance becomes low.
No response Out of measuring range Fluctuation of reading
Is the sample
flowing
smoothly?
Is it too high or
too low sample
temperature?
Is the wiring to the
transmitter
disconnected?
YES
YES
NO
Keep the sample temperature within the mea-
suring condition.
NO
Drift of reading
Contact us
YES
NO
Confirm the electrode wirings to the transmitter
and repair the defect.
Is the KCI tank filled
with solution? Replenish the tank if empty.
YES
NO
Does it respond to
pH7, pH9 or pH4?
NO
Is the pH electrode cracking?
Replace a pH electrode.
Is the insulation of pH tip failed?
Replace or clean the pH tip.
Is junction clogging?
Replace the junction or KCI solution.
YES

Data
12
Data
Specifications
Parts list
Option
Product name pH detector for pure water measurement
Model HP-8A
Compatible converter HP-200, HP-300, 48/96 series
Ambient temperature 10C to 50C
Relative humidity 0to 90
Structure Water proof structure (JIS C 0920) IPX3 corresponding
Mass Approx. 6.0 kg
Sample condition
Temperature 0C to 50C
Pressure 0 MPa to 0.05 MPa (Sample outlet should be open to
atmospheric pressure.)
Flow rate 50 mL/min to 250 mL/min
Conductivity 0.1 S/cm or more
Model Specification Part No.
# 100-7 Standard solution for pH7 500 mL 3200043637
# 100-9 Standard solution for pH9 500 mL 3200043636
# 100-4 Standard solution for pH4 500 mL 3200043638
# 150-7 Standard powder for pH7 10 bags 3200043620
# 150-9 Standard powder for pH9 10 bags 3200043621
# 150-4 Standard powder for pH4 10 bags 3200043619
Table of contents
Other horiba Test Equipment manuals