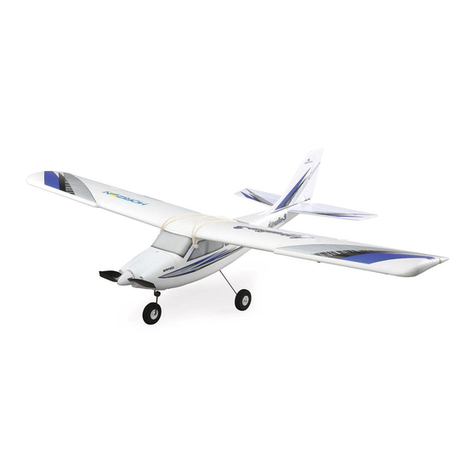
Horizon Fitness Super Cub dsm User manual

Instruction Manual
Bedienungsanleitung
Manuel d’utilisation
Manuale di istruzioni

2HobbyZone Super Cub • Instruction Manual
WARNING: Read the ENTIRE instruction manual to become familiar with the features of the product before operating. Failure to operate the product correctly can
result in damage to the product, personal property and cause serious injury.
This is a sophisticated hobby product. It must be operated with caution and common sense and requires some basic mechanical ability. Failure to operate this Product
in a safe and responsible manner could result in injury or damage to the product or other property. This product is not intended for use by children without direct adult
supervision. Do not attempt disassembly, use with incompatible components or augment product in any way without the approval of Horizon Hobby, Inc. This manual
contains instructions for safety, operation and maintenance. It is essential to read and follow all the instructions and warnings in the manual, prior to assembly, setup or
use, in order to operate correctly and avoid damage or serious injury.
Additional Safety Precautions and Warnings
Age Recommendation: Not for children under 14 years. This is not a toy.
• Always keep a safe distance in all directions around your model to avoid colli-
sions or injury. This model is controlled by a radio signal subject to interference
from many sources outside your control. Interference can cause momentary loss
of control
• Always operate your model in open spaces away from full-size vehicles, trafc
and people.
• Always carefully follow the directions and warnings for this and any optional sup-
port equipment (chargers, rechargeable battery packs, etc.).
• Always keep all chemicals, small parts and anything electrical out of the reach of
children.
• Always avoid water exposure to all equipment not specically designed and
protected for this purpose. Moisture causes damage to electronics.
• Never place any portion of the model in your mouth as it could cause serious
injury or even death.
• Never operate your model with low transmitter batteries.
The following terms are used throughout the product literature to indicate various levels of potential harm when operating this product:
NOTICE: Procedures, which if not properly followed, create a possibility of physical property damage AND a little or no possibility of injury.
CAUTION: Procedures, which if not properly followed, create the probability of physical property damage AND a possibility of serious injury.
WARNING: Procedures, which if not properly followed, create the probability of property damage, collateral damage, and serious injury OR create a high probability of
supercial injury.
NOTICE
All instructions, warranties and other collateral documents are subject to change at the sole discretion of Horizon Hobby, Inc. For up-to-date product literature, visit
horizonhobby.com and click on the support tab for this product.
Meaning of Special Language

3
HobbyZone Super Cub • Instruction Manual
Thank you for purchasing this HobbyZone® Super Cub DSM. Please charge the battery, read this manual, and attach the wing, tail and landing gear. While you charge
the battery, please watch the included DVD, which shows you how to y this model.
This Super Cub DSM helps you teach yourself to y using innovative Anti-Crash Technology™ (ACT), which uses two sensors on the model. The sensors connect to the
model’s control board to detect light from the sky and less light from the ground when the model ies straight and level. When the model dives, ACT corrects the model’s
ight, giving you time to get control. After your ying skill and condence increase, you can disable the ACT to increase your fun.
Please visit www.horizonhobby.com for more information about the Super Cub DSM and other products.
Table of Contents
Battery Warnings ................................................. 4
Charge the Aircraft Battery ................................... 5
Install Transmitter Batteries ................................... 5
Hi/Lo Rate ........................................................... 7
Trainer................................................................. 7
Antenna .............................................................. 8
First Flight Preparation ......................................... 9
Maintenance After Flying ...................................... 9
Attach Tail ......................................................... 10
Installing Clevises on Control Horns
and Control Centering ........................................ 10
Install Landing Gear ........................................... 11
Attach Wing ...................................................... 11
Using Elevator (Pitch Control) ............................. 12
Tail Control Test ................................................. 13
Range Test ........................................................ 14
Choose a Flying Field ......................................... 15
Flying Conditions ................................................ 15
Simulator Use .................................................... 15
Hand Launch ..................................................... 16
Runway Takeoff .................................................. 16
Anti-Crash Technology (ACT) ............................... 17
Flying ................................................................ 18
Landing ............................................................. 19
Repairing Minor Damage .................................... 19
Throttle Adjustment ............................................ 20
Aerobatic Flight .................................................. 20
Service of Power Components ............................ 21
Disassembly ...................................................... 21
Assembly .......................................................... 21
Troubleshooting Guide ........................................ 22
Replacement Parts ............................................. 24
Optional Parts .................................................... 24
AMA National Model Aircraft Safety Code ........... 25
Warranty and Repair Policy ................................ 26
Warranty and Service Contact Information ........... 27
Parts Contact Information ................................... 27
FCC Information ................................................. 27
Compliance Information for the European Union ... 28
Specifications
Wingspan 47.7 in (1200mm)
Length 32.5 in (825mm)
Flying Weight 25.2 oz (715 g)
Propeller Size 9 x 6
Components
Motor 480 Brushed (installed)
Battery 3S 11.1V 1300mAh Li-Po
(included)
Charger DC-powered 3S Li-Po balancing
charger (included)
Transmitter Spektrum DX4e 4-channel Ra-
dio with AA Batteries (included)
Receiver/ESC 2.4GHz DSM receiver/ESC
4HobbyZone Super Cub • Instruction Manual
Battery Warnings
The Battery Charger included with your aircraft is designed to safely charge the
Li-Po battery.
CAUTION: All instructions and warnings must be followed exactly.
Mishandling of Li-Po batteries can result in a re, personal injury, and/or
property damage.
• By handling, charging or using the included Li-Po battery you assume all risks
associated with lithium batteries.
• If at any time the battery begins to balloon or swell, discontinue use
immediately. If charging or discharging, discontinue and disconnect.
Continuing to use, charge or discharge a battery that is ballooning or swelling
can result in re.
• Always store the battery at room temperature in a dry area for best results.
• Always transport or temporarily store the battery in a temperature range of
40–120º F. Do not store battery or model in a car or direct sunlight. If stored
in a hot car, the battery can be damaged or even catch re.
• NEVER USE AN Ni-Cd OR Ni-MH CHARGER. Failure to charge the battery
with a compatible charger may cause re resulting in personal injury and/or
property damage.
• Never discharge Li-Po cells to below 3V under load.
• Never cover warning labels with hook and loop strips.
• Never plug the white balancing lead of the battery pack into anything other
than the included charger
• DO NOT plug into the X-Port socket of the fuselage.
Warnings and Safety Checklist
• Always keep body parts, clothing, jewelry and hair away from the propeller.
• Never y when wind is more than 7 mph (11km/h) or the model may be car-
ried by the wind away from transmitter control.
• Never try to catch a moving model.
• Always use only the included charger to charger your LiPo battery.
• Carefully hold the model and keep all body parts away from the propeller at all
times. When battery is connected to the model, carry the model prepared for
the propeller to turn at any time.
• After ying or at any time you have the transmitter powered on, ALWAYS
disconnect the model from the battery before powering off the transmitter.
• ALWAYS power on the transmitter before connecting the model to the battery.
• Never y when someone else is using the same frequency as your transmitter.
Trying to control several models using only one frequency can result in injury,
damage or loss of model control.

5
HobbyZone Super Cub • Instruction Manual
Charge the Aircraft Battery
The Super Cub LP Li-Po battery charger charges every cell correctly and protects
your Li-Po battery from the dangers of overcharging. This charger monitors the
battery’s charge and stops charging when the battery is fully charged.
Charge the included Li-Po battery pack only with a Li-Po battery charger capable
of balance charging.
CAUTION: Never leave the battery and charger unattended when charg-
ing a battery. When charging, make certain the battery is on a heat-
resistant surface. Failure to obey instructions can result in a re.
1. The 12V DC 3S Li-Po balancing charger uses a charge current of approxi-
mately 1.3-amps. This charges the included 11.1V 1300mAh Li-Po battery in
approximately 1 hour.
2. Connect the battery pack to the charger using the small white balance charg-
ing connector.
NOTICE: Do not connect the blue EC3 power connector when
charging the battery.
3. Connect the charger to the AC adapter (included with your model) and to
a power outlet, or to a vehicle outlet adapter and a 12V power outlet in a
vehicle. When connected to a power source, the charger’s LED blinks while
charging a Li-Po battery.
Note: Please consult your vehicle owner’s manual before connecting the
charger because some vehicle outlets only operate when the vehicle’s en-
gine is operating. Do not move the vehicle while charging Li-Po batteries.
4. The charger’s LED illuminates continuously when the battery is fully charged.
Install Transmitter Batteries
This transmitter requires 4 AA batteries.
1. Remove battery cover from the back of the transmitter.
2. Install batteries as shown where batteries t.
3. Install battery cover.
13
2
Table of contents
Other Horizon Fitness Toy manuals

Horizon Fitness
Horizon Fitness E-flite UMX Radian BNF BASIC User manual

Horizon Fitness
Horizon Fitness BLADE 230 S Smart User manual

Horizon Fitness
Horizon Fitness hobbyzone Apprentice S2 User manual

Horizon Fitness
Horizon Fitness Bio-Energy Kit User manual

Horizon Fitness
Horizon Fitness BLH1250 User manual

Horizon Fitness
Horizon Fitness FCJJ-25 i-H2GO User manual
Popular Toy manuals by other brands

FUTABA
FUTABA GY470 instruction manual

LEGO
LEGO 41116 manual

Fisher-Price
Fisher-Price ColorMe Flowerz Bouquet Maker P9692 instruction sheet

Little Tikes
Little Tikes LITTLE HANDIWORKER 0920 Assembly instructions

Eduard
Eduard EF-2000 Two-seater exterior Assembly instructions

USA Trains
USA Trains EXTENDED VISION CABOOSE instructions