SET INSTRUCTIONS
Waste electrical products should not
be disposed of with household waste.
Please recycle where facilities exist.
Check with your Local Authority or
retailer for advice.
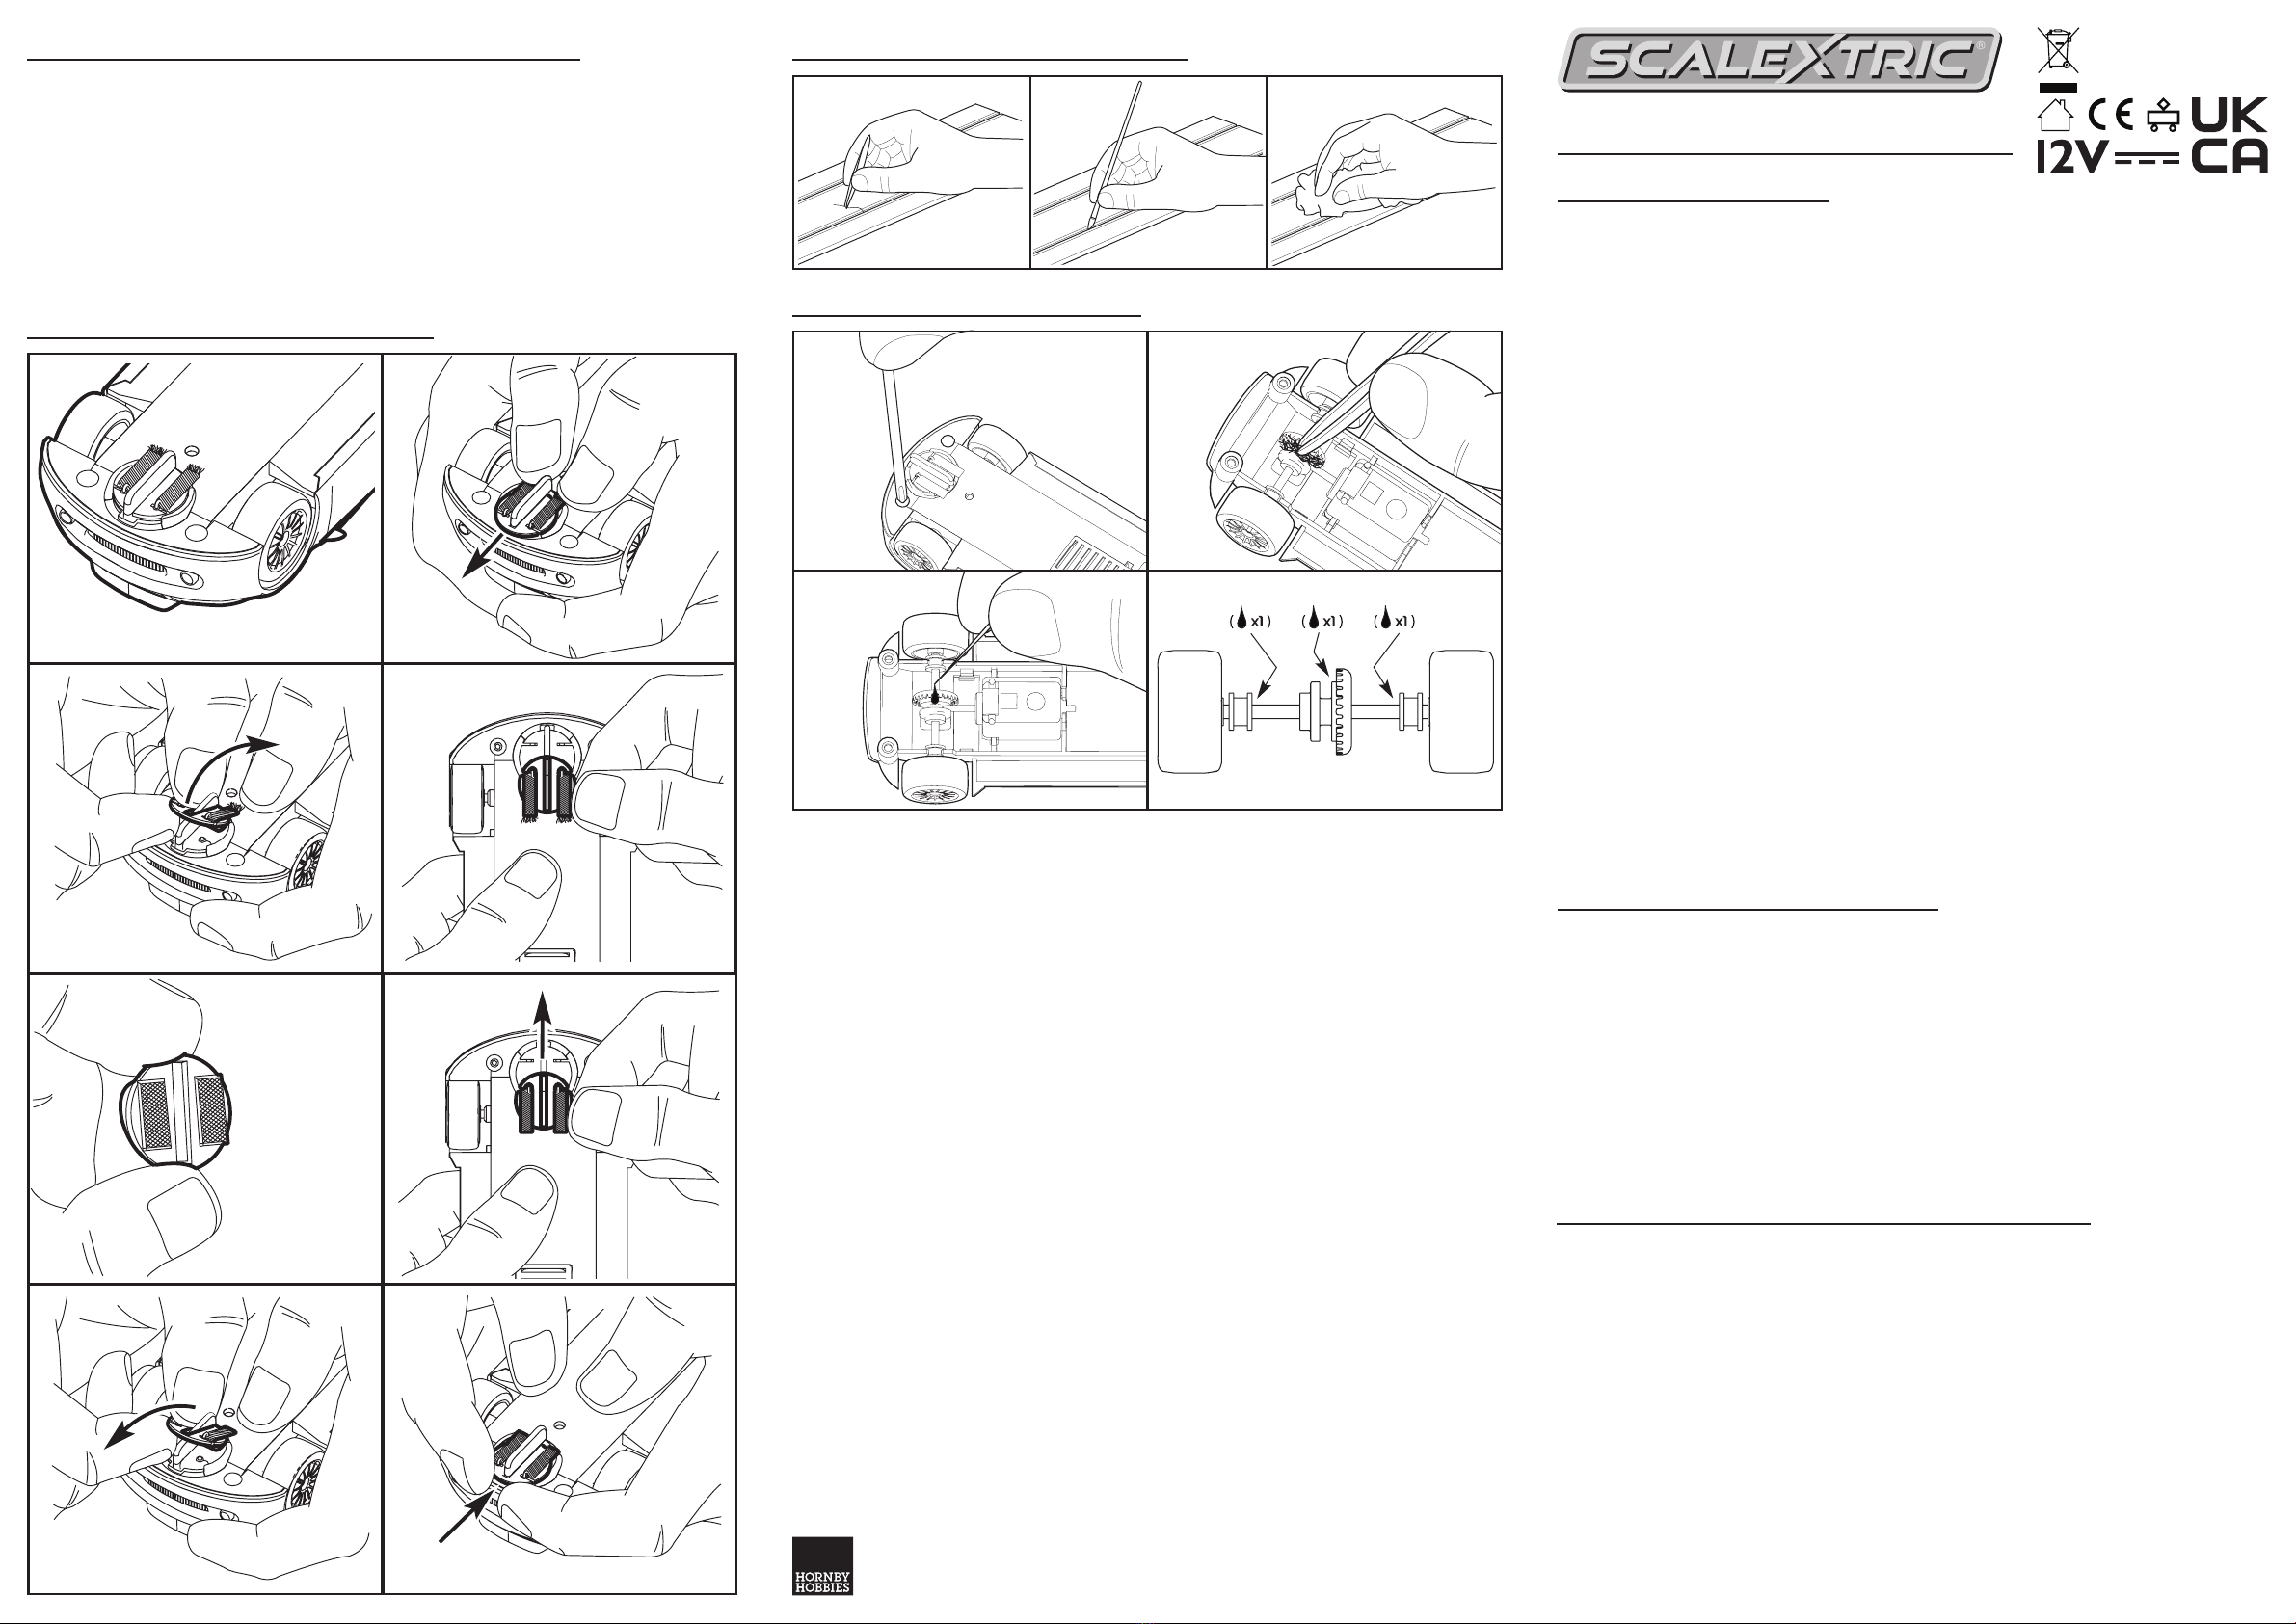
MAINTENANCE & SPARE PARTS TRACK MAINTENANCE
CAR MAINTENANCE
CHANGING THE BRAIDS
Various spares and accessories are available from your Scalextric Service Dealer. Wheels and axles will need to
be replaced as a complete assembly.
If in any doubt, contact your Scalextric Service Dealer or the Helpline for advice.
Maintenance and replacement of worm parts must be performed by an adult. The removed parts must be kept
out of reach of children.
A full list of Scalextric Service Dealers is available on www.scalextric.com.
Two spare braid plates are included in this set. Further braid plates are available as spares pack C8312.
3
5
7
12
4
6
8
Manufactured By:
Hornby Hobbies Ltd, Westwood, Margate, Kent, CT9 4JX, UK
EU Authorised Representative:
Hornby Italia SRL Viale dei Caduti, 52/A6, Castel Mella (BS), Italy, 25030
Leaflet No. PI-01364
S22 Barriers Layout Instructions
Printed in China
SAFETY NOTES
WARNING Not suitable for children under 36 months due to:
- Small parts which can present a choking hazard.
- Some components have functional sharp points and edges. Handle with care.
- Misuse of a transformer can cause electrical shock.
- Misuse of the product may result in hot surfaces.
- This product is intended for indoor use only
- If the electric motor in the car is jammed, remove the car from the track and let it cool down. Do not touch the motor casing.
- The transformer is not a toy. It is a “Transformer for Toys”. Before use, check that the transformer is the correct voltage
for your mains electricity supply. This product should only be used with the transformer for toys included in the set. The
transformer should be examined regularly for damage to the casing, plug ins and cables. In the event of such damage, the
set should not be used until the transformer is replaced with a new Hornby recommended unit. Never attempt to open the
transformer yourself.
- Refer to the label on the transformer included in this set for the transformer model number.
- This set must not be connected to more than the recommended number of power supplies. The output terminals of the
transformer must not be connected directly, or indirectly, to the output of any other AC circuit derived from a transformer or main
power supply.
- Use only as indicated in the instructions. Do not modify or change any part of the set. Modication may damage the set
and will invalidate the warranty claim. Use only genuine Scalextric spares and accessories available from your retailer or www.
scalextric.com
- When new, hand controllers may become warm, emit vapour and give off a slight smell. These effects are normal due to
protective coating on the internal parts and will disappear after use. However, these effects may return if the trigger is held
continuously in a xed position while racing.
- Before cleaning any part, disconnect the transformer from the mains electricity supply. Do not use liquid for cleaning.
- Please retain these details and the address for future reference.
Product Information
In some climatic instances a white “bloom” may appear on the rubber tyres of this product. This is not considered defective and
can be easily cleared by either:
1. Running the car several times around the track.
2. By wiping the tyres with a damp soft cloth and allowing to dry, before use.
HORNBY SERVICE WARRANTY
Hornby products are guaranteed against defects in materials or workmanship for a period of six months from purchace. If any
such defect occurs during the period of warranty, please follow the procedure outlined in the list of Service Dealers enclosed
with your set.
Alternatively, the product, or component, may be forwarded to Hornby Hobbies Ltd, carefully packed, referencing a case
number, to the address below. The case number can be obtained by contacting customer services via email or telephone (see
contact us).
Hornby Service Centre
Hornby HobbiesLtd.
Units 5-10 Sparrow Way
Lakesview Business Park
Hersdon
Kent
CT3 4JH
United Kingdom
Proof of postage should be obtained on despatch and retained.
The product will be repaired or replaced, free of charge, if the problem is found to be due to workmanship or materials.
The warranty is valid for products purchased in the United Kingdom and is in addition to, and does not diminish your statutory rights.
CUSTOMER SERVICES
If you have a question that has not been answered in this leaet, then please contact Hornby Customer Services using any of
the following methods:
Telephone: +44 (0) 1843 233512
Fax: +44 (0) 1843 233527
E-mail: customerservices.uk@hornby.com
Website: www.scalextric.com
Address: Customer Services
Hornby Hobbies Ltd
Westwood
Margate
Kent
CT9 4JX
United Kingdom


