Page 2
ASSEMBLY AND INSTALLATION INSTRUCTIONS:
CHARGING THE BATTERY:
No tools required for assembly and installation.
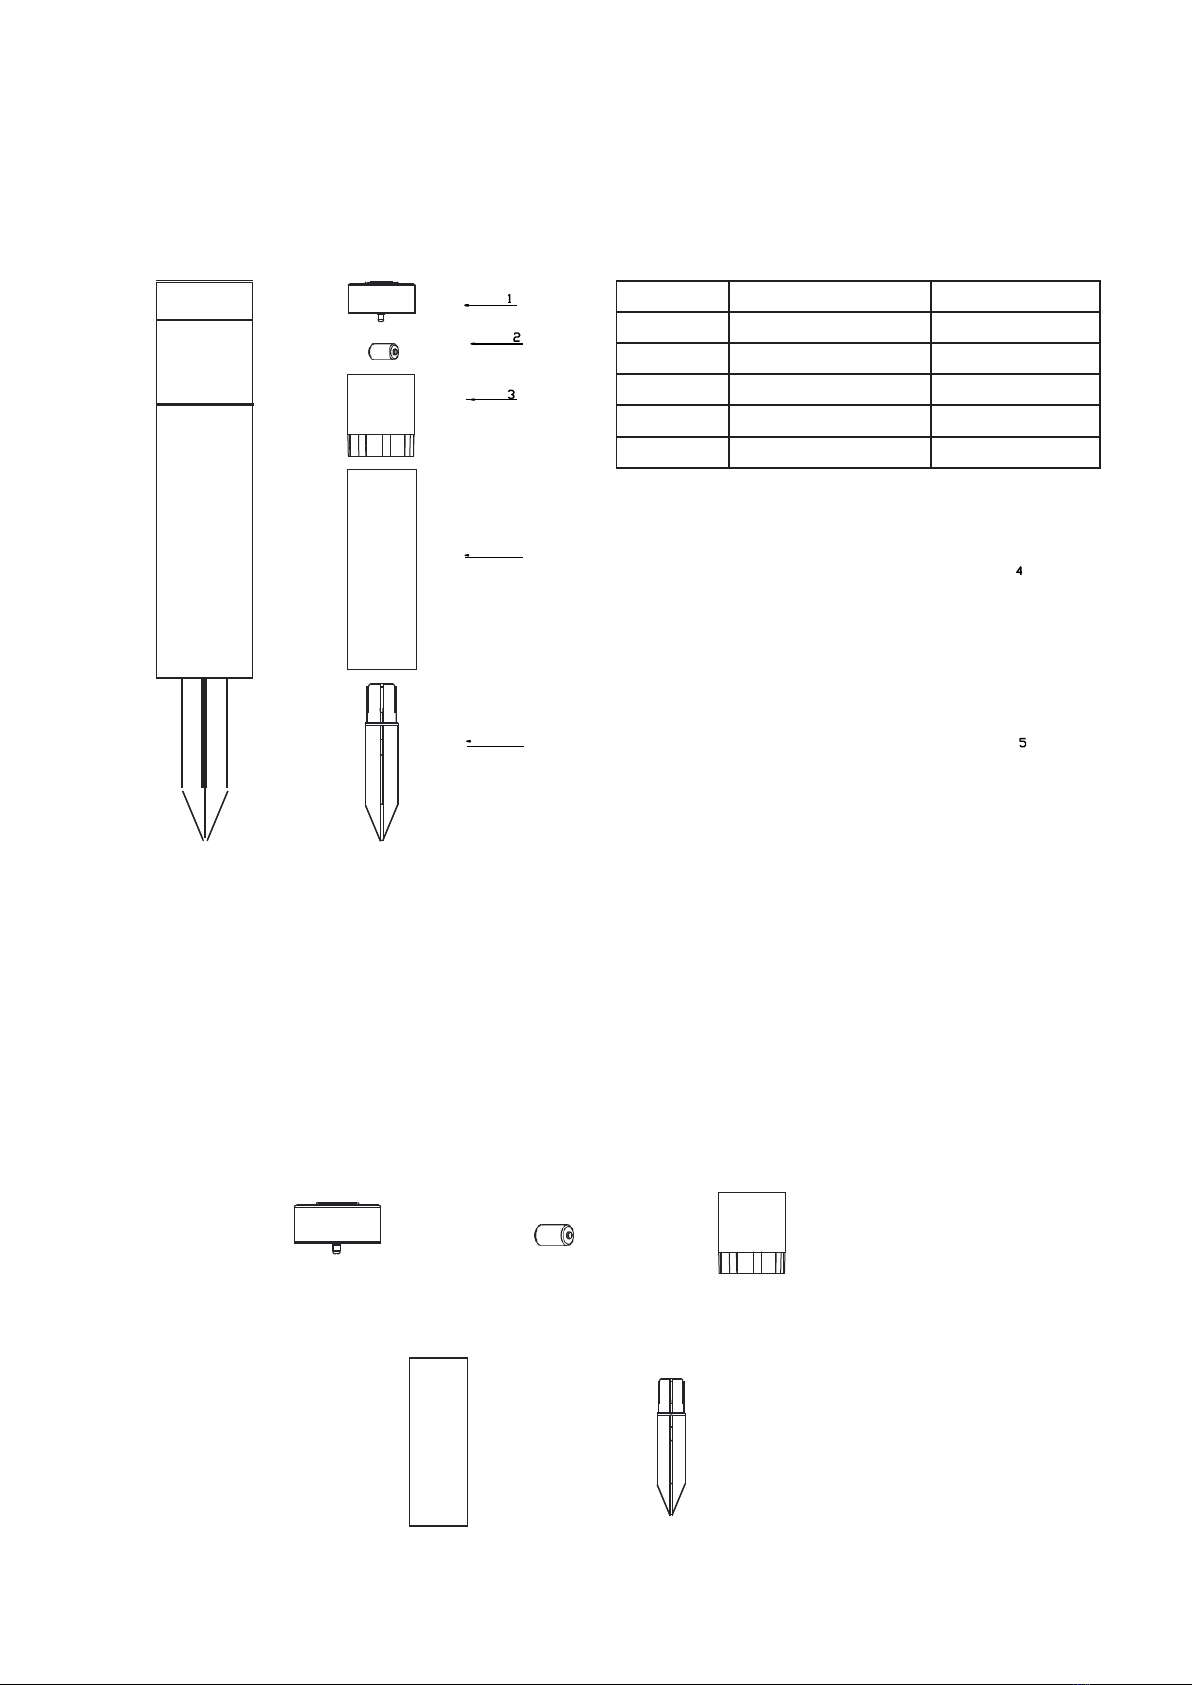
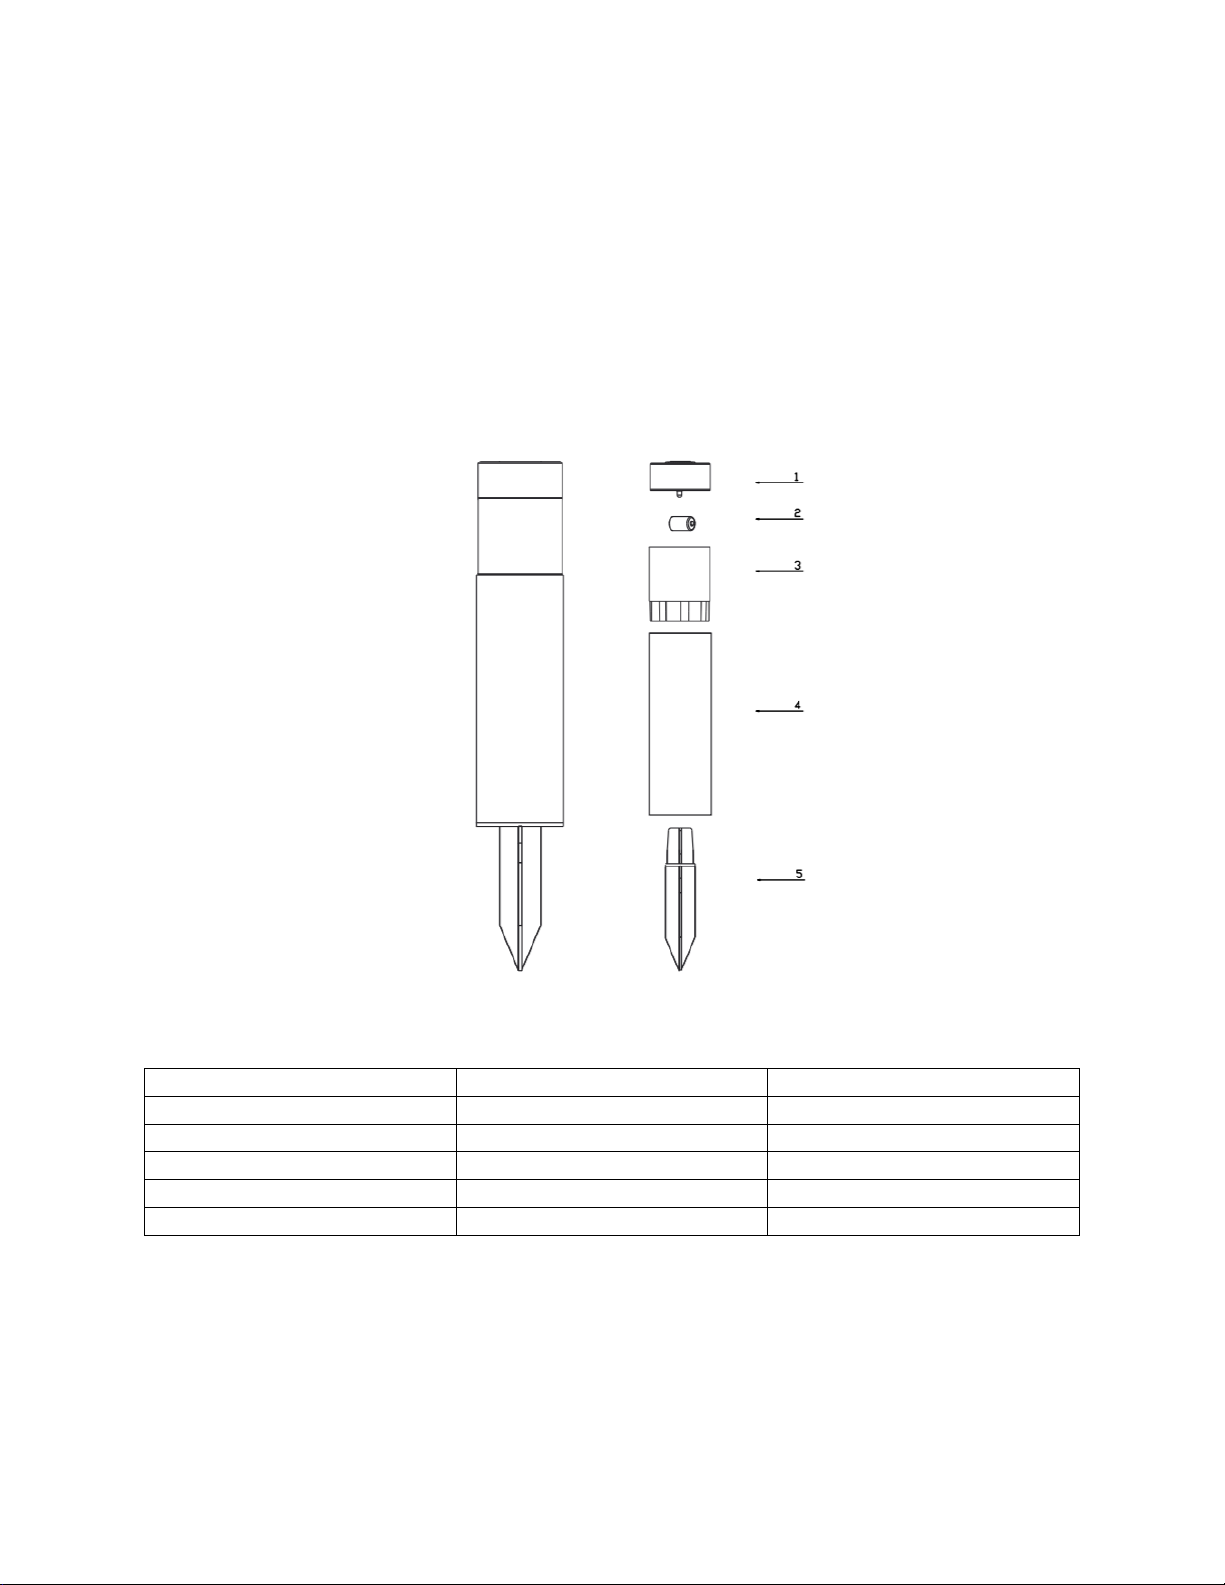
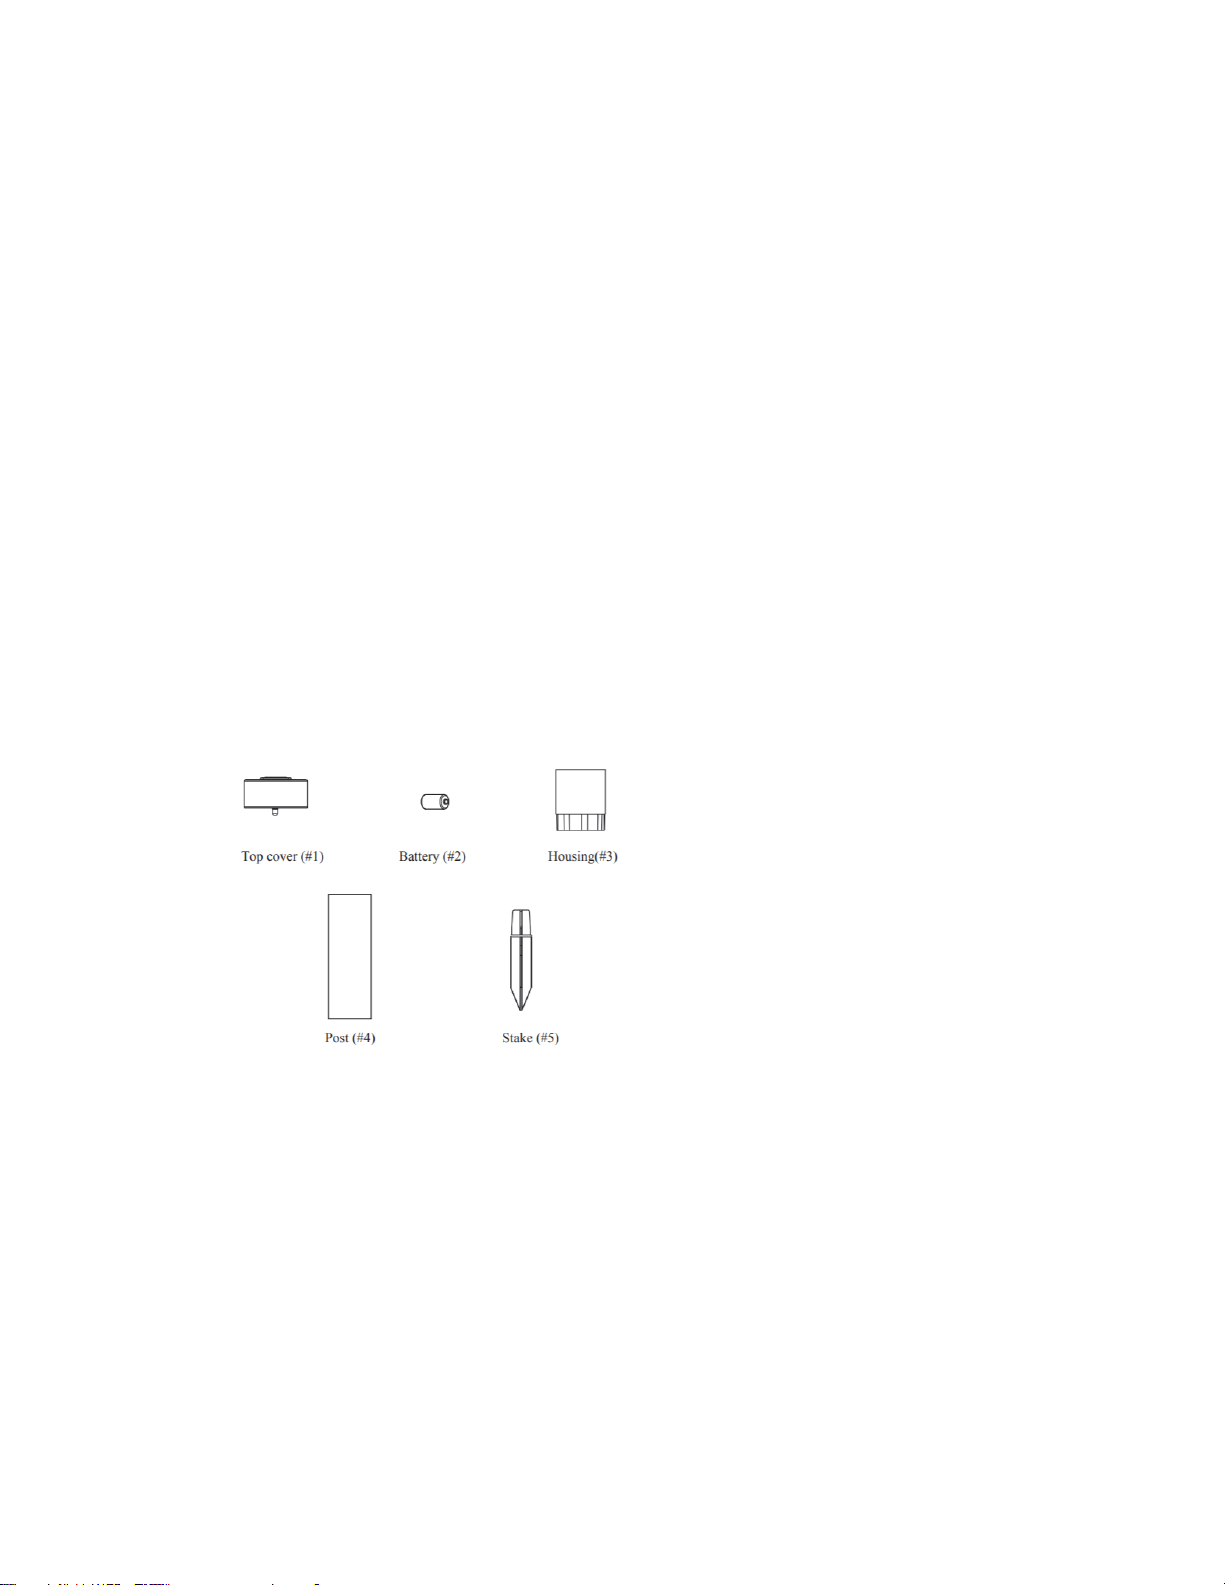
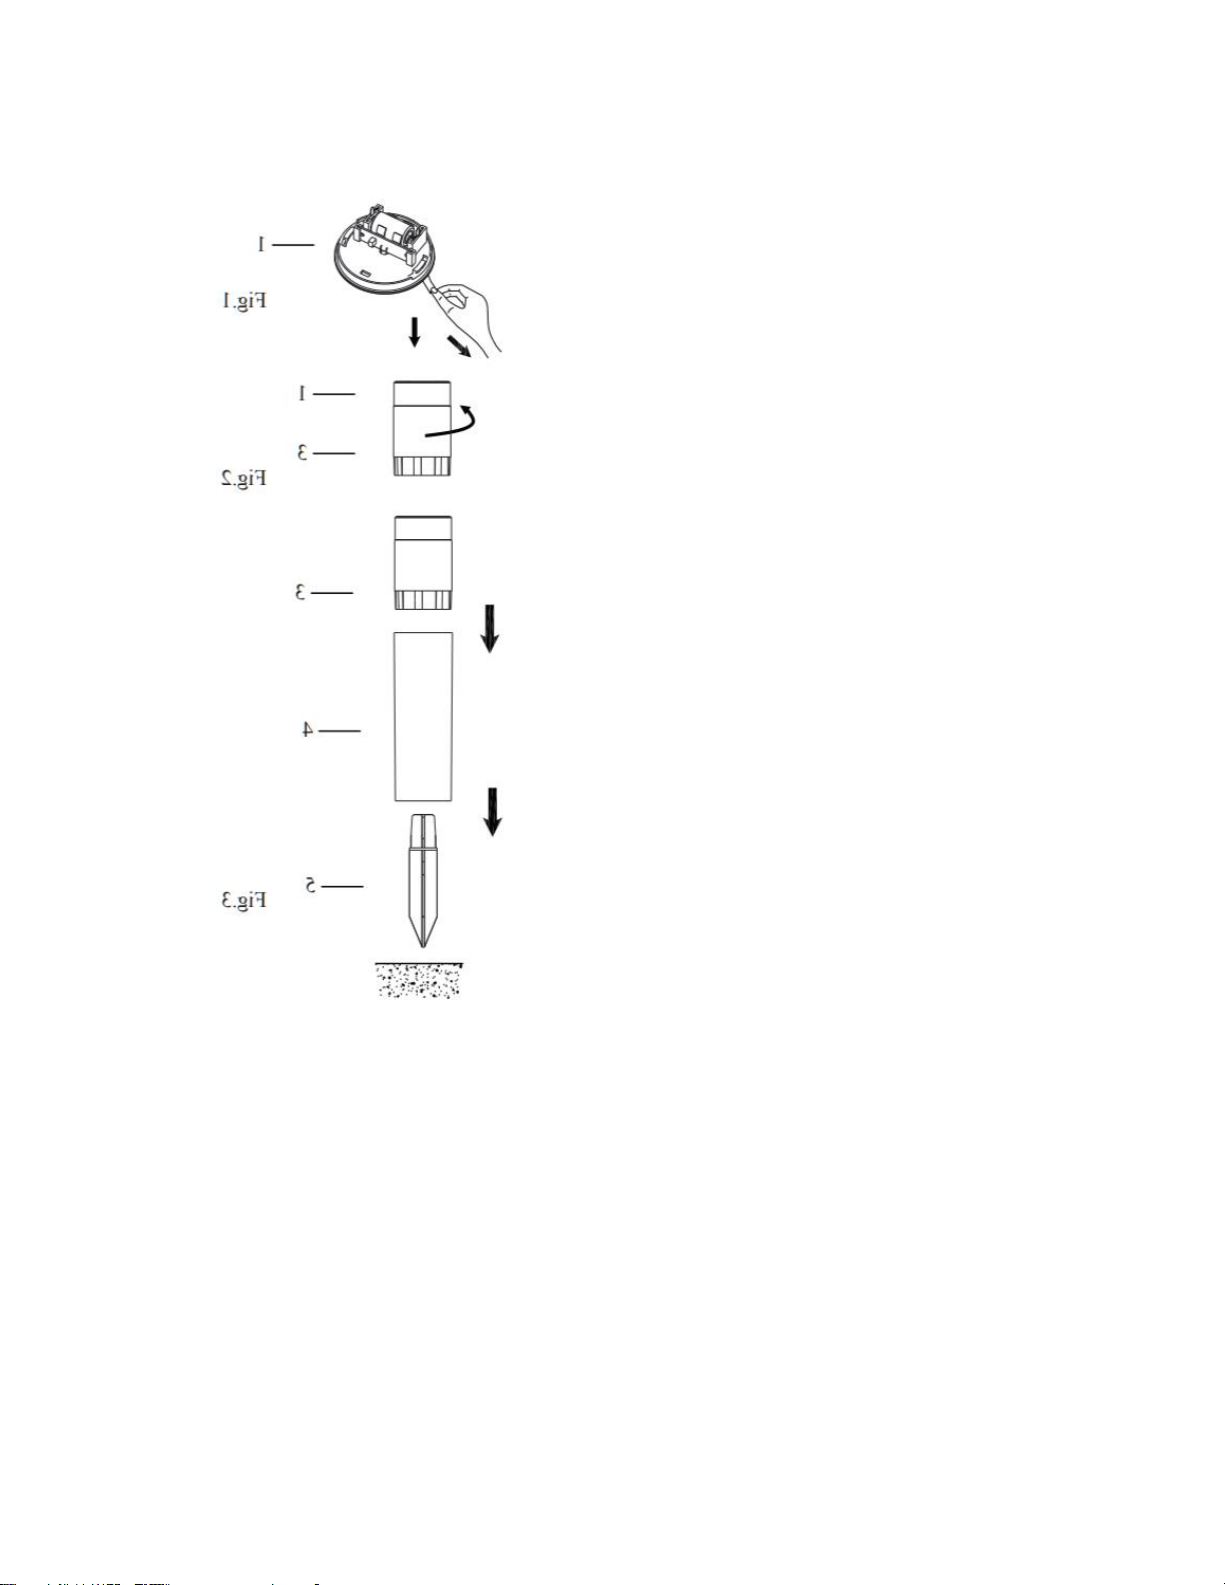
FOR FIRST TIME USE : Remove thepull tap betweenthetop cover
(1) and housing(3). (Fig. 1)
1. Insert the housing (3) into the top cover (1) and twist to lock. (Fig. 2)
2. Firmly slide post (4) into housing (3).
Attach the post (4) to stake (5). Push the stake(5) firmly into the ground
- DO NOT use a hammer. For ground with hard soil , to prevent breaking the
stake (5), use trowel to loosen soil first. (Fig. 3)
For optimum performance, it is best to install the solar lights in full
sunlight and charge for 10-12 hours. Allow the light to run at least
8-12 entire charging and discharging cycles to reach battery’s maximum
capacity.
Fig.3
Fig.2
Fig.1
1
1
5
4
3
3
Fig.4
Fig.5
1
3
2
Possible Cause Corrective Action
The nightly run time is
shorter.
1. Battery is not fully
charged.
Solar light does not turn
on at night.
Solar light is installed
close to other light sources.
1. Relocate the solar light.
2. Eliminate other light
sources.
1. Locate the solar light in an
area where it can receive the
maximum amount of full,
direct sunlight everyday.
2. Battery is reaching the
end of its useful life.
2. Replace the old battery
with a fresh one.
TROUBLESHOOTING:
REPLACING BATTERY:
For best performance, replace with rechargable 1.2V AAA battery when
performance diminishes.
1. Twist and remove the housing (3) from top cover (1).(Fig.4)
2. Replace the old battery with a fresh 1.2V AAA rechargeable battery.
Replace the housing.(Fig.5)
CAUTION:
BATTERY MUST BE RECYCLED OR DISPOSED
OF PROPERLY.BATTERY MUST BE FAR AWAY
FROM FIRE.