ENGLISH
6
III. MAINTENANCE
1. CLEANING
WARNING
1. Before carrying out any cleaning or maintenance operations,
unplug the icemaker from the electrical supply network.
2. Ask a trained service person to clean and sanitise the icemaker
water system at least twice a year and to check and clean the
condenser at least once a year.
3. This appliance must not be cleaned by use of a water jet.
4. Do not use any alcohol for cleaning/sanitisation of the icemaker.
It may cause cracks on the plastic parts.
5. To prevent possible damage, do not clean the plastic parts with
water above 40°C or in a dishwasher.
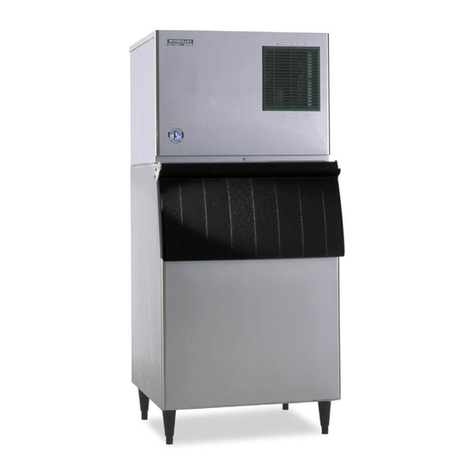
[1] Machine and Bin Exterior
Wipe the exterior at least once per week with a clean, soft cloth. Use a
dampclothcontaininganeutralcleanertowipeogreaseordirt.
[2] Scoop
1) Either mix 3 litres of water with 11 ml of 5.25% sodium hypochlorite
solution in a suitable container, or the recommended Hoshizaki
sanitiser as directed.
2) Soak the scoop in the solution for more than 3 minutes. Rinse
thoroughly, and shake to remove surplus liquid.
Note: Using a cloth to dry may re-contaminate.
[3] Storage Bin Interior Cleaning/Sanitisation (Weekly)
1) Open the storage bin door, and remove all ice.
Note: Hoshizaki recommends various types of storage bin for
the icemaker which vary in size and design. The following
instructions are therefore for general guidance only.
2) Wash the bin liner and door inner surface with a neutral non-abrasive
cleaner. Rinse thoroughly with a clean cloth and fresh water.
3) Either mix 5 litres of water with 18 ml of 5.25% sodium hypochlorite
solution in a suitable container or the recommended Hoshizaki
sanitiser as directed.
4) Soak a clean sponge or cloth with the solution, and wipe the bin liner
and door inner surface.
5)Rinsethoroughlywithfreshwaterandacleanclothtowipeothe
solution. Close the bin door.
Note: Some solutions may cause damage to the bin liner surfaces or
corrosion on the metal parts. Always rinse the sanitiser unless
directed otherwise by Hoshizaki guidelines.
[4] Air Filter
Plasticmeshairltersremovedirtordustfromtheair,andkeepthe
condenserfromgettingclogged.Iftheltersgetclogged,theicemaker’s
performancewillbereduced.Removeandcleantheairltersatleast
twice per month:
1)Removetheairlter.
Note: Do not put your hand inside the machine compartment.
2)Cleantheairlterbyusingavacuumcleaner.Whenseverelyclogged,
usewarmwaterandaneutralcleanertowashtheairlter.
3)Rinseanddrytheairlterthoroughly,andplaceitinposition.
[5] Icemaking Water System
To keep the icemaker hygienic, periodic cleaning of the icemaking water
system is recommended. Always ask a trained service person to clean
the water system.
Note: 1. The washing switch on the control box is intended for use by
service personnel only.
2. During normal icemaking operation, keep the washing switch
in the “ICE” position.
2. BEFORE CALLING A SERVICE AGENT
WARNING
Do not damage the refrigerant circuit.
If the icemaker does not work properly or does not work at all, before
calling for service, check that:
* The power is supplied to the unit.
* The control switch is in the “ICE” position.
* The water is turned on.
* Theairlterisclean.
For further assistance or advice, contact your local Hoshizaki service
agent.
No. of Beeps
(every 3 sec.)
Type of Alarm
1 High Evaporator Temp. (temperature > 53°C)
Check for harvest problem (stuck HGV or relay), hot
water entering the unit, or shorted thermistor.
To reset: Press reset switch while overheat thermistor detects
temp below 51°C.
2Harvest Backup Timer (harvest > 20min. for two
cycles in a row)
Check for open thermistor, HGV not opening, TXV
leakingby,lowcharge,inecientComp,orWRV
leaking by.
To reset: Press reset switch.
3Freezetimer(freeze>speciedsettingfortwocycles
in a row)
Checkforaoatswitchstuckclosed(up),WV
leaking by, HGV leaking by, PM not pumping, TXV
notfeedingproperly,lowcharge,orinecient
Comp.
6 Low voltage (184V± or less)
To reset: Supply voltage exceed 194V for 5 sec
7 High voltage (294V± or more)
To reset: Supply voltage falls 270V for 3 sec
Legend: Comp–compressor; HGV–hot gas valve; WV–water valve;
WRV–water regulating valve; PM–pump motor; TXV–thermostatic
expansion valve
3. WARRANTY
Hoshizaki warrants to the original owner/user that all Hoshizaki branded
products shall be free of defects in material and/or workmanship for the
durationofthe“warrantyperiod”.Thewarrantyshallbeeectivefortwo
years from the date of installation.
Hoshizaki’s liability under the terms of the warranty are limited and
shall exclude routine servicing, cleaning, essential maintenance and/or
repairs occasioned by misuse and installations not in accordance with
Hoshizaki guidelines.
Warranty repairs should be completed by an approved Hoshizaki dealer
or service agency using genuine Hoshizaki components.
To obtain full details of your warranty and approved service agency,
please contact your dealer/supplier, or the nearest Hoshizaki Service
oce:
