Hot Max LITTLE MAX 50G User manual

LITTLE MAX®
MODEL 50G
50,000 BTU
PROPANE TORCH
INSTRUCTION MANUAL
Thank you for your purchase! We hope you enjoy your torch!
Need a longer hose for your torch? Looking for other great Hot Max
accessories for your torch or our other products?
Check out our website for our current product offering.
BIG MAX®
MODEL 500G
500,000 BTU
PROPANE TORCH
WITH IDLE BOOST /
FUEL SAVER VALVE
Hot Max Extension Hoses
Model 24200 - 10’ LP Hose or
Model 24201 - 25’ LP Hose
KDAR Company
3671 New Town Blvd
St. Charles, MO 63301
(636) 493-9920 M-F 8 AM to 5
PM, CST
www.hotmaxtorches.com
Hot Max Garden Torch
Model GTORCH

MODEL 50G PROPANE TORCH
ASSEMBLY, TESTING, AND OPERATING INSTRUCTIONS
PLEASE READ AND RETAIN THIS INFORMATION FOR FUTURE REFERENCE
DO NOT OPERATE this torch unless you have been properly trained or are under the supervi-
sion of someone in its proper use. Read and understand all instructions before attempting to
use!
FOR YOUR SAFETY!
This device is intended for outdoor use only with adequate ventilation.
This torch is designed for use with a vapor-withdrawal liquid propane (LP) gas cylinder 10
pound size and larger with an OPD valve.
Eye protection, gloves, proper fire retardant clothing, and boots should be worn when
operating the torch.
NEVER direct torch flame toward hose or propane tank.
DO NOT leave torch unattended while torch is in operation.
NEVER point the torch at flammable materials you do not want to burn.
DO NOT stand or prop the torch on the burner end while in operation.
DO NOT use matches or a cigarette lighter to light the torch. ALWAYS use a spark lighter.
Secure LP cylinders in a level, upright position during operation. DO NOT lay tank on its
side.
DO NOT lift propane tank by the valve.
When not in use, the gas should be turned off at the LP gas cylinder valve. Close the flame
adjusting valve as well. When done using torch, disconnect torch from cylinder.
Have an ABC Fire Extinguisher readily accessible during the operation of the torch.
DO NOT apply heat or flame to tank, hose, or torch to check for leaks, or to increase the gas
pressure.
CAUTION: In daylight, the flame is barely visible. DO NOT place hands or body parts in
the path of the flame while lighting or operating the torch.
DO NOT use torch in areas where gasoline or other flammable vapors are stored or used.
CAUTION: The torch barrel becomes very hot when in use. Do not touch barrel or allow it
to come in contact with flammable materials until it has completely cooled down.
IF YOU SMELL GAS!
DO NOT operate torches or any equipment if the odor of LP gas is present.
IMMEDIATELY shut off all valves and extinguish any open flames.
Check all equipment for leaks using leak detection fluid or soapy water.
REPAIR all leaks and test for leaks prior to lighting the torch.
TROUBLE SHOOTING
Problem #3 -The flame adjusting valve is not working.
Possible Solutions:
1. If you can not get full flow out of the torch with the flame adjusting valve
all the way open, then the POL safety valve has probably detected too much
gas flow and restricted the gas flow. To reset the POL safety valve, turn the
LP gas cylinder valve completely off (clockwise), then open the flame
adjusting valve to release any pressure in the hose (or remove the POL
safety valve from the LP gas cylinder and then reinstall with a wrench),
close the flame adjusting valve, and then reopen the LP gas cylinder valve
very slowly to keep a lot of gas from entering the hose too quickly and
tripping the POL safety valve again.
2. If the flame adjusting valve just spins and spins, you might have unseated
the valve stem from the valve by accident. To fix this, you need to loosen
the nut under the flame adjusting valve knob with an adjustable wrench.
Then push the flame adjusting valve knob in towards the valve body while
turning clockwise. You should feel the threads “catch” and as you continue
to turn, the valve will close all the way. Then retighten the nut under the
flame adjusting valve knob (be careful not to over tighten it). If this doesn’t
work, then the flame adjusting valve needs to be replaced. Contact KDAR
Company for a replacement flame adjusting valve (Model 24209).
1 Year Limited Warranty.
Go to www.hotmaxtorches.com for more information.
OTHER SAFETY INFORMATION
CSA 2-94 US Requirements for Hand-Held LP Torches for use with Fuel
Supply
ANSI Z49.1 Safety in Welding and Cutting
NFPA 54 National Fuel Gas Code
NFPA 58 Standard for the storage and handling of liquefied petroleum gases
WARNING! This product may expose you to chemicals, including lead,
which is known in the State of California to cause cancer. Wash your hands
after using this product. For more information, go to
www.P65Warnings.ca.gov.

TORCH DISCONNECTION AND STORAGE
1. Be sure the LP gas cylinder valve is turned completely off (clockwise).
2. Disconnect the POL safety valve from the LP gas cylinder (again, these are
left handed threads) with a wrench.
3. Replace the plastic cover on the LP gas cylinder valve outlet.
4. NEVER attempt to store the torch while it is hot. When the torch is stored
indoors or in a garage or shed, it must be disconnected from the tank in
accordance with Chapter 5 of ANSI/NFPA 58.
5. Store the torch and hose in a clean, dry and protected area.
TROUBLE SHOOTING
Problem #1 - The POL safety valve will not thread into the LP gas cylinder
valve or doesn’t seal.
Possible Solutions:
1. Propane cylinders made after 2002 have an OPD valve with internal left
handed threads. Make sure you are threading the POL safety valve into the
LP gas cylinder valve in the correct direction (counterclockwise to tighten).
2. Be sure to use a wrench to tighten the POL safety valve. Hand tightening
the POL safety valve into the LP gas cylinder valve will not prevent leaks.
3. Check the threads in the LP gas cylinder valve. They might be damaged.
4. Make sure the undamaged rubber O ring is still on the end of the POL
safety valve. If it is not, contact KDAR Company for another O ring
(Model 90109).
5. If this still doesn’t fix it, your POL safety valve might be defective. Contact
KDAR Company for a replacement POL safety valve (Model 24203).
Problem #2 - I found a gas leak during my assembly.
Possible Solutions:
1. If the gas is leaking around the LP gas cylinder valve, see Problem #1
above.
2. If the gas leak is near the flame adjusting valve, try tightening the female
hose adapter with a wrench to seal the leak.
3. If the hose is leaking either with a hole in the hose or around the brass
ferrules, then the hose needs to be replaced. Contact KDAR Company for a
replacement hose (Model 24212).
PROPANE TORCH COMPONENTS
Trademarked Molded Handle for more
Comfort and Control
US Trademark 3,700,964
10’ UL/CSA Listed Propane Hose, 350 PSI Rated
Flame Adjusting Valve
POL Safety Valve
Single Flint Striker
Propane Regulator, 18 PSI
(Replacement regulator Model 24202)
Safety Stand
Barrel

ASSEMBLY INSTRUCTIONS CONTINUED
6. Make sure the knob on the flame adjusting valve (also called a needle valve)
is closed (all the way clockwise) and slowly open the LP gas cylinder valve.
Check all LP gas connections for leaks using a leak detection fluid or soapy
water. DO NOT attempt to operate the torch if there is any odor of gas.
LIGHTING INSTRUCTIONS
1. IMPORTANT NOTE!!! The POL safety valve contains an integral flow-
check valve. Opening the LP gas cylinder valve rapidly can cause the valve
to check and restrict the flow of gas. If the POL flow valve checks, close
the LP gas cylinder valve, open the flame adjusting valve on the handle to
release any pressure in the hose, reclose the flame adjusting valve on the
torch handle, wait 20 seconds, and then slowly open the LP Gas cylinder
valve. If NO leaks are found, proceed with lighting the torch.
2. Check all connections for leaks with leak detection fluid or soapy water.
Leaks will be indicated by bubbles forming around the source. Repair all
leaks and test again before lighting the torch.
3. Open the flame adjusting valve 2-3 turns until the sound of propane gas
escaping is heard.
4. Quickly, using a single flint striker or other long handle igniting source (NO
MATCHES OR CIGARETTE LIGHTERS), ignite the torch. Make sure
there is only a minimum amount of gas before lighting. If you do not get
the torch ignited quickly, turn off the flame adjusting valve to stop the flow
of gas and wait several minutes for the propane gas to disperse. You may
then return to step 2 above.
5. Adjust the flame using the flame adjusting valve on the torch handle to the
desired size of flame and heat.
TORCH SHUT OFF INSTRUCTIONS
1. Close the LP gas cylinder valve.
2. Allow the gas to completely burn out. After the flame is no longer burning,
turn the flame adjusting valve to the closed or OFF position (clockwise).
3. Be careful as the torch head is very hot and takes a long time to cool off.
4. If you are done using the torch, follow the torch disconnection and storage
procedures in the next section.
ASSEMBLY INSTRUCTIONS
1. Unpack and inspect for damage. DO NOT use torch if damaged.
2. Attach hose to flame adjusting valve on torch handle with two adjustable
wrenches. DO NOT use the molded handle to tighten the hose.
3. Attach the hose to the regulator with two adjustable wrenches.
4. Attach the safety stand to the back of the torch handle with two adjustable
wrenches.
5. Attach POL fitting to LP gas cylinder valve (remember this is a left hand
fitting) using the standard internal threads found on industry standard tanks
with OPD approved valves. DO NOT USE THREAD COMPOUND!
Remember, LP gas cylinder is to be no less than 10 LB. capacity.
LP gas cylinder valve with OPD
POL Safety Valve (left hand threads)
which is factory installed on the
regulator
Flame Adjusting Valve

TORCH DISCONNECTION AND STORAGE
1. Be sure the LP gas cylinder valve is turned completely off (clockwise).
2. Disconnect the POL safety valve from the LP gas cylinder (again, these are
left handed threads) with a wrench.
3. Replace the plastic cover on the LP gas cylinder valve outlet.
4. NEVER attempt to store the torch while it is hot. When the torch is stored
indoors or in a garage or shed, it must be disconnected from the tank in
accordance with Chapter 5 of ANSI/NFPA 58.
5. Store the torch and hose in a clean, dry and protected area.
TROUBLE SHOOTING
Problem #1 - The POL safety valve will not thread into the LP gas cylinder
valve or doesn’t seal.
Possible Solutions:
1. Propane cylinders made after 2002 have an OPD valve with internal left
handed threads. Make sure you are threading the POL safety valve into the
LP gas cylinder valve in the correct direction (counterclockwise to tighten).
2. Be sure to use a wrench to tighten the POL safety valve. Hand tightening
the POL safety valve into the LP gas cylinder valve will not prevent leaks.
3. Check the threads in the LP gas cylinder valve. They might be damaged.
4. Make sure the undamaged rubber O ring is still on the end of the POL
safety valve. If it is not, contact KDAR Company for another O ring
(Model 90109).
5. If this still doesn’t fix it, your POL safety valve might be defective. Contact
KDAR Company for a replacement POL safety valve (Model 24203).
Problem #2 - I found a gas leak during my assembly.
Possible Solutions:
1. If the gas is leaking around the LP gas cylinder valve, see Problem #1
above.
2. If the gas leak is near the flame adjusting valve, try tightening the female
hose adapter with a wrench to seal the leak.
3. If the hose is leaking either with a hole in the hose or around the brass
ferrules, then the hose needs to be replaced. Contact KDAR Company for a
replacement hose (Model 24212).
PROPANE TORCH COMPONENTS
Trademarked Molded Handle for more
Comfort and Control
US Trademark 3,700,964
10’ UL/CSA Listed Propane Hose, 350 PSI Rated
Flame Adjusting Valve
POL Safety Valve
Single Flint Striker
Propane Regulator, 18 PSI
(Replacement regulator Model 24202)
Safety Stand
Barrel

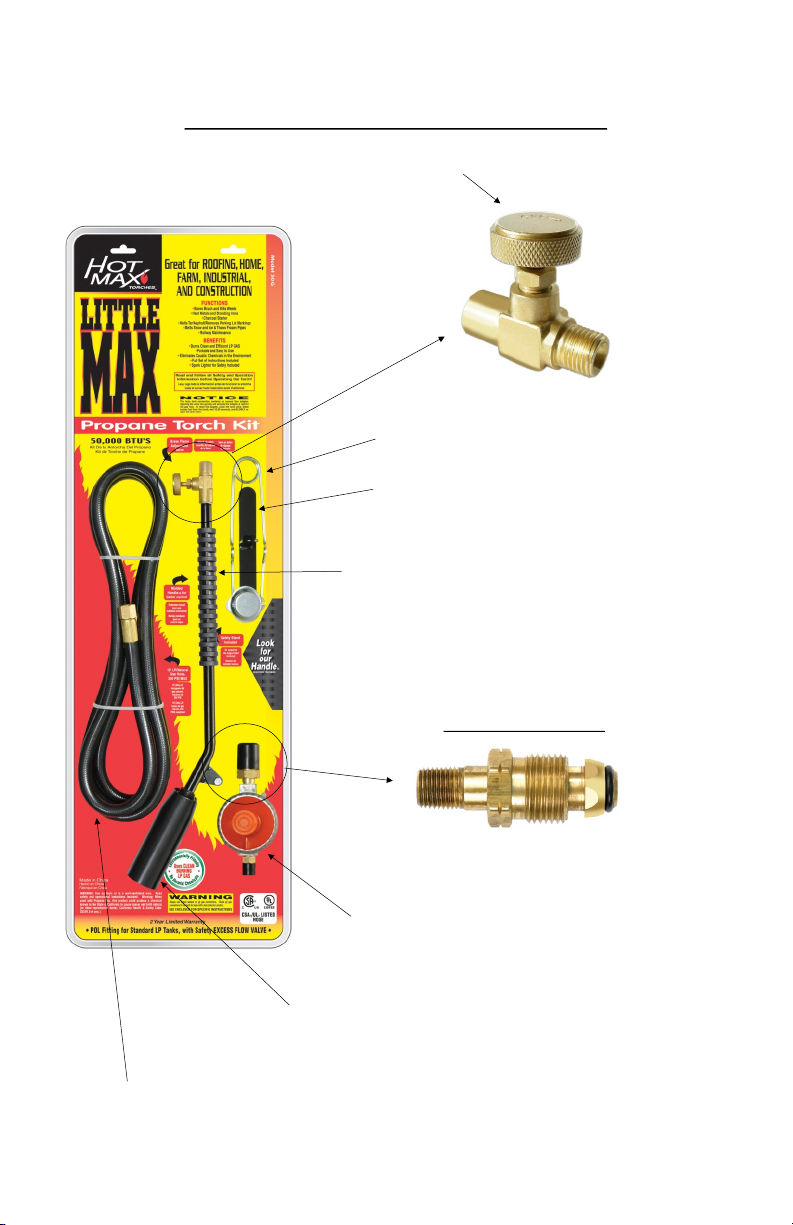
MODEL 50100 PROPANE TORCH
ASSEMBLY, TESTING, AND OPERATING INSTRUCTIONS
PLEASE READ AND RETAIN THIS INFORMATION FOR FUTURE REFERENCE
DO NOT OPERATE this torch unless you have been properly trained or are under the supervi-
sion of someone in its proper use. Read and understand all instructions before attempting to
use!
FOR YOUR SAFETY!
This device is intended for outdoor use only with adequate ventilation.
This torch is designed for use with a vapor-withdrawal liquid propane (LP) gas cylinder 10
pound size and larger with an OPD valve.
Eye protection, gloves, proper fire retardant clothing, and boots should be worn when
operating the torch.
NEVER direct torch flame toward hose or propane tank.
DO NOT leave torch unattended while torch is in operation.
NEVER point the torch at flammable materials you do not want to burn.
DO NOT stand or prop the torch on the burner end while in operation.
DO NOT use matches or a cigarette lighter to light the torch. ALWAYS use a spark lighter.
Secure LP cylinders in a level, upright position during operation. DO NOT lay tank on its
side.
DO NOT lift propane tank by the valve.
When not in use, the gas should be turned off at the LP gas cylinder valve. Close the flame
adjusting valve as well. When done using torch, disconnect torch from cylinder.
Have an ABC Fire Extinguisher readily accessible during the operation of the torch.
DO NOT apply heat or flame to tank, hose, or torch to check for leaks, or to increase the gas
pressure.
CAUTION: In daylight, the flame is barely visible. DO NOT place hands or body parts in
the path of the flame while lighting or operating the torch.
DO NOT use torch in areas where gasoline or other flammable vapors are stored or used.
CAUTION: The torch barrel becomes very hot when in use. Do not touch barrel or allow it
to come in contact with flammable materials until it has completely cooled down.
IF YOU SMELL GAS!
DO NOT operate torches or any equipment if the odor of LP gas is present.
IMMEDIATELY shut off all valves and extinguish any open flames.
Check all equipment for leaks using leak detection fluid or soapy water.
REPAIR all leaks and test for leaks prior to lighting the torch.
TROUBLE SHOOTING
Problem #3 - The flame adjusting valve is not working.
Possible Solutions:
1. If you can not get full flow out of the torch with the flame adjusting valve
all the way open, then the POL safety valve has probably detected too much
gas flow and restricted the gas flow. To reset the POL safety valve, turn the
LP gas cylinder valve completely off (clockwise), then open the flame
adjusting valve to release any pressure in the hose (or remove the POL
safety valve from the LP gas cylinder and then reinstall with a wrench),
close the flame adjusting valve, and then reopen the LP gas cylinder valve
very slowly to keep a lot of gas from entering the hose too quickly and
tripping the POL safety valve again.
2. If the flame adjusting valve just spins and spins, you might have unseated
the valve stem from the valve by accident. To fix this, you need to loosen
the nut under the flame adjusting valve knob with an adjustable wrench.
Then push the flame adjusting valve knob in towards the valve body while
turning clockwise. You should feel the threads “catch” and as you continue
to turn, the valve will close all the way. Then retighten the nut under the
flame adjusting valve knob (be careful not to over tighten it). If this doesn’t
work, then the flame adjusting valve needs to be replaced. Contact KDAR
Company for a replacement flame adjusting valve (Model 24209).
1 Year Limited Warranty.
Go to www.hotmaxtorches.com for more information.
OTHER SAFETY INFORMATION
CSA 2-94 US Requirements for Hand-Held LP Torches for use with Fuel
Supply
ANSI Z49.1 Safety in Welding and Cutting
NFPA 54 National Fuel Gas Code
NFPA 58 Standard for the storage and handling of liquefied petroleum gases
WARNING! This product may expose you to chemicals, including lead,
which is known in the State of California to cause cancer. Wash your hands
after using this product. For more information, go to
www.P65Warnings.ca.gov.

LITTLE MAX®
MODEL 50G
50,000 BTU
PROPANE TORCH
INSTRUCTION MANUAL
Thank you for your purchase! We hope you enjoy your torch!
Need a longer hose for your torch? Looking for other great Hot Max
accessories for your torch or our other products?
Check out our website for our current product offering.
BIG MAX®
MODEL 500G
500,000 BTU
PROPANE TORCH
WITH IDLE BOOST /
FUEL SAVER VALVE
Hot Max Extension Hoses
Model 24200 - 10’ LP Hose or
Model 24201 - 25’ LP Hose
KDAR Company
3671 New Town Blvd
St. Charles, MO 63301
(636) 493-9920 M-F 8 AM to 5
PM, CST
www.hotmaxtorches.com
Hot Max Garden Torch
Model GTORCH
Table of contents
Popular Power Tools manuals by other brands

Benman
Benman HG 2000 W Original instructions

Blaupunkt
Blaupunkt BP2913LK manual

Fayat Group
Fayat Group DYNAPAC DRP70D Operating instruction

Youngman Richardson & Co
Youngman Richardson & Co Mikasa Sangyo MVH-206 instruction manual

Bikers Dream
Bikers Dream 1004-D instructions

Craftsman
Craftsman 351.217030 Operator's manual