10
en
USE LCD
When switching on the iron for the rst
time, you may notice an unpleasant
odour, a little smoke and some impurities from
the manufacturing process that will disappear
in a few minutes.
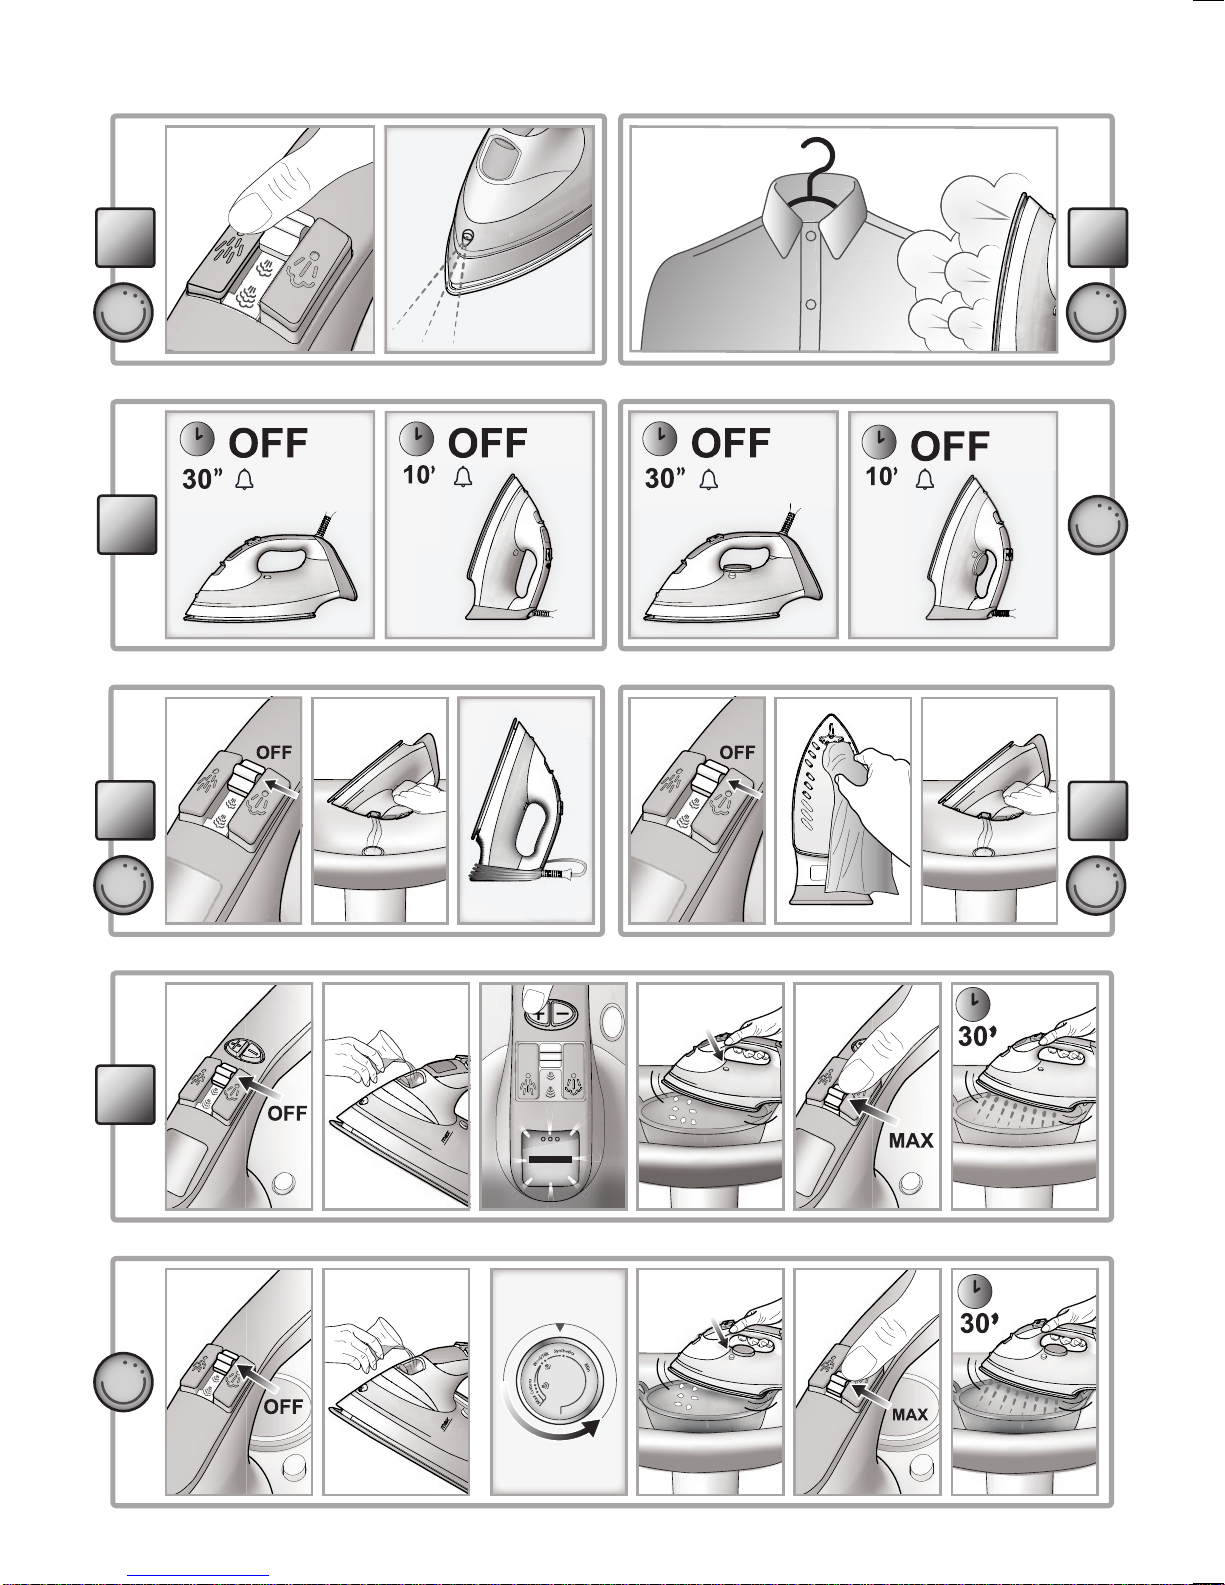
Ironing without steam (C1)
1. Set the steam regulator (3) to Off (=no
steam).
2. Select the recommended ironing
temperature with the temperature buttons
+/-(4a)(seestepB1andchapter“Usingthe
iron”,section“Selectingthetemperatureand
adjustingthesteam”).
Steam ironing (D1)
1. Checkthatthewaterlevelinthereservoiris
higherthan¼.
2. Selecttheappropriatesteamwiththesteam
regulator(3)and therecommendedironing
temperature with the temperature buttons
+/-(4a)(seestepB1andchapter“Usingthe
iron”,section“Selectingthetemperatureand
adjustingthesteam”).
The iron starts producing steam as
soon as it reaches the set temperature.
Ironing with shot of steam (E1)
Theshotofsteamfunctionallowsyoutoeliminate
persistentwrinkles.Youcanusethisfunctionboth
inno-steamandsteamironingmode.
1. Checkthatthewaterlevelinthereservoiris
higherthan¼.
2. Select the recommended ironing
temperature with the temperature buttons
+/-(4a)(seestepB1andchapter“Usingthe
iron”,section“Selectingthetemperatureand
adjustingthesteam”).
3. Presstheshotofsteambutton(1)toobtain
anextrasteamowwhenironing.Iftheshot
of steam function has not been used for
sometime,itmaybenecessarytopressthe
buttonrepeatedlytoactivatethepump.
If the water in the reservoir is nished, it
may be necessary to press the shot of
steam button several times to (re)activate the
pump, after lling the water reservoir again.
regulator(3)ormoveittoOfftoironwithout
steam.Whensteamironing,makesurethat
thewaterlevelinthereservoirisatleast¼.
Selecting the temperature
and adjusting the steam (B2)
1. Connect the plug of the appliance into a
groundedsocket(220/240V).
2. Use the temperature control (4b) to select
the desired temperature. Every time you
rotate the temperature control, an acoustic
signal is emitted. If you go from a lower
temperature to a higher temperature, the
temperatureindicatorlight(4c)lightupuntil
theselectedtemperatureisreached.
3. Whentheironreachesthesettemperature,
an acoustic signal is emitted and the
temperatureindicatorlightgoesoff.
4. Werecommendtocheckthegarmentlabel
in order to identify the fabric type. In case
ofdoubts,itisrecommendednottousethe
spray function and iron a hidden corner in
order to determine the most appropriate
temperatureandavoiddamagingthefabric.
In case of very delicate fabrics, such as
silk, wool, and synthetic materials, iron the
garmentinsideouttopreventshinymarks.
Start ironing the garments that require a
lowertemperature,suchassyntheticfabrics.
5. Select the steam level with the steam
regulator(3)ormoveittoOfftoironwithout
steam.Whensteamironing,makesurethat
thewaterlevelinthereservoirisatleast¼.
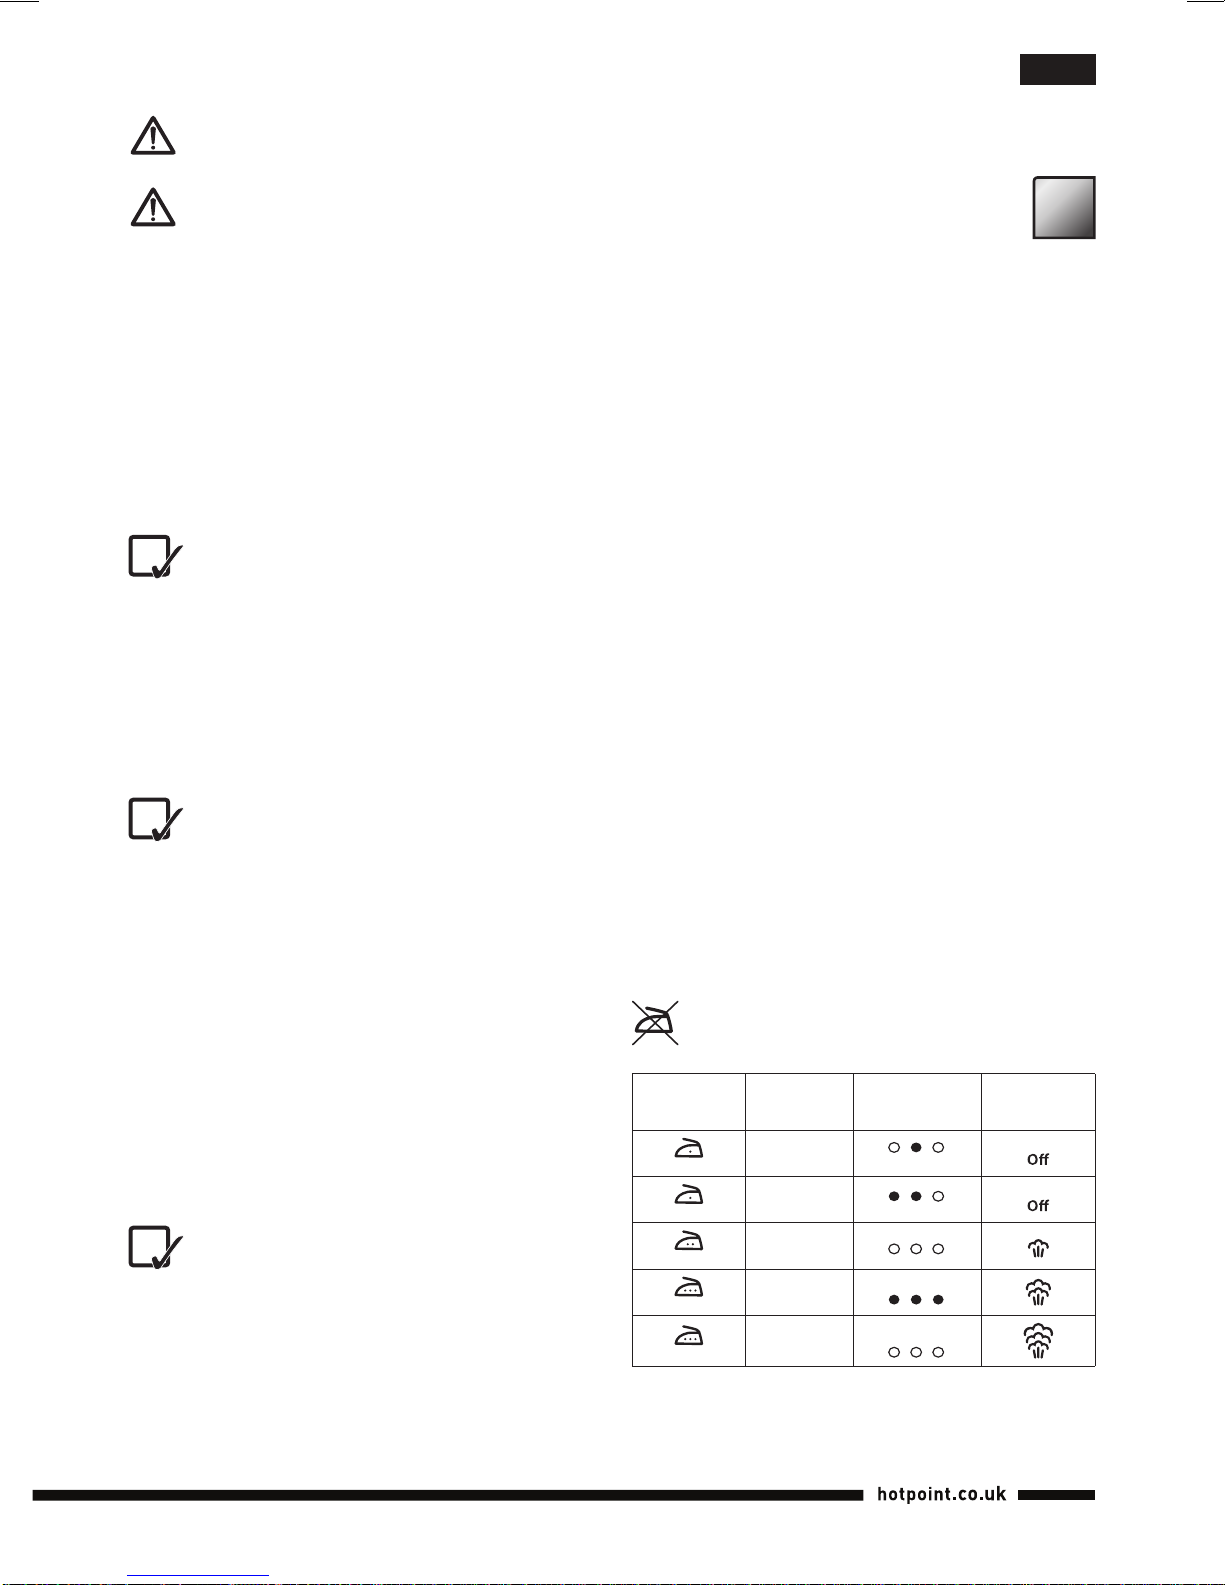
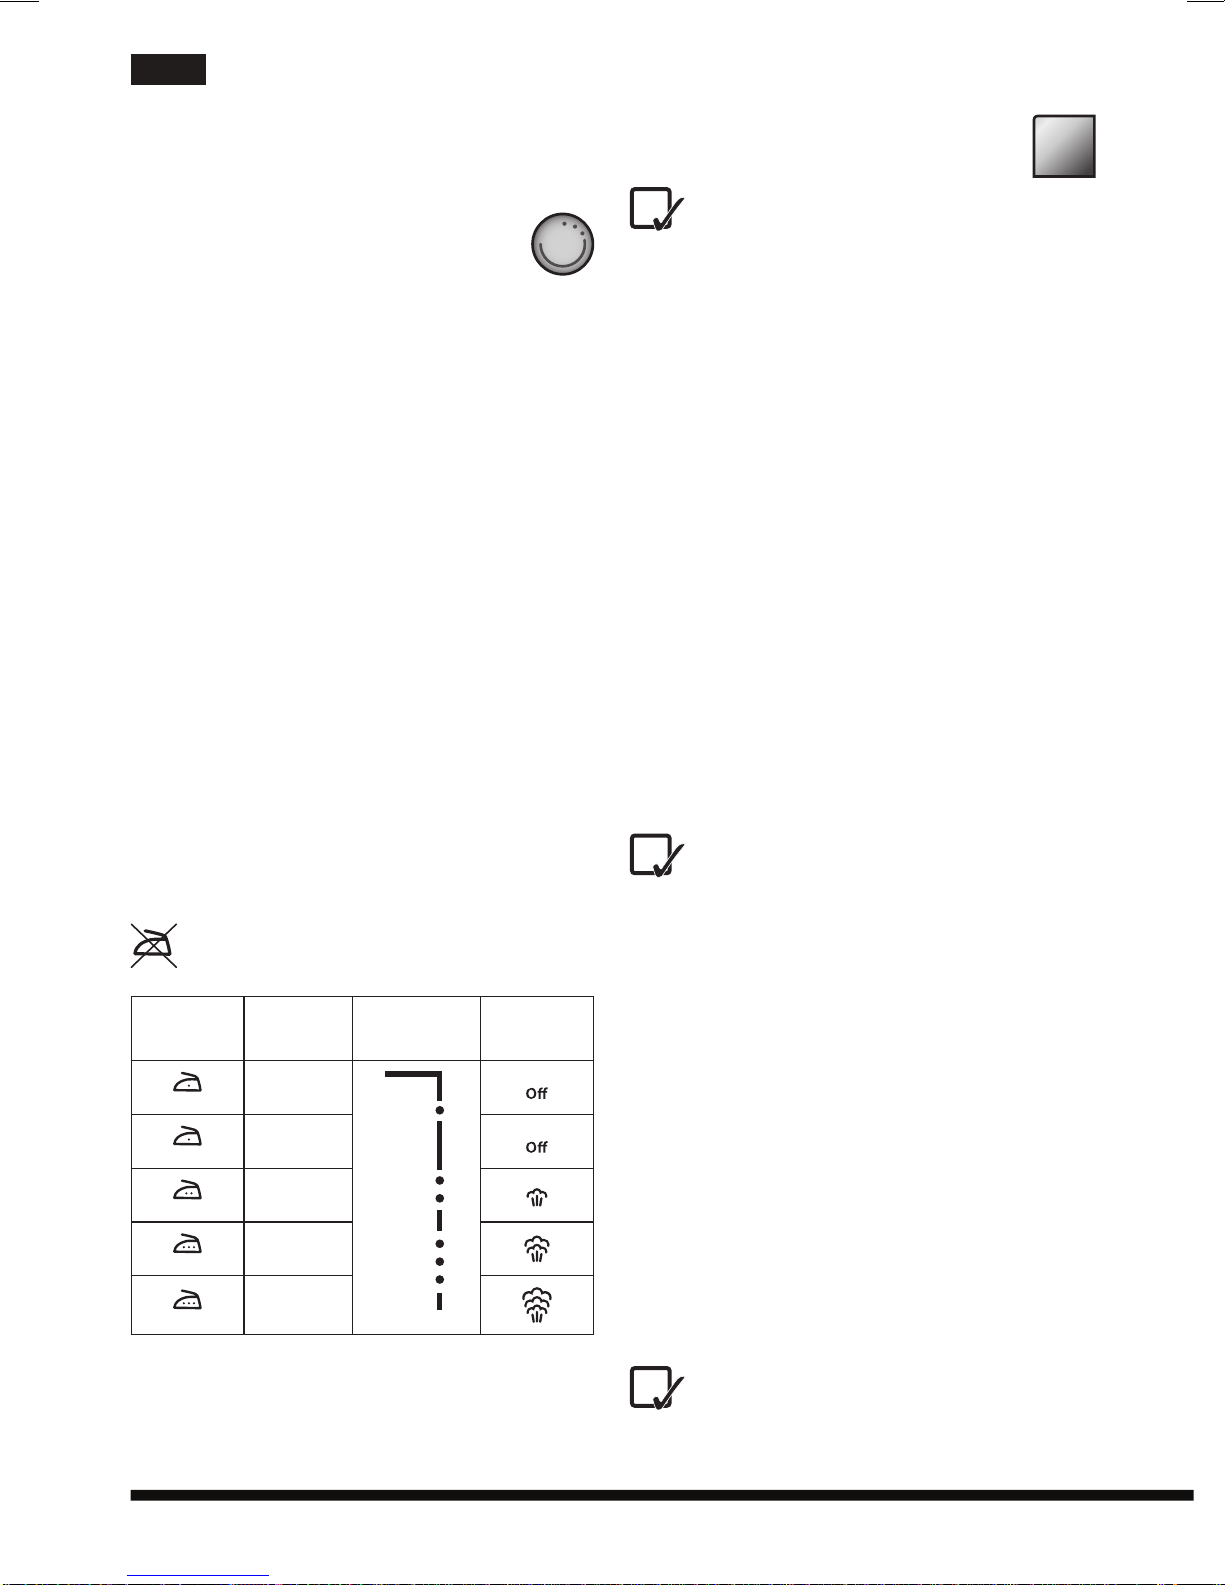
Fabrics with this symbol on the label
must not be ironed.
GARMENT
LABEL FABRIC TYPE TEMPERATURE
INDICATION
STEAM
INDICATION
synthetic
silk
mixedcotton
wool
mixedwool
cotton
linen
jeans
MIN
LINEN