manuals.online logo
Brands
  1. Home
  2. •
  3. Brands
  4. •
  5. HP
  6. •
  7. Disk Array System
  8. •
  9. HP StorageWorks Series User manual

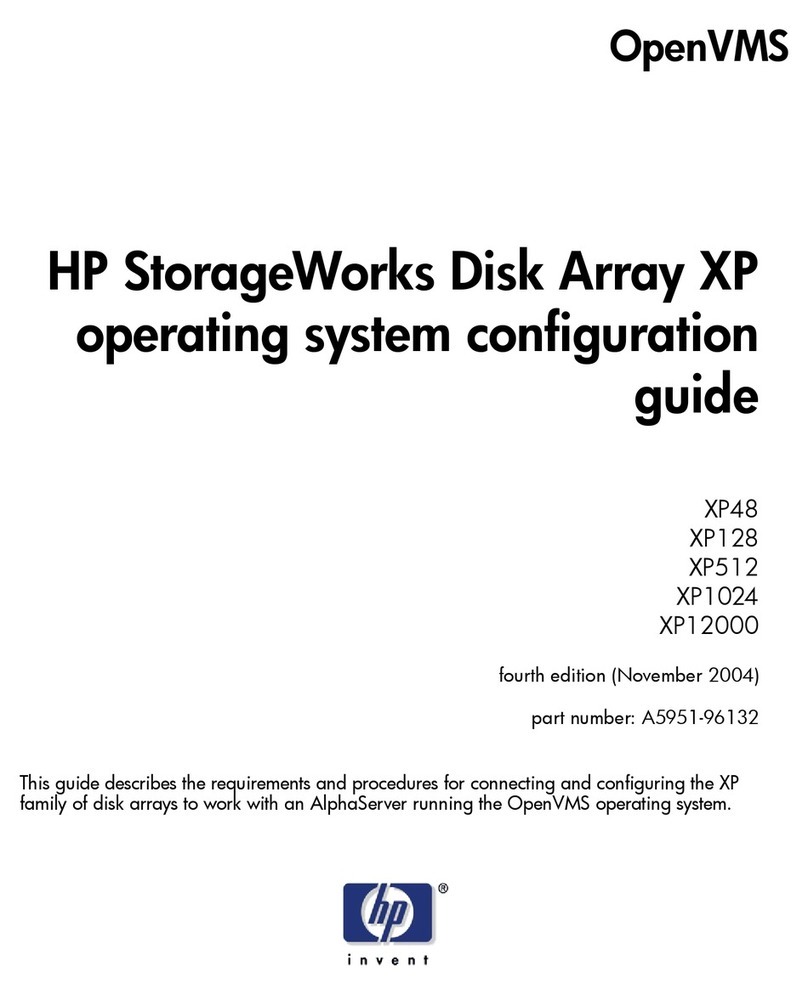
HP StorageWorks Series User manual

hp
Storage
W
orks
ESL
E-ser
ies
e1200-160
NetworkStor
age
Contro
ller
Caution:
P
artscanbedam
agedby
elect
ros
tatic
discha
rge
.Keeppa
rtsinthei
r
conta
iners
untilneed
ed.Ensur
eyouar
e
prop
erly
groun
dedwhe
ntouc
hingsta
tic
-
sensit
ive
compone
nts.
Note:
Thispart
isnothot-pl
uggabl
e.
Itisneces
sarytopo
werdo
wnthelib
rary
torep
lacethis
part.
2
3
1
Opentheba
ckdoor
ofthelibr
ary
.
4
Flip
thetwobr
eake
rswi
tche
soffatthepo
wer
distr
ibuti
onunit
.
Inspec
tthecont
entsofth
ekit.
P
ow
erdow
nthelibr
ary
.
a.
Plac
ethelibr
aryoff-li
nebypr
essin
gthe
Standb
y
button
onthelibr
ary'sfr
ontpane
l.
Thelibr
aryrobo
ticsco
mplet
esany
curr
ent
comman
dsandthen
stops
.
b.Ve
rifytha
tthefr
ontpane
ldispla
yindica
tes
“Sy
stemOff
-line
”
.
c.Ve
rifytha
tthepic
keris
empty
.Ifther
eisa
tapecart
ridg
einthepic
ker
,perfo
rma
Move
comman
dtoplacethe
cartri
dgeinan
avai
lableslo
t.[Con
tentnee
ded.]
d.Pres
sandholdth
epow
erbutto
nlocated
on
thefr
ontofthe
library
behindthe
laptoptr
ay
untilthe
fron
tpanelgoe
sblank.
hp
StorageWorks
ESL
E-series
e1200-160
NetworkStorage
Controller
Caution:
Partscanbedamagedby
electrostaticdischarge.K
eeppartsintheir
containersuntilneeded.En
e
properlygroundedwhentou
static-
sensitivecomponents.
Note:Thispartisnotho
Itisnecessarytopo
toreplacethispart.
2
3
1
Openthebackdo
4
Flipthetwo
ffatthe
distribution
Inspectthecontentsofth
Powerdownthelibra
.
a.
Placethelibraryoff
Standby
buttononthelibra
Thelibraryrobotics
current
commandsandthe
b.
Verifythatthefron
dicates
“SystemOff-line”
.
c.
Verifythatthepick
.Ifthereisa
tapecartridgein
ormaMove
commandtoplac
availableslot.[C
d.
Pressandholdth
thefrontofthelib
y
untilthefrontpa
hp
StorageWorks
ESL
E-Series
Connecting
TwoSANs
Caution:Partscanbedamagedby
electrostaticdischarge.Keeppartsintheir
containersuntilneeded.Ensureyouare
properlygroundedwhentouchingstatic-
sensitivecomponents.
Note:Thispartisnothot-pluggable.
Itisnecessarytopowerdownthelibrary
toreplacethispart.
2
3
1
Openthebackdoorofthelibrary.
4
Flipthetwobreakerswitchesoff(totheleft)at
the
po
werdistributionunit.
Besureyouhavethisposter,ane2400-160
roboticscontrollercard,therubberRFIgasket,a
razororotherscrapingtool,isopropylalcohol,a
#2Phillipsscrewdriver,andaslottedscrewdriver.
SeeEA#####forhowtoorderthegasket.
Downloadandinstallthefirmwareto
supportthe
e2
400-160.Ensurethat
youhavethelatestInterfaceManager
firmware,andCommandViewESL
software.RefertotheHPStorageWorks
CommandViewUsersGuidefor
detailedproceduresonchecking
firmwarerevisionsand
making
updates.
HP
StorageWorks
Connecting
TwoSANs to
ESL E-Series
Robotics
Caution:Parts canbedamagedby
electrostaticdischarge.Keepparts in their
containersuntil needed.Ensureyou are
properly groundedwhen touchingstatic-
sensitive components.
Note:This part is not hot-pluggable.
It is necessary topower downthelibrary
toreplacethispart.
3
1
Openthebackdoorof thelibrary.
Besureyou havethisposter, ane2400-160
robotics controller card,therubberRFI gasket, a
razoror otherscrapingtool, isopropyl alcohol,a
#2Phillipsscrewdriver,andaslottedscrewdriver.
SeeEN0605Wfor how to orderthegasket.
2
Power off thelibrary:
a. Use yourbackupsoftwaretoemptythepicker
or to verifythat thepicker is empty.
b. Placethelibraryoff-linebypressingthe
Stopbutton on thelibrary'sfrontpanel.
c.Select Yesto takethelibraryoff-line.
d. Verifythat thefront panel displayindicates
“Stopped”.
e.Press andhold thepowerbutton, locatedon
thefront of thelibrarybehindthelaptoptray,
until thefront panel clears.
4
Flip thetwo breakerswitchesoff (totheleft)at
thep
ower distributionunit.
HP
StorageWorks
Connecting
Two SANs to
ESL E-Series
Robotics
Caution: Parts can be damaged by
electrostatic discharge. Keep parts in their
containers until needed. Ensure you are
properly grounded when touching static-
sensitive components.
Note: This part is not hot-pluggable.
It is necessary to power down the library
to replace this part.
3
1
Open the back door of the library.
Be sure you have this poster, an e2400-160
robotics controller card, the rubber RFI gasket, a
razor or other scraping tool, isopropyl alcohol, a
#2 Phillips screwdriver, and a slotted screwdriver.
See EN0605W for how to order the gasket.
2
Power off the library:
a. Use your backup software to empty the
picker or to verify that the picker is empty.
b. Press and hold the power button, located
on the front of the library behind the laptop
tray, until the front panel clears.
4
Flip the two breaker switches off (to the left) at
the power distribution unit.
ACT/
LNK
ACT/
LNK
PORT1 PORT0 ETHERNET
SERIAL
PWR
FIBRE
CHANNEL
FIBRE
CHANNEL
ACT/
LNK
ACT/
LNK
PORT1 PORT0 ETHERNET
SERIAL
PWR
FIBRE
CHANNEL
FIBRE
CHANNEL
ACT/
LNK
ACT/
LNK
PORT1 PORT0 ETHERNET
SERIAL
PWR
FIBRE
CHANNEL
FIBRE
CHANNEL
ACT/
LNK
ACT/
LNK
PORT1 PORT0 ETHERNET
SERIAL
PWR
FIBRE
CHANNEL
FIBRE
CHANNEL
ACT/
LNK
ACT/
LNK
PORT1 PORT0 ETHERNET
SERIAL
PWR
FIBRE
CHANNEL
FIBRE
CHANNEL
ACT/
LNK
ACT/
LNK
PORT1 PORT0 ETHERNET
SERIAL
PWR
FIBRE
CHANNEL
FIBRE
CHANNEL
1
2
ACT/
LNK
ACT/
LNK
PORT1 PORT0 ETHERNET
SERIAL
PWR
FIBRE
CHANNEL
FIBRE
CHANNEL
ACT/
LNK
PORT2
FIBRE
CHANNEL
ACT/
LNK
ACT/
LNK
PORT 1 PORT3
FIBRE
CHANNEL
FIBRE
CHANNEL
ACT/
LNK
PORT2
FIBRE
CHANNEL
ACT/
LNK
ACT/
LNK
PORT1 PORT0 ETHERNET
SERIAL
PWR
FIBRE
CHANNEL
FIBRE
CHANNEL
ACT/
LNK
PORT2
FIBRE
CHANNEL
ACT/
LNK
ACT/
LNK
PORT 1 PORT0
FIBRE
CHANNEL
FIBRE
CHANNEL
ACT/
LNK
PORT2
FIBRE
CHANNEL
ACT/
LNK
ACT/
LNK
PORT1 PORT0 ETHERNET
SERIAL
PWR
FIBRE
CHANNEL
FIBRE
CHANNEL
ACT/
LNK
PORT2
FIBRE
CHANNEL
ACT/
LNK
ACT/
LNK
PORT1 PORT3
FIBRE
CHANNEL
FIBRE
CHANNEL
ACT/
LNK
PORT2
FIBRE
CHANNEL
Note: To gain the access needed
to continue with this procedure, HP
recommends removing drive cluster 0.
This poster provides instructions for this
method.
You can also obtain access by emptying
and removing the card cage, but that is
usually more difficult. Instructions for
removing the card cage are not
presented here.
Remove cluster 0
Identify drive cluster
0. It is the top-most
drive cluster, located
directly under the
card cage.
6
78
Label each Fibre Channel (FC) cable attached to
a drive (A through D) so that you know which
cable came from each location.
Disconnect the Fibre Channel (FC) cable from
each drive by pressing down on the cable
connector tab and pulling the connector away
from the drive. Caution: To avoid damaging
FC cables, do not pinch or sharply bend them.
5
Identify the robotics controller. It is the narrowest
card in the card cage, and is located in the
bottom-most slot.
Note: This poster shows fibre drives,
the procedure for SCSI drives is almost
identical. If you need more information
see the instructions for removing and
replacing a SCSI tape drive in the
service manual, or in the ESL E-Series
Tape Drive Replacement poster (part
number 350802-001).
0
1
2
3
4
5
AB
CD
ACT/
LNK
ACT/
LNK
PORT1 PORT0 ETHERNET
SERIAL
PWR
FIBRE
CHANNEL
FIBRE
CHANNEL
ACT/
LNK
PORT2
FIBRE
CHANNEL
ACT/
LNK
ACT/
LNK
PORT1 PORT3
FIBRE
CHANNEL
FIBRE
CHANNEL
ACT/
LNK
PORT2
FIBRE
CHANNEL
ACT/
LNK
ACT/
LNK
PORT1 PORT0 ETHERNET
SERIAL
PWR
FIBRE
CHANNEL
FIBRE
CHANNEL
ACT/
LNK
PORT2
FIBRE
CHANNEL
ACT/
LNK
ACT/
LNK
PORT1 PORT0
FIBRE
CHANNEL
FIBRE
CHANNEL
ACT/
LNK
PORT2
FIBRE
CHANNEL
ACT/
LNK
ACT/
LNK
PORT1 PORT0 ETHERNET
SERIAL
PWR
FIBRE
CHANNEL
FIBRE
CHANNEL
ACT/
LNK
PORT2
FIBRE
CHANNEL
ACT/
LNK
ACT/
LNK
PORT1 PORT3
FIBRE
CHANNEL
FIBRE
CHANNEL
ACT/
LNK
PORT2
FIBRE
CHANNEL
CASCADE TO FIBRE CHANNEL CONTROLLERS NETWORK SERIAL AUX STATUS
ERROR
1
2
11
Remove the FC cables from the clips on the drives.
109
Remove the tie wrap that secures the cables to
the drive handle on the lower right drive (drive C)
in the cluster.
Remove all drives
from cluster 0.
For each drive, use a
slotted screwdriver to loosen the
captive screw at the upper left corner of
the drive module. Grasp the drive handle and
pull the drive from its bay. Set the drives aside.
Label and disconnect the cables connected to
the cluster controller card and the Interface
Manager card.
12
13 14
Remove the
power cord
that supplies
power to
cluster 0.
Remove the drive cluster
by using a #2 Phillips
screwdriver to remove the
four screws that secure the drive cluster to the
library frame. Remove the cluster and set it aside.
ACT/
LNK
ACT/
LNK
PORT 1 PORT 0 ETHERNET
SERIAL
PWR
FIBRE
CHANNEL
FIBRE
CHANNEL
ACT/
LNK
ACT/
LNK
PORT 1 PORT 0 ETHERNET
SERIAL
PWR
FIBRE
CHANNEL
FIBRE
CHANNEL
ACT/
LNK
ACT/
LNK
PORT 1 PORT 0 ETHERNET
SERIAL
PWR
FIBRE
CHANNEL
FIBRE
CHANNEL
ACT/
LNK
ACT/
LNK
PORT 1 PORT 0 ETHERNET
SERIAL
PWR
FIBRE
CHANNEL
FIBRE
CHANNEL
ACT/
LNK
ACT/
LNK
PORT1 PORT0 ETHERNET
SERIAL
PWR
FIBRE
CHANNEL
FIBRE
CHANNEL
ACT/
LNK
ACT/
LNK
PORT1 PORT0 ETHERNET
SERIAL
PWR
FIBRE
CHANNEL
FIBRE
CHANNEL
ACT/
LNK
ACT/
LNK
PORT 1 PORT 0 ETHERNET
SERIAL
PWR
FIBRE
CHANNEL
FIBRE
CHANNEL
ACT/
LNK
PORT 2
FIBRE
CHANNEL
T/
K
ACT/
LNK
ACT/
LNK
PORT 1 PORT 0 ETHERNET
SERIAL
PWR
FIBRE
CHANNEL
FIBRE
CHANNEL
ACT/
LNK
PORT 2
FIBRE
CHANNEL
T/
K
ACT/
LNK
ACT/
LNK
PORT 1 PORT0 ETHERNET
SERIAL
PWR
FIBRE
CHANNEL
FIBRE
CHANNEL
ACT/
LNK
ACT/
LNK
PORT 1 PORT0 ETHERNET
SERIAL
PWR
FIBRE
CHANNEL
FIBRE
CHANNEL
ACT/
LNK
ACT/
LNK
PORT 1 PORT0 ETHERNET
SERIAL
PWR
FIBRE
CHANNEL
FIBRE
CHANNEL
ACT/
LNK
ACT/
LNK
PORT 1 PORT0 ETHERNET
SERIAL
PWR
FIBRE
CHANNEL
FIBRE
CHANNEL
ACT/
LNK
ACT/
LNK
PORT 1 PORT0 ETHERNET
SERIAL
PWR
FIBRE
CHANNEL
FIBRE
CHANNEL
ACT/
LNK
ACT/
LNK
PORT 1 PORT0 ETHERNET
SERIAL
PWR
FIBRE
CHANNEL
FIBRE
CHANNEL
ACT/
LNK
ACT/
LNK
PORT 1 PORT 0 ETHERNET
SERIAL
PWR
FIBRE
CHANNEL
FIBRE
CHANNEL
ACT/
LNK
ACT/
LNK
PORT 1 PORT 0 ETHERNET
SERIAL
PWR
FIBRE
CHANNEL
FIBRE
CHANNEL
ACT/
LNK
ACT/
LNK
PORT 1 PORT 0 ETHERNET
SERIAL
PWR
FIBRE
CHANNEL
FIBRE
CHANNEL
ACT/
LNK
ACT/
LNK
PORT 1 PORT 0 ETHERNET
SERIAL
PWR
FIBRE
CHANNEL
FIBRE
CHANNEL
ACT/
LNK
ACT/
LNK
PORT 1 PORT 0 ETHERNET
SERIAL
PWR
FIBRE
CHANNEL
FIBRE
CHANNEL
ACT/
LNK
ACT/
LNK
PORT 1 PORT 0 ETHERNET
SERIAL
PWR
FIBRE
CHANNEL
FIBRE
CHANNEL
Remove the e1200-160
robotics controller card
19 20
15 16
17 18
Label and disconnect the cables attached to the
robotics controller card.
Use a #2 Phillips screwdriver to loosen the
captive screws in the black ejector handles at
both ends of the robotics controller. Push the
ejector handles toward the outside, then pull on
them to remove the controller.
Using a #2 Phillips screwdriver, remove the 4
screws securing the metal spacer to the bottom of
the card cage.
Using a #2 Phillips screwdriver, remove the
1 screw on the front of the metal spacer directly
to the left of the e1200-160.
From the card cage, remove the metal spacer
and the metal plate associated with the spacer.
Using a razor or scraper, remove the rubber gasket
from the right side of the bottom of the robotics
controller slot. Use isopropyl alcohol to clean any
residue left on the card cage from the rubber gasket.

Other HP Disk Array System manuals

HP 2354 User manual

HP

HP 2354 User manual

HP STORAGEWORKS XP20000 User manual

HP

HP STORAGEWORKS XP20000 User manual

HP VMA Series Installation and maintenance instructions

HP

HP VMA Series Installation and maintenance instructions

HP StorageWorks 2000sa User manual

HP

HP StorageWorks 2000sa User manual

HP StorageWorks XP128 User manual

HP

HP StorageWorks XP128 User manual

HP XP20000/XP24000 User manual

HP

HP XP20000/XP24000 User manual

HP StorageWorks 2000fc - G2 Modular Smart Array User manual

HP

HP StorageWorks 2000fc - G2 Modular Smart Array User manual

HP StorageWorks P2000 Guide

HP

HP StorageWorks P2000 Guide

HP StorageWorks MSA 1000 User manual

HP

HP StorageWorks MSA 1000 User manual

HP StorageWorks XP12000 User manual

HP

HP StorageWorks XP12000 User manual

HP XP20000/XP24000 User manual

HP

HP XP20000/XP24000 User manual

HP XP20000/XP24000 User manual

HP

HP XP20000/XP24000 User manual

HP StorageWorks XP12000 Operating instructions

HP

HP StorageWorks XP12000 Operating instructions

HP XP20000/XP24000 User manual

HP

HP XP20000/XP24000 User manual

HP HPE XP P9500 User manual

HP

HP HPE XP P9500 User manual

HP StorageWorks XP128 User manual

HP

HP StorageWorks XP128 User manual

HP STORAGEWORKS XP24000 User manual

HP

HP STORAGEWORKS XP24000 User manual

HP StorageWorks MSA 1000 User instructions

HP

HP StorageWorks MSA 1000 User instructions

HP StorageWorks XP10000 - Disk Array User manual

HP

HP StorageWorks XP10000 - Disk Array User manual

HP StorageWorks XP128 User manual

HP

HP StorageWorks XP128 User manual

HP A3550A - High Availability Disk Arrays Model 20 Storage... User manual

HP

HP A3550A - High Availability Disk Arrays Model 20 Storage... User manual

HP StorageWorks XP10000 - Disk Array User manual

HP

HP StorageWorks XP10000 - Disk Array User manual

HP STORAGEWORKS XP24000 User manual

HP

HP STORAGEWORKS XP24000 User manual

HP StorageWorks 2000sa User instructions

HP

HP StorageWorks 2000sa User instructions

Popular Disk Array System manuals by other brands

Bosch Classixx 1200 Quick installation guide

Bosch

Bosch Classixx 1200 Quick installation guide

easyRAID Q08QA-2GR2 Hardware manual

easyRAID

easyRAID Q08QA-2GR2 Hardware manual

easyRAID S8A2-PETT Hardware user manual

easyRAID

easyRAID S8A2-PETT Hardware user manual

Digital Equipment StorageWorks RW555 Service manual

Digital Equipment

Digital Equipment StorageWorks RW555 Service manual

Dell EMC NX4 Series manual

Dell

Dell EMC NX4 Series manual

Bosch DSDA ISCSI DISK ARRAY SERIES DSA-N2B20 installation guide

Bosch

Bosch DSDA ISCSI DISK ARRAY SERIES DSA-N2B20 installation guide

NEC M120 Setup guide

NEC

NEC M120 Setup guide

Promise VTrak 15110 user manual

Promise

Promise VTrak 15110 user manual

EqualLogic PS Series quick start

EqualLogic

EqualLogic PS Series quick start

Overland Tandberg SnapServer DX1 instructions

Overland Tandberg

Overland Tandberg SnapServer DX1 instructions

EMC iomega StorCenter px12-350r quick start guide

EMC

EMC iomega StorCenter px12-350r quick start guide

Addonics Technologies Z4SN25NML user guide

Addonics Technologies

Addonics Technologies Z4SN25NML user guide

NetApp EF Series Installation and setup instructions

NetApp

NetApp EF Series Installation and setup instructions

manuals.online logo
manuals.online logoBrands
  • About & Mission
  • Contact us
  • Privacy Policy
  • Terms and Conditions

Copyright 2025 Manuals.Online. All Rights Reserved.