manuals.online logo
Brands
  1. Home
  2. •
  3. Brands
  4. •
  5. HP
  6. •
  7. Laptop
  8. •
  9. HP EliteBook 840 G6 Assembly instructions

HP EliteBook 840 G6 Assembly instructions

EL-MF877-00 Page 1
Template Revision C
Last revalidation date 04-01-2018
HPI instructions for this template are available at EL-MF877-01
Product End-of-Life Disassembly Instructions
Product Category: Notebooks and Tablet PCs
Marketing Name / Model
[List multiple models if applicable.]
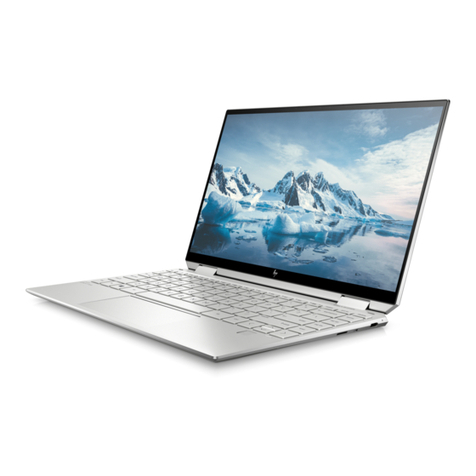
HP EliteBook 840 G6 Notebook PC
Purpose: The document is intended for use by end-of-life recyclers or treatment facilities. It provides the basic instructions for the
disassembly of HPI products to remove components and materials requiring selective treatment, as defined by EU directive
2002/96/EC, Waste Electrical and Electronic Equipment (WEEE).
NOTE: Recyclers should sort plastic materials into resin streams for recycling based on the ISO 11469 plastic marking code on the
plastic part. For any questions on plastic marking, please contact HP’s Sustainability Contact.
1.0 Items Requiring Selective Treatment
1.1 Items listed below are classified as requiring selective treatment.
1.2 Enter the quantity of items contained within the product which require selective treatment in the right column, as applicable.
Item Description
Notes
Quantity of
items
included in
product
Printed Circuit Boards (PCB) or Printed Circuit
Assemblies (PCA)
With a surface greater than 10 sq cm
M/B
2
Batteries, excluding Li-Ion batteries.
All types including standard alkaline, coin or button style
batteries
0
Li-Ion batteries. Include all Li-Ion batteries if more than
one is provided with the product (such as a detachable
notebook keyboard battery, RTC coin cell, etc.)
Battery(ies) are attached to the product by (check all
that apply with an “x” inside the “[ ]”):
[X] screws
[X] snaps
[ ] adhesive
[ ] other. Explain
NOTE: Add detailed removal procedures including
required tools in the sections 3.1/3.2.
2 (Main
battery and
RTC battery)
Mercury-containing components
For example, mercury in lamps, display backlights,
scanner lamps, switches, batteries
0
Liquid Crystal Displays (LCD) with a surface greater than
100 sq cm
Includes background illuminated displays with gas
discharge lamps (14”LED)
1
Cathode Ray Tubes (CRT)
0
Capacitors / condensers (Containing PCB/PCT)
0
Electrolytic Capacitors / Condensers measuring greater
than 2.5 cm in diameter or height
0
External electrical cables and cords
DC Cable for External Power Supply
1
Gas Discharge Lamps
0
Plastics containing Brominated Flame Retardants
weighing > 25 grams (not including PCBs or PCAs
already listed as a separate item above)
Excluding B&S parts (EPS)
0
EL-MF877-00 Page 2
Template Revision C
Last revalidation date 04-01-2018
HPI instructions for this template are available at EL-MF877-01
Item Description
Notes
Quantity of
items
included in
product
Components and parts containing toner and ink,
including liquids, semi-liquids (gel/paste) and toner
Include the cartridges, print heads, tubes, vent
chambers, and service stations.
0
Components and waste containing asbestos
0
Components, parts and materials containing refractory
ceramic fibers
0
Components, parts and materials containing
radioactive substances
0
2.0 Tools Required
List the type and size of the tools that would typically be used to disassemble the product to a point where components and
materials requiring selective treatment can be removed.
Tool Description
Tool Size (if
applicable)
Electric screwdriver (Cross)
#1
Electric screwdriver (Trox)
T8
Plastic stick
3.0 Product Disassembly Process
3.1 List the basic steps that should typically be followed to remove components and materials requiring selective treatment
including the required steps to remove the external enclosure:
1. Follow steps described in Disassembly instruction (file attached)
2. If parts can be removed without using a tool, remove it first
3. Use correct screwdriver and torque value before unlock the screw
4.
5.
6.
7.
3.2 Optional Graphic. If the disassembly process is complex, insert a graphic illustration below to identify the items contained in the
product that require selective treatment (with descriptions and arrows identifying location
制表:
審核:
MANUFACTURING PROCESS INSTRUCTIONS
MECHANICAL ASSEMBLY
1.00
Station Version Station Version Station Version Station Version
Station
Version
Station
Version
1 1.00 11 1.00 21 1.00
2 1.00 12 1.00 22 1.00
3 1.00 13 1.00 23 1.00
4 1.00 14 1.00 24 1.00
5 1.00 15 1.00 25 1.00
6 1.00 16 1.00 26 1.00
7 1.00 17 1.00 27 1.00
81.00 18 1.00 28 1.00
9 1.00 19 1.00
10 1.00 20 1.00
Station
Ver.
ALL 1.**
Page:
1 of 29
Sub-assembly name:
Crescent & Tenjin 拆机SOP
Document No.:
Crescent & Tenjin 拆机SOP
A.Current station version list:
B.Version Modify list:
Date
Content
Design
Written by:
陈博
Revision:
Date:
2019/3/4
2019/4/3
首次发行
陈博
MODEL : Computron Trypticon
黄雅君
李小波
作 业 指 导 书
Document No. : Crescent & Tenjin 拆机SOP 站 別:
作业名称: Ver. : 1.00 编辑日期:2019/4/3
治具清单(治具规格)数量 治具清单(治具规格)数量
步骤:
注意事项︰如有异常,请立即通知领班或助理。
发行部门:制表: 黃雅君 工業工程課
Remove the self-contained screws
1. Remove the self-contained screws*8
❖Torque:2.0 ±0.2 kgf.cm
❖No stripped screws
1(1/1)
螺丝起子 1
作 业 指 导 书
Document No. : Crescent & Tenjin 拆机SOP 站 別:
作业名称: Ver. : 1.00 编辑日期:2019/4/3
治具清单(治具规格)数量 治具清单(治具规格)数量
步骤:
注意事项︰如有异常,请立即通知领班或助理。
发行部门:制表: 黃雅君 工業工程課
Disassemble BASE 2(1/1)
1. Separate base with cable management rod
步骤: Inserted the cable bar into the gap
between TOP and BASE intermediate area, and
then slid cable bar to separate the TOP from
the BASE.
塑胶拆机棒 1
作 业 指 导 书
Document No. : Crescent & Tenjin 拆机SOP 站 別:
作业名称: Ver. : 1.00 编辑日期:2019/4/3
治具清单(治具规格)数量 治具清单(治具规格)数量
步骤:
注意事项︰如有异常,请立即通知领班或助理。
发行部门:制表: 黃雅君 工業工程課
Disassemble battery 3(1/1)
1. Pull out the battery CNTR
2. Remove battery screw T8*5
❖Torque:2.0 ±0.2 kgf.cm
❖No stripped screws
3. remove the battery
T8电动起子 1
作 业 指 导 书
Document No. : Crescent & Tenjin 拆机SOP 站 別:
作业名称: Ver. : 1.00 编辑日期:2019/4/3
治具清单(治具规格)数量 治具清单(治具规格)数量
步骤:
注意事项︰如有异常,请立即通知领班或助理。
发行部门:制表: 黃雅君 工業工程課
Disassemble DDR 4(1/1)
1. Disassemble DDR, Picture 1
2. Disassemble NFC FFC, NFC MODULE, NFC
ANTENNA
作 业 指 导 书
Document No. : Crescent & Tenjin 拆机SOP 站 別:
作业名称: Ver. : 1.00 编辑日期:2019/4/3
治具清单(治具规格)数量 治具清单(治具规格)数量
步骤:
注意事项︰如有异常,请立即通知领班或助理。
发行部门:制表: 黃雅君 工業工程課
DisassembleWWAN/WAN CABLE 5(1/1)
1. Disassemble WWAN/WAN CABLE, remove from the
hook in turn
2. Disassemble screws of WWAN/WLAN CARD/SSD, and
take out WWAN、WLAN CARD、SSD. Picture 2.
❖Torque:1.5 ±0.2 kgf.cm
❖No stripped screws
十字电动起子 1
作 业 指 导 书
Document No. : Crescent & Tenjin 拆机SOP 站 別:
作业名称: Ver. : 1.00 编辑日期:2019/4/3
治具清单(治具规格)数量 治具清单(治具规格)数量
步骤:
注意事项︰如有异常,请立即通知领班或助理。
发行部门:制表: 黃雅君 工業工程課
Disassemble Power FFC FAN/LVDS CABLE 6(1/1)
1. Disassemble Power FFC/FAN cable, LVDS cable
1
2
作 业 指 导 书
Document No. : Crescent & Tenjin 拆机SOP 站 別:
作业名称: Ver. : 1.00 编辑日期:2019/4/3
治具清单(治具规格)数量 治具清单(治具规格)数量
步骤:
注意事项︰如有异常,请立即通知领班或助理。
发行部门:制表: 黃雅君 工業工程課
Disassemble Hinge screws 7(1/1)
1. Disassemble Hinge screws M2.5*4.0
❖Torque:3.0 ±0.2 kgf.cm
❖No stripped screws
2. Open Top to 90 degrees, then remove TOP in parallel
十字电动起子1
作 业 指 导 书
Document No. : Crescent & Tenjin 拆机SOP 站 別:
作业名称: Ver. : 1.00 编辑日期:2019/4/3
治具清单(治具规格)数量 治具清单(治具规格)数量
步骤:
注意事项︰如有异常,请立即通知领班或助理。
发行部门:制表: 黃雅君 工業工程課
Disassemble KB screws 8(1/1)
1. Disassemble KB screws M2.0*3.0(6052B0302601)*2
❖Torque:1.5 ±0.2 kgf.cm
❖No stripped screws
十字电动起子 1
作 业 指 导 书
Document No. : Crescent & Tenjin 拆机SOP 站 別:
作业名称: Ver. : 1.00 编辑日期:2019/4/3
治具清单(治具规格)数量 治具清单(治具规格)数量
步骤:
注意事项︰如有异常,请立即通知领班或助理。
发行部门:制表: 黃雅君 工業工程課
Disassemble KB 9(1/1)
1. Use a thin round bar to push out KB from the gap between FAN and MB
2. Lift KB from the front of the KB to 90 degrees, then open the KB
CNTR/backlight FPC CNTR/PS CNTR and remove the keyboard
拆机棒 1
作 业 指 导 书
Document No. : Crescent & Tenjin 拆机SOP 站 別:
作业名称: Ver. : 1.00 编辑日期:2019/4/3
治具清单(治具规格)数量 治具清单(治具规格)数量
步骤:
注意事项︰如有异常,请立即通知领班或助理。
发行部门:制表: 黃雅君 工業工程課
Remove the screws under the KB 10(1/1)
1. Remove the screws under the KBM2.0*3.0(6052B0302601)*7
❖Torque:1.5 ±0.2 kgf.cm
❖No stripped screws
十字螺丝起子 1
作 业 指 导 书
Document No. : Crescent & Tenjin 拆机SOP 站 別:
作业名称: Ver. : 1.00 编辑日期:2019/4/3
治具清单(治具规格)数量 治具清单(治具规格)数量
步骤:
注意事项︰如有异常,请立即通知领班或助理。
发行部门:制表: 黃雅君 工業工程課
Remove the Thermal and Fan Screws 11(1/1)
1. Remove the Thermal/FAN self-contained screws*7(picture 1)
❖Torque:1.5 ±0.2 kgf.cm
❖No stripped screws
2. Pay attention to take the right location of the Thermal/FAN
十字螺丝起子 1
作 业 指 导 书
Document No. : Crescent & Tenjin 拆机SOP 站 別:
作业名称: Ver. : 1.00 编辑日期:2019/4/3
治具清单(治具规格)数量 治具清单(治具规格)数量
步骤:
注意事项︰如有异常,请立即通知领班或助理。
发行部门:制表: 黃雅君 工業工程課
Disassemble USB Bracket/FFC CNTR 12(1/1)
1. Remove the USB Bracket screw M2.0*3.0(6052B0302601)*2
❖Torque:1.5 ±0.2 kgf.cm
❖No stripped screws
2. Disassemble USB Bracket(6053B1479301)
3. Disassemble MSC FFC/Finger Pinter FPC
十字螺丝起子 1
作 业 指 导 书
Document No. : Crescent & Tenjin 拆机SOP 站 別:
作业名称: Ver. : 1.00 编辑日期:2019/4/3
治具清单(治具规格)数量 治具清单(治具规格)数量
步骤:
注意事项︰如有异常,请立即通知领班或助理。
发行部门:制表: 黃雅君 工業工程課
Disassemble RJ45 screws 13(1/1)
1. Disassemble RJ45 screws M2.0*4.0(6052B0101901)*6(picture 1)
❖No stripped screws
❖Torque:1.5 ±0.2 kgf.cm
十字螺丝起子 1
作 业 指 导 书
Document No. : Crescent & Tenjin 拆机SOP 站 別:
作业名称: Ver. : 1.00 编辑日期:2019/4/3
治具清单(治具规格)数量 治具清单(治具规格)数量
步骤:
注意事项︰如有异常,请立即通知领班或助理。
发行部门:制表: 黃雅君 工業工程課
Disassemble RJ45 screws 14(1/1)
1.Take off I/O Frame(6051B1194301)
2. Disassemble Speaker CNTR
3. Use disassemble stick to remove RTC battery in the
direction of below arrow
作 业 指 导 书
Document No. : Crescent & Tenjin 拆机SOP 站 別:
作业名称: Ver. : 1.00 编辑日期:2019/4/3
治具清单(治具规格)数量 治具清单(治具规格)数量
步骤:
注意事项︰如有异常,请立即通知领班或助理。
发行部门:制表: 黃雅君 工業工程課
Remove MB screws 15(1/1)
1. Remove MB screws M2.0*3.0(6052B0302601)*5
❖Torque:1.5 ±0.2 kgf.cm
❖No stripped screws
十字螺丝起子 1
作 业 指 导 书
Document No. : Crescent & Tenjin 拆机SOP 站 別:
作业名称: Ver. : 1.00 编辑日期:2019/4/3
治具清单(治具规格)数量 治具清单(治具规格)数量
步骤:
注意事项︰如有异常,请立即通知领班或助理。
发行部门:制表: 黃雅君 工業工程課
Disassemble SMC FFC/MB 16(1/1)
1. Disassemble Smart Card FFC和USB FPC
2. Tilt the MB about 30 degrees and take it out of the TOP
作 业 指 导 书
Document No. : Crescent & Tenjin 拆机SOP 站 別:
作业名称: Ver. : 1.00 编辑日期:2019/4/3
治具清单(治具规格)数量 治具清单(治具规格)数量
步骤:
注意事项︰如有异常,请立即通知领班或助理。
发行部门:制表: 黃雅君 工業工程課
Disassemble Finger Printer 17(1/1)
1. Disassemble Finger Pinter M2.0*2.0(6052B0156301)* 1
❖Torque:1.5 ±0.2 kgf.cm
❖No stripped screws
2. Remove the dummy finger/finger Pinter from the TOP
十字螺丝起子 1

Other manuals for EliteBook 840 G6

1

Other HP Laptop manuals

HP Pavilion AR5B125 Manual

HP

HP Pavilion AR5B125 Manual

HP EliteBook 8470p User manual

HP

HP EliteBook 8470p User manual

HP Compaq Presario V2000 Series Assembly instructions

HP

HP Compaq Presario V2000 Series Assembly instructions

HP LV967UT Manual

HP

HP LV967UT Manual

HP Compaq Presario,Presario 650 User manual

HP

HP Compaq Presario,Presario 650 User manual

HP ProBook 640 G1 Installation guide

HP

HP ProBook 640 G1 Installation guide

HP EliteBook 2570p User manual

HP

HP EliteBook 2570p User manual

HP 6930p - EliteBook - Core 2 Duo 2.8 GHz Manual

HP

HP 6930p - EliteBook - Core 2 Duo 2.8 GHz Manual

HP 2530p - EliteBook - Core 2 Duo 2.13 GHz Manual

HP

HP 2530p - EliteBook - Core 2 Duo 2.13 GHz Manual

HP mt42 Manual

HP

HP mt42 Manual

HP 17-p000 Manual

HP

HP 17-p000 Manual

HP Deskjet 2000 Manual

HP

HP Deskjet 2000 Manual

HP Net PC 20 User guide

HP

HP Net PC 20 User guide

HP Presario M2300 - Notebook PC Manual

HP

HP Presario M2300 - Notebook PC Manual

HP 345561-001 User manual

HP

HP 345561-001 User manual

HP Compaq Presario User manual

HP

HP Compaq Presario User manual

HP Computer Operating manual

HP

HP Computer Operating manual

HP Pavilion m7-1000 Manual

HP

HP Pavilion m7-1000 Manual

HP Stream 14 Manual

HP

HP Stream 14 Manual

HP 6930p - EliteBook - Core 2 Duo 2.8 GHz User manual

HP

HP 6930p - EliteBook - Core 2 Duo 2.8 GHz User manual

HP 6820s - Notebook PC User instructions

HP

HP 6820s - Notebook PC User instructions

HP ProBook 450 G2 Manual

HP

HP ProBook 450 G2 Manual

HP Pavilion DV4-1280 User manual

HP

HP Pavilion DV4-1280 User manual

HP EliteBook 8540W User manual

HP

HP EliteBook 8540W User manual

Popular Laptop manuals by other brands

Samsung NP-X22 user guide

Samsung

Samsung NP-X22 user guide

Toshiba M305-S4815 - Satellite - Core 2 Duo 1.83 GHz Specifications

Toshiba

Toshiba M305-S4815 - Satellite - Core 2 Duo 1.83 GHz Specifications

Dell Latitude C510 Service manual

Dell

Dell Latitude C510 Service manual

Vega Ultra Portable PC product manual

Vega

Vega Ultra Portable PC product manual

Lenovo Z61t Setup guide

Lenovo

Lenovo Z61t Setup guide

Dell Inspiron 5594 Setup and specifications

Dell

Dell Inspiron 5594 Setup and specifications

Lenovo IdeaPad Slim 7 Pro 16 user guide

Lenovo

Lenovo IdeaPad Slim 7 Pro 16 user guide

Dell XPS M1210 owner's manual

Dell

Dell XPS M1210 owner's manual

Toshiba Satellite Pro U400-S1001V user guide

Toshiba

Toshiba Satellite Pro U400-S1001V user guide

Dell Inspiron 15 5000 Series quick start guide

Dell

Dell Inspiron 15 5000 Series quick start guide

Clevo P370EM Concise user guide

Clevo

Clevo P370EM Concise user guide

Toshiba Tecra M9-ST5511 Specifications

Toshiba

Toshiba Tecra M9-ST5511 Specifications

Toshiba Satellite Pro M10 Series user manual

Toshiba

Toshiba Satellite Pro M10 Series user manual

EVGA X99 user guide

EVGA

EVGA X99 user guide

Fujitsu Lifebook P7120 user manual

Fujitsu

Fujitsu Lifebook P7120 user manual

Clevo M665JE user guide

Clevo

Clevo M665JE user guide

Sony Vaio PCG-C1VE Software manual

Sony

Sony Vaio PCG-C1VE Software manual

EUROCOM Notebook user manual

EUROCOM

EUROCOM Notebook user manual

manuals.online logo
manuals.online logoBrands
  • About & Mission
  • Contact us
  • Privacy Policy
  • Terms and Conditions

Copyright 2025 Manuals.Online. All Rights Reserved.