manuals.online logo
Brands
  1. Home
  2. •
  3. Brands
  4. •
  5. HP
  6. •
  7. Laptop
  8. •
  9. HP HP 340 G7 Assembly instructions

HP HP 340 G7 Assembly instructions

EL-MF877-00 Page 1
Template Revision C
Last revalidation date 09-May-2018
HPI instructions for this template are available at EL-MF877-01
Product End-of-Life Disassembly Instructions
Product Category: Notebooks and Tablet PCs
Marketing Name / Model
[List multiple models if applicable.]
HP 340 G7 Notebook PC
Purpose: The document is intended for use by end-of-life recyclers or treatment facilities. It provides the basic instructions for
the disassembly of HPI products to remove components and materials requiring selective treatment, as defined by EU directive
2012/19/EC, Waste Electrical and Electronic Equipment (WEEE).
NOTE: Recyclers should sort plastic materials into resin streams for recycling based on the ISO 11469 plastic marking code on
the plastic part. For any questions on plastic marking, please contact HP’s Sustainability Contact.
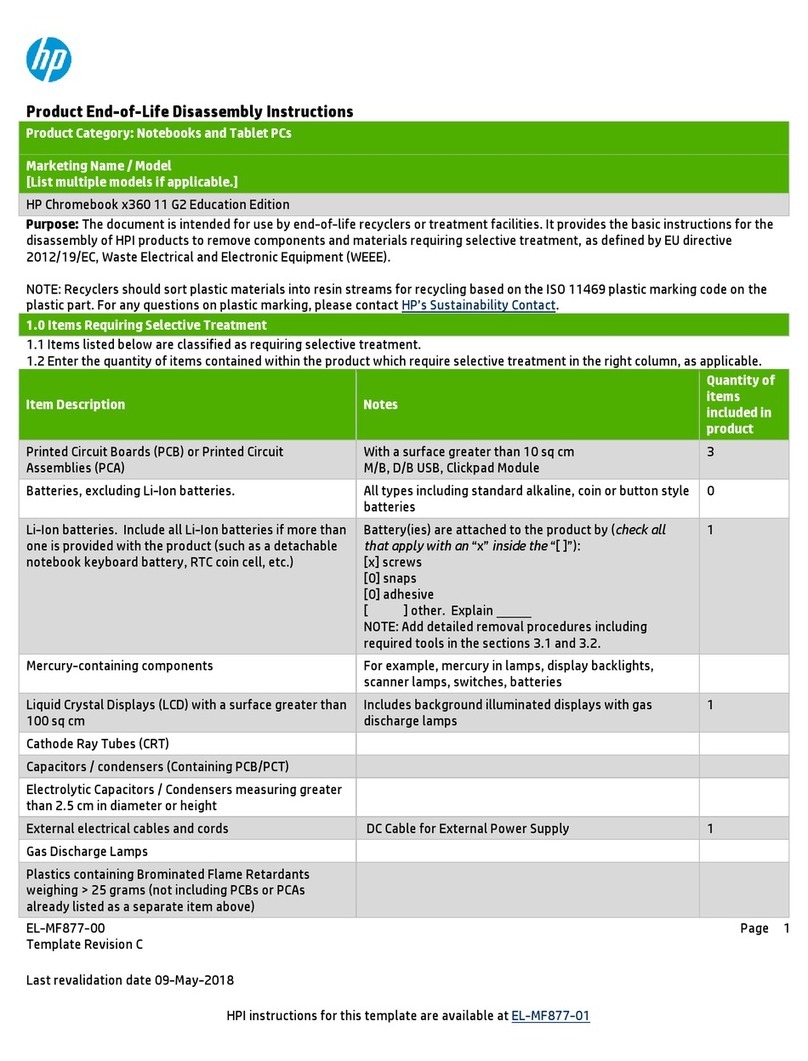
1.0 Items Requiring Selective Treatment
1.1 Items listed below are classified as requiring selective treatment.
1.2 Enter the quantity of items contained within the product which require selective treatment in the right column, as
applicable.
Item Description Notes
Quantity of
items
included in
product
Printed Circuit Boards (PCB) or Printed Circuit
Assemblies (PCA)
With a surface greater than 10 sq cm
4
Batteries, excluding Li-Ion batteries.
All types including standard alkaline, coin or button
style batteries
0
Li-Ion batteries. Include all Li-Ion batteries if more
than one is provided with the product (such as a
detachable notebook keyboard battery, RTC coin cell,
etc.)
Battery(ies) are attached to the product by (check all
that apply with an “x” inside the “[ ]”):
[X] screws
[] snaps
[] adhesive
[ ] other. Explain
NOTE: Add detailed removal procedures including
required tools in the sections 3.1 and 3.2.
1
Mercury-containing components
For example, mercury in lamps, display backlights,
scanner lamps, switches, batteries
0
Liquid Crystal Displays (LCD) with a surface greater
than 100 sq cm
Includes background illuminated displays with gas
discharge lamps
1
Cathode Ray Tubes (CRT)
0
Capacitors / condensers (Containing PCB/PCT)
0
Electrolytic Capacitors / Condensers measuring
greater than 2.5 cm in diameter or height
0
External electrical cables and cords
DC Cable for External Power Supply
1
Gas Discharge Lamps
0
Plastics containing Brominated Flame Retardants
weighing > 25 grams (not including PCBs or PCAs
0
EL-MF877-00 Page 2
Template Revision C
Last revalidation date 09-May-2018
HPI instructions for this template are available at EL-MF877-01
Item Description Notes
Quantity of
items
included in
product
already listed as a separate item above)
Components and parts containing toner and ink,
including liquids, semi-liquids (gel/paste) and toner
Include the cartridges, print heads, tubes, vent
chambers, and service stations.
0
Components and waste containing asbestos
0
Components, parts and materials containing
refractory ceramic fibers
0
Components, parts and materials containing
radioactive substances
0
2.0 Tools Required
List the type and size of the tools that would typically be used to disassemble the product to a point where components and
materials requiring selective treatment can be removed.
Tool Description
Tool Size (if
applicable)
Electric screwdriver (Cross)
Cross, #1
Screwdriver #2
Screwdriver #3
3.0 Product Disassembly Process
3.1 List the basic steps that should typically be followed to remove components and materials requiring selective treatment
including the required steps to remove the external enclosure:
1. Follow steps described in Disassembly instruction (file attached)
2. If parts can be removed without using a tool, remove it first
3. Use correct screwdriver and torque value before unlock the screw.
4.
5.
6.
7.
3.2 Optional Graphic. If the disassembly process is complex, insert a graphic illustration below to identify the items contained
in the product that require selective treatment (with descriptions and arrows identifying locations).
Tabulation:
Auditor:
MANUFACTURING PROCESS INSTRUCTIONS
MECHANICAL ASSEMBLY
3 1.00 11 1.00 19 1.00
4 1.00 12 1.00 20 1.00
5 1.00 13 1.00 21 1.00
6 1.00 14 1.00 22 1.00
7 1.00 15 1.00 23 1.00
81.00 16 1.00
Station
Ver.
ALL 1.**
B.Version Modify list:
Date
Content
Design
2019/9/18
First version SOP for dismantling
Yang.Mik
MODEL : Silverbell
Zhou.Hong Zhu.Ya
Operation Instruction
Document No. : Silverbell FA Dismantling SOP Work Station:
Operation Item : Ver. : Date
:
Jig list(Jig specification) QTY Jig list(Jig specification) QTY
Steps:
Attention︰If abnormal condition happens, please contact foreman or assistant immediately.
Department:
Tabulation:Zhu.Ya IE
1(1/1)
Dismantle BTCB Rubber 1.00 2019/9/18
1. Take down the rubber *2pcs
marked in red frame .
Electric screw driver 1
Color Rubber-front Rubber-Rear
Pick silver
6054B2050001
6054B2049901
Stone silver
6054B2162201
6054B2162101
Operation Instruction
Document No. : Silverbell FA Dismantling SOP Work Station:
Operation Item : Ver. : Date
:
Jig list(Jig specification) QTY Jig list(Jig specification) QTY
Steps:
Attention︰If abnormal condition happens, please contact foreman or assistant immediately.
Department:
Tabulation:Zhu.Ya IE
2(1/1)
Dismantle BTCB Screw 1.00
1. Take down screw M2.5x4 2pcs. Pay
attention to color of the NB.
Pick silver : Screw P/N:6052B0424501
Stone silver:Screw P/N:6052B0101901
❖Dismantling Sequence 1 2
2. Take down screw M2.5x6 (6052A0029201)*4
❖Screwdriver bits model: #1
❖Torsion:2.0 ±0.30 Kgf.cm
❖Dismantling Sequence 3 456
❖Recycle screw separately.
12
Electric screw driver 1
Color Screw
Pick silver
6052B0424501
Stone silver
6052B0101901
Outside Screw1&2
2019/9/18
Operation Instruction
Document No. : Silverbell FA Dismantling SOP Work Station:
Operation Item : Ver. : Date
:
Jig list(Jig specification) QTY Jig list(Jig specification) QTY
Steps:
Attention︰If abnormal condition happens, please contact foreman or assistant immediately.
Department:
Tabulation:Zhu.Ya IE
3(1/1)
Dismantle C/D cover 1.00
1. Open the notebook in angle of over
60°,put it upright on the desk..
Dismantle the parts which is on the
upper right of D cover. Dismantling
method is as shown in the picture.
4. Separate D cover from C cover with
a gap, then put a sucking disc on
the lower right of D cover.
5. Left hand holds TOP cover, and right
hand pulls the sucking disc to take
down the D cover as shown in the
picture.
6. At last, close the notebook and put it
flat, disassemble the side parts of D
cover from right to left in sequence,
and then take the whole D cover
with some strength.
7. During the dismantling, need protect
the surface of C/D cover and do not
make hard materials press on the
edge.
Sucking Disc 1
2019/9/18
Operation Instruction
Document No. : Silverbell FA Dismantling SOP Work Station:
Operation Item : Ver. : Date
:
Jig list(Jig specification) QTY Jig list(Jig specification) QTY
Steps:
Attention︰If abnormal condition happens, please contact foreman or assistant immediately.
Department:
Tabulation:Zhu.Ya IE
4(1/1)
Disassemble battery 1.00
2
54
3
1
1. Take down BATT screw
M2x3.5(6052A0051101))*4pcs
❖Screwdriver bits model #1
❖Torsion:1.5 ±0.30 Kg/cm
2. Take down the battery, and recycle it.
Electric screw driver 1
#1 Screwdriver bits 1
2019/9/18
Operation Instruction
Document No. : Silverbell FA Dismantling SOP Work Station:
Operation Item : Ver. : Date
:
Jig list(Jig specification) QTY Jig list(Jig specification) QTY
Steps:
Attention︰If abnormal condition happens, please contact foreman or assistant immediately.
Department:
Tabulation:Zhu.Ya IE
5(1/1)
Dismantle DDR 1.00
Upper card
slot
Lower card
slot
GOOD
1.Push aside the clips on both side of DDR
socket, and take out DDR for recycle.
2.Recycle hook(6051B1241101))
2019/9/18
Operation Instruction
Document No. : Silverbell FA Dismantling SOP Work Station:
Operation Item : Ver. : Date
:
Jig list(Jig specification) QTY Jig list(Jig specification) QTY
Steps:
Attention︰If abnormal condition happens, please contact foreman or assistant immediately.
Department:
Tabulation:Zhu.Ya IE
6(1/1)
Dismantle DDR 1.00
Upper card
slot
Lower card
slot
GOOD
1. Push the clips on both side
of DDR socket, and take out
DDR for recycle
2.Recycle
hook(6051B1241101))
2019/9/18
Operation Instruction
Document No. : Silverbell FA Dismantling SOP Work Station:
Operation Item : Ver. : Date
:
Jig list(Jig specification) QTY Jig list(Jig specification) QTY
Steps:
Attention︰If abnormal condition happens, please contact foreman or assistant immediately.
Department:
Tabulation:Zhu.Ya IE
7(1/1)
Dismantle HDD 1.00
1.Dismantle the HDD FFC on MB
2.Take HDD out from C cover.
2019/9/18
Operation Instruction
Document No. : Silverbell FA Dismantling SOP Work Station:
Operation Item : Ver. : Date
:
Jig list(Jig specification) QTY Jig list(Jig specification) QTY
Steps:
Attention︰If abnormal condition happens, please contact foreman or assistant immediately.
Department:
Tabulation:Zhu.Ya IE
8(1/1)
Dismantle SSD/EMMC 1.00
1.Dismantle SSD FFC for recycle(pic 1)
For EMMC(pic 2)
2.Disassemble screws M2x3.5(6052A0051101)
*3, and then recycle EMMC/B(1310A2760301)
❖Screwdriver bits model #1
❖Torsion:1.5 ±0.30 Kg/cm
❖Screws can not be loose.
For SSD (pic 3)
Disassemble the screws on SSD Card
M2x3.5(6052A0051101)*1 , recycle SSD Card
(P/N:6022B0260501)
Disassemble the screws on SSD Board
M2x3.5(6052A0051101)*2
Recycle SSD Board(1310A2745101)
❖Scresdriver bits model #1
❖Torsion:1.5 ±0.30 Kg/cm
❖Screws cannot be loose.
(Pic 2)
1
23
For EMMC
1For SSD
Pic 1
图三
Electric Screwdriver 1
2019/9/18
(Pic 3)
Operation Instruction
Document No. : Silverbell FA Dismantling SOP Work Station:
Operation Item : Ver. : Date
:
Jig list(Jig specification) QTY Jig list(Jig specification) QTY
Steps:
Attention︰If abnormal condition happens, please contact foreman or assistant immediately.
Department:
Tabulation:Zhu.Ya IE
9(1/1)
Disassemble HDD Protective Jacket & cable 1.00
Here printed “14NB”
1.Disassemble HDD patch cord
2.Disassemble HDD protective
jacket.
2019/9/18
Operation Instruction
Document No. : Silverbell FA Dismantling SOP Work Station:
Operation Item : Ver. : Date
:
Jig list(Jig specification) QTY Jig list(Jig specification) QTY
Steps:
Attention︰If abnormal condition happens, please contact foreman or assistant immediately.
Department:
Tabulation:Zhu.Ya IE
10(1/1)
Disassemble SSD BRKT/EMMC BRKT 1.00
1. Disassemble SSD BRKT
(P/N:6053B1557703)or EMMC
BRKT(6053B1557704)
Need distinguish EMMC BRKT from SSD BRKT.
SDD BRKT has one more BOSS pillar.
(pic 2)
For SSD
For EMMC
2019/9/18
(pic 1)
Operation Instruction
Document No. : Silverbell FA Dismantling SOP Work Station:
Operation Item : Ver. : Date
:
Jig list(Jig specification) QTY Jig list(Jig specification) QTY
Steps:
Attention︰If abnormal condition happens, please contact foreman or assistant immediately.
Department:
Tabulation:Zhu.Ya IE
11(1/1)
Disassemble antenna terminal 1.00
1.Disassemble antenna terminal*2
2.Disassemble screws on SSD、wlan
module. M2x3.5 (6052A0051101))*2
(pic 1/2)
❖Screwdriver bit model #1
❖Torsion:1.5±0.30 Kgf.cm
❖Screws cannot be loose or fall down
into notebook.
2.Recycle SD/WLAN card.
Electric screwdriver 1
2019/9/18
Operation Instruction
Document No. : Silverbell FA Dismantling SOP Work Station:
Operation Item : Ver. : Date
:
Jig list(Jig specification) QTY Jig list(Jig specification) QTY
Steps:
Attention︰If abnormal condition happens, please contact foreman or assistant immediately.
Department:
Tabulation:Zhu.Ya IE
12(1/1)
Dismantling USB/B FFC,Antenna 1.00
1. Dismantle USB/B FFC and turn orchid
out, remove the FFC
2. Dismantle Antenna cable.
2
1
2019/9/18
Operation Instruction
Document No. : Silverbell FA Dismantling SOP Work Station:
Operation Item : Ver. : Date
:
Jig list(Jig specification) QTY Jig list(Jig specification) QTY
Steps:
Attention︰If abnormal condition happens, please contact foreman or assistant immediately.
Department:
Tabulation:Zhu.Ya IE
14(1/1)
Dismantling Edp cable/FFC 1.00
圖一
圖二
1. Dismante Edp cable , turn orchid
out,remove the CNTR.
2. Dismante TH pad board FFC
2019/9/18
Operation Instruction
Document No. : Silverbell FA Dismantling SOP Work Station:
Operation Item : Ver. : Date
:
Jig list(Jig specification) QTY Jig list(Jig specification) QTY
Steps:
Attention︰If abnormal condition happens, please contact foreman or assistant immediately.
Department:
Tabulation:Zhu.Ya IE
15(1/1)
1.00
2
圖一
3
4
Remove hinge up Screw
1.Get Hinge UP.,remove fixed hinge
ScrewM2.5x6(6052A0029201)*4.5
2.Remove fixed Hinge to MBM2X3.5(
6052A0051101)
❖Torque:3.0 ±0.3 Kgf.cm
❖The screw must not slip its teeth and
into the machine.
❖Disassembly sequence:1 2 3
45
1
2
5
Electric screwdriver 1
2019/9/18
Operation Instruction
Document No. : Silverbell FA Dismantling SOP Work Station:
Operation Item : Ver. : Date
:
Jig list(Jig specification) QTY Jig list(Jig specification) QTY
Steps:
Attention︰If abnormal condition happens, please contact foreman or assistant immediately.
Department:
Tabulation:Zhu.Ya IE
16(1/1)
1.00
Remove Hinge UP
1.Turn the machine table open at a certain
angle and close again, make Hinge
separate from top.
2.Remove the TOP.
2019/9/18
Operation Instruction
Document No. : Silverbell FA Dismantling SOP Work Station:
Operation Item : Ver. : Date
:
Jig list(Jig specification) QTY Jig list(Jig specification) QTY
Steps:
Attention︰If abnormal condition happens, please contact foreman or assistant immediately.
Department:
Tabulation:Zhu.Ya IE
17(1/1)
1.00
Remove KB FPC/DC-IN Cable
1.Open the lid of the pot, take KBFPC with
backlight SKU
2.Get DC-IN cable.to the right and tilt
upward. don’t force straight up and down.
hook
2019/9/18
Operation Instruction
Document No. : Silverbell FA Dismantling SOP Work Station:
Operation Item : Ver. : Date
:
Jig list(Jig specification) QTY Jig list(Jig specification) QTY
Steps:
Attention︰If abnormal condition happens, please contact foreman or assistant immediately.
Department:
Tabulation:Zhu.Ya IE
18(1/1)
1.00
Remove DC-IN CNTR&Fan CNTR
1 Get DC-IN CNTR,remove DC-IN cable
2.Remove Fan CNTR.
2019/9/18

Other manuals for HP 340 G7

1

Other HP Laptop manuals

HP Notebook Assembly instructions

HP

HP Notebook Assembly instructions

HP EliteBook 2540P Manual

HP

HP EliteBook 2540P Manual

HP Pavilion DV7-2270 User manual

HP

HP Pavilion DV7-2270 User manual

HP Chromebook Pro c640 G2 Manual

HP

HP Chromebook Pro c640 G2 Manual

HP EliteBook 820 G3 User instructions

HP

HP EliteBook 820 G3 User instructions

HP Pavilion DM1-4050 User manual

HP

HP Pavilion DM1-4050 User manual

HP Compaq nc8000 Manual

HP

HP Compaq nc8000 Manual

HP EliteBook 820 G1 User manual

HP

HP EliteBook 820 G1 User manual

HP PAVILION TX2500 Manual

HP

HP PAVILION TX2500 Manual

HP Compaq NC4000 User manual

HP

HP Compaq NC4000 User manual

HP 2230s - Compaq Business Notebook Manual

HP

HP 2230s - Compaq Business Notebook Manual

HP EliteBook 2760p User manual

HP

HP EliteBook 2760p User manual

HP Pavilion dv4-4000 Manual

HP

HP Pavilion dv4-4000 Manual

HP Pavilion 15 Manual

HP

HP Pavilion 15 Manual

HP Pavilion dv2000 - Entertainment Notebook PC User manual

HP

HP Pavilion dv2000 - Entertainment Notebook PC User manual

HP Pavilion dv7-6b00 Manual

HP

HP Pavilion dv7-6b00 Manual

HP Compaq tc4200 User manual

HP

HP Compaq tc4200 User manual

HP ProBook 450 G2 User manual

HP

HP ProBook 450 G2 User manual

HP OmniBook 6000 User manual

HP

HP OmniBook 6000 User manual

HP OMNIBOOK 5700 Assembly instructions

HP

HP OMNIBOOK 5700 Assembly instructions

HP 6930p - EliteBook - Core 2 Duo 2.8 GHz Manual

HP

HP 6930p - EliteBook - Core 2 Duo 2.8 GHz Manual

HP Pavilion dm1-4200 Manual

HP

HP Pavilion dm1-4200 Manual

HP EliteBook 820 G2 Manual

HP

HP EliteBook 820 G2 Manual

HP OmniBook 800CCT User manual

HP

HP OmniBook 800CCT User manual

Popular Laptop manuals by other brands

Dell P138G Service manual

Dell

Dell P138G Service manual

Sony PCG-R505ESK VAIO   (primary manual) user guide

Sony

Sony PCG-R505ESK VAIO (primary manual) user guide

Samsung RIMINI NP-Q40 user manual

Samsung

Samsung RIMINI NP-Q40 user manual

Acer PT315-53 user manual

Acer

Acer PT315-53 user manual

Lenovo IdeaPad 5 14' 05 Setup guide

Lenovo

Lenovo IdeaPad 5 14' 05 Setup guide

Sony SVE11135CXW Specification sheet

Sony

Sony SVE11135CXW Specification sheet

MAXDATA VISION 350M user manual

MAXDATA

MAXDATA VISION 350M user manual

Sony Vaio PCG-GR114EK Software manual

Sony

Sony Vaio PCG-GR114EK Software manual

Lenovo V14 Gen 3 Hardware Maintenance Manual

Lenovo

Lenovo V14 Gen 3 Hardware Maintenance Manual

Toshiba SATELLITE M30-35 Series Maintenance manual

Toshiba

Toshiba SATELLITE M30-35 Series Maintenance manual

Alienware Aurora mALX user guide

Alienware

Alienware Aurora mALX user guide

NEC VERSA N1100 Series user guide

NEC

NEC VERSA N1100 Series user guide

Compal HEL81 user manual

Compal

Compal HEL81 user manual

Toshiba U205-S5022 Specifications

Toshiba

Toshiba U205-S5022 Specifications

Fujitsu FPCM21341 Specifications

Fujitsu

Fujitsu FPCM21341 Specifications

Dell Precision 7550 Service manual

Dell

Dell Precision 7550 Service manual

Sony VAIO VPCP114KX/P Specification sheet

Sony

Sony VAIO VPCP114KX/P Specification sheet

Dell Vostro 3500 Setup and specifications guide

Dell

Dell Vostro 3500 Setup and specifications guide

manuals.online logo
manuals.online logoBrands
  • About & Mission
  • Contact us
  • Privacy Policy
  • Terms and Conditions

Copyright 2025 Manuals.Online. All Rights Reserved.