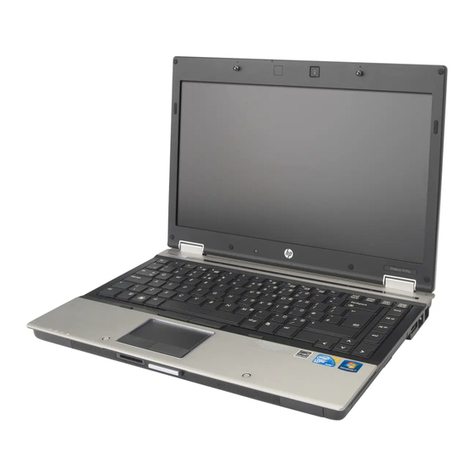
HP Pavilion N3110 Manual

1
Tips for Using the HP Pavilion Notebook PC
Configuring and Testing Your HP Pavilion Notebook PC
•Configuring the Pavilion Notebook with the BIOS Setup Utility
•Updating the Pavilion Notebook BIOS
•Testing the Pavilion Notebook with HP Diag Tools
•Using Enhanced Video and Dual Monitors
•Expanding the Hibernate Partition When Adding RAM
•Recovering Software
Modem Information
•Modem Specifications
•Selecting Modem Modes
Troubleshooting
•Audio Problems
•CD-ROM Drive Problems
•Display Problems
•Hard Disk Drive Problems
•Heat Problems
•Keyboard, Touch Pad, and Mouse Problems
•Infrared Problems
•Memory Problems
•Modem Problems
•PC Card (PCMCIA) Problems
•Performance Problems
•Port Replicator Problems
•Power and Battery Problems
•Printing Problems
•Serial, Parallel, and USB Problems
•Startup Problems
•Suspending and Resuming Problems
Specifications
•HP Pavilion Notebook PC Hardware Specifications
•Software System Resources

2
Configuring the Pavilion Notebook with the BIOS
Setup Utility
The BIOS (Basic Input and Output System) Setup utility is a menu-driven utility that enables you
to make changes to the system configuration and tailor the operation of your notebook to your
individual work needs.
The settings made in the BIOS Setup utility control the hardware and therefore have a
fundamental effect on how the Pavilion Notebook operates.
This page describes the BIOS Setup utility menus and options in detail.
To run the BIOS Setup utility
1. Close all applications, then shut down Windows and restart the computer.
2. When you see the HP logo, press F2 to enter the BIOS Setup utility.
3. The pointing devices are not active in the BIOS Setup utility. Press the RIGHT and LEFT
arrow keys to move among menus. Press the DOWN and UP arrow keys to move among
options in a menu. Press F5 or F6 to move through values for the current option or press
ENTER to display a list of choices. See the tables below for more information.
4. After you select the options you want, press F10 or use the Exit menu to exit the BIOS Setup
utility.
If the settings cause a conflict between devices during reboot, the system prompts you to run
BIOS Setup, and the conflicting settings are marked.
Main Menu Default
BIOS Revision Shows the current BIOS version. Detected
automatically.
System Time Sets the time using 24-hour format. Values set
take effect immediately.
System Date Sets the date using mm/dd/yyyy format.
Diskette A Sets the floppy drive type. Floppy disk drive
type detected and
set automatically.
Primary Master Sets the hard disk drive type and various
parameters. Hard disk drive
detected and set
automatically.
Secondary Master Sets the CD-ROM drive type and various
parameters. CD-ROM drive
detected and set
automatically.
Display Device Switches between the built-in display (LCD), an
external display (CRT) if attached, and both. LCD/CRT
PS/2 Mouse Enables or disables the pointing devices. Enabled
ZV Port Sets whether zoomed video function is enabled,
to connect from a PC card to a VGA controller. Enabled

3
Quiet Boot When enabled, hides summary of
power-on self-test and messages during boot. Enabled
System Memory Shows the system memory size. 640KB
Extended Memory Shows the extended memory size. Detected
automatically.
Advanced Menu Default
Serial port Sets how the serial port is configured by the
BIOS (specified or automatic). Enabled
Base I/O address Sets the I/O address and interrupt. 3F8 IRQ4
IrDA port Sets how the infrared port is configured by the
BIOS (specified or automatic). Disabled
Mode When IrDA port is enabled, sets the hardware to
support SIR (Standard IR) or FIR (Fast IR) infrared
communications. (Driver installation is required.)
SIR
Base I/O address When IrDA port is enabled, sets the I/O address
and interrupt. 2F8 IRQ3
DMA channel When Fast IR mode is enabled, sets the DMA
channel. DMA 3
Parallel Port Sets how the parallel port is configured by the
BIOS (specified or automatic). Enabled
Mode Sets the port to output only, bi-directional, ECP
mode, or EPP mode. Bi-directional
Base I/O address Sets the I/O address. 378 IRQ7
DMA channel When ECP mode is enabled, sets the DMA
channel. DMA 0
Local Bus IDE Adapter Enables the primary (hard drive) and secondary
(CD-ROM drive) controllers. Both
Floppy disk controller Enables the floppy disk drive. Enabled
Security Menu Default
User Password Is Shows if a user password is set. Clear
Supervisor Password Is Shows if a supervisor password is set. Clear
Set User Password Press ENTER to set, change, or clear user
password. Password length can be no longer
than 8 characters, 0-9, A-Z.
Set Supervisor
Password Press ENTER to set, change, or clear supervisor
password. This password protects BIOS Setup
settings.
Password on boot Sets whether a user password is required when
the computer boots. Enabled
Power (APM)
Menu* Default
PM Control Disables power management, or enables it Battery Powered

4
either always or when on battery power only. Only
or
Only
When Battery
Exists
Power Savings Sets the combination of power management
features for your usage. (Choose Customize if
you want to set any of the Timeout options.)
Maximum Battery
Life
Standby Timeout Sets the period of inactivity after which the
computer goes from On to Standby power mode. 2 minutes
Suspend Timeout Sets the period of inactivity after which the
computer goes from Standby to Suspend power
mode.
2 minutes
Hibernate Timeout Sets whether the computer goes from Suspend
to Hibernate power mode after the indicated
period of inactivity.
2 hours
Hard Disk Timeout Sets the period of inactivity after which the hard
disk stops spinning. 1 minute
Video Timeout Sets the period of hard disk inactivity after which
the screen is turned off. Off
Power Button Mode Sets the action (Suspend or Off) of the blue
power button when pressed for less than 4
seconds.
Suspend
Resume on Modem Ring Sets whether the system resumes from Suspend
if a ring signal is received. Off
Resume on Time Sets whether the system resumes from Suspend
at a defined time of day. Off
Resume Time Sets the 24-hour time when the system resumes
from Suspend if enabled.
Cooling Control Sets mode for reduction of CPU temperature to
Silence (less cooling) or Performance (more
cooling).
Performance
Boot Menu Default
Removable Devices
Hard Drive
ATAPI CD-ROM Drive
Shows the order of boot devices. Move the
entries to change the order. Removable Devices
include the floppy disk drive.
1. Removable
Devices
2. Hard Drive
3. ATAPI
CD-ROM Drive
Exit Menu
Exit Saving Changes Saves Setup changes to CMOS, exits, and
reboots.
Exit Discarding Changes Discards Setup changes since last save, exits,
and reboots. Does not affect security, date, or
time changes.
Load Setup Defaults Restores default settings, stays in Setup. Does
not affect security, date, or time changes.
Discard Changes Discards Setup changes since last save, stays in
Setup. Does not affect security, date, or time

5
changes.
Save Changes Saves Setup changes to CMOS and stays in
Setup. Security settings are saved when
changed.

6
Updating the Pavilion Notebook BIOS
Hewlett-Packard may provide updates to the BIOS to enhance the capabilities of the Pavilion
Notebook. Updates will be available from HP Customer Care. Visit the support area of the HP
notebook PC Web site at http://www.hp.com/notebook. Download the BIOS update and follow
the instructions in the README.TXT file on how to create the BIOS update floppy disk.
CAUTION: Because a BIOS update replaces the previous version, it is
important you follow these instructions exactly. Otherwise, the Pavilion
Notebook may be damaged. The BIOS update process resets the
configuration settings in the BIOS Setup utility, and it erases any BIOS
passwords.
To update the BIOS
1. Remove any PC Cards.
2. If the notebook is docked, undock it.
3. Connect the AC adapter to the notebook.
4. Insert the BIOS update disk in the floppy disk drive.
5. Restart the computer.
6. Follow the onscreen instructions. This starts a process that takes approximately 1 minute.
Once the update process begins, do not interrupt it.
7. When the process is completed, reboot the computer by pressing the system-off button on the
bottom of the notebook.

7
Testing the Pavilion Notebook with HP Diag Tools
The HP Diag Tools provide two levels of system hardware testing:
•Automated testing using the basic hardware test.
•Advanced testing using the individual hardware tests.
The tests are designed to run after the system reboots. This ensures that the computer will be in a
predictable state, so the diagnostic program can properly test the hardware components. The tests
are non-destructive and are designed to preserve the state of the computer. The notebook reboots
when you exit the program so drivers can be loaded.
To create a diagnostic floppy disk
NOTE: You do not need to run the diagnostics from a floppy disk; however, it’s
a good idea to create a diagnostic disk in case something happens to
your hard drive.
To create a diagnostic floppy disk, download the diagnostic software package from the HP
notebook PC Web site (http://www.hp.com/notebook). First run the downloaded file to unpack
the files, then run diaginst to create the diagnostic disk. Note that you can create this diagnostic
disk on any computer with Internet access.
To run the diagnostic test
1. Insert the diagnostic disk in the floppy drive and restart the computer.
or
Restart the computer; when you see the HP logo, press F10 to start the diagnostics utility.
2. When you see the initial diagnostics screen, press F2 twice to continue.
In case the initial diagnostics screen does not appear:
•If you ran the diagnostics from a floppy disk, run scandisk on the floppy disk. If you
discover errors on the disk, create a new diagnostic disk, using a different floppy disk,
before running the test again.
•If you ran the diagnostics from the hard disk, create a diagnostics floppy disk (according
to the procedure above) and then follow step 1 above.
3. When the hardware detection finishes, check the list of detected hardware.
If a device is not detected or fails its test below, it may be configured incorrectly in the BIOS
Setup utility. You can confirm the problem by running BIOS Setup and checking the settings.
4. Run the basic test. Press F2 twice to start the basic hardware test.
5. Wait until the test has finished.
6. If you intend to exit without running advanced tests, press F4 twice to save system and test
information in the Support Ticket log file, HPSUPPT.TXT. Then remove the diagnostic disk
(if you used one) and press F3 twice to exit.
7. Optional: Run the advanced tests. Press F2 twice to open the advanced test screen.

8
8. Select and run the appropriate tests. Tests are not listed if no such hardware is detected. Press
the following keys to run tests:
ENTER Runs the highlighted test.
F5 or SPACE Marks or unmarks the highlighted test.
F6 Marks or unmarks all tests in the current menu.
F7 Marks or unmarks all tests in all menus.
F10 Runs all marked tests.
9. When you have finished running tests, press ESC to exit the advanced tests.
10. Optional: Save system and test information. Press F4 to create the Support Ticket log file,
HPSUPPT.TXT.
NOTE: If you ran the diagnostics from a floppy disk, the log file is stored on the
diskette. If you ran the diagnostics from the hard disk (by pressing F10),
the log file is stored on a hidden partition on the hard disk.
11. To exit, remove the diagnostic disk (if you used one), and press F3 twice to exit and reboot.
12. Optional: Check the Support Ticket log. The Support Ticket log file contains a list of all
test results and errors. If you ran the diagnostics from a floppy disk, you can open the
HPSUPPT.TXT file with a text editor, such as Notepad. To open a log file that was stored on
your hard disk, go to the C:\DMI\HPDIAGS directory and double-click HPSUPPT.EXE; this
displays the log file in Notepad.

9
Using Enhanced Video and Dual Monitors
Standard video drivers are installed on your Pavilion Notebook for various settings of screen area
and colors, as well as for screen zoom capabilities. If you wish to use additional video features
such as Stretch and Rotate, you can install a supplemental video driver.
To install the supplemental video driver
1. In Windows Explorer, open the folder c:\notebook\drivers\video\control.
2. Double-click the Setup.exe file, and follow the onscreen instructions.
3. Click Start, Settings, Control Panel.
4. Double-click Display.
5. Select the Settings tab, choose either High Color (16 bit) or True Color (24 bit), and click
OK.
Do not select 256 colors, since the background is sometimes distorted.
To use the video control panel
After you have installed the supplemental video driver, a video control panel is available.
1. Click Start, Settings, Control Panel.
2. Double-click Display.
3. Select the LynxE tab and use the controls available there for additional features, such as
Stretch and Rotation, turning LCD (built-in display) and CRT (external monitor) on and off,
and enabling video hot keys.
To use two monitors in dual mode
You can use two monitors with your Pavilion Notebook, either in dual mode, effectively
expanding your screen real estate, or in simultaneous mode, displaying the same screen twice.
The LCD monitor that is part of the Pavilion Notebook is the primary display (Monitor 1), and a
second CRT monitor attached to the rear video port is the secondary display (Monitor 2). You can
also switch from one monitor to the other (using only one at a time) by pressing Fn+F12.
To enable the dual monitor display:
1. Click Start, Settings, Control Panel.
2. Double-click Display.
3. Select the Settings tab.
4. Position the second monitor to the right or left of your notebook display to match your
monitor location.
5. Select each monitor and set the colors and screen area to the desired values. The following
settings support dual display mode:
•Set a 12.1-inch display to 256 colors or High Color (16 Bit) with an 800×600 screen area.
•Set a 13.3-inch display to 256 colors with a 1024×768 screen area.

10
6. Make sure that the Settings box “Extend my Windows desktop onto this monitor” is checked.
Here are some other limitations to be aware of as you choose your monitor settings:
•The sum of the video memory used by both monitors must be less than the total video
memory size. Your HP Pavilion Notebook PC comes with 2 MB memory installed.
•Monitor 1 has to be in the same resolution as the panel size. For example, if the panel is
800×600, the resolution selected for the Monitor1 must be exactly 800×600 in order to enable
dual display mode.
•Monitor 1 can be set to 256 colors or High Color (16 Bit), not True Color (24 bit), since
Virtual Refresh can be supported only in 256 color and High Color (16 Bit) modes. Monitor 2
can be set to 256 colors or High Color (16 Bit) only.
•Monitor 1 and Monitor 2 cannot both be in 256 color mode.
•Settings cannot be changed on Monitor 2 if DirectDraw is enabled—for example, if video is
playing—since the display driver cannot reallocate the display memory for dual display
support.
•Under dual display mode, only the software cursor can be used. There is no hardware cursor
available under Virtual Refresh mode.
•Dual display mode is not available if you are currently in a special mode from the LynxE
video control panel settings, such as Rotation or Stretch.
•Games that use the DirectDraw API cannot run in dual display mode. You will be prompted
to disable Monitor 2 before running the game.

11
Expanding the Hibernate Partition When Adding
RAM
The HP Pavilion Notebook PC comes with either 32 or 64 megabytes (MB) of random access
memory (RAM) installed, and the size of the Hibernate partition is set appropriately. However, if
you add RAM so that your total RAM is greater than 256 MB, you must change the size of the
Hibernate partition. This partition is automatically used to save your current session from RAM
when battery level is low. As a result, you must provide a sufficiently large Hibernate partition to
accommodate all the information stored in RAM; otherwise, you risk losing work in progress.
You can create the Hibernate partition by booting from the Recovery CD. The partitioning and
recovery process takes approximately 20 minutes—do not interrupt the process or unplug the AC
adapter until the process is completed.
CAUTION: This procedure will format the hard disk drive and erase all data
on the disk. Be sure to back up all data from your hard disk before you
begin this procedure. After the hard disk drive is formatted, you’ll need to
reinstall any applications.
To expand the hibernate partition
1. Back up all data from your hard disk.
2. If you wish to install additional RAM, do so now.
3. Connect the AC adapter to the notebook.
4. Insert the Recovery CD in the CD-ROM drive. (If your system came with two Recovery CDs,
insert Disc 1.)
5. Restart the computer, and when you see the HP logo, press ESC twice.
6. Select the CD-ROM drive as the boot device, and press ENTER.
7. Choose Continue.
8. Choose Advanced.
9. Select a size from the Hibernate Partition Size drop-down list.
10. If you want to create a hibernate partition without recovering the operating system, select the
“Do not load operating system” checkbox and select one of the partition options.
11. Choose Continue.
12. Click OK to begin.
NOTE: If your system came with two Recovery CDs, you may be prompted to
insert the other Recovery CD during the partitioning process.
13. When you are prompted to reboot your computer, remove the Recovery CD and press
Ctrl+Alt+Delete.
14. Follow the onscreen instructions for setting up Windows.
15. When Windows setup is complete, reinstall any applications and restore backed up data.

12
Recovering Software
If you’ve deleted or lost files on the HP Pavilion Notebook PC, causing the system to work
improperly, you may need to recover the original Windows 98 operating system.
You can use the Recovery CD(s) to
•Recover the software that was factory-installed on your HP Pavilion Notebook PC.
•Expand the Hibernate partition

13
Recovering Software
The Recovery CDs provide the Pavilion-specific device drivers to configure your custom system.
The drivers are located on the CD in Notebook\Drivers\W98. The README file in
Notebook\Drivers\W98 contains complete installation instructions. The drivers are also located in
these places:
•On the Pavilion Notebook hard drive under C:\Notebook\Drivers.
•On the HP notebook PC Web site at http://www.hp.com/notebook. This Web site contains the
latest updates of software drivers.
Detailed instructions are located in the README files.
To recover the factory-installed software
The following procedure describes how to recover the original Windows 98 operating system and
pre-installed software that came with your HP Pavilion Notebook PC. The entire recovery process
takes approximately 20 minutes—do not interrupt the process or unplug the AC adapter until the
process is completed.
CAUTION: This procedure will format the hard disk drive and erase all data
on the disk. Be sure to back up all data from your hard disk before you
begin this procedure. After the hard disk drive is formatted, you’ll need to
reinstall any applications.
1. Back up all data from your hard disk.
2. Connect the AC adapter to the notebook.
3. Insert the Recovery CD in the CD-ROM drive. (If your system came with two Recovery CDs,
insert Disc 1.)
4. Reboot and, when you see the HP logo, press ESC twice.
5. Select the CD-ROM drive as the boot device, and press ENTER.
6. Choose Continue.
7. Choose Recover Operating System.
8. Click OK to begin.
NOTE: If your system came with two Recovery CDs, you may be prompted to
insert the other Recovery CD during the recovery process.
9. When you are prompted to reboot your computer, remove the Recovery CD and press
Ctrl+Alt+Delete.
10. Follow the onscreen instructions for setting up Windows.
11. When Windows setup is complete, reinstall any applications and restore backed up data.
You can find more details about recovering the factory installation of Windows on the Recovery
CD; the file README.TXT is in the CD’s root directory.

14
Modem Specifications
The internal modem that comes with your HP Pavilion Notebook PC supports the following
international and de facto standards:
Modulation: v.21, v.22, v.22bis, v.23, v.32, v.32bis, v.34, v.90, X2, Bell 103
Compression: v.42, v.42bis, MNP5
Fax: v.17, v.27ter, v.29
For standards that are not listed, please contact your service provider for information about
alternative methods of accessing or using its service.

15
Selecting Modem Modes
If you have trouble connecting to certain modems, you can try forcing the internal modem to
certain modulations and connect rates. To select a modulation, use the +MS command. In
addition to selecting the modulation, this command allows you to enable or disable automode and
specify the lowest and highest connection rate. The format of the command is as follows:
+MS= <mode>,<automode>,<min_rate>,<max_rate>
The +MS command should be used as part of the modem initialization sequence in your
communications program.
The following table indicates the mode value to use for each supported modulation as well as the
possible rates that can be used for each modulation.
<mode> Modulation Possible Rate (bps)
0 v.21 300
1 v.22 1200
2 v.22bis 2400, 1200
3 v.23 1200, 300
9 v.32 9600, 4800
10 v.32bis 14400, 12000, 9600, 7200,
4800
11 v.34 33600, 31200, 28800, 26400,
24000, 21600, 19200, 16800,
14400, 12000, 9600, 7200,
4800, 2400
17 X2, v.90 57,333–33,333
64 Bell 103 300
For example, to force the internal modem to connect with the V.34 modulation:
1. Click Start, Settings, Control Panel.
2. Double-click Modems.
3. Click Properties.
4. Click the Connection tab.
5. Click Advanced.
6. In the “Extra settings” field, type AT+MS=11 and click OK.
Most Windows modem applications use the modulation command in the “Extra settings” field as
part of the modem initialization.
The following table lists the other +MS parameters along with the acceptable values for each
parameter.

16
Parameter Acceptable Values
<automode> 0 (Automode Disabled)
1 (Automode Enabled)
<min_rate> 300 to 33600
<max_rate> 300 to 33600
To force a maximum rate, set the minimum rate to the same value as the maximum value.

17
Audio Problems
If sound is not audible
•Press Fn+Up Arrow several times.
•Click the speaker icon on the taskbar to ensure that Mute is not checked.
•When you are operating your Pavilion Notebook in MS-DOS mode (for example, when
running MS-DOS games), you may find that the sound does not operate properly. Use
Windows applications for full use of sound capabilities.
If sound does not record
•Check software controls for recording sound: Start, Programs, Accessories, Multimedia (or
Entertainment), Sound Recorder.
You may also want to test the audio with diagnostics. See Testing the Pavilion Notebook with
Diag Tools.

18
CD-ROM Drive Problems
If you can’t boot from a CD in the CD-ROM drive
•Make sure the CD is a bootable CD, such as the HP Pavilion Notebook PC Recovery CD.
•Press ESC twice during bootup to see if the CD-ROM drive is the first boot device.
•If you always want to boot from a CD when one is present, change the boot order in BIOS
Setup.
1. From the Start menu, shut down, then restart the computer.
2. When you see the HP logo, press F2 to enter the BIOS Setup utility.
3. Open the Boot menu. The default boot order is
•Removable devices
•Hard drive
•ATAPI CD-ROM drive
4. Use the arrow keys to select the ATAPI CD-ROM drive.
5. Press F6 to move up (or F5 to move down) in the list.
6. Press F10 to Save and Exit the BIOS Setup utility.
•Reboot the computer.
You may also want to test the CD-ROM drive with diagnostics. See Testing the Pavilion
Notebook with Diag Tools.

19
Display Problems
If the notebook is on, but the screen is blank
•Try pressing Fn+F1 to increase the contrast or Fn+F2 to decrease the contrast. (On TFT
displays, contrast control is not necessary and therefore is not available.)
•Press Fn+F12 in case the internal display was disabled. (Do this three times to return to the
state you started from.)
•If the notebook is cold, allow it to warm up.
If the screen is difficult to read
•Check whether the display resolution is set to its default setting—800 × 600 for 12.1" display
or 1024 × 768 for larger displays. Check this in Start, Settings, Control Panel, Display,
Settings.
•Try pressing Fn+F1 to increase contrast.
If part of the Windows desktop is not visible and you have to scroll down to see the taskbar
•Your display resolution may be set to 1024 x 768 on a 12.1" display, instead of 800 x 600.
You need to set the monitor type to Laptop Display Panel (800 x 600).
1. Click Start, Settings, Control Panel.
2. Double-click Display.
3. Click the Settings tab.
4. Click Advanced.
5. Click the Monitor tab.
6. Click Change.
7. Click Next.
8. Choose “Display a list of all drivers…” and click Next.
9. For the model, select Laptop Display Panel (800 x 600) and click Next.
10. Click Next and then Finish.
11. Click Close.
12. Reduce the resolution to 800 x 600 pixels and click OK.
If an external display does not work
•Check the connections.
•Press Fn+F12 in case the external monitor was disabled. (Do this three times to return to the
state you started from.)
•The external monitor may not be detected. In the BIOS Setup utility, try setting Video
Display Device to LCD/CRT in the Main menu. See Configuring the Pavilion Notebook with
the BIOS Setup Utility.
You may also want to test the display with diagnostics. See Testing the Pavilion Notebook with
Diag Tools.

20
Hard Disk Drive Problems
If the notebook’s hard drive doesn’t spin
•Make sure the notebook has power. If necessary, connect the AC adapter, making sure it is
plugged into a power source and into the rear of the Pavilion notebook.
If the hard disk makes a buzzing or whining noise
•Back up the drive immediately.
•Check for alternate noise sources, such as the fan or a PC Card drive.
If files are corrupted
•Run the VirusScan program.
•Run the ScanDisk surface scan to check the platter. From the Start menu, click Programs,
Accessories, System Tools, ScanDisk.
You may also want to test the hard disk drive with diagnostics. See Testing the Pavilion
Notebook with Diag Tools.
This manual suits for next models
3
Table of contents
Other HP Laptop manuals

HP
HP Pavilion ze1200 Series User manual

HP
HP Compaq Presario CQ71 Manual

HP
HP ProBook 455 User manual

HP
HP Compaq NX9005 User manual

HP
HP G7096EA User manual

HP
HP OmniBook 5000 User manual

HP
HP Modem and Local Area Network User manual

HP
HP OMNIBOOK 3000 Instruction Manual

HP
HP Pavilion m4-1000 User manual

HP
HP TouchSmart IQ810 Assembly instructions

HP
HP HP COMPAQ BUSINESS NOTEBOOK PC X1000 Manual

HP
HP EliteBook 2570p Manual

HP
HP OmniBook 300 User manual

HP
HP Pavilion dv3000 - Entertainment Notebook PC User manual

HP
HP Compaq nc8430 User manual

HP
HP ENVY 14-j000 Manual

HP
HP ENVY dv7-7200 User manual

HP
HP 17-x Series Manual

HP
HP LV967UT Manual

HP
HP ProBook 470 G4 Manual