manuals.online logo
Brands
  1. Home
  2. •
  3. Brands
  4. •
  5. HP
  6. •
  7. Monitor
  8. •
  9. HP Z27i Installation instructions

HP Z27i Installation instructions

EL-MF877-00
Template Revision B
Page1
PSG instructions for this template are available at EL-MF877-01
Product End-of-Life Disassembly Instructions
Product Category: Monitors
Marketing Name / Model
[List multiple models if applicable.]
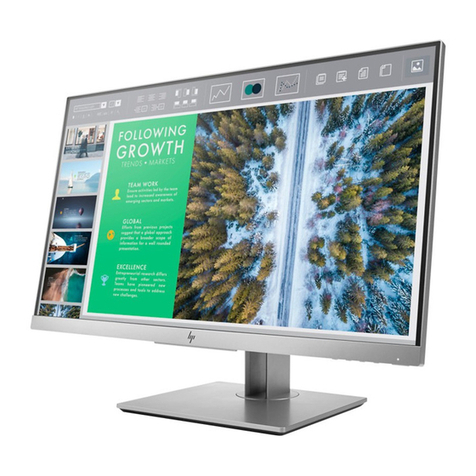
HP Z27i 27-inch IPS Display
Purpose: The document is intended for use by end-of-life recyclers or treatment facilities. It provides the basic instructions
for the disassembly of HP products to remove components and materials requiring selective treatment, as defined by EU
directive 2002/96/EC, Waste Electrical and Electronic Equipment (WEEE).
1.0 Items Requiring Selective Treatment
1.1 Items listed below are classified as requiring selective treatment.
1.2 Enter the quantity of items contained within the product which require selective treatment in the right column, as
applicable.
Item Description
Notes
Quantity
of items
included
in product
Printed Circuit Boards (PCB) or Printed Circuit
Assemblies (PCA)
With a surface greater than 10 sq cm
Interface board, power board, control board, USB
board
4
Batteries All types including standard alkaline and lithium coin
or button style batteries 0
Mercury-containing components
For example, mercury in lamps, display backlights,
scanner lamps, switches, batteries
0
Liquid Crystal Displays (LCD) with a surface greater
than 100 sq cm Includes background illuminated displays with gas
discharge lamps 1
Cathode Ray Tubes (CRT)
0
Capacitors / condensers (Containing PCB/PCT)
0
Electrolytic Capacitors / Condensers measuring
greater than 2.5 cm in diameter or height
power board
1
External electrical cables and cords DVI cable*1, Power cord*1, USB cable*1, DP
cable*1
All are inside monitor carton box
4
Gas Discharge Lamps
0
Plastics containing Brominated Flame Retardants
weighing > 25 grams (not including PCBs or PCAs
already listed as a separate item above)
0
Components and parts containing toner and ink, Include the cartridges, print heads, tubes, vent 0
EL-MF877-00
Template Revision B
Page2
PSG instructions for this template are available at EL-MF877-01
including liquids, semi-liquids (gel/paste) and toner
chambers, and service stations.
Components and waste containing asbestos
0
Components, parts and materials containing
refractory ceramic fibers
Components, parts and materials containing
radioactive substances
2.0 Tools Required
List the type and size of the tools that would typically be used to disassemble the product to a point where components
and materials requiring selective treatment can be removed.
Tool Description
Tool Size (if
applicable)
Screw driver
Hexagonal inserted handle box wrench
Diagonal cutting nippers
Description #4
Description #5
3.0 Product Disassembly Process
3.1 List the basic steps that should typically be followed to remove components and materials requiring selective treatment:
1. Use tool to separate head and stand.
2. Use tool to release screws and disassemble the rear cover by hand.
3. Separate rubber and RC by hand.
4. Tear AL-tape and acrylic adhesive tape off and separate FFC wire from connecter.
5. Remove USB SHD and use tool to release screw.--> Separate USB BD from Main Chassis.
6. Take the lamp wire off from panel and use tool to release side mount screws.
7. Use tool to release screws on PCBs. Then tear down the gaskets, rubber and AL tapes on main chassis and separate
all connector on PCBs.
8. Use tool to release screws on CTRL BD and take Ctrl BD off from assy-BZL.
9. Use tool to separate OSD-BTN and PWR-BTN parts from BZL. And use pin at back side to separate the logo.
10. Use tool to release screws and separate VESA BKT from stand.
11. Separate cable clip from stand by hand.
12. Separate Lift front CVR from stand by hand and use tool to release screws --> separate Lift back CVR from stand.
13. Use tool to release screws --> separate tilt CVR from stand.
14. Separate Clum front CVR from stand by hand and use tool to release screws --> separate Clum back CVR from stand.
15. Tear all rubbers and release screws on base.
16. There are capacitors on Interface BD , PWR BD and USB BD
3.2 Optional Graphic. If the disassembly process is complex, insert a graphic illustration below to identify the items
contained in the product that require selective treatment (with descriptions and arrows identifying locations).
EL-MF877-00
Template Revision B
Page 3
PSG instructions for this template are available at EL-MF877-01
Step 1 :Use quick release button to separate head and stand.
Step 2 : Use tool to release screws and disassemble the rear cover by hand..
EL-MF877-00
Template Revision B
Page 4
PSG instructions for this template are available at EL-MF877-01
Step 3 : Separate information card and RC by hand.
Step 4 : Use tool to release screws and disassemble quick release button and slider by hand.
Step 5 : Remove the LVDS cable adhesive tape and eparate assy-BZL and internal.
EL-MF877-00
Template Revision B
Page 5
PSG instructions for this template are available at EL-MF877-01
Step 6 :. Remove USB SHD and use tool to release screw.--> Separate USB BD from Main Chassis.
Step 7 : Take the lamp wire off from panel and use tool to release side mount screws.
EL-MF877-00
Template Revision B
Page 6
PSG instructions for this template are available at EL-MF877-01
Step 8 : Use tool to release screws on PCBs. Then tear down the gaskets, rubber and AL tapes on main chassis and separate all
connector on PCBs.
Step 9: Use tool to release screws on CTRL BD and take Ctrl BD off from assy-BZL.
EL-MF877-00
Template Revision B
Page 7
PSG instructions for this template are available at EL-MF877-01
Step 10: Use tool to separate OSD-BTN and PWR-BTN parts from BZL. And use pin at back side to separate the logo.
EL-MF877-00
Template Revision B
Page 8
PSG instructions for this template are available at EL-MF877-01
Step11: Use tool to release screws and separate base
Step12: Use tool to release screws and separate base cover and base SHD
EL-MF877-00
Template Revision B
Page 9
PSG instructions for this template are available at EL-MF877-01
Step13: Use tool to release screws and separate VESA from stand
Step14 : Use tool to release screws and separate VESA BKT and VESA cover
Step15 : Disassemble the middle cover by hand
EL-MF877-00
Template Revision B
Page 10
PSG instructions for this template are available at EL-MF877-01
Step16 : Disassemble the front cover and back cover by hand
EL-MF877-00
Template Revision B
Page 11
PSG instructions for this template are available at EL-MF877-01
Step17: Use tool to release screws and separate middle BKT ..
Step18: Use tool to release screws and separate Assy-slider
EL-MF877-00
Template Revision B
Page 12
PSG instructions for this template are available at EL-MF877-01
Step19: Use tool to release screws and separate back cover

Other manuals for Z27i

1

Other HP Monitor manuals

HP Passport 1912nm Installation instructions

HP

HP Passport 1912nm Installation instructions

HP W19B User manual

HP

HP W19B User manual

HP L1750 User instructions

HP

HP L1750 User instructions

HP L2105TM User manual

HP

HP L2105TM User manual

HP 2009m - 20" LCD Monitor User manual

HP

HP 2009m - 20" LCD Monitor User manual

HP L2401x User manual

HP

HP L2401x User manual

HP E24i G4 HO Assembly instructions

HP

HP E24i G4 HO Assembly instructions

HP P21b G4 Manual

HP

HP P21b G4 Manual

HP 2511X User manual

HP

HP 2511X User manual

HP Z43 Installation instructions

HP

HP Z43 Installation instructions

HP P244 Installation instructions

HP

HP P244 Installation instructions

HP NL773A8#ABA User manual

HP

HP NL773A8#ABA User manual

HP p4819a User manual

HP

HP p4819a User manual

HP 70004A User manual

HP

HP 70004A User manual

HP D8901A - 71 - 17" CRT Display Instruction manual

HP

HP D8901A - 71 - 17" CRT Display Instruction manual

HP Pavilion F50 User manual

HP

HP Pavilion F50 User manual

HP Z27n G2 Installation instructions

HP

HP Z27n G2 Installation instructions

HP LD4745tm User instructions

HP

HP LD4745tm User instructions

HP L1940T User manual

HP

HP L1940T User manual

HP Z40c G3 Manual

HP

HP Z40c G3 Manual

HP L200x User manual

HP

HP L200x User manual

HP L1750 User manual

HP

HP L1750 User manual

HP 32f Manual

HP

HP 32f Manual

HP HC240 Healthcare Installation instructions

HP

HP HC240 Healthcare Installation instructions

Popular Monitor manuals by other brands

BenQ SL6501 user manual

BenQ

BenQ SL6501 user manual

LG Flatron L1510BF user manual

LG

LG Flatron L1510BF user manual

AOC E2357FH Service manual

AOC

AOC E2357FH Service manual

Asus VE228TLB user guide

Asus

Asus VE228TLB user guide

LG 47WX50MF-B Speci?cations

LG

LG 47WX50MF-B Speci?cations

Aplex ADP-1122A user manual

Aplex

Aplex ADP-1122A user manual

AG Neovo SX-17 specification

AG Neovo

AG Neovo SX-17 specification

Minarik DLC600 user manual

Minarik

Minarik DLC600 user manual

ViewSonic VA926-LED user guide

ViewSonic

ViewSonic VA926-LED user guide

Asus VW247H user guide

Asus

Asus VW247H user guide

Zenith ZVM-1380 Service manual

Zenith

Zenith ZVM-1380 Service manual

Acer B235HL user manual

Acer

Acer B235HL user manual

Philips 190SW8FB Specifications

Philips

Philips 190SW8FB Specifications

beneq Lumineq EL320.240-FA3 Operation manual

beneq

beneq Lumineq EL320.240-FA3 Operation manual

Grundig GD-ML-CC2230HD user guide

Grundig

Grundig GD-ML-CC2230HD user guide

Akai PDP4216M Service manual

Akai

Akai PDP4216M Service manual

LG 38WP85C-W owner's manual

LG

LG 38WP85C-W owner's manual

Austin Hughes Electronics CyberView RP-1020QD brochure

Austin Hughes Electronics

Austin Hughes Electronics CyberView RP-1020QD brochure

manuals.online logo
manuals.online logoBrands
  • About & Mission
  • Contact us
  • Privacy Policy
  • Terms and Conditions

Copyright 2025 Manuals.Online. All Rights Reserved.