manuals.online logo
Brands
  1. Home
  2. •
  3. Brands
  4. •
  5. HP
  6. •
  7. Storage
  8. •
  9. HP StorageWorks EVA4000 Guide

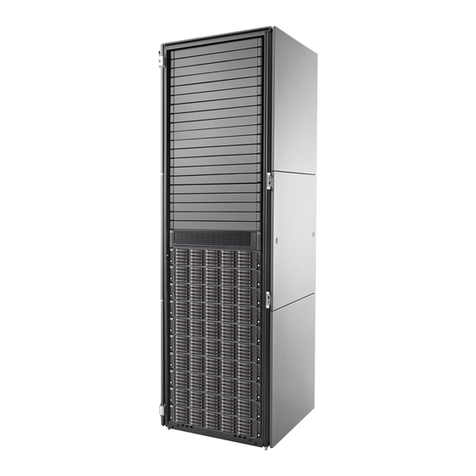
HP StorageWorks EVA4000 Guide

This manual suits for next models

2

Other HP Storage manuals

HP RDX USB 3.0 User manual

HP

HP RDX USB 3.0 User manual

HP LeftHand P4000 - SAN Solutions Instruction Manual

HP

HP LeftHand P4000 - SAN Solutions Instruction Manual

HP dat72 5242 User manual

HP

HP dat72 5242 User manual

HP Surestore 6164 - Switch User manual

HP

HP Surestore 6164 - Switch User manual

HP BAAD0010HBK-NHSN User manual

HP

HP BAAD0010HBK-NHSN User manual

HP HPE XP P9500 User manual

HP

HP HPE XP P9500 User manual

HP StorageWorks 1/8 G2 User manual

HP

HP StorageWorks 1/8 G2 User manual

HP StorageWorks 8000 - NAS Installation guide

HP

HP StorageWorks 8000 - NAS Installation guide

HP Ultrium 215 User instructions

HP

HP Ultrium 215 User instructions

HP P9000 User manual

HP

HP P9000 User manual

HP C7745NB - SureStore DLT Tape Autoloader 1/9 User manual

HP

HP C7745NB - SureStore DLT Tape Autoloader 1/9 User manual

HP StorageWorks P2000 User manual

HP

HP StorageWorks P2000 User manual

HP StorageWorks SDLT 600 Installation guide

HP

HP StorageWorks SDLT 600 Installation guide

HP v119r User manual

HP

HP v119r User manual

HP AU183AA - 2TB Personal Media Drive Use and maintenance manual

HP

HP AU183AA - 2TB Personal Media Drive Use and maintenance manual

HP LTO-6 Ultrium FH SAS User manual

HP

HP LTO-6 Ultrium FH SAS User manual

HP StorageWorks 2100 - Disk System User manual

HP

HP StorageWorks 2100 - Disk System User manual

HP D2D User manual

HP

HP D2D User manual

HP StorageWorks 8B - FC Entry Switch User manual

HP

HP StorageWorks 8B - FC Entry Switch User manual

HP LaserJet P2050 Series User manual

HP

HP LaserJet P2050 Series User manual

HP D7171A - NetServer - LPr User manual

HP

HP D7171A - NetServer - LPr User manual

HP StorageWorks 4000/6000/8000 - Enterprise Virtual... Instruction Manual

HP

HP StorageWorks 4000/6000/8000 - Enterprise Virtual... Instruction Manual

HP StorageWorks 4000/6000/8000 - Enterprise Virtual... Instruction Manual

HP

HP StorageWorks 4000/6000/8000 - Enterprise Virtual... Instruction Manual

HP Surestore 100st - Archive Server User manual

HP

HP Surestore 100st - Archive Server User manual

Popular Storage manuals by other brands

IBM 40/80 GB HH DLTVS user guide

IBM

IBM 40/80 GB HH DLTVS user guide

Synology DiskStation DS716+II Quick installation guide

Synology

Synology DiskStation DS716+II Quick installation guide

Vantec NexStar-HX4 user manual

Vantec

Vantec NexStar-HX4 user manual

LaCie Christofle Galet datasheet

LaCie

LaCie Christofle Galet datasheet

LaCie Rugged Thunderbolt user manual

LaCie

LaCie Rugged Thunderbolt user manual

OCZ IBIS datasheet

OCZ

OCZ IBIS datasheet

Transcend JetFlash 110 Brochure & specs

Transcend

Transcend JetFlash 110 Brochure & specs

QNAP TS 32PXU Series user guide

QNAP

QNAP TS 32PXU Series user guide

LaCie RUGGED RAID user manual

LaCie

LaCie RUGGED RAID user manual

Freecom CLS DOCK Quick install guide

Freecom

Freecom CLS DOCK Quick install guide

PNY Attache P-FD64MBATT3 install guide

PNY

PNY Attache P-FD64MBATT3 install guide

OWC Mercury Elite Pro Dual mini Assembly manual

OWC

OWC Mercury Elite Pro Dual mini Assembly manual

OLT 6x6 Maximizer Assembly manual

OLT

OLT 6x6 Maximizer Assembly manual

Transcend JetFlash 160 Specifications

Transcend

Transcend JetFlash 160 Specifications

Thunderbolt 600 user manual

Thunderbolt

Thunderbolt 600 user manual

Intel RAID High Availability user guide

Intel

Intel RAID High Availability user guide

LaCie 12big Thunderbolt 3 Quick install guide

LaCie

LaCie 12big Thunderbolt 3 Quick install guide

Spectra Logic T-Series Spectra T50e quick start guide

Spectra Logic

Spectra Logic T-Series Spectra T50e quick start guide

manuals.online logo
manuals.online logoBrands
  • About & Mission
  • Contact us
  • Privacy Policy
  • Terms and Conditions

Copyright 2025 Manuals.Online. All Rights Reserved.

HP StorageWorks
Fibre Channel Disk Drive
Replacement Instructions
These instructions apply to the EVA
4000/6000/8000 product family. The part
may also be used in other HP products. Please refer to
documentation for your specific product for detailed
replacement instructions.
Printed on at least 50% total recycled fiber with at least
10% post-consumer paper.
Copyright ©2005 Hewlett-Packard Development Company, L.P.
First edition April, 2005
Product names mentioned herein may be trademarks of their
respectivecompaniesasreflected by an associated footnote.
The information in this document is subject to change without
notice.
Printed in the U.S.A.
www.hp.com
.
*5697-5248*
Warranty Information
If the product in which this part is being replaced is still under
HP warranty, then the replacement part(s) referred to in these
Replacement Instructions is provided under the terms and conditions
of the Hewlett-Packard Company Limited Warranty for that
product. A copy of this Limited Warranty may be viewed at:
http://h18006.www1.hp.com/products/storageworks/warranty.html
If this is a trade sale part (product out of warranty), then the replacement
part(s) referred to in these Replacement Instructions is provided under
HP's express limited warranty statement, which may be viewed at:
http://customerops.corp.hp.com/1sw/pdm_om/warranty_support/
policies/2330100.doc
The replacement part takes on either the Limited Warranty Period of the
part being replaced or a ninety-day period that begins upon installation
of the replacement part, whichever is greater.
The only warranty for this replacement product is as noted above.
Nothing in these replacement instructions should be construed as
constituting an additional warranty. The information provided in these
replacement instructions is provided "AS IS" and HP is not liable for
technical or editorial errors or omissions contained herein.
1 About This Document
This document describes the procedure for replacing the Fibre Channel
disk drive used in the EVA 4000/6000/8000 products.
2 Before you begin
Observe the following precautions when replacing the disk drive.
CAUTION:
Make sure you have a replacement part available before
removing the failed component. Removing a component
impacts cooling within the enclosure.
Do not remove more than one disk drive at a time from the
enclosure. Doing so will impact cooling of the enclosure
and may cause data loss.
Parts can be damaged by electrostatic discharge. Use
proper anti-static protection. Refer to the documentation that
shipped with your system for additional information.
Have a copy of the product User Guide available for
reference. You can download a copy of the User Guide
from the product support page on the HP web site.
3 Verifying component failure
Before replacing a disk drive, use the following methods to verify the
component failure:
CAUTION:
IfCommandViewEVAdoesnotpresentastatusconsistent
with that of the disk drive status indicators, or if Command
View or the System Event Analyzer indicates multiple
hardware failures, contact HP support for assistance. The HP
support web site is located at http://www.hp.com/support
Page 1
•Analyze any failuremessagesyoumayhavereceivedfromsystem
monitoring (System Event Analyzer).
•Check the disk drive status indicators. See Figure 1.TheFault
indicator should be On.
•Check status using Command View EVA:
1. In the Navigation pane, select Storage system > Hardware >
Rack > Disk enclosure > Bay
2. In the Content pane, select the Disk Drive tab. The Operational
state should be Failed .
3. Verify the following status conditions are met before proceeding:
• Migration state - Not migrating
• Requested usage - Ungrouped
•Actualusage-Ungrouped
4. Click Remove to prepare the disk for removal. The status
indicators on the disk drive will begin flashing to help you
locate the disk.
123
Figure 1 Disk drive status indicators
1. Activity 2. Online 3. Fault
4 Removing a disk
CAUTION:
Rotating media can make the disk drive difficult to handle.
To avoid dropping and damaging the disk drive, wait
approximately 30 seconds for the media to stop rotating
before removing the drive from the enclosure.
1. Push in the wine-colored ejector button (1) and pull the release
lever (2) down to the full open position.
2. Pull the disk drive part way out of the enclosure (3) and wait for the
media to stop spinning.
3. When the media has stopped spinning, remove the disk drive from
the enclosure.
1
1
0115a
2
3
Figure 2 Removing a disk drive
5Installingadiskdrive
1. Push in the ejector button on the disk drive and pull the release
lever down to the full open position.
2. Insert the drive into the enclosure as far as it will go (1).
3. Close the release lever until it engages the ejector button, and the
disk drive seats in the backplane (2).
4. Press in firmly on the disk drive to ensure it is seated properly.
1
1
2
0116a
Figure 3 Installing a disk drive
Page 2
6 Verifying proper operation
After replacing the disk drive, check the following to verify that the
disk drive is operating normally:
NOTE:
Itmaytakeupto10minutesforthecomponenttodisplay
good status.
•Check the disk drive status indicators. See Figure 1.
•Activityindicator(1)shouldbeonorflashing
• Online indicator (2) should be on or flashing
• Fault indicator (3) should be off
•Check the following using Command View EVA.
• Navigate back to the component and check the operational
state. It should be
• Ensure the disk drive is using the correct firmware. Check the
Firmware Version against the supported disk firmware in the HP
StorageWorks Enterprise Virtual Array Release Notes.Themost
current edition of the release notes can be downloaded from the
following web site:http://www.hp.com/go/eva8000
If the disk drive is using an unsupported version of firmware,
contact HP support for assistance. Do not add the disk drive to a
disk group if it using an unsupported firmware version.
7 Adding the disk to a disk group
After replacing the disk, it should be added to a disk group. The disk is
typically added back into its original disk group.
1. In the Navigation pane, select Storage system > Hardware > Rack
>Diskenclosure>Bay
2. In the Content pane, select the Disk Drive tab.
3. Click Group to initiate the process for adding the disk to a disk
group.
NOTE:
If the Device Addition Policy is set to automatic, the disk will
automatically be added to a disk group. In this case the
Group option will not be available.
8Returningthe failed component
Please follow the return instructions provided with the new component.
Page 3