manuals.online logo
Brands
  1. Home
  2. •
  3. Brands
  4. •
  5. HP
  6. •
  7. Switch
  8. •
  9. HP v1810g User manual

HP v1810g User manual

1
HP Switch Quick Setup Guide
For more detailed instructions and information, view or download the documentation for your switch at
www.hp.com/networking/support.
1. Unpack and check included parts:
•Switch
• Accessory kit
•Powercord
• Documentation kit
2. Prepare for installation.
To avoid personal injury or product damage, review the
“Safety Precautions” on page 3.
3. Power on and verify selftest by connecting
the power cord.
Note: The switch does not contain a power switch.
It is turned on by connecting the power cord.
Port LEDs
After selftest:
PowerLED=On
Fault LED = Off
4. Install the switch.
To attach the mounting brackets to the switch, use a #1
Phillips (cross-head) screwdriver and the included 8-mm
M4 screws.
To mount the switch to a wall or wood surface, use two
5/8-inch (15.875 mm) number 12 wood screws (not
included).
Rack Mounting
Table or Desktop
Wall Mounting
2
5. Configure for operation on your network (minimal configuration).
To change the factory-default settings:
1. Reconfigure a PC’s IP address and Subnet Mask so that it can communicate
with the switch. For example, on a PC running Windows XP:
a. Click Start > Connect to > Show all connections.
b. Select and right-click Local Area Connection, then click Properties.
c. Scroll and select Internet Protocol (TCP/IP), then click Properties.
Note: Be sure to record all your PC’s current IP settings to be able to
restore them later.
d. On the General tab, click Use the following IP address.
e. For IP address, enter an IP address in the same range as the switch’s
default IP address. For example, enter 192.168.2.12.
f. For Subnet mask, enter 255.255.255.0, then click OK.
g. Click Close (or OK) to close the Local Area Connection Properties screen.
2. Connect the PC directly to the switch using a standard Ethernet LAN cable.
3. Open your Web browser on the PC, and enter the factory-default address,
http://192.168.2.10, to access the switch’s Web interface.
4. Click Log on to log onto the switch (there is no default password).
5. Click Network Setup > Get Connected and configure IP network settings on
the switch for operation on your network.
Note: If you enable DHCP for automatic IP network configuration, the
switch must be connected to the same network as the DHCP server. After
automatic IP configuration, you must determine the IP address assigned to
the switch. To do this, you will need to access your DHCP server files, or
use LLDP (Link Layer Discovery Protocol) commands on a connected
device (such as another switch).
6. Click Maintenance > Save Configuration and save your settings to retain them
when the switch is rebooted.
You are done with preconfiguration. Disconect the LAN cable, and return your
PC to its original network settings for your network..
Factory-default settings:
Connect a PC to configure the switch:
Parameter Factory Default Setting
Password <blank>
IP address 192.168.2.10
Subnet mask 255.255.255.0
Default gateway not set
Connect to
any port
6. Connect network cables.
RJ-45
connector Fiber cable
connector
Optional transceiver
(not included)
3
Safety Precautions
To avoid personal injury or product damage when installing your switch, read the installation precautions and guidelines below.
Installation Precautions
Warnings
■The rack or cabinet should be adequately secured to prevent it from becoming unstable and/or falling
over.
■Devices installed in a rack or cabinet should be mounted as low as possible, with the heaviest devices at
the bottom and progressively lighter devices installed above.
■Do not wall mount any switch without checking for restrictions in the Installation and Getting Started
Guide
Cautions
■Ensure the power source circuits are properly grounded, then use the power cord supplied with the switch to connect
it to the power source.
■If your installation requires a different power cord than the one supplied with the switch and/or power supply, be
sure the cord is adequately sized for the switch’s current requirements. In addition, be sure to use a power cord
displaying the mark of the safety agency that defines the regulations for power cords in your country/region. The
mark is your assurance that the power cord can be used safely with the switch and power supply.
■When installing the switch, the AC outlet should be near the switch and should be easily accessible in case the switch
must be powered off.
■Ensure the switch does not overload the power circuits, wiring, and over-current protection. To determine the
possibility of overloading the supply circuits, add together the ampere ratings of all devices installed on the same
circuit as the switch and compare the total with the rating limit for the circuit. The maximum ampere ratings are
usually printed on the devices near the AC power connectors.
■Do not install the switch in an environment where the operating ambient temperature exceeds its specification.
■Ensure the air flow around the switch is not restricted. Leave at least 7.6 cm (3 inches) for cooling. For the air flow
direction, see the Installation and Getting Started Guide for your product, located on the HP Web site at
www.hp.com/networking/support.
For additional Safety and Regulatory information, refer to the Safety and Regulatory documentation included with your switch.
© Copyright 2011 Hewlett-Packard Company, L.P.
The information contained herein is subject to change without notice.
Printed in China
February 2011
5998-1309
*5998-1309*

Other HP Switch manuals

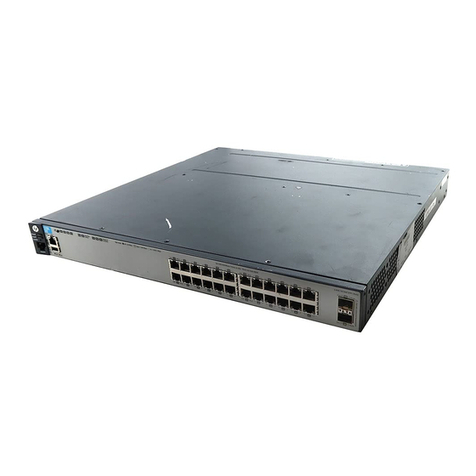
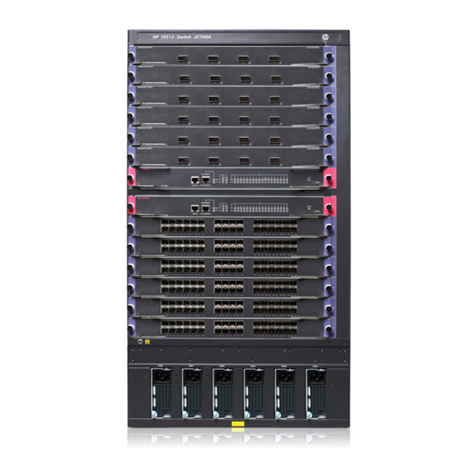
HP 10500 series Installation instructions

HP

HP 10500 series Installation instructions

HP ProCurve 2510 User manual

HP

HP ProCurve 2510 User manual

HP StorageWorks Brocade User manual

HP

HP StorageWorks Brocade User manual

HP ProCurve 1600M User manual

HP

HP ProCurve 1600M User manual

HP AF620A User instructions

HP

HP AF620A User instructions

HP 316095-B21 - StorageWorks Edge Switch 2/24 Instruction Manual

HP

HP 316095-B21 - StorageWorks Edge Switch 2/24 Instruction Manual

HP StorageWorks MSA 2/8 - SAN Switch User manual

HP

HP StorageWorks MSA 2/8 - SAN Switch User manual

HP 445860-B21 - 10Gb Ethernet BL-c Switch User manual

HP

HP 445860-B21 - 10Gb Ethernet BL-c Switch User manual

HP ProCurve Switch 2650 User manual

HP

HP ProCurve Switch 2650 User manual

HP ProCurve J8763A Manual

HP

HP ProCurve J8763A Manual

HP StorageWorks 8/24 - SAN Switch Quick user guide

HP

HP StorageWorks 8/24 - SAN Switch Quick user guide

HP FlexFabric 5700 series User manual

HP

HP FlexFabric 5700 series User manual

HP JD318B Assembly instructions

HP

HP JD318B Assembly instructions

HP 6125XLG Installation manual

HP

HP 6125XLG Installation manual

HP 3600 v2 Series Installation manual

HP

HP 3600 v2 Series Installation manual

HP ProCurve 5400zl Series User instructions

HP

HP ProCurve 5400zl Series User instructions

HP JC106A User manual

HP

HP JC106A User manual

HP Aruba JL253A User manual

HP

HP Aruba JL253A User manual

HP 6125G Installation manual

HP

HP 6125G Installation manual

HP HCPL-2400 Instruction manual

HP

HP HCPL-2400 Instruction manual

HP 6125G User manual

HP

HP 6125G User manual

HP J3128A AdvanceStack 10Base-T Hub-8E User manual

HP

HP J3128A AdvanceStack 10Base-T Hub-8E User manual

HP ProCurve 1600M Assembly instructions

HP

HP ProCurve 1600M Assembly instructions

HP P2361AA #ABA User manual

HP

HP P2361AA #ABA User manual

Popular Switch manuals by other brands

Phybridge NVT PoLRE Series user guide

Phybridge

Phybridge NVT PoLRE Series user guide

B.E.G. WAVE-PIR-120/277-N installation instructions

B.E.G.

B.E.G. WAVE-PIR-120/277-N installation instructions

Wisi DY 94....98 operating instructions

Wisi

Wisi DY 94....98 operating instructions

ISON IS-DG305 Quick installation guide

ISON

ISON IS-DG305 Quick installation guide

SWiiD SwiidInter Installation and user guide

SWiiD

SWiiD SwiidInter Installation and user guide

Edimax EK-PS2C user manual

Edimax

Edimax EK-PS2C user manual

Belkin 4x4 USB Peripheral Switch user manual

Belkin

Belkin 4x4 USB Peripheral Switch user manual

BEL MS64-F Installation and user guide

BEL

BEL MS64-F Installation and user guide

Linksys SRW2024 Product data

Linksys

Linksys SRW2024 Product data

SkyLink SW-318 user manual

SkyLink

SkyLink SW-318 user manual

Lutron Electronics Switch user manual

Lutron Electronics

Lutron Electronics Switch user manual

Nematron NF541S Series user manual

Nematron

Nematron NF541S Series user manual

D-Link DES-7000 Series user manual

D-Link

D-Link DES-7000 Series user manual

SWEEX SW128 manual

SWEEX

SWEEX SW128 manual

Cisco Catalyst 3120 Software guide

Cisco

Cisco Catalyst 3120 Software guide

3Com Switch 5500G-EI PWR 48-Port Command reference guide

3Com

3Com Switch 5500G-EI PWR 48-Port Command reference guide

Inline 33293I user manual

Inline

Inline 33293I user manual

Vivitek NovoConnect NC-X500 quick start guide

Vivitek

Vivitek NovoConnect NC-X500 quick start guide

manuals.online logo
manuals.online logoBrands
  • About & Mission
  • Contact us
  • Privacy Policy
  • Terms and Conditions

Copyright 2025 Manuals.Online. All Rights Reserved.