HTC HTC Flyer User manual

Your HTC Flyer
User guide

Contents
Getting started
Inside the box 5
HTC Flyer 5
Top cover 7
SIM card 8
Storage card 9
Battery 10
Switching the power on or off 10
Entering your PIN 11
Finger gestures 11
Setting up HTC Flyer for the first time 12
Ways of getting contacts into HTC Flyer 12
Home screen 13
Basics
Adjusting the volume 14
Sleep mode 14
Status and notifications 15
Notifications panel 18
Connecting HTC Flyer to a computer 19
Copying text, looking up information, and sharing 20
Printing 22
Personalizing
Making HTC Flyer truly yours 23
Personalizing HTC Flyer with scenes 23
Changing your wallpaper 24
Applying a new skin 25
Personalizing your Home screen with widgets 25
Adding icons and other shortcuts on your Home screen 27
Adding folders on your Home screen 27
Rearranging or removing widgets and icons on your Home screen 28
Using sound sets 28
Rearranging or hiding application tabs 30
Tablet pen and fun apps
About the tablet pen 32
Scribbling 34
About Notes 35
Writing a note 36
Sketching 37
Switching to Kid Mode 39
2 Contents

Snapbooth and Camera
Snapbooth 40
Camera 41
Photos, videos, and music
Gallery 45
Music 53
Accounts and sync
About online accounts 58
Synchronizing with a Google Account 58
Adding a social network account 59
Managing your online accounts 59
Social
Facebook for HTC Sense 61
Facebook app 62
What’s the difference between Facebook app and Facebook for HTC Sense? 63
Twitter for HTC Sense 63
Using Friend Stream 64
Tweeting in Friend Stream 67
Chatting in Google Talk 68
Internet connections
Data connection 71
Wi-Fi 72
About connection widgets 74
Connecting to a virtual private network (VPN) 74
Using HTC Flyer as a modem (USB tethering) 75
Connecting HTC Flyer to the Internet through a computer (Internet Pass-through) 76
Using HTC Flyer as a wireless router 76
Bluetooth
Bluetooth basics 77
Connecting a Bluetooth headset or car kit 77
Disconnecting or unpairing from a Bluetooth device 78
Sending information using Bluetooth 79
Receiving information using Bluetooth 81
Trademarks and copyrights
Index
3 Contents

Conventions used in this guide
In this user guide, we use the following symbols to indicate useful and important
information:
This is a note. A note often gives additional information, such as what happens
when you choose to do or not to do a certain action. A note also provides
information that may only be applicable to some situations.
This is a tip. A tip gives you an alternative way to do a particular step or procedure,
or lets you know of an option that you may find helpful.
This indicates important information that you need in order to accomplish a certain
task or to get a feature to work properly.
This provides safety precaution information, that is, information that you need to be
careful about to prevent potential problems.
4 Conventions used in this guide

Getting started
Inside the box
You will find the following inside the box:
§HTC Flyer
§Tablet pen
§Tablet pen battery
§USB cable
§Power adapter
§3.5mm stereo headset
§Protective case
§Quick guide
§Safety and regulatory guide
§Call center card (hotline card)
§Warranty card
HTC Flyer
Front panel
1. HOME
2. MENU
3. BACK
4. PEN OPTIONS
5. Front camera
6. Front camera on or off indicator
5 Getting started
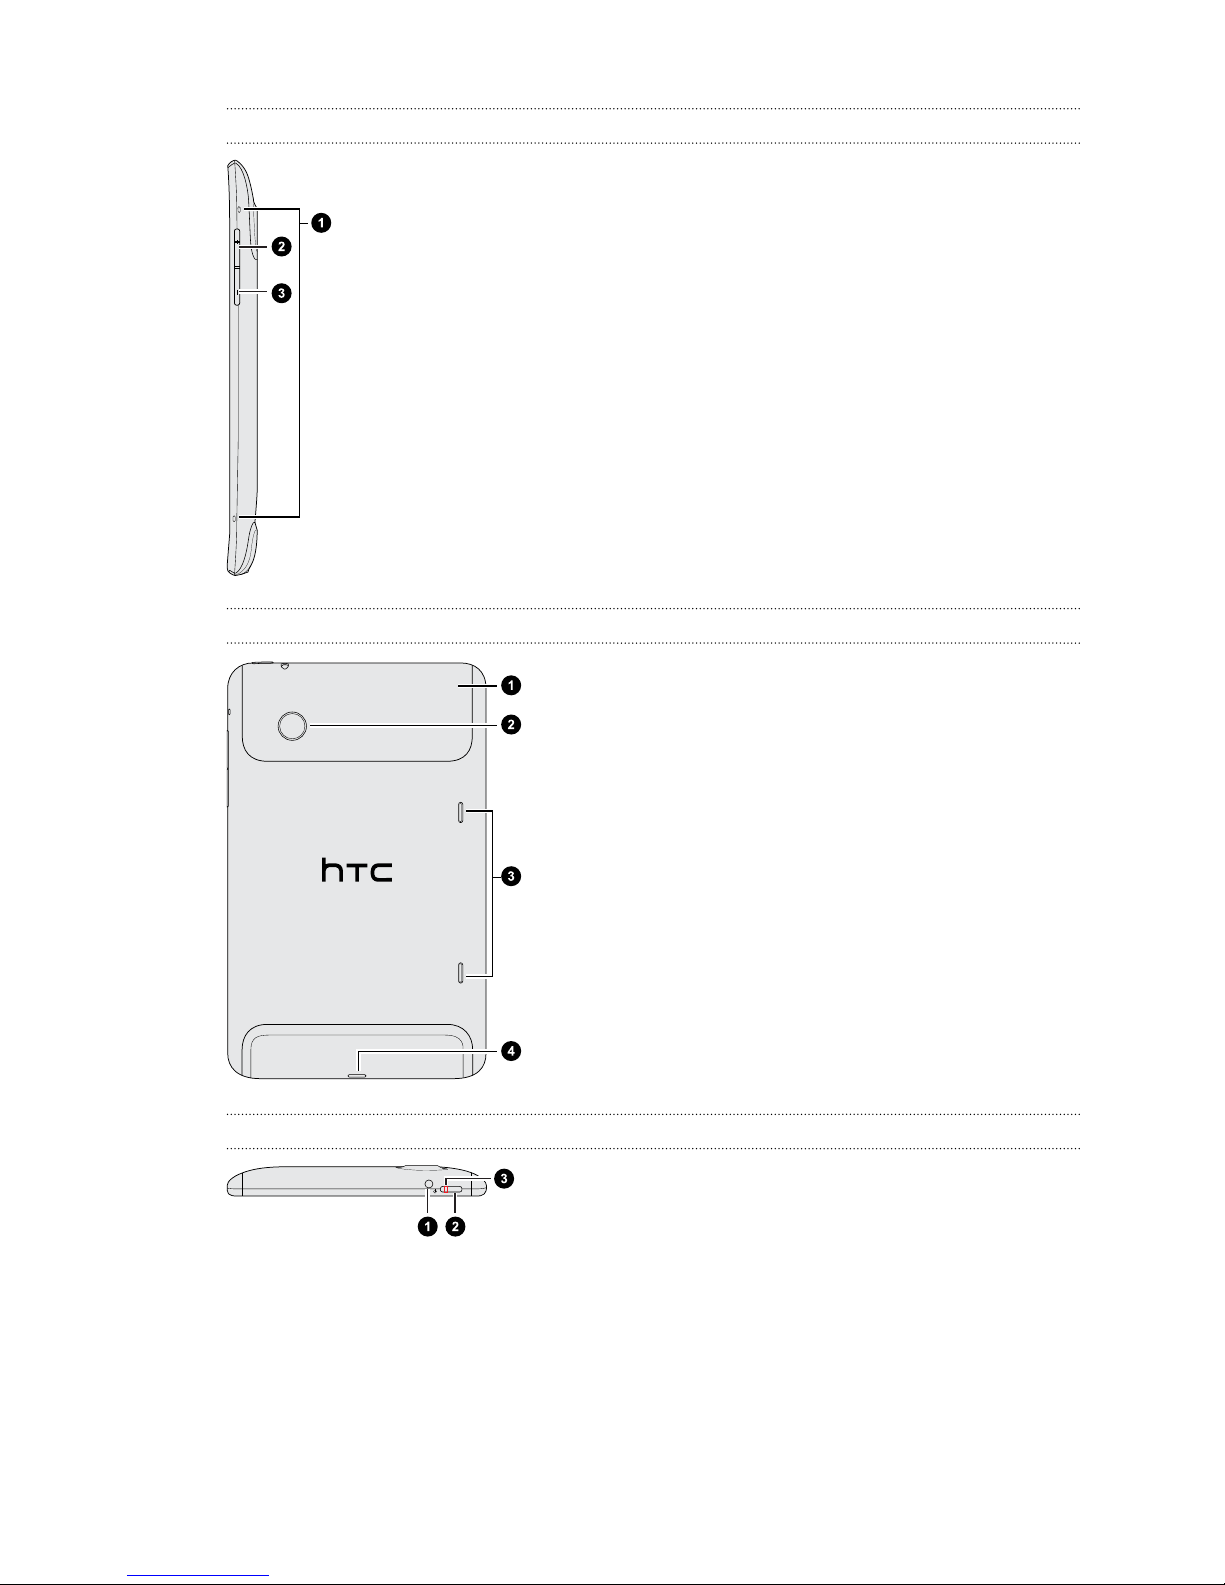
Right panel
1. Microphones
2. VOLUME UP
3. VOLUME DOWN
Back panel
1. Top cover
2. 5 megapixel camera
3. Speakers
4. USB connector
Top panel
1. 3.5mm headset jack
2. POWER
3. Notification LED
6 Getting started
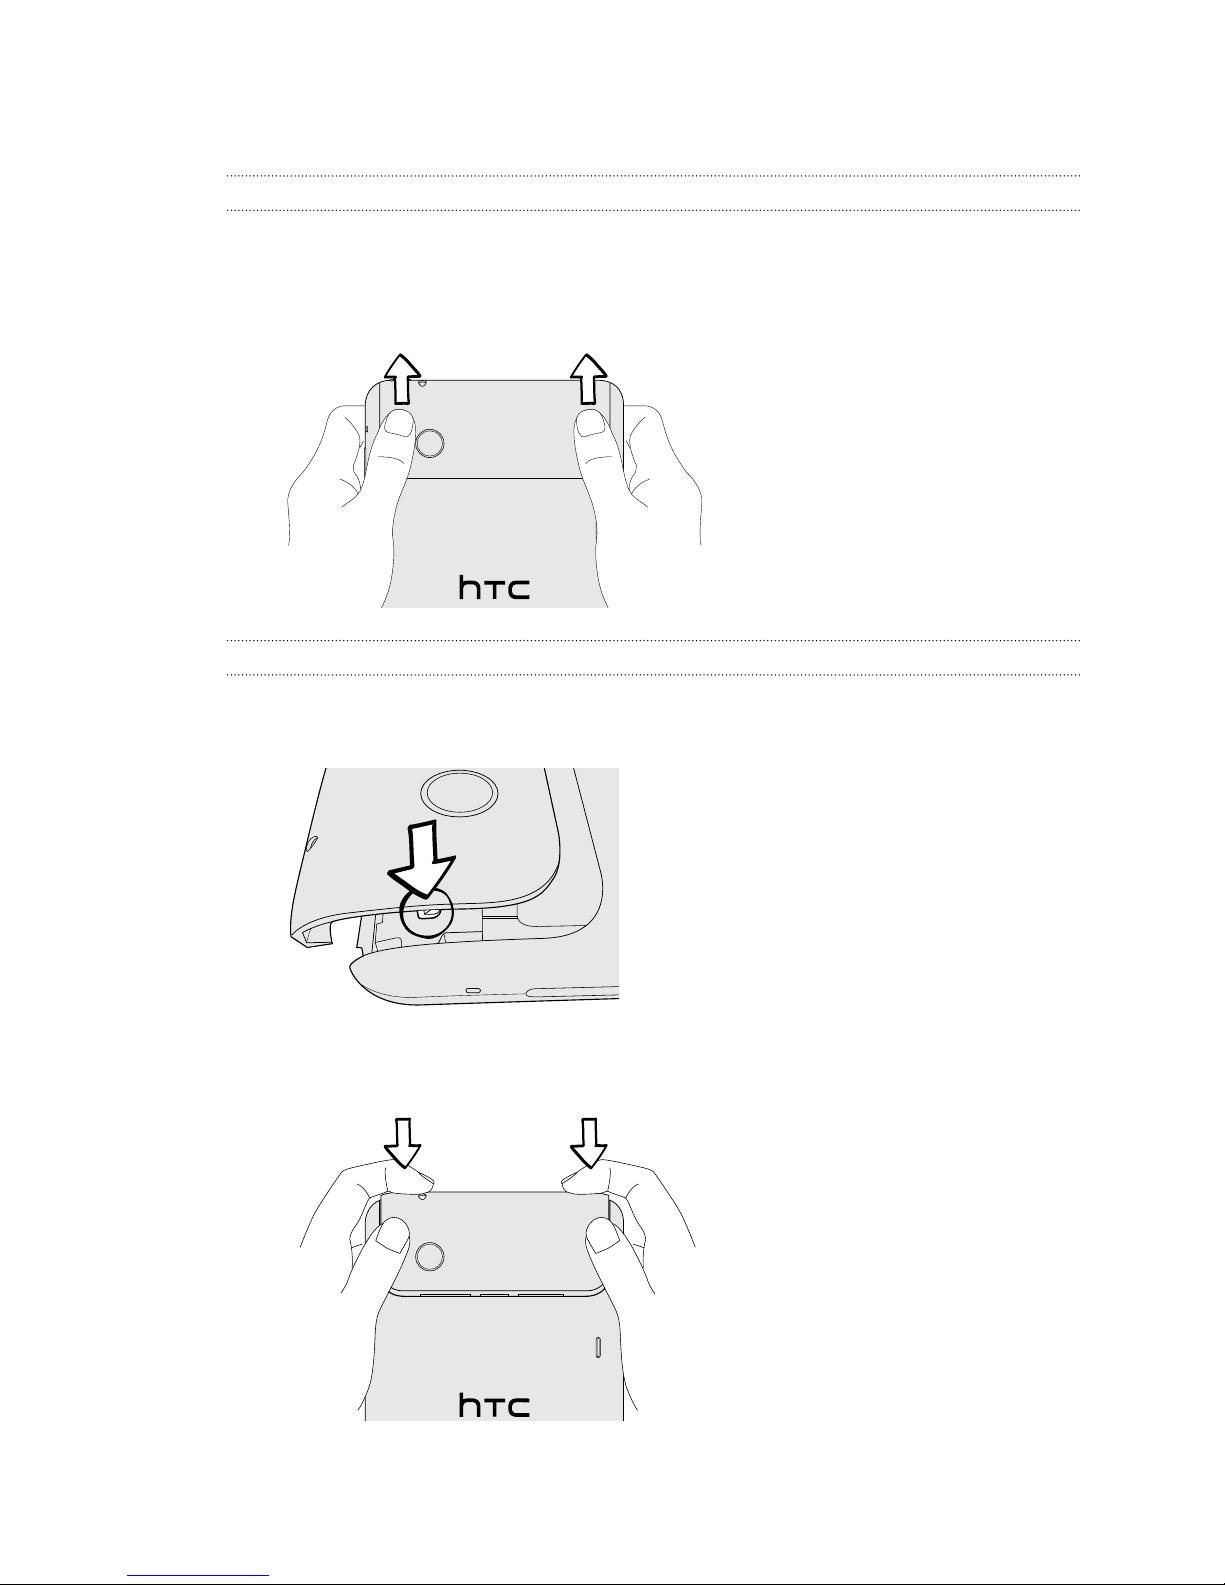
Top cover
Removing the top cover
Remove the top cover to access the SIM card and storage card slots.
1. Turn off HTC Flyer and hold it securely with the front facing down.
2. With your right and left thumbs, push the top cover out to remove it.
Replacing the top cover
1. Align the two teeth underneath the top cover (one on each side) with the two
notches on the top of HTC Flyer.
2. Place the top cover on HTC Flyer, gently press down on the cover with your
thumbs, and then push it in until it clicks and locks into place.
7 Getting started

SIM card
You'll need a SIM card inserted in HTC Flyer to use a data connection. Both 1.8V and
3V SIM cards can be used.
Some legacy SIM cards may not function with HTC Flyer. You should consult with
your mobile operator for a replacement SIM card. There may be fees for this
service.
Inserting the SIM card
1. Turn off HTC Flyer and hold it securely with the front facing down.
2. Take the top cover off
3. With the SIM card’s gold contacts facing down and its cut-off corner facing out,
insert the SIM card into the SIM card slot.
Removing the SIM card
Make sure to switch off HTC Flyer before removing your SIM card.
1. Take the top cover off
2. With your finger, press down the small tab located near the opening of the SIM
card slot.
3. Slide the SIM card out from the SIM card slot.
8 Getting started

Storage card
HTC Flyer comes with an internal storage that you can use to store your photos,
videos, and music. If you need more storage space, you can insert a storage card into
HTC Flyer.
Inserting the storage card
1. Take the top cover off
2. Insert the storage card into the storage card slot with its gold contacts facing
down and push it until it clicks into place.
Removing the storage card
If HTC Flyer is on you must first "unmount" the storage card before removing it to
prevent corrupting or damaging the files in the storage card.
1. Take the top cover off
2. Push the storage card in to eject it from its slot.
3. Slide the storage card out from its slot.
Unmounting the storage card
When you need to remove the storage card while HTC Flyer is on, unmount the
storage card first to prevent corrupting or damaging the files in the storage card.
1. From the Home screen, press , and then tap Settings.
2. Tap SD & phone storage > Unmount SD card.
9 Getting started

Battery
HTC Flyer uses a rechargeable battery. How long the battery can last before it needs
recharging depends on how you use HTC Flyer. Among these are the features and
accessories you use (for example, leaving your Bluetooth™connection always on uses
more power). Frequent web browsing uses up a lot of battery power. Also, consider
your location: poor signal strength from your mobile network and extreme
temperature make the battery work harder.
Charging the battery
The battery is partially charged when shipped. Before you turn on and start using HTC
Flyer, it is recommended that you charge the battery. Some batteries perform best
after several full charge/discharge cycles.
Only the power adapter provided in the box must be used to charge the battery.
1. Plug the power adapter into the USB connector of HTC Flyer.
2. Plug in the power adapter to an electrical outlet to start charging the battery.
As the battery is being charged, the notification LED shows a solid orange light. The
light turns to solid green when HTC Flyer is fully charged.
When you charge the battery while HTC Flyer is on, the charging battery icon is
displayed in your tablet’s status bar. After the battery has been fully charged, the
charging battery icon turns to a full battery icon .
As a safety precaution, the battery stops charging when it overheats.
Switching the power on or off
Switching the power on
Press the POWER button. Easy.
When you turn on HTC Flyer for the first time, you’ll need to set it up.
10 Getting started
Other manuals for HTC Flyer
6
Table of contents
Other HTC Tablet manuals


Popular Tablet manuals by other brands

Laser
Laser MID-1060 Quick operation guide

MUNBYN
MUNBYN IRT09J Easy setup guide

Motorola
Motorola MC3090R - Win CE 5.0 Professional 520 MHz quick start guide

Dell
Dell Latitude ST Setup and features information

Lenovo
Lenovo IdeaTab S6000L Hardware Maintenance Manual

Venturer
Venturer WT9L11 quick start guide


