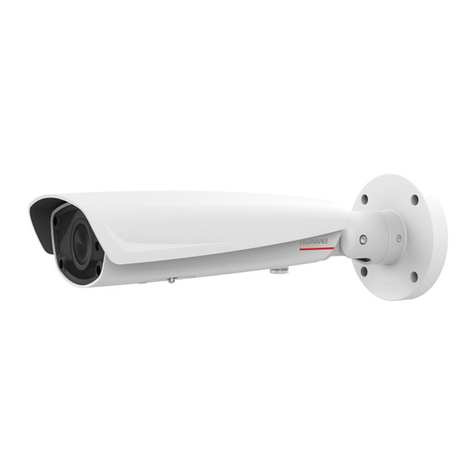
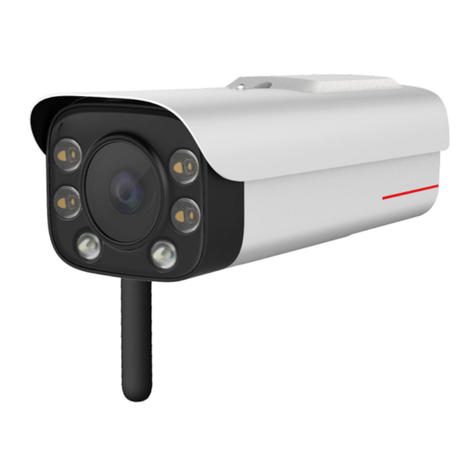
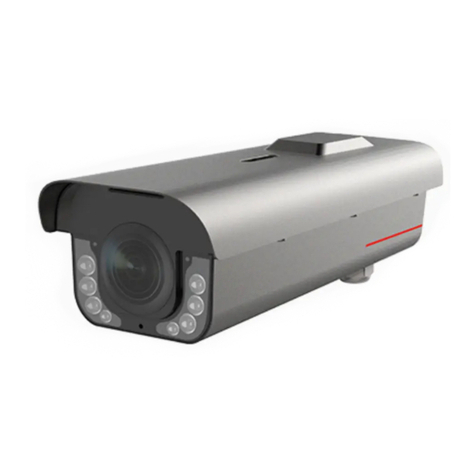
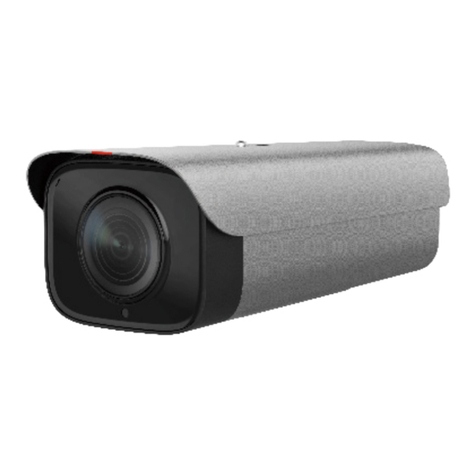
Huawei X2221-VL User manual

X2221-VL
Issue: 05
版权所有 © 华为技术有限公司 2018。保留一切权利。
Copyright © Huawei Technologies Co., Ltd. 2018.
All rights reserved.
Quick Start Guide
快速入门
版本:05
Packing List and Qualification Card
装箱清单和合格证
电子电气产品有毒有害物质声明
Additional Guides Available
资料获取路径
Huawei Enterprise
Technical Support app
华为企业技术支持 APP
部件名称 有毒有害物质或元素
Pb 铅 Hg 汞 Cd 镉 Cr6+ 六价铬 PBB 多溴联苯 PBDE 多溴二苯醚
结构件 × ○ ○ ○ ○ ○
单板/电路模块 × ○ ○ ○ ○ ○
线缆和线缆组件 × ○ ○ ○ ○ ○
纸质配件 ○ ○ ○ ○ ○ ○
本表格依据SJ/T 11364的规定编制。
○:表示该有害物质在该部件所有均质材料中的含量在GB/T 26572规定的限量要求以下。
×:表示该有害物质至少在该部件的某一均质材料中的含量超出GB/T 26572规定的限量要求。
This product has an environment friendly use period (EFUP) of 20 years. Some replaceable
parts have their own EFUP labels. The EFUP is suitable only for products that work in conditions
specified in the product manual.
本产品的环保使用期限为20 年。某些可更换的零部件会有一个不同的环保使用期贴在其产品上。此环保使
用期限只适用于产品是在产品手册中所规定的条件下工作。
1
Default Login IP
Adresse IP
IP accesso predefinito
默认 IP 地址
User Name
nom d'utilisateur
nome utente
用户名
192.168.0.120 admin
Scan for MultimediaGuide
扫码获取多媒体
Component
物品 PCS Component
物品 PCS
IPC
网络摄像机 1Crimp terminal (supporting 0.75 mm2 and 1.0 mm2 cables)
压线端子(支持0.75mm2和1.0mm2的线缆) 2
M6*12 Screws
M6*12螺钉 22.5 mm flat-head screwdriver
一字螺丝刀(刀头宽度为2.5mm) 1
Power terminal
电源端子 1Quick Start Guide
快速入门 1
To obtain the latest documents, including the Product Documentation and FOSS License
Information, visit http://support.huawei.com/enterprise and enter the camera model
to search for related documents. You can also log in to http://support.huawei.com/
enterprise or scan the QR code using your mobile phone to download the Huawei
Enterprise Technical Support app. Then start this app and choose Video Surveillance > IP
Cameras to obtain the latest documents.
请登录 http://support.huawei.com/enterprise网站,输入摄像机型号进行搜索,获取最新资料,
包括《产品文档》和《开源软件使用声明》等。您也可以用手机登录 http://support.huawei.com/
enterprise网站或者扫描右侧二维码,下载“华为企业技术支持 APP”,选择“视频监控 > IP摄像机”
获取最新资料。
限制物質含有情況標示聲明書,請登錄 http://support.huawei.com/enterprise網站,輸入對應的攝像機型號進行搜索,在對
應的產品文檔下選擇“安裝指南 > 附錄 > 限制物質含有情況標示聲明書”查看。

Interface Description/ 接口说明 Reset Button and SD Card Slot/Reset 键和 SD 卡槽
Required Tools/ 准备安装工具
1
2
3
2
NOTE/ 说明
Use the Phillips
screwdriver to remove
the camera bottom
cover. Then, you can
see the Reset button,
SD card slot and
system running status
indicator.
使用十字螺丝刀将摄像
机底盖卸下,即可看到
重置键、SD 卡槽和系统
运行指示灯。
Video surveillance tester
视频监控测试仪
Hammer drill (for ceiling- or
wall-mounted installations)
冲击钻(吊顶和墙壁安装时使用)
PVC insulation tape
绝缘胶带
Hammer (for ceiling- or wall-
mounted installations)
羊角锤(吊顶和墙壁安装时使用)
RJ-45 connector crimping tool
水晶头压线钳
Phillips screwdrivers (1# and 2#)
十字螺丝刀(1#和2#)
Diagonal cutting pliers
斜口钳
Measuring tape
钢卷尺
Cable stripper
剥线钳
Waterproof tape
防水胶带
Utility knife
裁纸刀
Wrench
扳手
Wiring terminals
接线端子
Cable ties
扎线带
NO.
序号
Item
名称
Description
说明
1PoE/LAN Ethernet/PoE connection. This interface supports PoE.
网络接口,该接口支持PoE供电。
2RS485+/
RS485-
RS485 interface. This interface provides a transparent data channel for half-duplex transmission
between the camera and the connected device.
RS485接口。通过该接口,摄像机可以以半双工的方式通过透明通道与连接的设备互相传递数据。
3
AUDIO IN/
AUDIO OUT/
GND
Audio input/output interface and audio ground interface.
AUDIO IN/AUDIO OUT为音频输入/输出接口。GND为音频接地接口。
4
ALARM_OUT Alarm output and reference interfaces. The interfaces work together to form the alarm output.
The rated power of the device driven by alarm output is less than or equal to 30 W, and its
rated voltage is less than or equal to 110 V DC or 125 V AC.
告警输出接口。ALARM OUT和ALARM REF组成一组告警输出。告警输出所驱动设备的额定功率不大于
30W,额定电压不高于DC 110V或AC 125V。
ALARM_REF
ALARM_IN
Alarm input interface. There are two alarm input interfaces (for example: ALARM_IN0, ALARM_
IN1). Each one connects to the GND connection to form a single alarm input.
告警输入接口。存在2路告警输入线,采用ALARM_INn表示,n为数字,每条告警线与GND组成一组告
警输入。
GND Alarm input ground interface.
告警输入接地接口。
5GND Ground interface of an IPC.
设备接地接口。
6POWER Power input interface.24 V AC (-25%,+24.9%)
电源输入接口。AC24V (-25%,+24.9%)电源输入。
The color identifier
of the alarm cable is
subject to the actual
pigtail label.
告警线缆颜色标识以
实际的尾线标签为准。
NOTE/ 说明
1
2
3
4
5
6
NO.
序号
Description
说明
1Reset button
重置键
Reset button. To restart the device, hold down the reset button (less than 3s). To restore the device to
factory settings, hold down the reset button for at least 3s while the device is running.
Exercise caution
when restoring the camera to factory settings. After the camera is restored to factory settings, user account
and some other configuration data may be lost.
重置按钮。运行时按住RESET键短于3秒重启设备;运行时按住RESET键不短于3秒后恢复出厂配置。
恢复出厂配置
后将会导致用户的账号信息以及部分配置信息丢失,请慎重操作。
2SD card slot
SD卡卡槽
SD card slot. The SD card slot supports only class 10 or higher Micro SD cards. To replace a Micro
SD card, the device must be powered off. Otherwise, system exception may occur. When a Micro
SD card is used for the first time, log in to the web client of the device and format the Micro SD
card. For details, see the Configuration Guide.
SD卡卡槽,支持Micro SD卡(Class 10及以上)。请在设备断电的情况下插拔SD卡,否则可能会造成系
统异常。首次使用时,请登录设备Web客户端,格式化SD卡,操作方法请参见《配置指南》。
3Status
indicator
系统运行状态
指示灯
Off: The device is powered off.
灯灭:设备未上电。
Green: The system is running
properly.
绿色:系统运行正常。
Orange: The system is starting.
橙色:系统正在启动。
Steady red: The hardware is faulty.
红色长亮:硬件产生故障。
Fast flashing red: The device temperature is outside of
its acceptable operating range and an alarm has been
generated.
红色快闪:高温低温到达阈值,产生温度告警。
Slow flashing red: Packet loss
occurs on the network port or the
optical port is abnormal.
红色慢闪:网口丢包、光口异常。
Reset
1
2
3

3
Device Installation/ 设备安装
A. Device Installation Requirements/ 设备安装要求
1
2
3
B. SD Card Installation/ 安装 SD 卡
When the camera is not or cannot be
connected to a video surveillance platform
for a long time, you are advised to disable
video buffering to increase the service life
of the SD card.
Do not remove the protective film from the
lens before the installation is complete.
若摄像机长时间无法接通平台或者不对接
平台使用,建议手动关闭摄像机的平台离
线缓存补录功能,以提高SD卡的使用寿
命。
安装完成前切勿撕下镜头保护膜。
CAUTION/ 注意
Use the Phillips screwdriver to remove the camera bottom cover, and insert the SD card. You can refer to the SD
card icon on the maintenance window for the insertion direction. During SD card installation, you are advised to
turn the camera maintenance window downward and insert the SD card into the SD card slot from below to avoid
accidentally dropping the SD card into the camera.
使用十字螺丝刀将摄像机底盖卸下,插入 SD 卡,SD 卡插入方向参考维护窗上标识。安装 SD 卡时,建议将摄像机维护窗朝下 ,
避免不慎将 SD 卡掉入摄像机内部,造成设备故障。
Reset
Micro SD Card
C. Beam-mounted Installation/ 横臂安装
1Install the universal joint into No.2 hole (for the No.2 hole identifier, see the silk screen on the physical device)
on the pole-mount bracket. Unfasten the screws on the universal joint to enable the universal joint to rotate
freely. Adjust the horizontal and vertical shooting angles and tighten all screws on the universal joint.
将万向节安装到抱装支架 2 号孔位(2 号孔位标识请参见实物上的丝印)。拧松万向节上的螺钉,使得万向节可以自由转动。
初步调整好水平和垂直监控角度,拧紧万向节上的所有螺钉。
a: Loosen the screw here. Then, you can adjust the tilt angle of the camera.
b: Loosen the screw here. Then, you can adjust the horizontal angle of the camera.
c: Loosen the screw here. Then, you can adjust the vertical angle of the camera.
a:通过拧松该处螺钉,可调节摄像机倾斜角度。
b:通过拧松该处螺钉,可调节摄像机水平角度。
c:通过拧松该处螺钉,可调节摄像机垂直角度。
NOTE/ 说明
a
c
b
a
When installing a camera, note that the location, height, and angle can affect the accuracy of license plate
recognition.
摄像机的架设点位选择,以及高度、角度调整等,直接影响到车牌识别的准确率。
Requirements for the camera installation position:
摄像机的架设点位要求:
• The camera must be installed along a straight road, with no junction located within 50 meters of the camera.
• 建议点位前后 50m范围道路为直线,没有分岔口。
• There must not be any traffic lights within 200 meters of the camera.
• 建议点位前后 200m范围内没有交通信号灯。
• The lanes in the place where the camera is installed is as few as possible.
• 选择车道少的截面位置架设。
Requirements for the camera installation height:
摄像机的高度要求:
• The camera installation height must be between 4.5 m and 6 m.
• 摄像机的安装高度 H应在 4.5-6m之间。
• The distance (D) between the camera and the area where license plates are recognized must be between 15
m and 25 m. The installation height is often between a quarter and a third of the distance.
• 摄像机的安装横向距离 D应在 15~25m之间,可按照安装高度 H的 3~4倍进行设定
• The length of the recognition area should be about 15 m to 20 m.
• 摄像机的识别和抓拍区域的长度 L应在 15-20m之间。
Requirements for the camera installation angle:
摄像机的角度要求:
• The vertical angle of the camera must range from 10° to 15° .
• 摄像机的垂直角度尽量控制在 10~15°之间。
• If the camera is installed by the side of a road, a horizontal angle of less than 20° is recommended. If the
camera is located above a road, a horizontal angle of between –10° and 10° is recommended.
• 若使用道路侧装,横向角度建议在 0~20°之间;若使用道路中间装,横向角度建议控制在 -10~10°之间。
For details about installing a camera, visit http://support.huawei.com/enterprise and search for the Huawei
IPC Micro Checkpoint Document. Alternatively, you can contact Huawei engineers.
具体的摄像机安装要求,请登录 http://support.huawei.com/enterprise网站,获取《华为智能 IPC 微卡口专题》文
档,或者联系华为工程师获取。

Device Installation/ 设备安装
C. Beam-mounted Installation/ 横臂安装
2
3
Unfasten the three hose clamps and thread them through the installation holes on the pole-mount bracket.
Place the hose clamps around the beam and tighten them to affix the pole-mount bracket firmly onto the
beam.
将 3 个喉箍环穿过抱装支架的安装孔,并环绕在横臂上,拧紧喉箍。使用喉箍将抱装支架安装到横臂上。
Adjust the surveillance angle. Fasten all screws on the universal joint and use captive screws to fasten the two
planes of the universal joint to fix the universal joint. Then, adjust the position of the sunshield.
调整好监控角度,拧紧万向节上的所有螺钉,再使用辅助紧固螺钉在万向节的两个面上拧紧,使万向节固定。同时调整好
遮阳板位置。
d: Move it back and
forth. Then, you can
adjust the position of
the sun shield.
d:通过前后移动此位
置,可调节遮阳板。
4
a
b
c
d
NOTE/ 说明
D. Pole-mounted Installation/ 抱柱安装
1Fix the camera to the universal joint with the screws in No. 1 holes. Loosen screws a and b on the universal
joint for the universal joint to rotate freely. Adjust the horizontal and vertical shooting angles and tighten all
screws on the universal joint.
通过标识 1 位置的螺钉将摄像机固定到万向节上,拧松万向节上的 a 和 b 螺钉,使得万向节可以自由转动。初步调整好
水平和垂直监控角度,拧紧万向节上的所有螺钉。
2
Install the wall-mount bracket into No. 5 holes on the pole-mount bracket (for the No.5 hole identifier, see
the silk screen on the physical device).
将壁装支架安装到抱装支架 5 号孔位(5 号孔位标识请参见实物上的丝印)上。
a
b
1

NOTE/ 说明
ac
b
Use three hose clamps to install the pole-mount bracket to the pole. Adjust the surveillance angle. Fasten all
screws on the universal joint and use captive screws to fasten the two planes of the universal joint to fix the
universal joint. Then, adjust the position of the sunshield.
使用 3 个喉箍将抱装支架安装到柱杆上。调整好监控角度,拧紧万向节上的所有螺钉,再使用辅助紧固螺钉在万向节的
两个面上拧紧,使万向节固定。同时调整好遮阳板位置。
3
a: Loosen the screw here. Then, you can adjust the horizontal angle of the camera.
b: Loosen the screw here. Then, you can adjust the vertical angle of the camera.
a:通过拧松该处螺钉,可调节摄像机水平角度。
b:通过拧松该处螺钉,可调节摄像机垂直角度。
NOTE/ 说明
5
Device Installation/ 设备安装
D. Pole-mounted Installation/ 抱柱安装
E. Wall-mounted Installation/ 墙壁安装
1Fix the camera to the universal joint with the screws in No. 1 holes. Loosen screws a and b on the universal
joint for the universal joint to rotate freely. Adjust the horizontal and vertical shooting angles and tighten all
screws on the universal joint.
通过标识 1 位置的螺钉将摄像机固定到万向节上,拧松万向节上的 a 和 b 螺钉,使得万向节可以自由转动。初步调整好
水平和垂直监控角度,拧紧万向节上的所有螺钉。
a
b
1
Place the mount in the desired installation position. Use a marker to mark the screw installation locations.
Select a drill bit with a diameter of 8 mm to drill holes with a depth of about 60 mm. Use a claw hammer to
install the expansion bolts into the holes. Then, screw off the flat washers, spring washers, and nuts from the
expansion bolts. Use screws to fix the wall-mount bracket to the wall.
将支架放置于安装位置 , 使用记号笔绘制螺钉安装位置,选择直径为 8mm 的钻头,钻取深约 60mm 的导孔。使用羊角
锤将膨胀螺栓打入钻好的孔内。 再将平垫、弹垫和螺母拧下。使用螺钉将壁装支架固定到墙壁上。
2
E. Wall-mounted Installation/ 墙壁安装
Adjust the surveillance angle. Fasten all screws on the universal joint and use captive screws to fasten the two
planes of the universal joint to fix the universal joint. Then, adjust the position of the sunshield.
调整好监控角度,拧紧万向节上的所有螺钉,再使用辅助紧固螺钉在万向节的两个面上拧紧,使万向节固定。同时调整
好遮阳板位置。
3
a: Loosen the screw here. Then, you can adjust the horizontal angle of the camera.
b: Loosen the screw here. Then, you can adjust the vertical angle of the camera.
a:通过拧松该处螺钉,可调节摄像机水平角度。
b:通过拧松该处螺钉,可调节摄像机垂直角度。
ac
b

NOTE/ 说明
a
1
1Fix the camera to the wall-mount bracket with the screws in No. 1 holes. Loosen screws a on the universal joint
for the universal joint to rotate freely. Adjust the horizontal and vertical shooting angles and tighten all screws
on the universal joint.
通过标识 1 位置的螺钉将摄像机固定到吊装支架上,拧松万向节上的 a 螺钉,使得万向节可以自由转动。初步调整好垂
直监控角度,拧紧万向节上的所有螺钉。
6
Device Installation/ 设备安装
F. Ceiling-mounted Installation/ 吊顶安装 F. Ceiling-mounted Installation/ 吊顶安装
2Place the mount in the desired installation position. Use a marker to mark the screw installation locations.
Select a drill bit with a diameter of 8 mm to drill holes with a depth of about 45 mm. Use a hammer to
carefully drive the white plastic expansion tubes into the holes. Use screws to fix the wall-mount bracket to
the wall.
将支架放置于安装位置 , 使用记号笔绘制螺钉安装位置,选择直径为 8mm 的钻头,钻取深约 45mm 的导孔。使用羊角
锤将白色膨胀螺栓打入钻好的孔内。 使用螺钉将壁装支架固定到墙壁上。
3Adjust the surveillance angle. Fasten all screws on the universal joint, fix the universal joint. Then, adjust the
position of the sunshield.
调整好监控角度,拧紧万向节上的所有螺钉,固定万向节。同时调整好遮阳板位置。
a: Loosen the screw here. Then, you can adjust the vertical angle of the camera.
a:通过拧松该处螺钉,可调节摄像机垂直角度。
a
1
A. Cable Connection/ 连接线缆
Cable Connection/ 连接线缆
A. Cable Connection/ 连接线缆
CAUTION/ 注意
• In areas prone to lightning strikes, the lightning arrester must be installed and grounded.
在易受雷击的区域,必须安装避雷器,避雷器必须接地。
• Strong and weak current cables must be kept at least 5 cm apart from each other. When connecting the
cables to the device, take care to avoid connecting strong current cables to weak current interfaces or
you will damage your device.
强电和弱电必须分开布线,两者间的距离不小于 5cm。线缆与设备连接时,禁止将强电接到弱电接口上,以免造
成设备损坏。
• Wrap all pigtail cables in insulated, waterproof, rubber tape to prevent short circuits or water damage.
Cutting off the pigtail cables will void your warranty.
请务必使用绝缘胶带和防水胶带对所有尾线进行绝缘和防水处理,以免造成短路和漏水。尾线不能剪断,若剪断,
则无法维保。

1
2
3
4
Cable Connection/ 连接线缆
A. Cable Connection/ 连接线缆
Connect the ground cable to ground the device, and then connect the power cable. If crimp terminals are not
used, the wire thickness cannot exceed 1.5 mm², and the length cannot exceed 25 m. If crimp terminals are
used, the wire can be up to 0.75 mm² for a 15 m length of wiring, or up to 1.0 mm² if 20 m is required. Longer
wiring is not supported. The ground impedance cannot exceed 5 ohms.
连接接地线和电源线。接裸线最大支持 1.5mm²(长度最大支持 25m)电源线,配压线端子支持 0.75mm²(长度最大支
持 15m)或 1.0mm²(长度最大支持 20m)电源线。接地线要求阻抗≤ 5Ω。
Connect the network cable. Loosen the components 1, 2, and 3 of the waterproof connector kit on the network
cable port in sequence, thread the network cable through the kit, and install the components in the sequence
marked in the following figure. The waterproof connector of the network cable must be secured tightly, or they
may come loose later.
连接网线。先把网线接口上防水套件的组件 1、组件 2 和组件 3 依次旋转拆卸,然后穿入网线,再将各组件按如图所示
顺序安装。网线防水接头务必拧紧到位,否则会有脱落风险。
Power cable
电源线
Ground cable
接地线
Connect the audio cable.
连接音频线。
5m
m
O-ring for the waterproof connector (rubber ring)
网线防水接头密封圈(细橡皮圈)
1
2
3
Connect the alarm cable and RS485 cable. It is
recommended that twisted pair cables be used as
alarm cables. The diameter of the cable core ranges
from 22 AWG to 28 AWG. The impedance of the
entire cable is less than or equal to 100 ohms.
连接告警线缆、RS485 线缆。告警线缆建议使用双绞
线,线芯的线径为 22AWG ~ 28AWG,整条线路的阻抗
≤ 100Ω。
4
7
Wrap one layer of insulation tape around each
cable joint.
用绝缘胶带缠绕每条线缆对接处,缠绕一层。
Stretch the waterproofing tape evenly to twice its
original length. Then apply it for three layers from
bottom to top, from top to bottom, and from bottom
to top again.
均匀拉伸防水胶带,使其长度为原长度的 2 倍。再采用由
下至上,由上至下,再由下至上的处理方式缠绕三层。
1
2
3
Apply three layers of insulation tape. Then, use
cable ties to secure the both ends.
用绝缘胶带缠绕三层。最后用扎线带绑扎上下两端。
Cover the rest of the cabling in a conduit or with
protective waterproof rubber tape. Make a drip loop
as shown below to create an artificial lowest point of
the cable.
使用防护皮管或者防水胶带,包住线缆其他部分,并制作
滴水弯。滴水弯呈倒 Ω 型,形成线缆的最低点。
Insulation tape
绝缘胶带
Waterproof tape
防水胶带
Insulation tape
绝缘胶带
Cable tie
扎线带
Waterproof and insulate all cables including power cables, network cables, and unused pigtails.
Before that, check the cabling and ensure that the camera runs normally to avoid reworkings.
The waterproof tape must cover the cable bundle from the insulation sheath all the way to the cable conduit (for
example, a PVC tube). The tape must be wrapped tightly and there must be no gaps in the coverage or water will
leak in.
电源线、网线等所有的线缆,包括未使用的尾线都需要做防水绝缘处理。
做绝缘防水处理前请检查线缆是否接好并可正常工作,避免二次返工。
防水胶带务必从线缆束绝缘外皮开始缠绕至防护皮管(如 PVC 管),且尽量缠紧,且覆盖到位,以免漏水。
NOTE/ 说明
Drip loop
滴水弯
B. Waterproofing and Insulation/ 防水绝缘处理
12
34
Component 2
组件 2
1
2
3
Component 1
组件 1
Component 3
组件 3

Installation Verification/ 安装后检查
Verifying the Installation/ 安装后检查
8
Check Items/ 检查项 Result/ 检查结果
All screws are fully tightened.
确认所有螺钉已经完全拧紧,以接合处不能偏移为准。 Yes/ 是□ No/ 否□
The camera is securely installed on the bracket or wall.
确认摄像机与支架或者墙壁等之间的安装是稳固可靠的。 Yes/ 是□ No/ 否□
Necessary protective measures have been taken for the IPC.
IPC 设备有必要的防护,不易损坏。 Yes/ 是□ No/ 否□
The ambient temperature meets the device specifications.
确认工作的环境温度满足设备规格。 Yes/ 是□ No/ 否□
Insulation and waterproofing measures have been taken to protect cables installed in humid
environments, and the drip loops are in correct positions.
设备安装在潮湿环境时,确认网线以及尾线已经做好绝缘防水处理,滴水弯位置正确。
Yes/ 是□ No/ 否□
The camera is grounded, and if it is powered by PoE, the PoE connection is grounded too.
确认摄像机已接地,如果是 PoE 交换机供电,则 PoE 交换机也已接地。 Yes/ 是□ No/ 否□
The protective film and fixing rubber strip have been removed from the lens and camera body
respectively.
确认已撕掉摄像机镜头保护膜和机身固定胶条。
Yes/ 是□ No/ 否□
The camera can power on normally.
确认设备能够正常上电运行。 Yes/ 是□ No/ 否□
You can access the camera web portal using the IP address you configured.
确认能够使用配置好的 IP 地址登录设备 Web 页面。 Yes/ 是□ No/ 否□
On the camera web portal, you can view live video from the camera.
确认能够通过 Web 页面浏览实况。 Yes/ 是□ No/ 否□
The camera can accurately capture license plates during the day and at night and the
recognition accuracy rate is as expected.
确认白天和夜晚,摄像机都能准确的抓拍到车牌,识别准确率达到相应要求。
Yes/ 是□ No/ 否□
You can view the surveillance scene on camera web pages and the image is clear, as shown in
the following figure.
通过 Web 页面查看画面,确认要监控的画面在镜头监控范围内,且图像清晰。如下图所示。
Yes/ 是□ No/ 否□
After the device installation, check the following items to ensure that the device is installed properly.
设备安装完成后,请确认如下事项,以保证设备安装正确。
1There are no large areas of white (saturated) pixels.
画面中,没有大面积像素为白色(像素饱和)的现象。
2The pixel size of the license plate is sufficient.
车牌像素大小满足要求。
Data Plan/ 数据规划
IP address/IP 地址
Parameter
参数名
Description
参数解释
IP address
assignment
method
获取IP方式
• Automatic: The system automatically configures the IP address, subnet mask, gateway IP address,
and DNS.
自动获取IP地址:系统将自动配置IP地址、子网掩码、网关地址和DNS。
• Manual: You need to manually set the IP address, subnet mask, gateway IP address, and DNS.
使用下面的IP地址:需要用户手动配置IP地址、子网掩码、网关地址和DNS。
IP address
IP地址
• IP addresses starting with 127 are not valid. You must enter an IP address starting with another
value from 1 to 223.
以127开头的IP地址无效,请输入介于1和223之间的其它数值。
• If the camera is passively registered with the platform using the ONVIF or SDK, only the IP address
needs to be configured.
通过ONVIF或者SDK被动注册时,仅需要配置IP地址即可。
GB/T28181
Parameter
参数名
Description
参数解释
Platform IP
平台IP
IP address of the platform server. This parameter is mandatory.
监控平台所在服务器的IP地址。必须设置。
Port number
端口号
Port number of the platform server. This patameter is mandatory.
监控平台所在服务器的端口号。必须设置。
Device ID
设备ID
Unique ID that the video surveillance platform allocates to the camera. The value of this parameter
must be the same as the first 20 digits in the device ID (the value of Code on the IVS platform)
configured on the video surveillance platform. If they are different, the camera will fail to connect
the video surveillance platform.
监控平台分配给前端设备的唯一标识。必须与平台配置的设备ID(在IVS平台中,该参数名为编码)的前20位保
持一致,以免造成对接失败。
Login name
登录名
User name used to register the camera with the video surveillance platform. The value of this
parameter is in the login name@domain name format. The login name indicates the device ID. The
domain name consists of 10 digits.
用于注册到监控平台。格式为:登录名@域名。登录名为设备ID,域名为自定义10位数字。
Password
密码
Password used to register the camera with the video surveillance platform. This password must be
the same as the registration password configured on the video surveillance platform.
设备注册到平台时的注册密码。必须和监控平台中的注册密码保持一致。
Server code
服务器编码
The 20-digit server code complies with the GB/T28181 protocol.
GB/T28181服务器编码。自定义输入20位数字。
IP address/IP 地址
3The license plate is as horizontal as possible and the tilt
range is within the range of –5° to +5° .
车牌的倾斜角尽可能水平,保证水平倾斜角度处于 -5°~ 5°之间
范围。

Specifications/ 技术参数
9
Web Operations/Web 操作
1
1
2
3
Open Internet Explorer, enter the IPC IP address, and press Enter. The IP address can be set automatically
via DHCP, or a static IP address can be used (default: 192.168.0.120).
在Internet Explorer地址栏里输入摄像机的IP地址,IP地址默认通过DHCP自动获取,也可以手动进行设置(默认为
192.168.0.120),按“Enter”键。
NOTE/ 说明
Log in to the web client as the admin.
以管理员用户 admin 账号登录 Web 客户端。
Choose Settings > Network > Platform Connection.
选择“高级配置 > 网络 > 平台对接参数”。
Set the platform connection parameters as planned, for detail about how to set platform connection
parameters, see Configuration Guide.
根据规划的数据配置平台对接参数。平台对接参数的具体配置方式请参见《配置指南》。
Setting Platform Connection Parameters/ 配置平台对接参数
Setting Basic Network Parameters/ 配置基本网络参数
Log in to the web client as the admin.
以管理员用户 admin 账号登录 Web 客户端。
Choose Settings > Network.
选择“高级配置 > 网络”。
Set the network parameters as planned, for details about how to set basic network parameters, see
Configuration Guide.
根据规划的数据配置基本网络参数 , 基本网络参数的具体配置方式请参见《配置指南》。
1
2
3
The default IPC video coding protocol is H.265. Verify that the connected surveillance platform supports H.265.
Otherwise, see the Configuration Guide to modify the video coding protocol used by your IPC.
摄像机出厂默认编码协议为H.265,请务必确认所对接的监控平台是否支持H.265编码协议,否则请参见《配置指南》修改
摄像机编码协议。
NOTE/ 说明
Logging In to the Web Client/ 登录 Web 客户端
Appendix/ 附录
Troubleshooting/ 常见问题处理
Q : After you enter the IPC IP address in the address box and press Enter, the Internet Explorer displays
"There is a problem with this website's security certificate."
问:在 IE 浏览器中输入设备 IP 地址后,网页显示“此网站的安全证书有问题”?
A : Click Continue to this web (not recommended) to continue browsing this website. Then, install the
root certificate or upload your own certificate. For details, see Configuration Guide.
答:单击“继续浏览此网站(不推荐)”,继续访问设备 Web 页面 , 然后安装根证书或上传用户自己的证书文件,具体
操作请参见《配置指南》。
Q : After the root certificate is installed, the Internet Explorer still displays "There is a problem with this
website's security certificate." After you click Continue to this web (not recommended) to access the
login page, the "Certificate Error" message is displayed in the address box.
问:根证书下载安装完成后,IE 仍提示“此网站的安全证书有问题”,单击“继续浏览此网站(不推荐)”进入登录页面
后,地址栏中出现“证书错误”提示。
A : Choose Setting > System Configuration > Configuration Management and upload a valid certificate.
After the certificate is uploaded, restart the browser.
答:选择“配置 > 系统配置 > 配置管理”,上传用户自己的合法证书,完成后重新启动浏览器。
Q : What can I do if I forgot the password of the admin user?
问:忘记 admin 用户的密码?
A : Hold down the reset button for at least 3s to restore the camera to factory defaults.
答:长按 Reset 键 3s 以上恢复系统默认配置。
Q: What can I do when the message "Your request for URL has a security risk. You can access this URL by
clicking the Continue, I accept this risk. button. If you make this choice, it means that you accept this
risk.”is displayed during a login attempt?
问:通过 web 页面登录摄像机时显示“您访问的链接存在安全风险。若您接收此风险,请点击“继续,我接受此风险”
按钮继续访问”,应如何处理?
A :Choose Tools > Internet Options, click the Connections tab, click LAN Setting, and uncheck Use a
proxy for your LAN.
答:选择“工具 > Internet 选项”,选择“连接”页签,点击“局域网设置”,“为 LAN 使用代理服务器”选择框去掉勾选。
Exercise caution when restoring the camera to factory settings. After the camera is restored to factory settings, user
account and some other configuration data may be lost.
恢复出厂配置后将会导致用户的账号信息以及部分配置信息丢失,请慎重操作。
CAUTION/ 注意
2
3
Enter the user name (admin) and password. For the first login, set the password as prompted.
输入用户名admin和密码。首次登录,请按照提示设置密码。
Click Log In.
单击“登录”。
• Supported browsers: Internet Explorer 9-11, Google Chrome 32 and later versions, and Mozilla Firefox 35-51.
Google Chrome 45 and later versions require installation of Internet Explorer Tab plug-in.
支持的浏览器:Internet Explorer 9~11、Google Chrome 32及以上版本、Mozilla Firefox 35-51版本。其中Google
Chrome 45及以上版本需安装Internet Explorer Tab插件。
• When using HTTPS to access a camera, you must enable TLS 1.1 or TLS 1.2. Otherwise, the camera web page
cannot be displayed.
使用HTTPS协议访问摄像机时需要启用TLS 1.1或TLS 1.2,否则无法打开摄像机web页面。
• Please open the web browser on your PC as the administrator.
请使用PC的管理员身份打开浏览器。
Warranty Card
Thank you for choosing products of Huawei Technologies Co., Ltd. (Huawei). To be entitled for warranty service for
the product, please read the following warranty statements carefully.
1. Warranty Period
Unless otherwise stated specifically by Huawei, the following periods apply:
Duration of Hardware Warranty: 12 months
Duration of Software Media: 3 months
The start date of the warranty:
The warranty starts on the 90th day after the date of the product shipment from Huawei, or the date of receiving
service request, whichever is earlier.
Notes:
1. If there is any conflict with contract terms and conditions, the contract terms and conditions shall prevail.
2. When you purchase a product from Huawei, please confirm the date when the product will be shipped from Huawei,
and check other warranty-related information.
3. For expansion and replacement parts, you are entitled to either of the following warranties (whichever is longer):
(1) A 90-day warranty starting from the date the replacement parts are shipped
(2) The remaining warranty of the original equipment
4. Warranty service is provided for the lithium battery modules for the S series switches, but the terms related to
hardware warranty service response time in the Huawei Enterprise Standard Warranty do not apply to the lithium
battery modules.
2. Service Guidelines
This warranty card entitles you to free warranty service within the warranty period. For a complete listing of
applicable warranties, please visit http://e.huawei.com, choose Support > Service Solutions > Warranty.
Technical Support: Visit http://support.huawei.com/enterprise, click Contact Us at the bottom of the page, and select
your country to obtain contact information of Huawei local office.
TAC Support: Visit http://support.huawei.com/enterprise and choose Contact > Global Service Hotline to find the
service hotline available in your country.
Complete the form below and keep for ready reference:
Product supplier:
Supplier telephone number:
Product serial number:
Specifications/ 技术参数
NOTE/ 说明
Item/名称 Description/说明
Image sensor
图像传感器
1/1.8" 2.0 megapixel progressive scan
1/1.8" 200万像素逐行扫描
Video compression
视频编码格式 H.265/H.264/MJPEG
Power supply
电源
AC24V(-25%,+24.9%), PoE++.Do not support the power supply, no priority power
supply.
AC24V(-25%,+24.9%),PoE++,不支持电源热备,无优先供电
Power consumption
功耗
Typ. 8.5W, Max. 32W
典型8.5W,最大32W
Operating temperature
工作温度 -40~+60℃
Corrosion resistance
防腐等级
Applicable to areas 1500 meters away from the seaside (far away from chemical
industry or heavily polluted areas)
适用于距离海边1500米以外的区域(远离化工、重污染区)
• To ensure the camera performance, use PoE switches that comply with the IEEE 802.3.bt standard.
• The parameters listed in the table are for reference only. For details about the technical specifications, see the
product datasheet. To obtain the product datasheet, log in to http://e.huawei.com, choose Products & Solutions
> Video Surveillance, and download the datasheet of a specified product model
• 为了保摄像机的性能,请使用符合IEEE 802.3.bt标准的POE交换机。
• 表格中所列参数仅供参考,设备详细技术参数以Datasheet为准,您可以登录http://e.huawei.com,在产品与解决方案,
产品分类下,选择”视频监控“,根据具体型号下载。
Supplier’s Declaration of Conformity (SDoC)
Unique Identier: trade name: HUAWEI; product name: Network camera; model number: X2221-VL
Responsible Party- U.S. Contact Information
Huawei Technologies USA Inc.
5700 Tennyson Parkway, Suite 500
Plano, Texas 75024
Main: 214-919-6000 / TAC Hotline: 877-448-2934
FCC Compliance Statement ( for products subject to Part 15)
This device complies with part 15 of the FCC Rules. Operation is subject to the following two conditions: (1) This
device may not cause harmful interference, and (2) this device must accept any interference received, including
interference that may cause undesired operation.

Appendix/ 附录
Security Precautions/ 安全注意事项
保 修 卡
尊敬的用户,感谢您使用华为技术有限公司(以下简称华为)的产品,请详细填写保修卡内容,并将下面
的保修卡厂家留存联寄回华为公司,华为公司会登记备案,并保证您的以下权益:
1.您购买的主机可获得12个月的设备免费保修服务(软件介质保修期为3个月)。
2.保修期起始时间计算方式:
从发货之日起九十(90)日或买方第一次申请保修服务之日起孰早开始计算,最晚保修起算时间不超过发货之日起九十(90)日。
3.请注意:
(1)在购买产品时,为保障您的权益,请确认产品从华为的发货日期等保修相关信息。
(2)扩容部件与故障更换件的保修期为华为发货之日起90天,或者跟随主机原有的剩余保修期服务,以两者中较长的时间为准。
(3)免费保修服务仅限于主机(系列主板、电源模块、风扇模块、通信模块、硬盘)和相关辅助部件。
(4)S系列交换机配套的锂电池模块提供保修,但不适用《标准保修说明书》的硬件返修服务响应时间条款。
4.用户可凭保修卡享受保修期内的基本保修服务,服务的详细内容可查看《企业网络产品标准保修说明书》,该保修说明书可在华为企
业业务网站(http://e.huawei.com)查询。
5.中文保修卡仅适用于中国大陆。
华为公司Help Desk热线:400-822-9999(7*24小时)
商业分销产品授权服务中心网站:
http://e.huawei.com
,
依次点击“技术支持>渠道服务>商业分销授权服务中心>授权服务中心服务指南”。
保修卡须经销商盖章方有效
(用户留存)
用户名称:
产品型号:
产品条码:
购买日期: 年 月 日
经销商:
详细地址:
邮编: 电话:
传真: E-mail:
经销单位:(盖章)
用户名称:
详细地址:
邮编: 电 话:
传真: E-mail:
产品条码:
购买日期: 年 月 日
经销商:
经销单位:(盖章)
用户名称:
详细地址:
邮编: 电 话:
传真: E-mail:
产品条码:
经销单位:(盖章)
保修卡(经销商留存)
重要提示:请将此联寄回以下地址
保修卡(厂家留存)
广东省东莞市松山湖科技园新城大道6号
华为南方工厂C区C7-1F 华为维修服务中心
电话:0755-28560555(5*8h: 8:30-12:00, 13:30-18:00)
邮编:523808
邮件上注明保修卡
Carefully read and strictly comply with the following instructions. Pay special attention to the alarm details in
this manual:
请仔细阅读本说明并严格遵守,留意本手册中的所有警告信息。
• The power adapter to be used by the device must meet the input voltage and current requirements described
on the device label.
设备所使用的电源适配器必须满足设备标签上注明的电源输入电压和输入电流要求。
• In areas prone to lightning strikes, a lightning arrester must be installed and grounded.
在易受雷击的区域,必须安装避雷器,避雷器必须接地。
• If a battery is replaced by an incorrect type, the batter may explode. Dispose of used batteries according to
the instructions.
如果更换不正确的电池规格会有爆炸的风险,请按制造商说明书处理使用过的电池。
• This is a class A product. In a domestic environment this product may cause radio interference. Users may be
required to take compensatory measures.
此为 A级产品,在生活环境中,该产品可能会造成无线电干扰。在这种情况下,可能需要用户对其干扰采取切实可行的措施。
• Use a soft dry cloth when cleaning the camera body. Do not use strong or abrasive alkaline cleaners or
volatile solvents such as alcohol, benzene, or chemical thinners.
清洁机身可用柔软的干布擦拭,请勿使用如酒精、苯或稀释剂等挥发性溶剂或者强烈的、带有研磨性的碱性清洁剂。
• Keep the device away from water or any other liquids. Take proper waterproofing measures.
禁止让任何液体流入设备中,必须做好防水措施。
• Keep the device away from heat sources, and fire sources (such as heating apparatus or candles), and strong
magnetic fields (for example, high-voltage power distribution cabinets).
安放设备时请远离热源、裸露的火源(例如电暖器、蜡烛等)和强磁场环境(例如高压变电箱)。
• Avoid any unauthorized modifications on the design of the structure, security, or performance.
未经授权,任何单位和个人不得对设备进行结构、安全和性能方面的改动。
• Installation and maintenance must be performed by professional technical engineers or system installation
engineers. Installation and maintenance must be performed by professional technical engineers or system
installation engineers.
有关本装置的所有安装维修工作均应由专业的维修技术人员或系统安装人员来完成。
• If the installation environment ever exceeds 50℃, install the product in an area accessible only to professional
personnel.
当该产品安装区域的最高温度超过 50℃时,该产品需要安装在仅能由专业人士接触到的受限制区域。
• Use product-attached auxiliaries and recommended fittings.
请使用产品配套的附件以及厂商推荐的配件。
• Carry a device by the device body. Do not pull the pigtails.
搬运设备时,使用双手合抱机身将摄像机捧起,禁止提拉尾线。
• Comply with related laws and regulations, and respect legal rights of others when using this device. If a
camera is installed in a public place, post a clearly visible notice stating, "You have entered an electronic
surveillance area."
使用本设备时应遵循相关的法律法规,尊重他人的合法权利。如果您在公共场所安装摄像机,请在醒目的位置给予提示:
您已进入电子监控范围。
Table of contents
Other Huawei Digital Camera manuals

Huawei
Huawei ViewPoint 8053 User manual

Huawei
Huawei VPT300 Operating and safety instructions

Huawei
Huawei IPC6125-WDL-FA User manual

Huawei
Huawei X2382-HL User manual

Huawei
Huawei X3221-C User manual

Huawei
Huawei HoloSens User manual

Huawei
Huawei X6721-GZ37 User manual

Huawei
Huawei IPC6225-VRZ User manual

Huawei
Huawei M8544-EL-Z37 User manual

Huawei
Huawei MATE 9 PRO User manual

Huawei
Huawei X6781-Z37 User manual

Huawei
Huawei M2221-QL-MG User manual

Huawei
Huawei X2221-VI User manual

Huawei
Huawei HoloSens User manual

Huawei
Huawei X2331-CPI User manual

Huawei
Huawei C6620-Z23 User manual

Huawei
Huawei CV60 User manual

Huawei
Huawei RP200 User manual

Huawei
Huawei HoloSens User manual

Huawei
Huawei ITS User manual