Hubsan H205B User manual

15
>INTRODUCTION
>SAFETY NOTES
>SAFETY CHECK BEFORE FLYING
>TRANSMITTER SETUP
>INSTRUCTION FOR BATTERY RECHARGING
>FLYING TRAINING
CONTENTS
INSTRUCTION
MANUAL
™
No.H205B
H205B Spare Part Chart
H203-01
Main Frame set
H203-02
Bearing
H203-03
Swashplate set
H203-04
Servor
H103-C01
Undercarriage
H203-08
Screw set
H203-09
Linkage Set
H205-A02
Tail Decorations
H203-A05
Balance Bar
H203-13
Battery
H203-A11
Receiver
H103B-06
Transmitter
H105-A01
Charging/Switch PCB
H203B-01
Alloy Side
H203-19
Rotor Grip set
H203-20
Main shaft set
H203-21
Lower Head Set
H203-22
Main Rotor
H203-25
Motor
H103-A21
Charger
H205-A01
Body
H203-A04
inner shaft gear set
H103-A22
usb charger
H103-A19
Charging convert PCB

1 INTRODUCTION
2 SAFETY NOTES
Thank you for buying HUBSAN products. The helicopter is designed as an easy to
use, full featured RC helicopter model capable of all forms of rotary flight. Please read
the manual carefully before assembling the model, and follow all precautions and
recommendations within the manual. Be sure to retain the manual for future
reference, routine maintenance, and tuning.
1.1 IMPORTANT NOTES
This RC helicopter is not a toy, it utilizes various high-tech products and technologies
to provide superior performance.
Please read this manual carefully before operating this product. Improper use of this
product can result in serious injury. Be aware of your personal safety, safety of others
and your surrounding environment.
We recommend that you obtain the assistance of an experienced pilot before
attempting to fly our product for the first time.
2.1 CAUTION
R/C helicopters have parts that move at high speed, thus posing a certain degree of
danger. Pilots are responsible for any actions resulting in damage or injury from the
improper operation of their R/C aircraft models.
Choose a wide open space without obstacles. Do not operate R/C aircraft near
buildings, crowds of people, high voltage cables, or trees to ensure the safety of
yourself, others and your model.
Operate this unit within your ability. Do not fly whilst tired, improper operation may
cause in danger.
2.2 LiPo Battery Recharging
Your helicopter is powered by a Lithium-Polymer (LiPo) battery.
Never recharge your battery whilst it is inserted in your model. It can catch fire leading
to the total destruction of the item.
114
6.7 Flying Outdoors
These inputs will result in your model adopting a nose-down right-roll attitude. Note that the top
rotor remains almost horizontal (as a result of the gyroscopic stabilizer arm), while the servos
have pushed the swash plate to tilt the lower rotor right-and-forwards in the intended direction
of travel.
Tip- if you become confused, releasing your helicopter’s controls will bring it to a stop. It will not
lose height, as the Throttle is on a ratchet.
The effect of simultaneous control inputs will, with practice, result in elegant slip-free turns
which demonstrate the sophisticated controls of your 4 channel RC helicopter.
The final challenge is to fly your helicopter outdoors under open skies!
Remember, your helicopter is designed for indoor operation, where low-speed
precision-control is paramount. When flying in the great outdoors - even though you may think
it’s absolute flat calm - you will notice that your helicopter is susceptible to almost
imperceptible air currents. This presents an interesting challenge for the experienced pilot, but
could spell disaster if attempted too soon. So, take your time and practice the Flying Lessons
described in this manual until you have acquired proficiency in the Advanced Maneuvers.
Make sure it really is a flat calm day outside. And remember that outdoor flight is a whole new
learning experience.
Flying your radio-controlled helicopter outdoors really is great fun. Just remember its design
limitations and be prepared to make the professional pilot’s decision to cancel your plans and
you helicopter will live to fly another day.
There are Old pilots, and there are Bold pilots……
But, there are no Old Bold pilots!

2
Charge and store LiPo batteries in a location where a battery fire or
explosion (including smoke hazard) will not endanger life or property
Keep LiPo batteries away from children and animals
Consider how you would deal with a LiPo battery fire/explosion as part of your
normal home Fire Safety & Evacuation Planning
Never charge a LiPo pack that has ballooned or swelled due to
over-/under-charging or from a crash
Never charge a LiPo battery pack that has been punctured or damaged in a
crash (After a crash, inspect the battery pack for the sign of damage. Discard
in accordance with your country’s recycling laws.).
Do not charge LiPo batteries near flammable materials or liquids
Ensure that charging leads are connected correctly. Reverse polarity charging
can lead to battery damage or a fire or explosion
Never charge a LiPo battery in a moving vehicle
Only charge your LiPo battery using the supplied “balanced” charger
Have a suitable(electrical type) fire extinguisher near the charging area OR a
large bucket of dry sand. Do not try to extinguish electrical (LiPo) battery fires
with water
Reduce risks from fire/explosion by storing and charging LiPo batteries inside
a suitable container: a LiPo Sack or metal/ceramic container is advised
Monitor recharging LiPo batteries for signs of overheating
Never over charge a LiPo battery
Never leave a LiPo battery unattended during recharging
Protect your LiPo battery from accidental damage during storage and
transportation. (Do not put battery packs in pockets or bags where they can
short circuit or can come into contact with sharp or metallic objects.)
If your LiPo battery is subjected to a shock (such as a helicopter crash) you
should place it in a metal container and observe for signs of swelling or
heating for at least 30 minutes
Do not attempt to disassemble or modify or repair a LiPo battery
LiPo batteries differ from conventional batteries in that their chemical contents are
encased in a relatively insubstantial foil packaging. This has the advantage of
significantly reducing their weight, but does make them more susceptible to
damage if roughly or inappropriately handled. As with all batteries, there is a risk
of fire or explosion if safety practices are ignored:
13
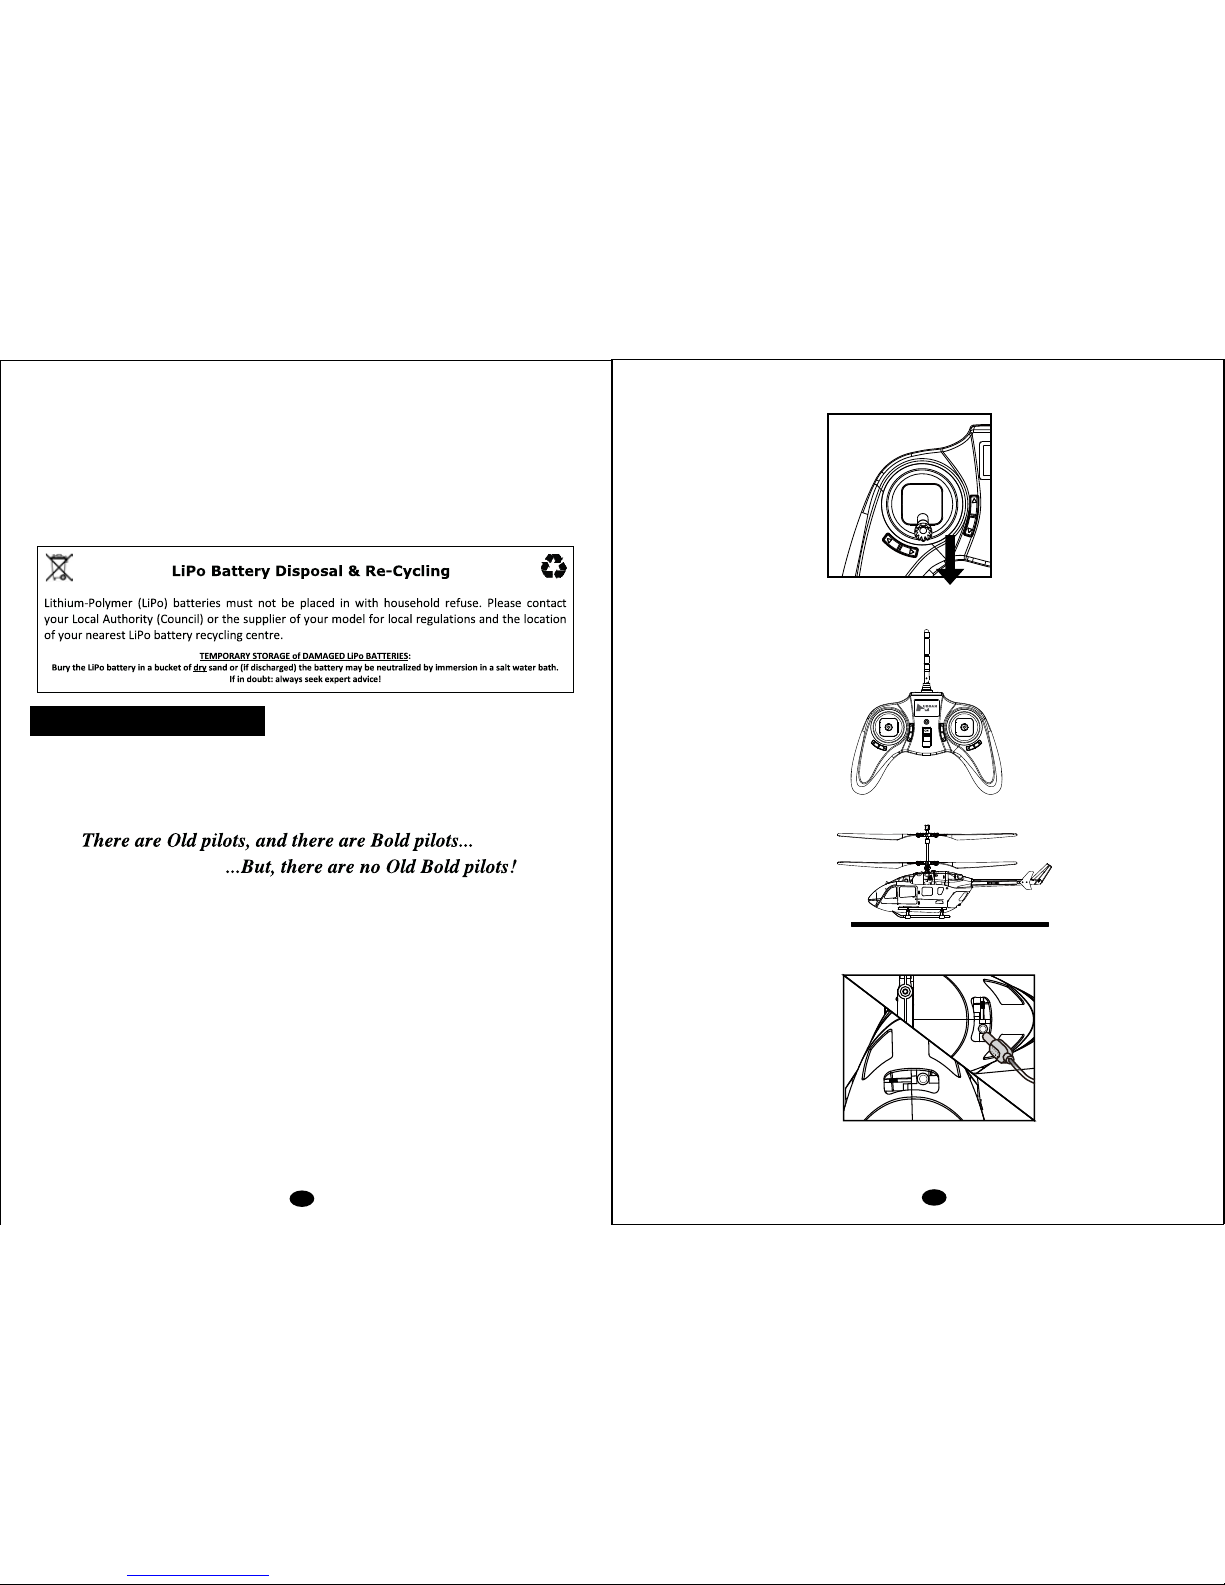
4. Notice that the cyclic joystick is spring-loaded, you must maintain a forwards pressure on the
cyclic joystick otherwise it will return to its neutral position and your helicopter will stop moving.
Tip-if you become confused, releasing your helicopter's controls will bring it to stop. it will not
lose height as the throttle is on a ratchet.
5. Stop you helicopter, turn it around (use rudder), and bring it back.
6. Choose a landing site. Fly your helicopter to a position that is precisely over your chosen
landing site and set your helicopter down in a smooth and precise landing.
7. Repeat this flying lesson until you become S-M-O-O-T-H-L-Y proficient and precise.
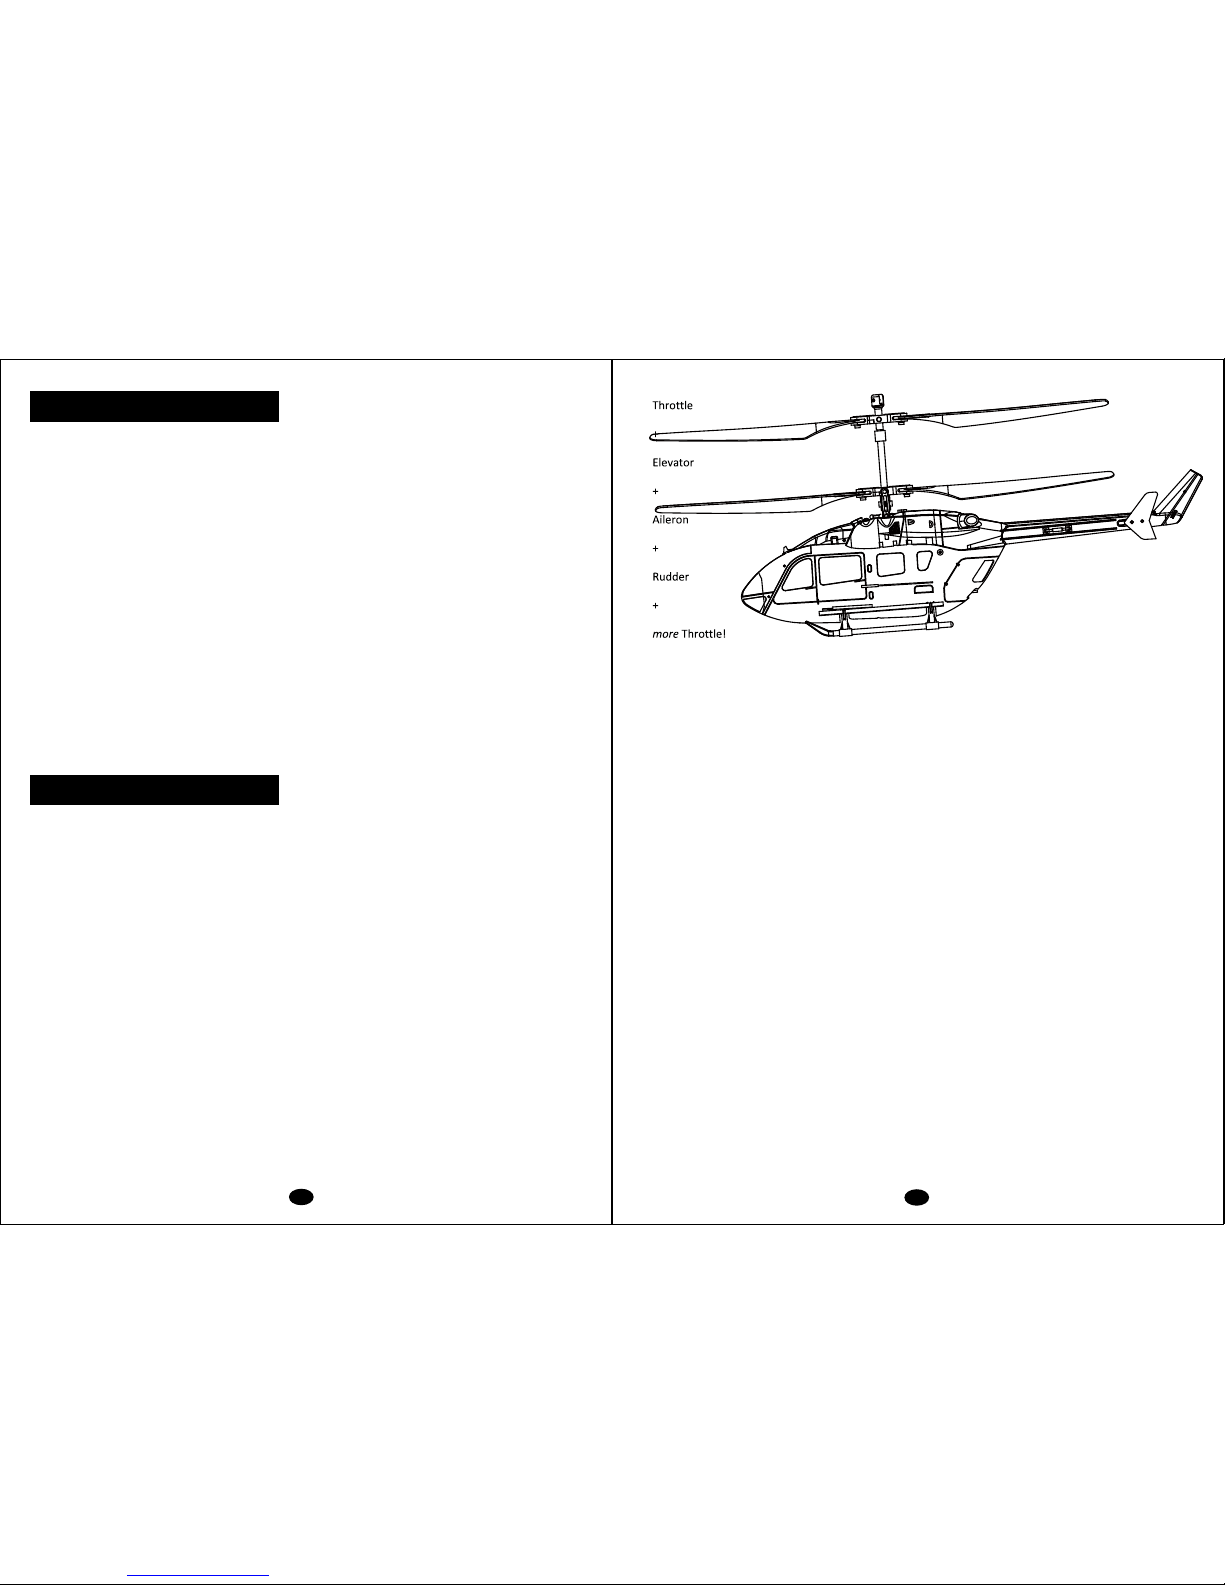
3.5 Advanced Maneuvering
In this flying lesson you will combine cyclic joystick Pitch and Roll inputs with collective Rudder
and Throttle inputs to give more precise control to your helicopter maneuvers.
You've probably already tried combining Rudder and forward Pitch inputs. This combination
allows you to turn your helicopter, but it won’t look right. The helicopter will remain upright. It's
like watching a bicycle that's not leaning into the turn, because air has very little grip, your
helicopter will actually skid through its turn.
The solution is to make the helicopter lean-"Roll"-so that rotors help to counteract the tendency
to skid (or 'side slip').To do this, you must learn to synchronise your use of mixed Pitch and Roll
on the cyclic joystick, with mixed Rudder and Throttle on the collective joystick
1. Begin a hover at shoulder height.
2. Push the cyclic stick Forwards to gather sufficient airspeed.
3. Begin your turn by pushing the cyclic joystick to the right (setting up the Roll) while
maintaining forward pressure.
4. As your model begins to respond to the Roll, push the collective Rudder joystick to the right
to initiate the turn.
5. Don't forget to be ready to catch the helicopter's loss of lift. As you servos are creating a
battery power drain, you will need to increase the collective Throttle while maintaining the
Rudder input Exiting the Turn maneuver
6. At the end of the turn, begin to SUMULTANEOUSLY ease off the cyclic Roll, collective
Rudder and the additional Throttle inputs. You should practice until you can simultaneously
use all of the joystick inputs in smooth, synchronized
movements. This will take a lot of practice!

3
2.3 PREVENT MOISTURE
R/C models are composed of many precision electrical components.
It is critical to keep the model and associated equipment away from condensation and
other contaminants. Exposure to water or moisture may cause the model to
malfunction resulting in loss of responsiveness, or a crash.
2.4 PROPER OPERATION
For the safety purpose, please only use hubsan’s spare parts for replacement.
2.5 ALWAYS BE AWARE OF THE ROTATING BLADES
When in operation, the main and tail rotor blades will be spinning at high speed. The
blades are capable of inflicting serious body injury and damage to the environment.
Be cautious of your actions and careful to keep your body and loose clothing away
from the blades. Never take your eyes off the model or leave it unattended while it is
turned on. Once landed, immediately turn off the model and transmitter.
2.6 AVOID FLYING ALONE
Beginners should avoid flying alone whilst learning flight skills. It is advised that an
experienced pilot be on hand for guidance.
It is recommended to practice with a computer-based flight simulator.
CAREFULLY INSPECT BEFORE REAL FLIGHT
• Before operation, please check the batteries of the transmitter and receiver are
charged enough for the flight.
• Before turning on the transmitter, please check that the throttle stick is in the
minimum position.
• Check for any missing or loose screws and nuts. Carefully check main rotor blades
and rotor holders. Broken or premature failure of parts will result in a dangerous
situation.
• Check all the ball links to avoid excess play and replace as needed. Failure to do so
will result in poor flight stability.
• Check the battery and power plug are securely fastened. Vibration and violent flight
may cause the plug to loosen resulting in loss of control.
• When turning on the unit, please follow the power on/off procedure: for Power ON-
please turn on the transmitter first, and then turn on the receiver. For Power OFF-
please turn off the receiver first and then turn off the transmitter. Improper procedure
may cause loss of control of the helicopter.
3 SAFETY CHECK BEFORE FLYING
12
6.4 Basic Maneuvering
In this Flying Lesson you will use the cyclic joystick and the Rudder to maneuver
your helicopter.
1.Keeping a safe 1 to 2 meters from your model, S-M-O-O-T-H-L-Y advance the
collective Throttle joystick until your helicopter reaches approximately shoulder
height.
2.S-L-O-W-L-Y apply collective Rudder control to point the nose of your helicopter in
the direction you wish to fly.
3.Once you have turned your helicopter, place your right thumb over the tip of the
cyclic joystick and S-L-O-W-L-Y press forwards.
The lower rotor will tilt forward. The helicopter’s nose will pitch down. Your helicopter
will begin to move forward.
Tip- Be ready to slightly increase your Throttle power, as the helicopter is likely to
lose a little height during maneuvering. Also remember that the swash plate on the
helicopter links all of your cyclic controls; so don't be surprised if your helicopter
moves slightly to the left/right as well as forwards. As you gain experience, you will
stop thinking in terms of Left/Right or Forwards/Backwards and start to automatically
synchronize cyclic joystick corrections, just like flying a full size helicopter.
MODE 2 MODE 1
MODE 2 MODE 1
OFF OFF
OFF OFF
Tip: The helicopter will find the rudder
central automatically in 3 seconds after
the helicopter landing on the ground.

11
6.3 Hovering and Cyclic Trim
Because your helicopter’s rotors create a ‘downdraft’ any
attempt to hover at too low an altitude (height) is more
difficult than hovering a little higher. This difficulty is
because the downdraft from your rotors is bounced back off
the ground, resulting in turbulent air around the
helicopter-this is referred to as ‘Ground Effect’. For this
reason, we recommend that you begin your hovering
practices at about 1 meter off the ground.
1. Keeping a safe 1 to 2 meters from your model, S-M-O-O-T-H-L-Y advance the
collective Throttle joystick until your helicopter reaches approximately waist height.
Throttle(Collective Power)Increases/decreases the Flying Height of your helicopter
2.If the helicopter has a tendency to rapidly move in any direction, either:
a.LAND IMMEDIATELY, by S-M-O-O-T-H-L-Y reducing the throttle power. Then
adjust the trim sliders to compensate. Repeat the sequence from Step1, above.
b.GENTLY apply cyclic joystick correction in the opposite direction to the
helicopter’s aberrant movement. Once you’ve established the amount of required
control correction, land your helicopter. Adjust the trim sliders equivalent to the
amount of the applied joystick compensation. Repeat this sequence, beginning at
Step1, above.
3.GENTLY and S-L-O-W-L-Y push forward/pull back on the collective Throttle to
maintain an even height without ‘bouncing’ the helicopter up and down.
Tip: for more sensitive control-and improved ability to mix Throttle and Rudder
inputs-try placing your left thumb on the tip of the collective joystick.
4.S-L-O-W-L-Y reduce the Throttle power and GENTLY land your helicopter.
5.Repeat the exercise, from Step 1 until you can confidently lift, hover and land your
helicopter under full control.
MODE 2 MODE 1
OFF OFF
4
4 TRANSMITTER
4.1 Identification and functional keys
TRANSMITTER
(MODE 2)
(MODE 1)
9 Antenna
OFF
4 Elevator Trim
1 Throttle/Rudder Stick
5 Rudder Trim
6 Throttle Trim
2 Elevator/Aileron stick
7 Power SW
3 Aileron Trim
9 Antenna
OFF
4 Elevator Trim
(2) Elevator/Rudder Stick
5 Rudder Trim
6 Throttle Trim
(1) Throttle /Aileron stick
7 Power SW
3 Aileron Trim

10
Although the helicopter’s trim has been factory set, you will need to fine tune the
settings so that your helicopter can maintain a better balanced hover
IMPORTANT: KEEP YOUR CONTROL INPUTS VERY S-L-O-W & GENTLE
1. Set the collective Throttle joystick and trim slider to its lowest setting. All other
trim sliders should be at their mid positions.
2. After completing the ‘Power-On (Failsafe) Procedure’, place your model on a
smooth, flat surface which will allow it to slide and turn (a landing board is idea).
Tip: The helicopter will find the
rudder central automatically in
3 seconds after the helicopter
landing on the ground.
3. Keeping a safe 1 to 2 metres away from your model, always ready to switch off
the Throttle, S-L-O-W-L-Y advance the collective Throttle joystick until you can see
that the model’s landing skids are just trying to lift but are not yet hovering.
4. Observe how your helicopter behaves.
5. Most likely, your model will begin to Yaw (rotate) or Roll (topple to one side). It
may even show signs of an inclination to Pitch (Rock forwards or backwards) onto
its nose or tail.
6. Adjust the appropriate trim slider(s) to counteract any observed movement(s).
7. Once the trim sliders have balanced your helicopter, it is time to test the Rudder
response. Move the collective joystick S-L-O-W-L-Y to the Left/Right and verify that
your model is responding as shown in the ‘Effects of Controls’ illustration.
8. You will probably find you need to re-adjust the slider trim to get an equal
response from Left/Right Rudder inputs.
If your helicopter’s control response do not correspond to the behaviour described in
‘Effects of Controls’, check that your Servo Reverse switches are set correctly.
Note: we have not yet used the cyclic joystick controls (other than their trim sliders),
as these will tilt the helicopter, which may cause the lower rotors to touch the
ground. This would result in wear or damage.
5
Input Key Function
S/N Identification Function
1 Throttle/Rudder Stick
2 Elevator/Aileron Stick
Forward and backward movement of the stick makes the helicopter
move forward and backward respectively. Left and right movement of
the stick makes the helicopter drift sideways left/right respectively.
(1) Throttle /Aileron stick
Forward and backward movement of the stick makes the helicopter
ascend and descend respectively. Left and right movement of the
stick makes the helicopter drift sideways left/right respectively
(2) Elevator/Rudder Stick
Forward and backward movement of the stick makes the helicopter
move forward and backward respectively. Left and right movement
of the stick will rotate the helicopter's fuselage left/right respectively.
3 Aileron Trim Aileron trim subsidiary adjusts left and right drift.
4 Elevator Trim Elevator trim subsidiary adjusts forward and backward movement.
5 Rudder Trim Rudder trim subsidiary adjusts left and right rotation.
6 Throttle Trim Throttle trim subsidiary adjusts ascent and descent.
7 Power SW Pushing up switches on the power transmitter, pulling down
switches it off.
8 Antenna Transmits wireless signal
Forward and backward movement of the stick makes the helicopter
ascend and descend respectively. Left and right movement of the
stick will rotate the helicopter’s fuselage left/right respectively.
4.2Battery Mounting
Notice: >Do not mix old and new batteries
>Do not mix different types of batteries
>Do not charge non-rechargeable battery.
Release the screw Take out the cover According to the correct
polarities,install 4 x AAA battery
PUSH

5 Li-Po Battery Charging
6
5.1 The helicopter is equipped with a LiPo battery:
3.7V 1 Cell 450mAh x 1 unit Lipo battery
The supplied LiPo battery is mounted inside a cradle on the underside of your
helicopter’s fuselage.
5.2 For safety, the 3.7v 1 Cell battery has an integrated safety auto cut-off PCB, you
can connect the battery to a wall charger directly with the correct polarity. The LED is
OFF whilst charging and turns ON when charging is finished (wall charger not
included).
Fasten the screw
Return the cover
9
6.2 Effect of Control
CAUTION: To avoid loss of control: ALWAYS move the controls S-L-O-W-L-Y! Be
aware that control inputs will reduce available lift (see ‘Helicopter Principles of
Flight’).Be ready to use a little extra Throttle to maintain height during maneuvers.
Throttle (Collective Power) increases/decreases the Flying Height of your helicopter
Rudder (Collective Torque Yaw) rotates your helicopter’s fuselage Left / Right
Elevator (Cyclic Pitch) moves your helicopter Forwards/Backwards
Aileron (Cyclic Roll) moves your helicopter ‘sideways’ Left/Right
MODE 2 MODE 1
MODE 2 MODE 1
MODE 2 MODE 1
MODE 2 MODE 1
OFF
OFF
OFF OFF
OFF
OFF
OFF OFF
OFF ON CHG
OFF ON CHG
OFF ON CHG
Power off your helicopter connect the USB line to the socket as picture
shows.The led is on whilst charging and turns off when charging is finished
USB

6. Flight Training
7
Your RC helicopter is an easy-to-fly model but, you don’t become an expert pilot
without taking time to learn the basics. As the saying goes:
In other words, if you don’t want your first few flights to end in a pile of mangled
wreckage-requiring expensive repairs to your new model – take the time to follow this
brief Flight Training Program. After all, learning to fly your helicopter is all part of the
enjoyment!
6.1 Power-On (Failsafe) Procedure
Your RC helicopter’s 4-in-1 Gyro Receiver is fitted with a Power-On failsafe.
This is designed to ensure that the helicopter’s motor will not start unless it detects a
suitable radio-control signal when the LiPo battery is connected. The correct Start-Up
sequence is as follows:
5.3.Please refer to 2.2. Safety Advisory Notice
Always partially charge your LiPo battery before storage. LiPo batteries retain a
charge over a reasonable period; It is not normally necessary to recharge stored
LiPo batteries unless stored for periods longer than 3-6 months.
If your LiPo battery has been over-discharged, it will not be possible to recharge it
again.
8
OFF
Move the Transmitter's collective joysick(and throttle trim)to the
minimum throttle setting
Power-On Transmitter
Put the helicopter on a horizontal ground
Switch-On the helicopter
There is a short high tone when the signal is established
OFF ON CHG
OFF ON CHG
Table of contents
Other Hubsan Toy manuals

Hubsan
Hubsan Spy Hawk H301S User manual

Hubsan
Hubsan Spy Hawk H301S User manual

Hubsan
Hubsan SpyHawk User manual

Hubsan
Hubsan H202F User manual

Hubsan
Hubsan X4 H107 User manual

Hubsan
Hubsan spy hawk User manual

Hubsan
Hubsan h102f User manual

Hubsan
Hubsan H101D User manual

Hubsan
Hubsan F22 User manual

Hubsan
Hubsan H101 User manual