Husky 7901304012 User manual

THANK YOU
We appreciate the trust and con dence you have placed in Husky through the purchase of this LED PORTABLE
CORDED WORKLIGHT. We strive to continually create quality products designed to enhance your home. Visit us online
to see our full line of products available for your home improvement needs. Thank you for choosing Husky!
Item #1006 221 711
Model #
7901304012
USE AND CARE GUIDE
LED PORTABLE CORDED WORK LIGHT
Questions, problems, missing parts?
Before returning to the store, call
Husky Customer Service
8 a.m. – 7 p.m., EST, Monday-Friday
9 a.m. – 6 p.m., EST, Saturday
1-888-HD-HUSKY
HUSKYTOOLS.COM

2
Table of Contents
Safety Information................................2
Warranty ...............................................2
Pre-Installation.....................................3
Planning Installation................................... 3
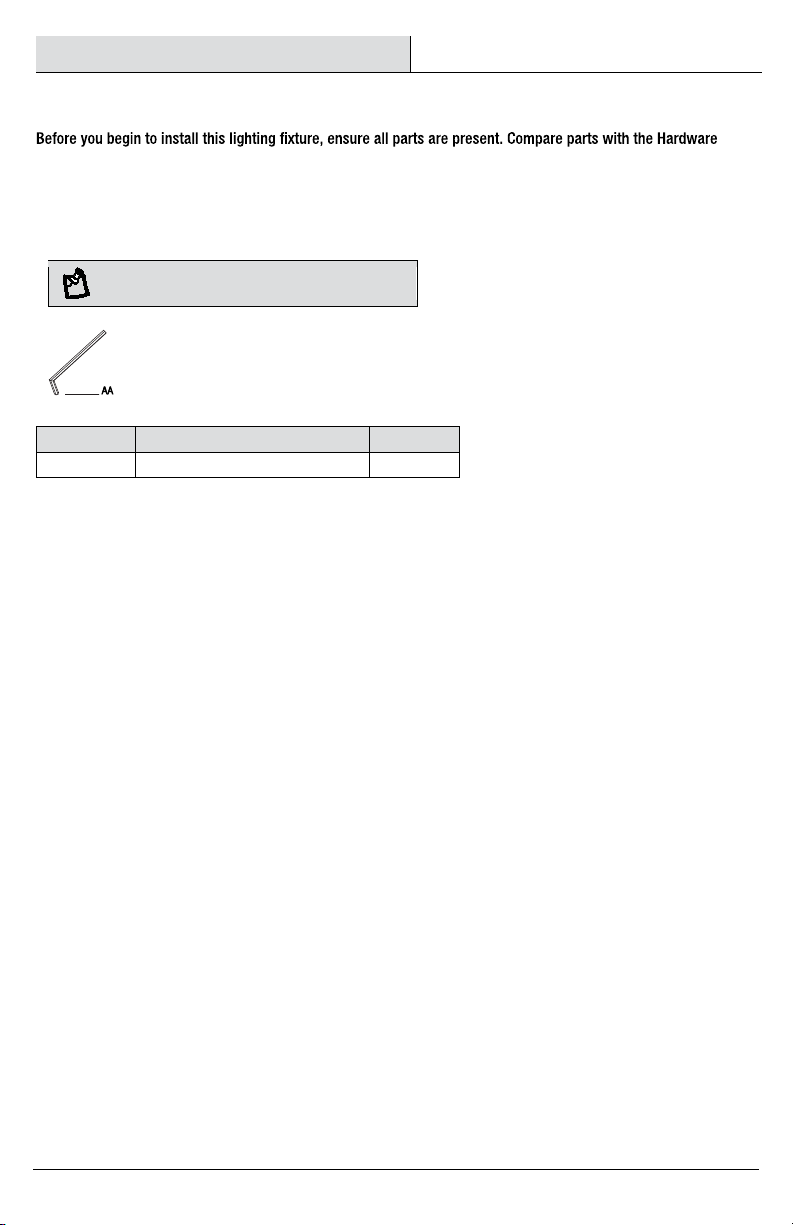
Hardware Required.................................... 3
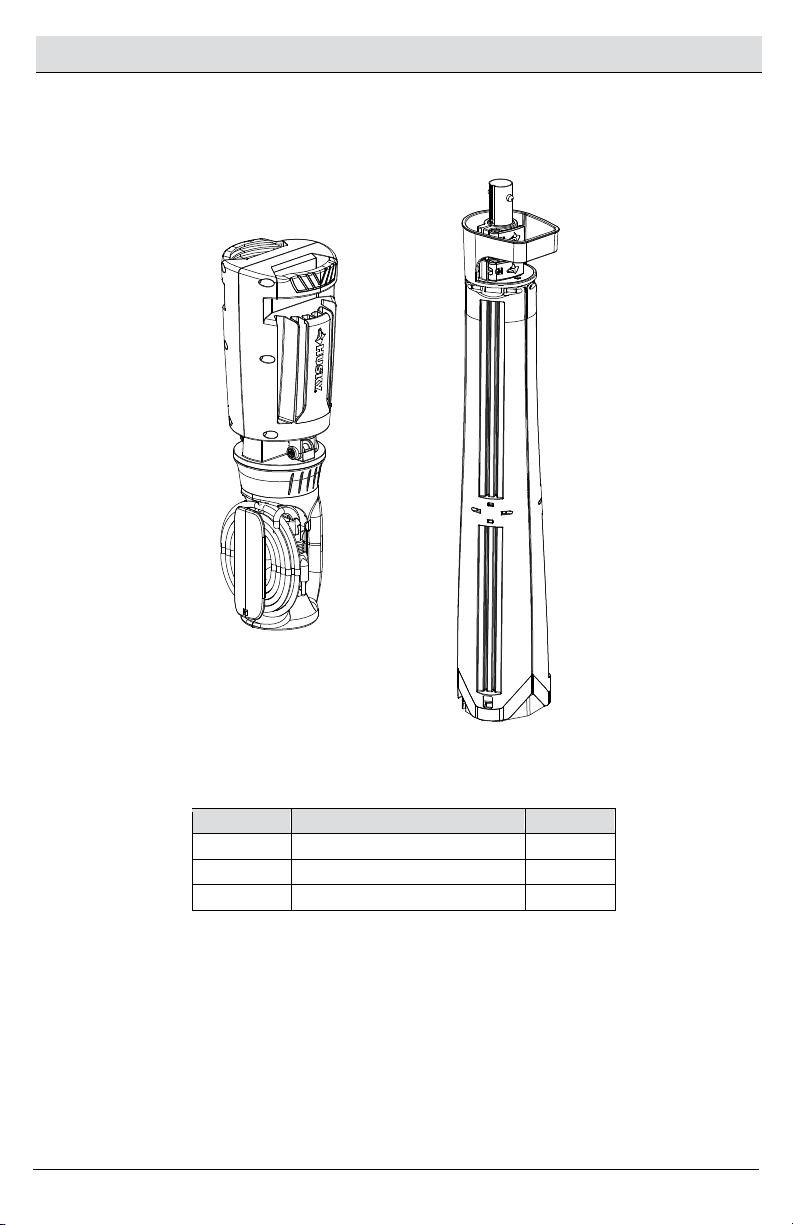
Package Contents ...................................... 4
Installation ........................................... 5
Care and Maintenance........................ 9
Troubleshooting .................................. 9
Safety Information
Please read and understand this entiremanual before
attempting to assemble, operate or install theproduct.
WARNING
:
CAUTION:
NOTICE: This equipment hasbeen tested and found to comply
with the limits for a Class B digital device, pursuant to Part 15 of
the FCC Rules. Theselimits are designed toprovidereasonable
protection against harmful interference in aresidential installation.
This equipment generates, uses and can radiate radiofrequency
energyand, if not installed and used in accordance with the
instructions, may cause harmful interferenceto radio
communications. However, there is noguarantee that interference
will notoccur in a particular installation. If thisequipment does
causeharmful interferencetoradio or television reception, which
can bedetermined by turning the equipment off and on, the user is
encouraged to try to correct the interferenceby one or more of the
following measures:
Reorient or relocate the receiving antenna.
Increase the separation between the equipment and receiver.
Connect the equipmentinto an outlet on a circuit different from
that to which the receiver in connected.
Consult the dealer or an experienced radio/TV technician for help.
Warranty
3-YEAR LIMITED WARRANTY
If within three yearsfrom date of purchase, this Husky product failsdueto adefect in materials or workmanship,
return theproduct toany Home Depot retail store with a receipt indicating proof of purchase for replacement with
an item of equal or greater value. This warranty excludesincidental/inconsequential damages and failures due to
which vary from state to state. Please see store or call 1-888-HD-HUSKY.
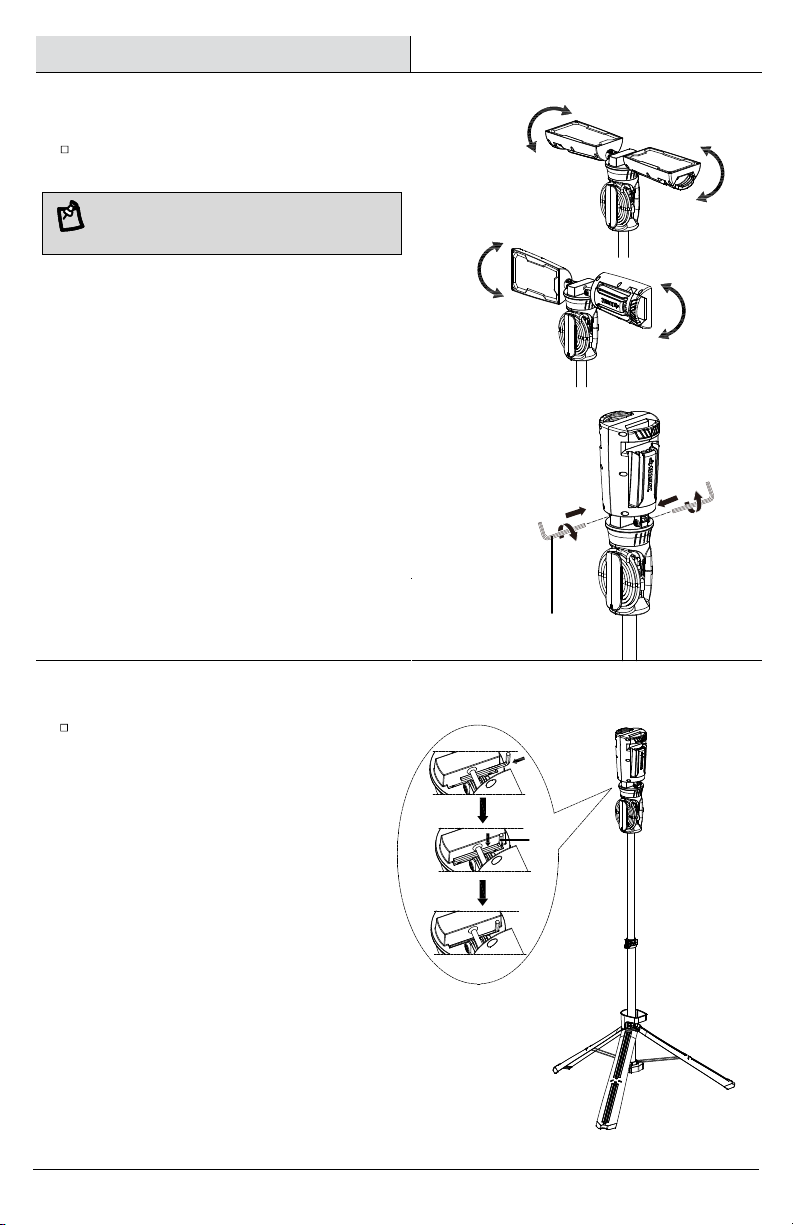
not certain about the installation process. Always install
wiring connectionsin accordance with local code,
ordinances and theNational Electric Code.
When using outdoor-use portable
luminaires, basic safety precautions should always be
personal injury, including the following:
a) Use only three-wire outdoor extension cords that
have three-prong grounding plugs and grounding
receptacles that accept the appliance’s plug.
b) Ground Fault CircuitInterrupter (GFCI) protection is to
be provided on thecircuit(s) or outlet(s) tobeused for
the wet location portableluminaire. Receptacles are
availablehaving built-in GFCI protection and are able to
be used for thismeasure of safety.
c) Use only with an extension cord for outdoor use, such
as an extension cord of cord type SEW, SEOW, SEOOW,
SOW, SOOW, STW, STOW, STOOW, SJEW, SJEOW,
SJEOOW, SJW, SJOW, SJOOW, SJTW, SJTOW, or
SJTOOW.
PROPER MOUNTING ENVIRONMENT:
SUITABLE FOR WET LOCATION
CAUTION:
RISK OFELECTRICSHOCK, Donotuse with
extension cord near water or where water may
accumulate. Keep lamp atleast 16 feet from pools and
spas. Keep plugs and receptacles dry. For use only on
GFCI protected circuits.
WARNING:
not expressly approved by the party responsible for
compliancecould void theuser's authority to operate
the equipment.

3 HUSKYTOOLS.COM
Please contact 1-888-HD-HUSKY for further assistance.
Pre-Installation
PLANNING INSTALLATION
Included and Package Contents lists. If any part is missing or damaged, donot attempt to assembletheproduct.
HARDWARE REQUIRED
NOTE: Hardware not shown to actual size.
Part
Description
Quantity
AA
Wrench
1

4
Pre-Installation (continued)
PACKAGE CONTENTS
Part
Description
Quantity
A
Work light head
1
B
Work light body
1
—
B
—
A
—
BB
BB
Spring buckle
2

5 HUSKYTOOLS.COM
Please contact 1-888-HD-HUSKY for further assistance.
Installation
1
Assemble the worklight
2
Release the tripod extension
lock
Press and hold the spring buckle (BB) on the
bracket and assemble the work light head (A)
to the work light body (B) in the direction
indicated by the arrow.
To deploy, release the tripod extension lock and
lift the light head upward until all three legs
release.
3
Open the tripod
4
Put the light on the ground
Shake the bracket to open the tripod.
Once all three legs are released, push the light
downward until all three legs make contact with
the ground.
same direction
A
B
BB

6
Installation (continued)
5
Lock the extension lock
Once all three legs have made contact with the ground,
lock it. To return the legs to the folded position for storage,
release the extension lock and pull it back to the original
position.
NOTE
6
Raise the light head
Release the top extension lock and raise the light
head to the desired height, then lock the top
extension lock.
: Ensure the worklight is notplaced on a surface with
greater than 8°slope.
>8°

7 HUSKYTOOLS.COM
Please contact 1-888-HD-HUSKY for further assistance.
Installation (continued)
7
AA
Adjust the lighthead
Unfold the light head and adjust to the desired angle.
NOTE
: If the lightheads are either tooloose or tight after
adjustment, tighten the screwin the shaft as pictured with
the wrench (AA) provided.
90°
90°
±165°
±165°
Store the wrench
After using, store the wrench (AA) in the storage
slot next to the light heads.
8
AA

9
8
Installation (continued)
Plug thepower cord into the outlet
Place the power cord in the tripod slot as pictured
and plug into the outlet.
10 Turn on the light
Press the rocker switch.
OFF ON

9 HUSKYTOOLS.COM
Please contact 1-888-HD-HUSKY for further assistance.
Care and Maintenance
Your portable LED work light requires very little careand maintenance. Simplyclean the lens, lamp head and lamp
stand regularly with a non-abrasive cleaner.
Troubleshooting
Problem
Possible Cause
Solution
The light will not illuminate.
The power is off.
Make sure the power supply is on.
The switch is off.
Make sure the switch is on.
There is poor connection
between the cable and
outlet.
Make sure the connection is OK.
to lock.
The screw beside the
extension lock is loose.
screwdriver (not included).
WARNING: Alwaysmake sure the work lightis
unplugged and completely cool before attempting to
clean it.
CAUTION: Turn OFF all power to the circuit at the
main circuit breaker or fuse box. DO NOT rely on the
wall switch alone toturn off power.

Questions, problems, missing parts? Before returning to the store,
call Customer Service
8 a.m. - 7 p.m., EST, Monday-Friday,9a.m. – 6 p.m., EST, Saturday
1-888-HD-HUSKY
HUSKYTOOLS.COM
Retain this manual for future use.

GRACIAS
PORTÁTIL CON CABLE. Nos esforzamos continuamente para crear productos decalidad diseñados para mejorar su
hogar. Visítenos en línea para ver nuestra línea completa deproductos disponibles para sus necesidades de
mejoramientodel hogar. ¡Graciaspor elegir Husky!
Modelon.°
7901304012
GUÍA DE USO Y CUIDADO
LUZLED DE TRABAJO PORTÁTIL CON CABLE
1-888-HD-HUSKY
HUSKYTOOLS.COM
¿Tiene preguntas o problemas, o le faltan piezas?
Antes de devolver a la tienda, llame a
Atención al Cliente de Husky
Lunes a viernes de 8:00 a.m. a 7:00 p.m., EST,
y los sábados de 9 a.m. a 6:00 p.m., EST
Artículo n.°1006 221 711

12
Índice
Información de seguridad ....................12
Garantía ...............................................12
Antes de la instalación ........................13
13
Herrajerequerido ........................................13
Contenido del paquete ...............................14
Instalación ........................................... 15
Cuidado y mantenimiento .................. 19
19
Información de seguridad
Lea y entienda este manual por completo antes de
intentar ensamblar, operar o instalar el producto.
ADVERTENCIA:
PRECAUCIÓN:
AVISO:
Garantía
GARANTÍA LIMITADA POR 3 AÑOS
Si dentro de los 3 años desde la fecha decompra, este producto Husky falla debido a un defecto demateriales o mano
de obra, devuelva el producto a cualquier tienda minorista Home Depot con un reciboque indiqueprueba decompra
para reemplazarlo por un artículo de igual o mayor valor. Esta garantía excluye los daños incidentales/inconsecuentes
usted tenga otros derechos que varían según el estado. Acuda a la tienda o llame al 1-888-HD-HUSKY.
tiene certeza sobre todo el proceso deinstalación. Siempre
instale las conexiones eléctricas en conformidad con los
códigos locales y el Código Eléctrico Nacional.
Cuando utiliceluminariasportátiles en
exteriores, siempresedeben seguir las precauciones básicas
de seguridad para reducir el riesgodeincendio, descarga
eléctricay lesiones personales, incluidaslas siguientes:
a) Use solo extensiones de tres hilospara exterioresque
tengan enchufes deconexión a tierrade tres clavijas y
receptáculos deconexión a tierraque acepten el enchufe
del aparato.
b) Se debe proporcionar protección mediante un interruptor
de fallos de conexión a tierra(GFCI) en el circuito(s) o
tomacorriente(s) autilizar para laluminaria portátil en
ubicaciones húmedas. Hay receptáculos disponibles con
protección GFCI integrada y sepueden utilizar paracumplir
con esta medida de seguridad.
c) Use solo con una extensión para uso en exteriores, como
una extensión con tipo de cable SEW, SEOW, SEOOW, SOW,
SOOW, STW, STOW, STOOW, SJEW, SJEOW, SJEOOW, SJW,
SJOW, SJOOW, SJTW, SJTOW o SJTOOW.
PRECAUCIÓN:
Resolución de problemas ...................
RIESGO DE DESCARGAELÉCTRICA. No
usar con un cablede extensión cercadel aguaodonde pueda
acumularse agua. Mantengalalámpara al menos a 16 pies
de piscinas y spas. Mantengalos enchufes y receptáculos
secos. Solo para usar en circuitos protegidos por GFCI.
cumple con los límites de un dispositivo digital de Clase B, según lo
estipulado en la Sección 15 de las normas de la FCC. Estos límites
están diseñados para brindar una protección razonable contra la
interferencia dañina en una instalación residencial. Este equipo genera,
utiliza y puede emitir energía de radiofrecuencia y, si no se instala y
utiliza de acuerdo con las instrucciones, puede causar interferencias
perjudiciales en las radiocomunicaciones. Sin embargo, no existe
garantía de que no ocurra interferencia en una instalación en particular.
Si esteequipo efectivamente causa interferencia dañina a la recepción
de radio o televisión, lo cual puede determinarse apagando y
encendiendo el equipo, se recomienda al usuario que trate de corregir
la interferencia realizando uno o varios de los siguientes pasos:
Cambiar de dirección o de lugar la antena receptora.
Aumentar la separación entre el equipo y el receptor.
Conectar el equipo en un tomacorriente en un circuito diferente de
donde esté conectado el receptor.
Consultar al concesionario o a un técnico de radio/TV con experiencia
para que le ayude.
WARNING:
unidad no aprobados expresamente por laparte
responsibledel cumplimiento podrían anular la
autoridad del usuariopara operar el equipo.
ENTORNO DE MONTAJE ADECUADO:
APTO PARA UBICACIONES HÚMEDAS

13 HUSKYTOOLS.COM
Llame al 1-888-HD-HUSKY para obtener asistencia adicional.
Antes de la instalación
PLANIFICACIÓN DE LA INSTALACIÓN
Antes de empezar ainstalar esta lámpara, asegúrese de que estén todas las piezas. Compare las piezas con las listas
de Herraje Incluido y Contenido del Paquete. Si falta alguna pieza o está dañada, no intente armar el producto.
HERRAJE REQUERIDO
NOTA: El herraje no se muestra en su tamaño real.
Pieza
Descripción
Cantidad
AA
Llave
1

14
Antes de la instalación (continuación)
CONTENIDO DEL PAQUETE
Pieza
Descripción
Cantidad
A
Cabezal de la luz de trabajo
1
B
Cuerpo de la luz de trabajo
1
—
B
—
A
—
BB
BB
Sujetador de resorte
2

15 HUSKYTOOLS.COM
Llame al 1-888-HD-HUSKY para obtener asistencia adicional.
Instalación
1
Ensamblar laluz de trabajo
2
Liberar la traba de extensión
del trípode
Mantenga presionado el sujetador de resorte (BB)
en el soporte y monte el cabezal de la luz de
trabajo (A) al cuerpo de la luz de trabajo (B) en la
Para desplegar, libere la traba de extensión del
trípode y levante el cabezal de la luz hasta que
las tres patas se liberen.
3
Abrir el trípode
4
Colocar la luz en el suelo
Sacuda el soporte para abrir el trípode.
Una vez que las tres patas estén liberadas,
empuje la luz hacia abajo hasta que las tres
patas hagan contacto con el suelo.
En la misma dirección
A
B
BB

16
Instalación (continuación)
5
Bloquear la traba de extensión
Una vez que las tres patas hayan hecho contacto con
el suelo, trábelas. Para regresar las patas a la posición
plegada para su almacenamiento, libere el bloqueo de
extensión y vuelva a colocarlas en la posición original.
NOTA
6
Levantar el cabezal de laluz
Libere el bloqueo de la extensión superior,
levante el cabezal de la luz a la altura deseada
y luego bloquee la traba de extensión superior.
>8°
: Asegúrese de que la luz de trabajo no esté sobre una

17 HUSKYTOOLS.COM
Instalación (continuación)
7
AA
Ajustar el cabezal de laluz
Despliegue el cabezal de la luz y ajuste al ángulo deseado.
NOTA
90°
90°
±165°
±165°
Guardar la llave
Después de usarla, guarde la llave (AA) en
la ranura junto a los cabezales de la luz.
8
AA
Llame al 1-888-HD-HUSKY para obtener asistencia adicional.
: Si los cabezales de la luz están demasiado sueltos o
apretados después del ajuste, apriete el tornillo en el eje
como se muestra con la llave (AA) incluida.

9
18
Instalación (continuación)
Enchufar el cable eléctrico en el tomacorriente
Coloque el cable de alimentación en la ranura del
trípode como se muestra y enchúfelo en el tomacorriente.
10 Encender lalámpara
Presione el interruptor basculante.
APAGAR ENCENDER

19 HUSKYTOOLS.COM
Cuidado y mantenimiento
Su luz LED de trabajo requiere muypoco cuidado ymantenimiento. Solo limpielacubierta, el cabezal de la lámpara
y su soporte con frecuencia con un limpiador no abrasivo.
Resolución de problemas
Problema
Causaposible
Solución
La luz no se enciende.
Asegúrese de que el suministro de
alimentación esté encendido.
El interruptor está apagado.
Asegúresede queel interruptor esté encendido.
Hay una mala conexión
entre el cable y el
tomacorriente.
Asegúrese de que la conexión esté bien.
Es difícil bloquear la traba
de extensión.
El tornillo junto a la traba
de extensión está suelto.
destornillador Phillips (no incluido).
ADVERTENCIA:
PRECAUCIÓN:
Llame al 1-888-HD-HUSKY para obtener asistencia adicional.
Asegúrese siempre de que la luz de
trabajo esté desenchufada y completamente fría antes
de intentar limpiarla.
APAGUE la alimentación en el
disyuntor principal o caja de fusibles. NUNCA confíe en
el interruptor de pared solo para apagar la energía.
El suministro de alimentación
está apagado.

¿Tiene preguntas o problemas, o le faltan piezas? Antes de devolver a la tienda,
llame a Atención al Cliente
Lunes a viernes de 8:00 a.m. a 7:00 p.m., EST,
y los sábados de 9:00 a.m. a 6:00 p.m., EST
1-888-HD-HUSKY
HUSKYTOOLS.COM
Guarde este manual para su uso futuro.
This manual suits for next models
1
Table of contents
Languages:
Other Husky Work Light manuals
Popular Work Light manuals by other brands

STL
STL FLASH CIRCLE CARBINE 18 instruction manual

Feit Electric
Feit Electric 1286740 instructions

Night Stick
Night Stick XPR-5572R instruction manual

Stanley
Stanley SXLS35527E instruction manual

jedi LIGHTING
jedi LIGHTING 3in1 GLAM User instructions

Deluce Lighting
Deluce Lighting LEDSTRIPKIT/WH Fitting instructions