Hygge VESTER User manual

www.hyggebikes.com
VESTER & VESTER STEP
MANUAL
READ BEFORE YOU RIDE

CONGRATULATIONS
Kind Regards,
Copenhagen, Denmark.
On the Purchase of your new Hygge E-Bike.
You are now ocially the part of owner of Hygge, We welcome
you to the ever-expanding global Hygge family.
We ask that you read through this Manual thoroughly and
apply our instructions before you ride your eBike, our safety
warnings are especially important.
Please scan the QR code below to access your Hygge manual.
It aims to provide you with a comprehensive Hygge eBike
experience that is easily accessible via both mobile and
computer devices.
We also recommend registering online with us at -
https://hyggebikes.com/my-account/

REGISTRATION
Register of your Hygge Bike
Owner’s name
Frame number
Model and color
Date of purchase
Please keep this manuel safe and ll in the details below. The serial number
is located at the back of the E-Bike near the gears. This number is unique to
your E-Bike and will help for warranty issues and also if the ebike is lost
or stolen. For the Vester and Vester Step it starts with RSIII /RSIX followed
by 5 numbers.
In addition, if you would like to insure your ebike you’ll need to provide your
insurance company with a frame number and invoice/receipt of sale.

TABLE OF CONTENTS
Quick set up guide
Specication
Bicycle and components
LCD Display
Brakes
Motor
Battery Pack
Gears
Tyre Pressure
Protective Clothing
Unpowered riding
Battery Care
Folding your eBike
EU/UK regulations for eBikes
Warranty & General Tips
01
02
03
05
06
07
07
09
09
11
11
15
17
19
20

QUICK SET UP GUIDE
Unpacking and Open-box Inspection
• Open the package.
• Remove the bicycle from the box. Use two people to avoid any damages.
• Remove the protection packaging from the bike.
• Unfold the bike from the frame rst then lock it in using the locking pin.
• Now unfold the handles bars, again lock these in.
• The battery comes factory charged but should be charged 2-3 hours before
using the rst time.
• Charging the battery can be done when the battery is on or o the ebike.
NOTE: DO NOT HAVE THE EBIKE OR BATTERY ON WHILST CHARGING,
THIS WILL DETOIRATE THE BATTERY QUICKILY.
• Remove the battery charger from its packaging.
• Insert the charger plug into plug socket the light on the convertor will be green.
• Now insert the cable into the battery and the light will show Red.
Keep charging the battery until the light is green. Green light states
the battery is fully charged. NOTE: DO NOT LEAVE BATTERY CHARGING
OVERNIGHT OR LONGER THAT 4 HOURS.
• There are two keys – keep the spare safe!
• To remove the battery from the slot please insert key then push in
and turn to unlock.
• To avoid suocating, keep children from playing with packaging.
Dispose of packaging materials in accordance with local legislation
and guidelines.
01 02
This manuel is made to get the most out of your ebike. Your box should
also come with a quick set-up guide which is made to get you riding as
soon and as safe as possible. If you have any further questions please contact
us at – support@hyggebikes.com
1Frame material: Folding Alloy Frame
Wheels: 20”Alloy
Suspension: Front Alloy Crown
Tyres: CST 20”FAT tyres
Saddle: Comfortable Sport
Cables: Waterproof
Weight: 27kg
Max Rider Weight: 135kg
Front/Rear Brakes: YX-DB06 Alloy Disc / Disc
2Display: S866 LCD
3Motor: 250w Hub Motor
4Max Speed: 25km
5Range: up to 60km
6Charging time: 2-6hrs (250w)
7Gears: Shimano Derailleur RDM310, 7 speed
8
9
10
11
12
13
14
15
16
Crank Set: Prowheel Pro 546pp
SPECIFICATION:

GET TO KNOW
YOUR HYGGE
Bicycle and Componentvz
19
1
4
7
3
20
12
15
16
10
17
5
2
9
14 13
18
8
9
0403
1Front Disk Brake 11 Kickstand
12 Frame folding lock pin
13 Motor
14 Shimano Derailleur Gears
15 Saddle tube quick release
16 Saddle
17 Back rack
18 CST Tyres
19 Suspension
20 Brakes
2Rear Disk Brake
3Horn
4Front light
5Back Light (Red)
6Front Light (White)
7LCD
8Folding stand
9Folding pedal
1o Removable Battery

BRAKESLCD DISPLAY
• To turn your ebike on, press power key for 3 seconds to start the ebike –
ensure your battery is charged and on before doing so.
• To turn your ebike o, press power key for 3 seconds to turn o the ebike;
• The LCD will have 4 options to view - ODO, VOL, TRIP, TIME.
• ODO: The total mileage of this bicycle when it is turned on
• VOL: Current battery voltage value display
• TRIP: Mileage travelled since start of trip
• TIME: The time since the start of this ride
• These can be viewed when the LCD is on and switched to by pressing the on button
• Press the"+" button to increase level of assistance (Uphill)
• Press the "-" button to decreased Level of Assistance. (Downhill)
• To turn front light on – Press and hold the plus/increase assist switch (+),
to turn o press and hold this again.
• Walk assist is done by pressing and holding the‘-‘button. To deactivate this
setting squeeze the brakes. NOTE: The ebike will move forward when the walk
assist is activated. This must be used with care and when always holding the brakes.
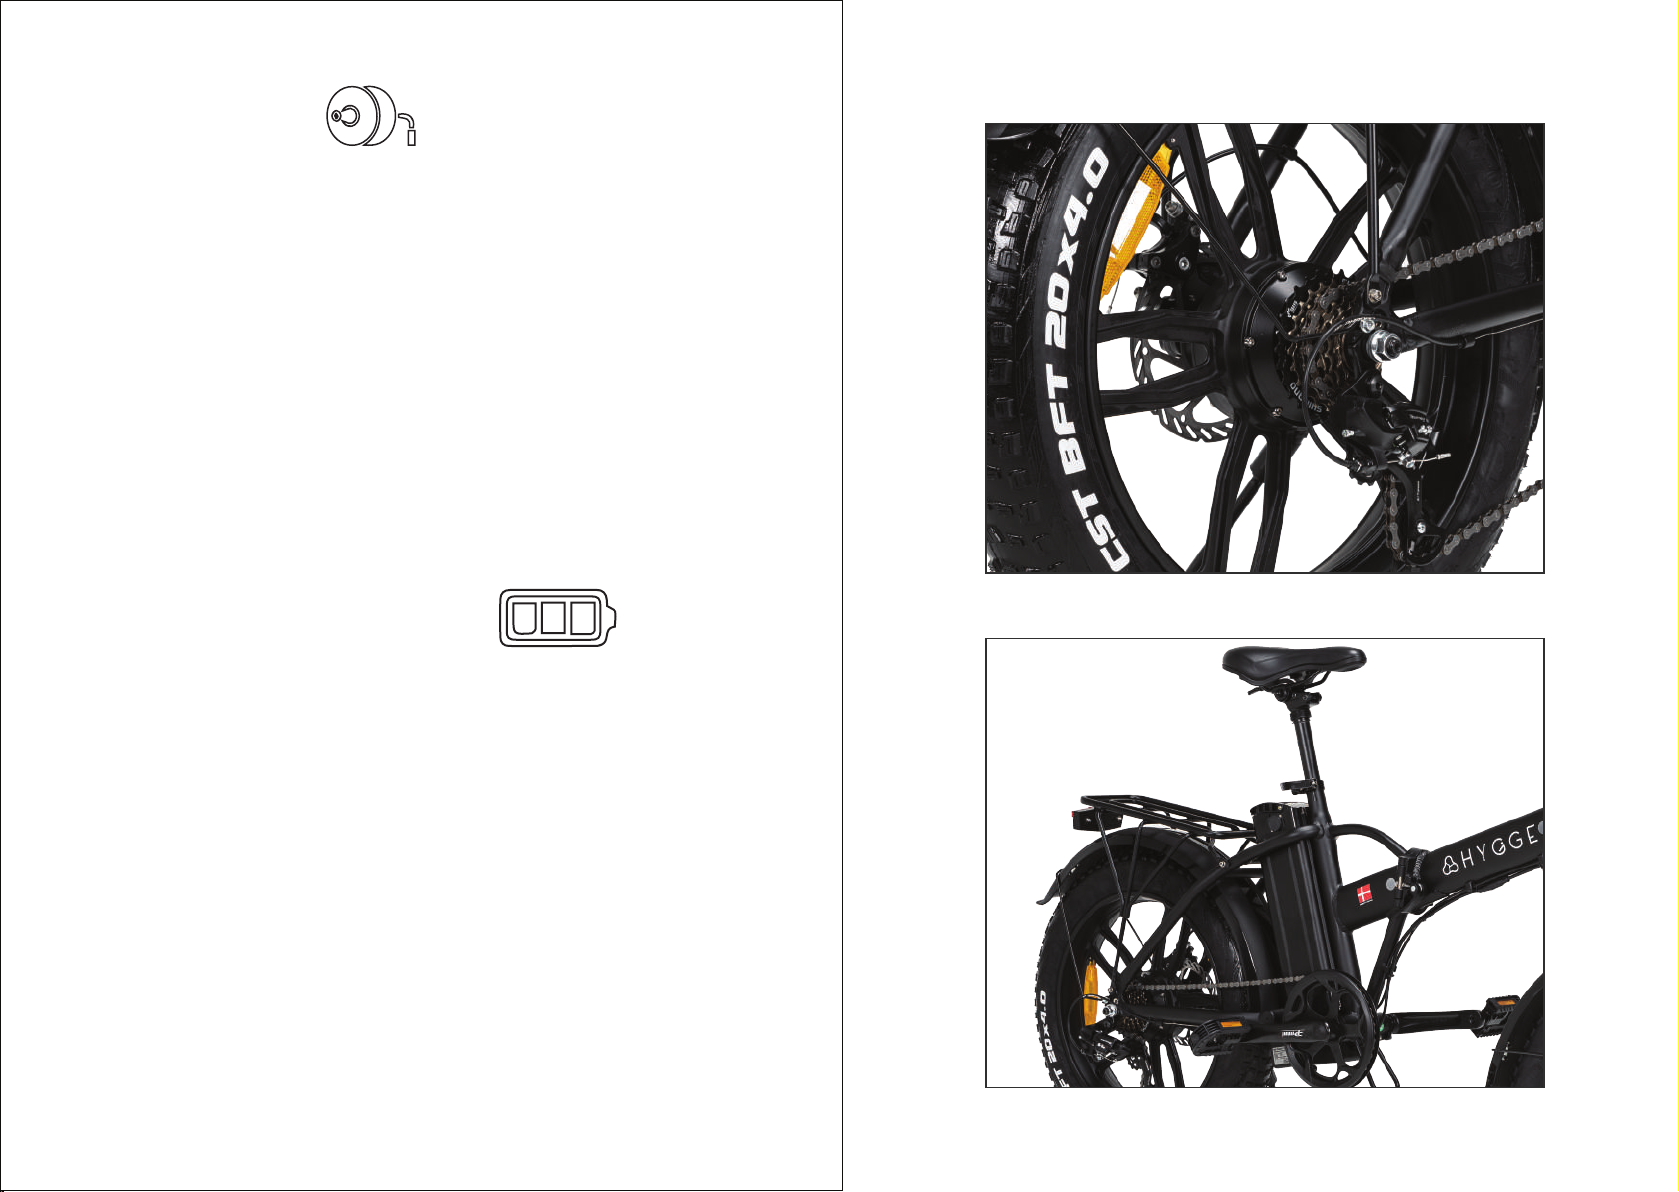
The brakes on the Vester and Vester Step are mechanical Disk brakes.
The brakes are mounted on both the front and back wheels. The disc brake
block slows the disc by acting on it. The brakes are functioned by both
brake levers on the handlebars. right-hand lever operating the front
brake and the left the rear.
ALWAYS CHECK YOUR BRAKES BEFORE CYCLING
The bicycle brake is not only used to stop the bicycle, but also to regulate
its speed. Maximum tyre braking force is the force exerted when the tyres
are "locked" (not rotating) and sliding. In the event of tyre slippage, the majority
of braking force will be lost, rendering the bicycle uncontrollable. Please use
a little touch to the brakes and stop the bicycle gradually, known as progressive
braking, to avoid locking the tyres.
05 06

The ebike is operated by a hub based 250W motor. This means the motor
operates directly on the back wheel and assists in the rider's pedalling. Using
the LCD control system, the user may change the motor's power and pick from
several riding levels 1-5. The motor provides a maximum speed of 25 km/h /
15.5 mph in accordance with EU/UK regulations.
Power assist recommendations
Downhill – levels 1-2
Uphill – levels 4-5
Flat – Levels 3
BATTERY PACK
The bike is powered by a battery that can be removed from behind the seat post.
Simply insert the key into the key slot to remove the battery from its place on
the ebike. The battery may now be readily removed from its container after pushing
in the key and turning to 'Unlock'.
Ensure the key is in the unlock position before reinstalling the battery in the ebike.
Slide the battery down while ensuring that the rear of the battery is aligned with
the back of the rack. Turn the key to the on or o position depending on whether
or not you intend to ride the bicycle. These two options will lock the
battery to the rack.
MOTOR
07 08

GEARS
Vester and Lite Step are Shimano Tourney Derailleur the gear shifter is located
on the right side of the handlebar. To move up gears (increasing resistance)
press the ‘+’ with your thumb. To go lower down the gears (decreasing resistance)
push the lever on the shifter. The gears can only operate when the bike is
in motion and should not be operated when stationary.
TYRE PRESSURE
The user may locate the acceptable ination pressure range on the side of the
tyre, for the Vester range it is 25-30 PSI. To examine and adjust tyre pressure,
it is advised to use a foot pump with a pressure gauge or pressure metre.
NOTE: ITS ESSENTIAL THAT THE TYRES ARE INFLATED TO RECCOMENDED
PRESSURE BEFORE USE. PLEASE INFLATE TYRES TO 25-30 PSI
09 10

PROTECTIVE
CLOTHING
• Please use a helmet that meets the most recent certication requirement
while riding. When riding, the head can sustain the most serious injuries,
which may be avoided by wearing a helmet.
• Please wear secure footwear with nonslip soles (such as special-shaped
rubber soles).
• Please wear gloves at all times.
• Please wear tights to prevent getting grabbed by the bicycle or other
roadside items.
• Please use glasses that are (transparent) dirtproof, dustproof, and insect proof.
• Please ensure that you are wearing sunglasses on sunny days.
UNPOWERED RIDING
You may also utilise a e-bike without a power. When the power-assisted
mechanism is deactivated, the e-bike becomes unpowered. For example:
when the batteries are depleted.
11
12
12

1413

BATTERY CARE
15 16
IIt takes 3 to 4 hours (from 1% to 100%) to completely recharge the battery
Please follow the methods below to store battery for longer than two months:
Take the battery out.
Ensure the battery housing and any visible components are undamaged.
Charge the battery before long-term storage.
Place the battery in a secure and dry location. Keep the battery between
5° and 20°C. Prevent battery temperature from uctuating excessively.
Please refrain from storing battery in direct sunlight or at high temperatures.
Please charge the batteries every two months at minimum.

FOLDING OF BIKE
To fold the bike, ensure the bike stand is folded away then unclip the middle
frame pin. Slide this up to unlock and then fold the bike from the frame rst.
The bike can now us the folding stand to keep the bike in position. Next is
to dol the handle bars. This is done by pressing the red button on the level
of the handle bars then unclipping. You can now unfold the handle bars to
a compact position.
All Vester bikes are designed to fold into a small package; see images below.
This is intended for storage and transit. The stand at the bottom of the bicycle
is designed to hold the weight of the bicycle alone. Do not sit or lean on the
bicycle while it is supported by this, since it might break potentially cause potential injury.
All Vester bikes are designed to fold into a small package; see images below.
This is intended for storage and transit. The stand at the bottom of the bicycle
is designed to hold the weight of the bicycle alone. Do not sit or lean on the
bicycle while it is supported by this, since it might break potentially
cause potential injury.
EASY &
COMPACT
Where ever you go,
HYGGE goes with you!
17 18

Transportation regulations vary from country to country (or state to state,
as the case may be), so please familiarise yourself with the specic regulations
applicable to the territory in which you intend to ride your Hygge ebike.
The specic regulations may include (but are not limited to): the requirement
to wear a specic approved helmet, a valid driver's licence, speed limits,
an age restriction, a riding regulation (such as the use/non-use of cycle paths),
limitations on bicycle weight and dimensions, and mandatory insurance,
among others. In certain instances, the legal classication of your Hygge
may limit its use to private property.
WARRANTY
• One year on the motor.
• One year on the battery.
• Three years on the frame.
• One year limited warranty on the electrical components and other parts.
• Hygge Bikes are categorised as having: I a maximum nominal power
output of 250 W in UK and EU
• They only assist the rider when pedalling
• For the walking assist function of no more than 6 km/h
• They only provide assistance up to a maximum top speed of 25 km/h / 15.5 mph
GENERAL TIPS
• It is recommended to take your Hygge for a full tune-up and maintenance check
by a bike mechanic on a regular basis, at least once a year.
• While our Hygge bikes are rain and splash-proof, their electrcial components
should not be submerged in water.
• When washing your Hygge, use soap and water only, When rising with water,
use nothing stronger than a normal low pressure garden hose. Be sure to
avoid spraying directly into the motor as well as any pivot and connection
points or areas where bearings are housed. This includes headset, bottom
bracket and hubs. Never use a hugh pressure water hose under an circumtances
• To prevent corrosion, dry the HYGGE and its components after every wet ride.
• Under extreme weather conditions please store the battery in room
temperature environment.
EU/UK REGULATION
19 20
For Warranty Information please visit:
https://hyggebikes.com/warranty/
Returns and Refunds information please visit:
https://hyggebikes.com/refund_returns/
Other manuals for VESTER
1
This manual suits for next models
1
Table of contents
Other Hygge Bicycle manuals