8
Included Accessories
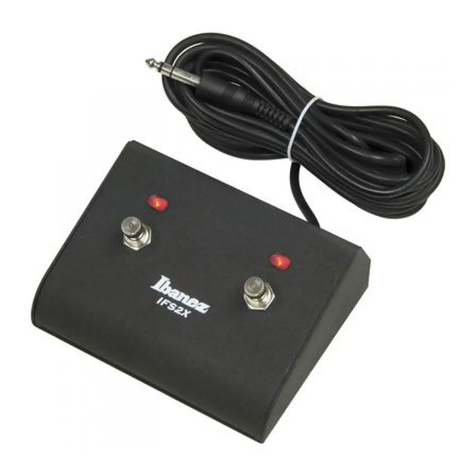
IFS4 dedicated foot switch for the TB100R/TB100H
Foot switch cable
Casters
Caster wrench
Power Cable
Owner’s Manual
Foreword
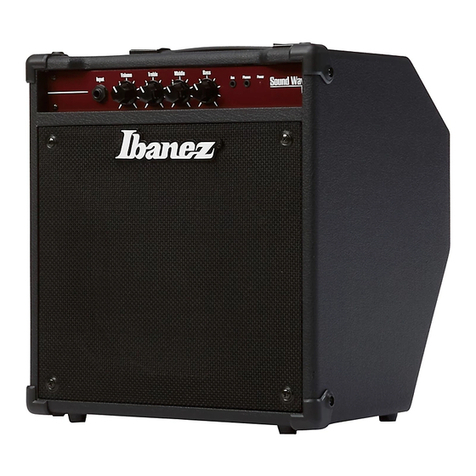
Thank you for purchasing the Ibanez TB100R guitar amplifier. Read this manual
thoroughly prior to using your amplifier in order to get the most out of the func-
tions available. Then keep the manual in a safe place.
Precautions during use
• Do not subject the amplifier to shocks by dropping, etc., or treat it roughly in any
way.
• Place the amplifier carefully in a stable position. The sound from the amplifier
will vary depending on how and where it is set up.
• Ensure that the power supply has been switched off when not in use. Also,
remove the power cord from the power supply socket when the amplifier is not
to be used for an extended period of time.
• Do not use or store the amplifier in locations where it is subject to direct sunlight
or in environments that experience extreme temperatures and humidity levels.
• Reduce the volume to “0” or switch off the power supply when connecting the
guitar shielded cable and the effects or other cables required for external con-
nection. Note that the noise generated when plugs are inserted and removed
may cause severe damage to the equipment.
• To avoid the risk of fire, do not place containers of liquid (such as vases) on the
amp.
Setup
1. Connecting a speaker cabinet
1) A speaker cabinet of 8Ωimpedance and 100W or greater power handling can
be connected to the TB100R. Use a speaker cable with a 1/4" plug to connect it
to the LSPEAKER OUTPUT jack.
2)
The IBANEZ TB212 8Ω(MONO) speaker cabinet rated at 200 Wrms is ideal for
expansion. In this case, the TB100R’s internal speaker plus the TB212 will create
a total speaker system impedance of 4Ω, and the output will increase to 120 W.
*
Caution: Speakers must be connected correctly. In particular if you use multiple
speaker systems, the system impedance of the connected speakers must not be
lower than 4Ω. Specifically, the internal speaker of the TB100R is 8Ω, so an 8Ω
speaker is ideal for expansion. Connections such as 8Ω×4Ω, 8Ω×8Ω×8Ω, 8Ω
×8Ω×4Ω, or 8Ω×4Ω×4Ωare not appropriate. With connections such as the
latter, the amp will be loaded excessively, and may malfunction or fail to operate
correctly.
2. Connecting cables
1)
Connect the included power cable from an AC outlet to the rear panel
P
AC inlet.
2) Using a shielded guitar cable, connect your electric guitar to the 1INPUT jack.
3)
If you are using compact effect devices, connect effects such as distortion or compres-
sor between the guitar and amp. If you will be using the TB100R’s pre-amp to create
distortion, it is effective to connect spatial-type effects such as chorus, delay, or reverb,
or other types of effects such as noise gate, graphic EQ, and limiter using the FSEND
/ GRETURN jacks. If you are using a floor-type multi-effect unit and want to use the
distortion of the multi-effect unit, connect it between your guitar and the amp.
4) If you want to use the included foot switch, connect the included dual-stereo
cable to the foot switch, and then connect plugs 1 and 2 of the foot switch cable
to rear panel KFOOT SW jacks 1 and 2.
5)
Make sure that each 7DVOLUME control is set to “0.” Then turn on the JPOWER
switch and verify that the switch is lit.
6) Make sure that the volume control of your guitar is raised.
3. Playing the clean channel
1) Use the foot switch or the 9CHANNEL switch (located in the center of the front
panel) to make the green LED light.
2) First raise the 7VOLUME control to approximately 5, and then raise the 3
GAIN control to adjust the volume.
1. At this time, it will be easier to produce distortion if you select a humbucking
pickup (particularly the neck position) on your guitar, raise the 3GAIN con-
trol to approximately 7--10, and boost the equalizer settings.
2. If you particularly want to avoid distortion, raise 7VOLUME, and adjust the
volume by lowering the 3GAIN.
3.
If you particularly want to improve the S/N ratio, raise 3GAIN as far as possible
without causing distortion, and adjust the volume by lowering 7VOLUME.
3)
To obtain a naturally distorted “crunch” sound, turn on the 2BOOST switch, raise the
3GAIN control, and adjust 7VOLUME after you create the distortion in the pre-amp.
4) Use the 456equalizer, 8REVERB, and HPRESENCE controls to adjust
the tone as desired, and then use 7VOLUME to adjust the volume once again.
4. Playing the overdrive channel
1)
Use the foot switch or the front panel
9
CHANNEL switch to make the red LED light.
2) First use the 2BOOST switch to make the LED go dark, turning it off.
3) Set DVOLUME to approximately 2--4.
4) Then raise 0GAIN, and you will begin to hear sound. Adjust the degree of
distortion as desired.
5) Adjust the ABCequalizer, BMID SHIFT switch, EREVERB, and HPRES-
ENCE controls as desired.
6)
Use DVOLUME to set the volume. The volume will increase if you turn on the 2BOOST switch.
ENGLISH
