manuals.online logo
Brands
  1. Home
  2. •
  3. Brands
  4. •
  5. Ibanez
  6. •
  7. Tuner
  8. •
  9. Ibanez RU10 User manual

Ibanez RU10 User manual

JAM TUNER Tuner Metronome Rhythm
RU10
OWNER’S MANUAL
Caution
●To avoid short circuit, electric shock or malfunction:
Do not disassemble for repair.
Do not place in high temperature and humid space such as
electric heater, direct sunlight, bathroom, wet floor etc.
Do not place in excessive vibration.
Do not place in dusty or dirty space.
Do not operate the tuner with wet hands.
●To avoid breakdown
Do not handle all controls with excessive power.
Do not drop the tuner.
●Cleaning
Do not use thinner or alcohol for cleaning.
Use only dry and clean cloth.
●To prevent battery loss
Remove the battery when the tuner is not in use for a long
time.
Turn the power button off when the tuner is not in use.
Functions and Features
1POWER
Slide the POWER switch to turn ON/OFF.
2VOLUME
Controls the volume of Tuner, Metronome, Rhythm Play and
AUX Input.
3GAIN
Use this to adjust the amount of distortion. By turning clock-
wise all the way till it clicks, you will be able to turn off the
built-in distortion effect.
4LEVEL
Use this knob to adjust the level of guitar sound indepen-
dently from the level of METRONOME or RHYTHM PATTERN.
5MODE
Pressing the MODE button will switch the mode between
TUNER, METRONOME and RHYTHM PLAY. In TUNER
mode, you will get the function of a CHROMATIC TUNER.
6FUNCTION
● In TUNER mode
Pressing the FUNCTION button will switch between PITCH
and FLAT.
● In METRONOME mode
Pressing the FUNCTION button will switch between BEAT,
TEMPO, TAP, and RHYTHM.
● In RHYTHM PLAY mode
Pressing the FUNCTION button will switch between TEMPO
and RHYTHM PATTERN.
7SOUND/MUTE
● In TUNER mode
When you press the SOUND button, the LCD will indicate
"NOTE" and the speaker will output a note of the pitch you
select. You can change the pitch by the button.
If you press the FUNCTION button to select FLAT, the
speaker will output the flatted pitch in the range of
~for the current note.
The SPEAKER icon is shown in the LCD while the RU10 is
producing sound.
● In METRONOME mode
This button functions as a MUTE button.
The SPEAKER icon is shown in the LCD while the RU10 is
producing sound.
● In RHYTHM PLAY mode
This button switches ON/OFF the output (rhythm pattern)
from the built-in speaker. The SPEAKER icon is shown in
the LCD while the RU10 is producing sound.
8ADJUST
Use the ADJUST buttons to adjust the values of the mode
you selected.
● In TUNER mode
PITCH : 435Hz ~ 445Hz
FLAT : ~
● In METRONOME mode
BEAT :0~ 7 beats
TEMPO : = 40 ~ 208 beats per minute
TAP : The tempo at which you press the
button will be displayed
RHYTHM PATTERN :
● In RHYTHM PLAY mode
TEMPO : Quarter note = 40 ~ 208 beats per
minute
RHYTHM PATTERN : 20 preset RHYTHM PATTERNS. (De-
scribed in the appendix)
9Tuning guide LEDs
The green LED in the center will light when your instrument
matches the displayed note. The red LED at the left will light
if your instrument is flat, and the red LED at the right will
light if your instrument is sharp.
Operation
[TUNER]
Slide the POWER ON/OFF switch to turn the power on.
Press the TUNER button to enter TUNER mode.
In this mode, the RU10 functions as a chromatic tuner.
Connect the output of your instrument to the input jack. You
can choose PITCH or FLAT by the FUNCTION button and use
buttons to change the settings. When you turn on the
power, the RU10 is automatically set to PITCH=440 Hz. By using
the built-in microphone, you can also tune an acoustic guitar or
similar instrument.
If the pitch of your instrument is more than 50 cents away from
the correct pitch, tune your instrument until the correct note name
appears in the LCD and one of the guideline LEDs is lit. If the
pitch is within 50 cents of the correct pitch, watch the meter and
tune your instrument so that the needle stops at the "0" position.
When the needle stops at "0" and the center LED is lit, your
instrument is tuned correctly.
● Tuning by sound
When you press the SOUND button, the NOTE will indicate "A"
and the note "A" will sound.
As necessary, use the FUNCTION button and the but-
tons to change the NOTE and/or FLAT settings to the desired
note, and tune your instrument.
[METRONOME]
Slide the POWER ON/OFF button to turn the power on.
Press the MODE button to enter METRONOME mode.
In this mode the RU10 functions as a metronome.
You can use the FUNCTION button and buttons to change
the BEAT, TEMPO, TAP, and RHYTHM settings.
● BEAT setting
Use the FUNCTION button to select BEAT, and use to
select a beat (time signature) in the range of 0 ~7 beats.
● TEMPO setting
Use the FUNCTION button to select TEMPO, and use to
adjust the tempo in the range of 40 ~ 208.
● TAP setting
Use the FUNCTION button to select TAP. Then press the
button several times to get the desired tempo. The RU10 will
detect the tempo and display it.
If the detected tempo is less than 40, the display will indicate
"LO".
If it is 209 or higher, the display will indicate "HI".
● RHYTHM setting
Use the FUNCTION button to select RHYTHM, and use but-
ton to select the desired rhythm.
[RHYTHM PLAY]
Slide the POWER ON/OFF button to turn the power on.
Press the MODE button to enter RHYTHM PLAY mode.
In this mode you can play your guitar along with the preset
RHYTHM PATTERNS.
● TEMPO setting
Use the FUNCTION button to select TEMPO, and use to
adjust the tempo in the range of 40 ~ 208.
● RHYTHM PATTERN setting
There are 20 different preset RHYTHM PATTERNS. Use
to select the desired RHYTHM PATTERN.
Input the signal from your guitar into RU10 INPUT, play along
with RHYTHM PATTERN, and you can enjoy a more powerful
guitar sound by using the DISTORTION EFFECT.
※SPEAKER
Guitar sound out of RU10 is as much as the micro speaker can produce.
Depending on the output level of your guitar's pickup, you may
hear distorted sound even when the gain switch is off.
Installing or replacing the battery
Specifications
●TUNER
Tuning range A0 (27.50 Hz)~C8 (4,186 Hz)
Notes A, A#, B, C, C#, D, D#, E, F, F#, G, G#
Flat tuning , , ,
Accuracy +/-1 cent
Calibration 435~445 Hz
Display LCD, LED
●METRONOME
Tempo range 40~208 beats per minute
Beat range 0~7 beats
Rhythm
●RHYTHM PLAY
Tempo range 40~208 beats per minute
Rhythm pattern
●Input INPUT, MICROPHONE, AUX IN
●Output SPEAKER, PHONE
●
Power supply 9V 006P x 1
AC ADAPTER Ibanez AC109
* If used with AC power supply, be sure to use Ibanez AC
Adapter AC109. Usage of different AC Adapter may cause
malfunction or could be the reason for a breakdown.
●Dimensions 115(W) x 74(D) x 29.2(H) mm
●Weight 158 g (including batteries)
* Design and specifications are subject to change without
notice for improvement of the product.
JAM TUNER-Stimmgerät, Metronom, Rhythmusmaschine
RU10
BEDIENUNGSANLEITUNG
Achtung
●Kurzschlüsse, elektrische Schläge und Fehlfunktionen
vermeiden:
Öffnen Sie niemals das Gerät.
Lagern Sie das Gerät nicht an extrem heißen oder feuchten
Orten, wie beispielsweise auf einer Heizung, im direkten
Sonnenlicht, im Bad oder auf einem feuchten Fußboden.
Setzen Sie das Gerät keinen starken Erschütterungen aus.
Lagern Sie das Gerät nicht an staubigen oder verschmutz-
ten Orten.
Bedienen Sie das Gerät nicht mit nassen Händen.
●Schäden vermeiden
Bedienen Sie die Steuerelemente nicht mit übermäßiger
Kraft.
Achten Sie darauf, das Stimmgerät nicht fallen zu lassen.
●Reinigung
Verwenden Sie kein Lösemittel oderAlkohol zur Reinigung,
sondern nur ein trockenes, sauberes Tuch.
●Batterieverbrauch minimieren
Nehmen Sie die Batterie aus dem Stimmgerät heraus, sollte
es längere Zeit nicht benutzt werden.
Schalten Sie das Stimmgerät immer aus, wenn es nicht be-
nutzt wird.
Funktionen und Leistungsmerkmale
1POWER
Bewegen Sie den POWER-Schalter, um das Gerät ein- und
auszuschalten (ON/OFF).
2VOLUME
Steuert die Lautstärke von Tuner, Metronom, Rhythmus-
wiedergabe und AUX-Eingang.
3GAIN
Stellen Sie hier die Stärke der Verzerrung ein. Durch Drehen
im Uhrzeigersinn bis zum Einrasten schalten Sie den einge-
bauten Verzerrer-Effekt (Distortion) aus.
4LEVEL
Verwenden Sie diesen Regler, um den Pegel des Gitarren-
sounds unabhängig vom Pegel METRONOME oder RHYTHM
PATTERN einzustellen.
5MODE
Durch Drücken der MODE-Taste schalten Sie den Modus (die
Betriebsart) zwischen TUNER (Stimmgerät), METRONOME
(Metronom) und RHYTHM PLAY (Rhythmuswiedergabe) um.
Im TUNER-Modus erhalten Sie die Funktion eines chromati-
schen Stimmgeräts.
6FUNKTION
●Im TUNER-Modus
Durch Drücken der FUNCTION-Taste schalten Sie um zwischen
PITCH und FLAT.
●Im METRONOME-Modus
Durch Drücken der FUNCTION-Taste schalten Sie um zwischen
BEAT, TEMPO, TAP und RHYTHM.
●Im RHYTHM-PLAY-Modus
Durch Drücken der FUNCTION-Taste schalten Sie um zwischen
TEMPO und RHYTHM PATTERN.
7SOUND/MUTE
●Im TUNER-Modus
Wenn Sie die SOUND-Taste drücken, zeigt die LCD-Anzeige
"NOTE" an, und aus dem Lautsprecher erklingt eine Note in
der ausgewählten Tonhöhe. Sie können die Tonhöhe mit den
Tasten ändern.
Wenn Sie die FUNCTION-Taste drücken, um FLAT zu wählen,
gibt der Lautsprecher die verminderte Tonhöhe ("Flat") bis
für die aktuelle Note aus.
Das SPEAKER-Symbol erscheint im LCD, während das RU10
den Ton ausgibt.
●Im METRONOME-Modus
Diese Taste funktioniert als MUTE-Taste.
Das SPEAKER-Symbol erscheint im LCD, während das RU10
den Ton ausgibt.
●Im RHYTHM-PLAY-Modus
Diese Taste schaltet die Ausgabe (Rhythmus) vom eingebau-
ten Lautsprecher ein und aus. Das SPEAKER-Symbol er-
scheint im LCD, während das RU10 den Ton ausgibt.
8ADJUST
Verwenden Sie die ADJUST-Tasten (Einstelltasten) zum
Einstellen der Werte des aktuellen Modus.
● Im TUNER-Modus
PITCH : 435 Hz bis 445 Hz
FLAT : bis
● Im METRONOME-Modus
BEAT :0- 7 Schläge
TEMPO : = 40 ~ 208 Schläge pro Minute
TAP : Es wird das Tempo angezeigt, in
dem Sie die Taste drücken
RHYTHM :
● Im RHYTHM-PLAY-Modus
TEMPO : Viertelnote = 40 - 208 Schläge pro
Minute
RHYTHM PATTERN : 20 vorgegebene RHYTHM PATTERNS.
(Beschrieben im Anhang)
9Stimm-LEDs
Die grüne LED in der Mitte leuchtet auf, wenn Ihr Instrument auf
die angezeigte Note gestimmt ist. Die rote LED links leuchtet
auf, wenn Ihr Instrument zu tief gestimmt ist, die rote LED rechts
leuchtet auf, wenn es zu hoch gestimmt
ist.
Bedienung
[TUNER]
Bewegen Sie den POWER-Schalter, um das Gerät einzuschalten (ON).
Drücken Sie die TUNER-Taste, um in den TUNER-Modus zu
schalten.
In diesem Modus arbeitet das RU10 als chromatisches
Stimmgerät.
Verbinden Sie den Ausgang Ihres Instruments mit der
Eingangsbuchse. Mit der FUNCTION-Taste können Sie zwischen
PITCH oder FLAT wählen, und mit den Einstelltasten
können Sie die Einstellungen ändern. Wenn Sie das Gerät
einschalten, ist das RU10 automatisch auf die Tonhöhe (PITCH)
440 Hz eingestellt. Mit dem eingebauten Mikrofon können Sie auch
eine akustische Gitarre oder ähnliche Instrumente stimmen.
Wenn die Tonhöhe Ihres Instruments mehr als 50 Cents von der
richtigen Tonhöhe abweicht, stimmen Sie Ihr Instrument, bis die
richtige Note im LCD erscheint und eine der Stimm-LEDs leuchtet.
Wenn die Tonhöhe weniger als 50 Cents von der richtigen Tonhöhe
abweicht, beobachten Sie die Messanzeige und stimmen Sie Ihr
Instrument so, dass die Nadel in der Position "0" bleibt. Wenn die
Nadel bei "0" stoppt und die mittlere LED leuchtet, ist Ihr Instru-
ment richtig gestimmt.
● Stimmen nach Gehör
Wenn Sie die SOUND-Taste drücken, wird bei NOTE "A"
angezeigt, und die Note "A" erklingt.
Verwenden Sie die FUNCTION-Taste und die Einstelltasten
wie erforderlich, um die Einstellungen für NOTE und/oder FLAT
auf die gewünschte Note einzustellen, und stimmen Sie Ihr In-
strument.
[METRONOME]
Bewegen Sie den POWER-Schalter, um das Gerät einzuschalten (ON).
Drücken Sie die MODE-Taste, um in den METRONOME-Modus
zu schalten.
In diesem Modus arbeitet das RU10 als Metronom.
Mit der FUNCTION-Taste und den Einstelltasten können
Sie die Einstellungen der Funktionen BEAT(Schlag), TEMPO, TAP
(Klopfen) und RHYTHM (Rhythmus) ändern.
● BEAT-Einstellung
Wählen Sie mit der FUNCTION-Taste die BEAT-Funktion aus, und
stellen Sie mit eine Schlaganzahl (ein Taktmaß) im Bereich
von 0 - 7 Schlägen ein.
● TEMPO-Einstellung
Wählen Sie mit der FUNCTION-Taste die TEMPO-Funktion aus,
und stellen Sie mit ein Tempo zwischen 40 - 208 Schlägen
pro Minute ein.
● TAP-Einstellung
Wählen Sie mit der FUNCTION-Taste die TAP-Funktion aus.
Drücken Sie dann mehrmals die Taste im gewünschten Tempo, um
dieses einzustellen. Das RU10 erkennt das Tempo und zeigt es an.
Wenn das erkannte Tempo langsamer als 40 BPM ist, erscheint im
Display
”
LO“ (
”
Low“ = niedrig).
Wenn es 209 oder höher ist, erscheint im Display
”
HI“ (
”
High“ = hoch).
● RHYTHM setting
Wählen Sie mit der FUNCTION-Taste die RHYTHM-Funktion aus,
und wählen Sie mit der Taste den gewünschten Rhythmus aus.
[RHYTHM PLAY]
Bewegen Sie den POWER-Schalter, um das Gerät einzuschalten
(ON).
Drücken Sie die MODE-Taste, um in den RHYTHM-PLAY-Modus
zu schalten.
In diesem Modus können Sie mit Ihrer Gitarre zu den
voreingestellen Rhythmen (RHYTHM PATTERNS) spielen.
● TEMPO-Einstellung
Wählen Sie mit der FUNCTION-Taste die TEMPO-Funktion aus,
und verwenden Sie die Tasten zum Einstellen des Tempos
im Bereich von 40 ~ 208.
● RHYTHM-PATTERN-Einstellung
Es gibt 20 verschiedene vorgegebene RHYTHM PATTERNS.
Wählen Sie mit das gewünschte RHYTHM PATTERN aus.
Führen Sie das Signal Ihrer Gitarre zum Eingang (INPUT) am RU10,
und spielen Sie zum RHYTHM PATTERN. Einen kräftigeren
Gitarrensound erhalten Sie durch Einsatz des DISTORTION-Effekts.
※SPEAKER
Der vom RU10 ausgegebene Gitarrensound entspricht dem
Sound, der vom Mikrolautsprecher ausgegeben werden kann.
Abhängig vom Ausgangspegel des Tonabnehmers Ihrer Gitarre,
hören Sie möglicherweise verzerrten Sound, sogar wenn der
GAIN-Schalter ausgeschaltet ist.
Einsetzen oder Austauschen der Batterie
Technische Daten
●TUNER
Stimmbereich A0 (27,50 Hz) - C8 (4.186,00 Hz)
Stimmbare Noten A, A#, B, C, C#, D, D#, E, F, F#, G, G#
Flat-Tuning , , ,
Genauigkeit +/-1 cent
Kalibrierung 435~445 Hz
Anzeigen LCD, LED
●METRONOME
Tempobereich 40 - 208 Schläge pro Minute
Taktmaßzähler 0~7 beats
Rhythmus
●RHYTHM PLAY
Tempobereich 40 - 208 Schläge pro Minute
Rhythmus-Pattern
●Eingabe INPUT, MICROPHONE, AUX IN
●Ausgabe SPEAKER, PHONE
●
Spannungsversorgung
1 x 9 V,Typ 006P
AC ADAPTER Ibanez AC109
* Bei Einsatz mit Netzadapter verwenden Sie ausschließlich den
Netzadapter AC109 von Ibanez. Die Verwendung eines anderen
Netzadapters kann Fehlfunktion zur Folge haben oder einen
Ausfall des Gerätes verursachen.
●
Abmessungen
115(B) x 74(T) x 29.2(H) mm
●Gewicht 158g (einschließlich Batterie)
*
Ausführung und Technische Daten können sich aus Gründen
der Weiterentwicklung des Produkts ohneAnkündigung ändern.
1. Turn off the power switch
firstly when the battery is
replaced.
2. Pull the battery cover in
the direction of the arrow
to remove.
3. Insert the battery in the
correct polarity and re-
place the battery cover.
1.
Stellen Sie den POWER-
Schalter vor dem
Batteriewechsel in Aus-Stellung.
2.
Ziehen Sie die
Batteriefachabdeckung in
Pfeilrichtung ab, um sie zu
entfernen.
3.
Legen Sie die Batterie mit der
richtigen Polarität ein, und setzen
Sie die Batteriefachabdeckung
wieder auf.
JAM TUNER - Accordeur métronome boîte à rythmes
RU10
MANUEL DE L'UTILISATEUR
Prudence
●Pour éviter des court-circuits, des électrocutions ou des
dysfonctionnements:
N’essayez jamais de démonter cet appareil.
Evitez de placer l’appareil dans des endroits soumis à une
chaleur ou une humidité excessive. Exemples: près d’un ra-
diateur, en plein soleil, dans une salle de bains, sur un sol
humide, etc.
Evitez de soumettre l’appareil à de fortes vibrations.
Evitez les endroits poussiéreux et sales.
Ne manipulez jamais cet accordeur avec des mains mouillées.
●Pour éviter des dysfonctionnements
Manipulez les commandes avec soin.
Ne laissez jamais tomber cet accordeur.
●Nettoyage
N’utilisez jamais de détergent ou du benzène pour le net-
toyage.
Nettoyez l’appareil avec un chiffon sec et doux.
●Pour économiser la pile
Si vous ne pensez pas utiliser cet appareil durant une longue
période, retirez la pile.
Mettez l’accordeur hors tension tant que vous n’en avez pas
besoin.
Fonctions de l'accordeur
1POWER
Ce commutateur permet de mettre l'appareil sous/hors tension.
2VOLUME
Permet de régler le volume de l'Accordeur, le Métronome, la
Lecture de rythme et l'Entrée AUX.
3GAIN
Cette molette permet de régler la quantité de distorsion.
Tournez-la au maximum dans le sens des aiguilles d'une
montre pour désactiver l'effet de distorsion intégré.
4NIVEAU
Cette mollette permet de régler le niveau sonore de la guitare
indépendamment du niveau du METRONOME ou du
RHYTHM PATTERN.
5MODE
Si vous appuyez sur ce bouton, vous passez en mode
TUNER, METRONOME ou RHYTHM PLAY. En mode
TUNER, vous disposez des mêmes fonctions qu'un accordeur
chromatique.
6FUNCTION
●En mode TUNER
Si vous appuyez sur le bouton FUNCTION, vous passez en
mode PITCH ou FLAT.
●En mode METRONOME
Si vous appuyez sur le bouton FUNCTION, vous passez en
mode BEAT, TEMPO, TAP ou RHYTHM.
●En mode RHYTHM PLAY
Si vous appuyez sur le bouton FUNCTION, vous passez en
mode TEMPO ou RHYTHM PATTERN.
7SOUND/MUTE
●En mode TUNER
Lorsque vous appuyez sur le bouton SOUND, "NOTE"
apparaît sur l'écran LCD et le haut-parleur reproduit une note
de la hauteur sélectionnée. Vous pouvez modifier la hauteur
à l'aide des boutons .
Si vous appuyez sur le bouton FUNCTION pour sélectionner
FLAT, le haut-parleur reproduit la hauteur abaissée dans la
plage de ~pour la note actuelle.
L'icône SPEAKER s'affiche sur l'écran LCD lorsque le RU10
produit le son.
●En mode METRONOME
Ce bouton fonctionne comme le bouton MUTE.
L'icône SPEAKER s'affiche sur l'écran LCD lorsque le RU10
produit le son.
●En mode RHYTHM PLAY
Ce bouton permet d'activer/de désactiver la sortie (modèle
rythmique) du haut-parleur intégré. L'icône SPEAKER
s'affiche sur l'écran LCD lorsque le RU10 produit le son.
8ADJUST
Ces boutons permettent de régler les valeurs du mode
sélectionné.
● En mode TUNER
PITCH : 435 Hz ~ 445 Hz
FLAT : ~
● En mode METRONOME
BEAT :0à 7 temps
TEMPO : = 40 à 208 temps par minute
TAP :Tempo suivant lequel vous appuyez
sur le bouton s'affiche
RHYTHM :
● En mode RHYTHM PLAY
TEMPO : Noire = 40 à 208 temps par minute
RHYTHM PATTERN : 20 modèles rythmiques préréglés
(décrits dans l'annexe)
9Témoins de référence pour l'accordage
Le témoin vert au centre s'allume lorsque votre accordage
correspond à la note affichée. Si la note est trop basse, le
témoin rouge de gauche s'allume. Si elle est trop haute, le
témoin rouge de droite s'allume.
Fonctionnement
[ACCORDEUR]
Déplacez le commutateur POWER ON/OFF pour mettre l'appareil
sous tension.
Appuyez sur le bouton TUNER pour passer en mode TUNER.
Le RU10 fonctionne alors comme un accordeur chromatique.
Branchez la sortie de votre instrument dans la prise d'entrée.
Vous pouvez choisir PITCH ou FLAT à l'aide du bouton FUNC-
TION et utiliser les boutons pour modifier les réglages.
Lorsque vous mettez le RU10 sous tension, il est
automatiquement réglé sur PITCH=440 Hz. Le microphone
intégré vous permet également d'accorder une guitare acoustique
ou un instrument similaire.
Si la hauteur de votre instrument est éloignée de plus de 50
cents par rapport à la hauteur juste, accordez votre instrument
jusqu'à ce que le nom de la note correcte s'affiche sur l'écran
LCD et que l'un des témoins indicateurs s'allume. Si la hauteur
se situe dans une fourchette de 50 cents de la hauteur juste,
observez l'aiguille de l'indicateur et accordez votre instrument
pour qu'elle s'arrête sur "0". Lorsque l'aiguille se trouve dans
cette position et que le témoin indicateur central s'allume, votre
instrument est correctement accordé.
● Accord à l'oreille
Lorsque vous appuyez sur le bouton SOUND, NOTE indique "A"
et la note "A" est émise.
Au besoin, utilisez le bouton FUNCTION et les boutons
pour modifier les réglages NOTE et/ou FLAT afin d'obtenir la
note souhaitée et accordez votre instrument.
[METRONOME]
Déplacez le bouton POWER ON/OFF pour mettre l'appareil sous tension.
Appuyez sur le bouton MODE pour passer en mode
METRONOME.
Le RU10 fonctionne alors comme un métronome.
Vous pouvez utiliser le bouton FUNCTION et les boutons
pour modifier les réglages BEAT, TEMPO, TAP et RHYTHM.
● Réglage BEAT
Utilisez le bouton FUNCTION pour sélectionner BEAT et les
boutons pour sélectionner un temps (signature rythmique)
dans une plage de 0 à 7 temps.
● Réglage TEMPO
Utilisez le bouton FUNCTION pour sélectionner TEMPO et les
boutons pour régler le tempo dans une plage de 40 à 208.
● Réglage TAP
Utilisez le bouton FUNCTION pour sélectionner TAP. Appuyez
ensuite plusieurs fois sur le bouton pour obtenir le tempo
souhaité. Le RU10 détecte le tempo et l'affiche.
Si le tempo détecté est inférieur à 40, "LO" apparaît sur l'écran.
S'il est supérieur ou égal à 209, "HI" apparaît sur l'écran.
● Réglage RHYTHM
Le bouton FUNCTION permet de sélectionner RHYTHM. Le
bouton permet de sélectionner le rythme souhaité.
[LECTURE DE RYTHME]
Déplacez le bouton POWER ON/OFF pour mettre l'appareil sous tension.
Appuyez sur le bouton MODE pour passer en mode RHYTHM PLAY.
Vous pouvez alors jouer de la guitare sur les modèles rythmiques
préréglés.
● Réglage TEMPO
Utilisez le bouton FUNCTION pour sélectionner TEMPO et les
boutons pour régler le tempo dans une plage de 40 à 208.
● Réglage RHYTHM PATTERN
Il existe 20 modèles rythmiques préréglés différents. Utilisez les
boutons pour sélectionner le modèle rythmique souhaité.
Transmettez le signal de votre guitare dans la prise INPUT du
RU10, jouez sur le modèle rythmique sélectionné et bénéficiez
d'un son plus puissant grâce à l'effet de distorsion.
※SPEAKER
Le son de la guitare produit par le RU10 correspond au maxi-
mum pouvant être produit par le micro haut-parleur.
En fonction du niveau de sortie du micro de votre guitare, le son
pourrait être distordu même si le gain de distorsion est désactivé.
Installation ou remplacement de la pile
Fiche technique
●TUNER
Fréquences reconnues A0 (27,50 Hz) - C8 (4.186,00 Hz)
Notes A, A#, B, C, C#, D, D#, E, F, F#, G, G#
Accord bémol , , ,
Précision +/-1 cent
Calibrage 435~445 Hz
Affichage Écran LCD, témoin indicateur
●METRONOME
Plage de tempo 40 - 208 temps par minute
Plage de battements
0~7 beats
Rythme
●RHYTHM PLAY
Plage de tempo 40 - 208 temps par minute
Modèle rythmique
●Entrée INPUT, MICROPHONE, AUX IN
●Sortie SPEAKER, PHONE
●Alimentation
9 V 006P x 1
Adaptateur secteur Ibanez AC109
*
En cas d'alimentation secteur, veillez à utiliser l'adaptateur secteur
AC109 d'Ibanez. L'utilisation d'adaptateurs secteur différents peut
provoquer un disfonctionnement ou être à l'origine d'une
défaillance.
●Dimensions 115(L) x 74(P) x 29.2(H) mm
●Poids 158 g (pile comprise)
* Les caractéristiques et la présentation sont susceptibles d'être
modifiées sans avis préalable pour l'amélioration du produit.
1. Mettez le commutateur
d'alimentation en position
d'arrêt avant de
remplacer la pile.
2. Retirez le couvercle en le
faisant glisser dans le
sens de la flèche.
3. Insérez la pile en respectant
la polarité et remettez le
couvercle en place.
The RU10 fully conforms to the protection
requirements of the following EC Council
Directives.
2004/108/EC : ELECTROMAGNETIC
COMPATIBILITY
1 Rock 1
2 Rock 2
3 Rock 3
4 Rock 4
5 Metal 1
6 Metal 2
7 Metal 3
8 Metal 4
9 POP 1
10 POP 2
No.
Category
11 Ballad 1
12 Ballad 2
13 Dance 1
14 Dance 2
15 Dance 3
16 Blues
17 Fusion
18 Country
19 Rockabily
20 Disco
No.
Category
1 Rock 1
2 Rock 2
3 Rock 3
4 Rock 4
5 Metal 1
6 Metal 2
7 Metal 3
8 Metal 4
9 POP 1
10 POP 2
No.
Category
11 Ballad 1
12 Ballad 2
13 Dance 1
14 Dance 2
15 Dance 3
16 Blues
17 Fusion
18 Country
19 Rockabily
20 Disco
No.
Category 1 Rock 1
2 Rock 2
3 Rock 3
4 Rock 4
5 Metal 1
6 Metal 2
7 Metal 3
8 Metal 4
9 POP 1
10 POP 2
No.
Category
11 Ballad 1
12 Ballad 2
13 Dance 1
14 Dance 2
15 Dance 3
16 Blues
17 Fusion
18 Country
19 Rockabily
20 Disco
No.
Category
注意
電池を正しく装着しないと故障の原因になりま
す。
次のような場所での使用や保存はしない。故障
の原因になります。
・温度が極端に高い場所(直射日光の当たる場
所、暖房機器の近く、発熱する機器の上など)
・水気の近く(風呂場、洗面台、濡れた床など)
や湿度の高い場所
・振動の多い場所
電池は長時間使用しないときは外す。漏液等で
故障の原因になります。
スイッチや本体に無理な力を加えたり、落とし
たり、強くぶつけたりしない。
故障・けがの原因になります。
お手入れにはシンナー・アルコール類は使用し
ない。
故障の原因になります。
機能・特徴
1POWERSWITCH
POWERスイッチをスライドすると電源の ON/OFFが切り替わります。
2VOLUME
ギターサウンド以外のボリュームを調節します。
3GAIN
内蔵されているDistortionの歪の量を可変します、又、歪の量を最小にし
た場所に DistortionON/OFFが切り替えられれるスイッチが付いています。
4LEVEL
INPUT から入力されたギターの音量を調節することができます。
5MODESWITCH
この MODEスイッチを押すと、TUNER,METRONOME,RHYTHMPLAYと
切り替わります、TUNERの場合は CHROMATICTUNERの機能になり
ます。
6FUNCTIONSWITCH
FUNCTIONSWITCHを押すごとにTUNERMODEの場合はPITCH、FLAT
と切り替わります。
METRONOMEの場合は BEAT、TEMPO、TAP、RHYTHMと切り替わり
ます。
RHYTHMPLAYの場合は TEMPO、RHYTHMPATTERNと切り替わりま
す。
7SOUND/MUTESWITCH
●TUNERの場合
SOUNDボタンを押すと液晶画面に NOTE が表示され▲▼ボタンを押し
て画面に表示される音名の音が SPEAKERより出力されます。
また、FUNCTION ボタンを押し FLAT にすると現在の NOTE での♭〜♭
♭♭♭までの音が出力されます。
発音時には液晶画面に SPEAKERのマークが表示されます。
TUNER METRONOME
RU10
取扱説明書
●METORONOMEの場合
MUTEボタンとして機能します。
発音時には液晶画面に SPEAKERのマークが表示されます。
●RHYTHMPLAYの場合
内蔵スピーカーの出力(RhythmPattern)の ON/OFFの切り替えが可能にな
ります。発音時には液晶画面に SPEAKERのマークが表示されます。
8ADJUSTSWITCH▲▼
FUNCTIONボタンで選んだTUNERの場合PITCH、FLATMETRONOME
の場合BEAT、TEMPO、TAP、RHYTHM、RHYTHMPLAYの場合は
TEMPO,RHYTHMPATTERNのそれぞれの可変要素がADJUSTSWITCH
を押すことで変更されます。
●TUNERの場合
PITCH 435Hz〜445Hz
FLAT ♭〜♭♭♭♭
●METORONOMEの場合
BEAT:  0〜7拍子
TEMPO: 4分音符=40〜208/ 分
TAP:  押した速さのテンポを表示します
RHYTHM: 2 連符、3 連符、3 連符中抜き、4 連符、
4連符中抜き

●RHYTHMPLAYの場合
TEMPO: 4分音符=40〜208/ 分
RHYTHMPATTERN:20種類内蔵されている RHYTHMPATTERNの
切り替えが出来ます。
(明細は別表に記されています)
9チューニングガイド LED
チューニングが表示されたノートにあうと中央緑色のLEDが点灯しま
す。表示されたノートよりも低いときは左側の赤色 LED が , 高いと
きは右側の赤色の LED が点灯します。
使用方法
[[
[[
[TUNERTUNER
TUNERTUNER
TUNER]]
]]
]
電源 ON/OFFボタンを押して、電源を ONにします。
MODEボタンを押して TUNERMODEに入ります。
この MODEでは CHROMATICTUNERとして活用することができ、FUNC-
TION 及び▲▼ボタンにより PITCH、FLAT を変更することができます。
内蔵されているマイクを使用すればアコースティックギター等もチューニング
することができます。
入力されたギターの音程が50cents以上はなれている場合は弦の張りを調整し
ながら目的の音名をLCDに表示させ、どちらかのガイドライン LEDを点灯
させます。
弦の音程が 50cents以内の場合は針を見ながら調整して "0"に近づけます。
チューナーの針が"0"で止まったら中央のLEDが点灯しチューニング完了です。
●SOUNDモードに依るチューニングの方法
SOUNDボタンを押すと NOTEは Aを表示して Aの音を発音します。必要に
応じて FUNCTION、▲▼ボタンを操作して NOTE、FLATを変更してチュー
ニングできます。
[[
[[
[METRONOMEMETRONOME
METRONOMEMETRONOME
METRONOME]]
]]
]
電源 ON/OFFボタンを押して、電源を ONにします。
MODEボタンを押して METRONOMEMODE に入ります。
この MODEでは METRONOMEとして使用でき、FUNCTION及び▲▼ボタ
ンによりBEAT、TEMPO、TAP、RHYTHMを変更して使用することができま
す。
●BEATの設定
FUNCTIONボタンで BEATを選択し、▲▼により 0〜7 拍子までの変更が
可能です。
●TEMPOの設定
FUNCTIONボタンで TEMPO を選択し、▲▼により 40〜208までの TEMPO
数変更が可能です。
●TAPの設定
FUNCTIONボタンで TAPを選択し、▲ボタンを一定の間隔で何回か押すこ
とにより、間隔を検知して TEMPOとして表示します。検知した TEMPOが
39以下の場合は LOを表示して、209以上の場合は HIと表示します。
●RHYTHMの設定
FUNCTIONボタンで RHYTHMを選択し、▲ボタンで2 連符、3連符、3 連符
中抜き、4 連符、4連符中抜きの中より好みの RHYTHM を選択して使えます。
[RHYTHMPLAY][RHYTHMPLAY]
[RHYTHMPLAY][RHYTHMPLAY]
[RHYTHMPLAY]
電源 ON/OFFボタンを押して、電源を ONにします。
MODEボタンを押して RHYTHMPLAYMODE に入ります。
この MODE では、内蔵されている RHYTHMPATTERN に合わせてGUITAR
を弾いて楽しむ事が出来ます。
●TEMPOの設定
FUNCTIONボタンで TEMPO を選択し、▲▼により 40〜208までの TEMPO
数変更が可能です。
●RHYTHMPATTERNの設定
RHYTHMPATTERNが20通り内蔵してありますので、▲▼によりRHYTHM
PATTERN を選んでください。

お手持ちの GUITARの出力を本機INPUTに入れ、RHYTHMPATTERN を
BGMとして演奏する際、GUITAR 音にDISTORTION EFFECT を掛ける事
でより迫力のある演奏で楽しむ事が出来ます。
※スピーカー
本機に付いているスピーカーはチューナー・メトロノーム機能用です。
ギター本体のレベルによってはゲインスイッチをオフにした状態でも歪むこと
があります。
電池のセットと交換方法
製品仕様
●TUNER
TUNING 範囲 A0(27.50Hz)〜 C8(4,186Hz)
音名
A、A#、B、C、C#、D、D#、E、F、F#、G、G#
FLATTUNING ♭、♭♭、♭♭♭、♭♭♭♭
精度 + / − 1cent
CALIBLATION 435 〜 445Hz
表示 LCD、LED
●METRONOME
TEMPO 範囲 40 〜 208/ 分
BEAT 範囲 0〜 7 拍子
RHYTHM 2 連符、3 連符、3 連符中抜き、4 連符、
4 連符中抜き
● RHYTHMPLAY
TEMPO 範囲 40 〜 208/ 分
RHYTHMPATTERN
●入力INPUT、MICROPHONE、AUXIN
●出力 SPEAKER,PHONE
●電源 9V006Px1
ACADAPTERIbanezAC119
*AC 電源で使用する場合は、必ず Ibanez社の ACAdapterAC119 を使用し
て下さい。他のACAdapter等を使用した場合、正常な動作をしなかったり
故障の原因となります。
●外形寸法 115(W)✕74(D)✕29.2(H)mm
●重量    158g(電池込み)
*規格及び外観は改良の為に予告なく変更することがありますのでご了承願
います。
JAM TUNER Afinador, metrónomo, secuenciador
RU10
MANUAL DEL USUARIO
Precaución
●Para evitar cortocircuitos, sacudidas eléctricas o
malfuncionamiento:
No desmonte el aparato para repararlo.
No lo coloque en ambientes de elevada temperatura ni en
espacios que contengan humedad, como los de los calen-
tadores eléctricos, los expuestos a la luz del sol directa,
cuartos de baño, suelos húmedos, etc.
No lo coloque en sitios de excesiva vibración.
No lo coloque en espacios polvorientos o sucios.
No active el sintonizador con las manos mojadas.
●Para evitar la falla de aislación
No maneje los controles con excesiva potencia.
No deje caer el sintonizador.
●Limpieza
No utilice diluyente ni alcohol para limpiarlo.
Utilice únicamente un paño limpio y seco.
●Para evitar la disipación de la energía de la batería
Quite la batería cuando no vaya a utilizar el sintonizador
durante un periodo de tiempo prolongado.
Desactive el sintonizador cuando no lo utilice.
Funciones y características
1INTERRUPTOR POWER
Mueva el interruptor POWER para encender/apagar el
aparato.
2VOLUMEN
Controla el volumen del afinador, metrónomo, secuenciador
y entrada AUX.
3GANANCIA
Utilice este mando para ajustar la cantidad de distorsión. Si
lo gira completamente a la derecha hasta notar un chasquido,
podrá desactivar el efecto de distorsión.
4NIVEL
Con este mando puede ajustar el volumen del sonido de
guitarra independientemente del nivel del METRÓNOMO
o la PAUTA DE RITMO.
5Botón MODE
Pulsando el botón MODE se seleccionan las funciones
TUNER, METRONOME y RHYTHM PLAY. La función TU-
NER es la de un afinador cromático.
6Botón FUNCTION
●En modo TUNER
Al pulsar el botón FUNCTION cambiará entre PITCH y
FLAT.
●En modo METRONOME
Al pulsar el botón FUNCTION cambiará entre BEAT, TEM-
PO, TAP, y RHYTHM.
●En modo RHYTHM PLAY
Al pulsar el botón FUNCTION cambiará entre TEMPO y
RHYTHM PATTERN.
7Botón SOUND/MUTE
●En modo TUNER
Cuando pulsa el botón SOUND, el LCD indica "NOTE" y el
altavoz emite una nota del tono seleccionado. Puede
cambiar el tono con el botón .
Si pulsa el botón FUNCTION para seleccionar FLAT, el
altavoz emite el tono bemol en la gama de ~ de
la nota actual.
Mientras el RU10 esté produciendo sonido, el icono
SPEAKER aparece en la pantalla LCD.
● En modo METRONOME
Este botón funciona como botón MUTE (silenciador).
Mientras el RU10 esté produciendo sonido, el icono
SPEAKER aparece en la pantalla LCD.
●En modo RHYTHM PLAY
Con este botón se activa/desactiva la salida (pauta de
ritmo) del altavoz incorporado. Mientras el RU10 esté
produciendo sonido, el icono SPEAKER aparece en la
pantalla LCD.
8Botones ADJUST
Utilice los botones ADJUST para ajustar los valores de la
función seleccionada.
● En modo TUNER
PITCH : 435Hz~445Hz
FLAT : ~
● En modo METRONOME
BEAT: 0 ~7 pulsaciones
TEMPO : = 40~208 pulsaciones por minuto
TAP : La pantalla indica el tempo con el
cual está pulsando el botón
RHYTHM :
● En modo RHYTHM PLAY
TEMPO : Negra = 40~208pulsaciones por
minuto
RHYTHM PATTERN : 20 pautas de ritmo programadas.
(Se describen en el apéndice)
9Diodos (LED) indicadores de afinación
El diodo verde del centro se ilumina cuando la afinación del instrumento
coincide
con la nota que se visualiza. El diodo rojo de la
izquierda se ilumina cuando el instrumento está desafinado
en grave y el diodo rojo de la derecha se ilumina cuando el
instrumento está desafinado en agudo.
Funcionamiento
[AFINADOR]
Mueva el interruptor para encender el aparato.
Pulse el botón TUNER para seleccionar el afinador.
En este modo el RU10 funciona como un afinador cromático.
Conecte la salida del instrumento a la toma de entrada. Puede
escoger PITCH o FLAT con el botón FUNCTION y utilizar los
botones para realizar los ajustes. Cuando lo enciende, el
RU10 se activa automáticamente en PITCH = 440 Hz. Con el
micrófono incorporado puede afinar también una guitarra
acústica o instrumento similar.
Si el tono del instrumento difiere en más de 50 centésimas del
tono correcto, afine el instrumento hasta que aparezca en la
pantalla LCD el nombre de la nota correcta y se ilumine uno
de los LED indicadores. Si el tono difiere menos de 50
centésimas del tono correcto, observe el indicador y afine el
instrumento hasta que la aguja se detenga en la posición "0".
Cuando la aguja se detenga en "0" y el LED del centro se
ilumine, el instrumento estará correctamente afinado.
● Afinación por el sonido
Cuando pulsa el botón SOUND, el indicador NOTE muestra
"A" y suena la nota "A".
Si es preciso, utilice el botón FUNCTION y los botones
para cambiar NOTE o FLAT a la nota que desee y afine el
instrumento.
[METRÓNOMO]
Pulse el botón POWER ON/OFF para encender el aparato.
Pulse el botón MODE para seleccionar el modo METRO-
NOME.
En este modo, el RU10 funciona como metrónomo.
Puede utilizar el botón FUNCTION y los botones para
cambiar los valores de BEAT, TEMPO, TAP y RHYTHM.
● Ajuste de BEAT
Utilice el botón FUNCTION para seleccionar BEATy para
seleccionar un compás en la gama de 0~7 pulsaciones.
● Ajuste de TEMPO
Utilice el botón FUNCTION para seleccionar TEMPO y los
botones para ajustar el tempo en la gama de 40~208.
● Ajuste de TAP
Utilice el botón FUNCTION para seleccionar TAP.
Seguidamente pulse el botón varias veces con el tempo
deseado. El RU10 detecta el tempo y lo indica.
Si el tempo detectado es menor de 40, la pantalla muestra la
indicación "LO".
Si es igual o superior a 209, la pantalla muestra la indicación "HI".
● Ajuste de RHYTHM
Seleccione RHYTHM con el botón FUNCTION y utilice el botón
para seleccionar el ritmo deseado.
[RHYTHM PLAY]
Mueva el botón POWER ON/OFF para encender el aparato.
Pulse el botón MODE para seleccionar el modo RHYTHM PLAY.
En este modo puede tocar la guitarra acompañándose de las
pautas de ritmo programadas.
● Ajuste de TEMPO
Utilice el botón FUNCTION para seleccionar TEMPO y los
botones para ajustar el tempo en la gama de 40~208.
● Ajuste de RHYTHM PATTERN
Hay 20 pautas de ritmo programadas. Utilice para
seleccionar la pauta de ritmo que desee.
I
ntroduzca la señal de la guitarra en RU10 INPUT, toque
acompañado por RHYTHM PATTERN y podrá disfrutar de un
sonido más potente de la guitarra si utiliza DISTORTION EFFECT.
※SPEAKER
El sonido máximo que puede producir el microaltavoz es el
sonido de guitarra de RU10.
Dependiendo del nivel de salida de pastilla de su guitarra,
puede percibir un sonido distorsionado incluso cuando la
ganancia está desactivada.
Instalación o cambio de la pila
Especificaciones
●AFINADOR
Margen de afinación A0 (27,50 Hz)-C8 (4186 Hz)
Notas
A, A#, B, C, C#, D, D#, E, F, F#, G, G#
Afinación en bemol , , ,
Precisión +/-1 centésima
Calibrado 435~445 Hz
Indicaciones LCD, LED
●METRÓNOMO
empo 40 - 208 pulsaciones por minuto
Gama de compases 0 ~7 pulsaciones
Ritmo
●RHYTHM PLAY
Tempo 40~208 pulsaciones por minuto
Pauta de ritmo
●Entrada INPUT, MICROPHONE, AUX IN
●Salida SPEAKER, PHONE
●Alimentación:
9V 006P x 1
Adaptador de corriente Ibanez
AC109
* Si lo utiliza con corriente alterna, debe emplear el adaptador
de corriente Ibanez AC109. El uso de un adaptador diferente
puede ocasionar fallos o una avería.
●Dimensiones 115(A) x 74(F) x 29.2(Alt) mm
●Peso 158g (pilas incluidas)
* El diseño y las especificaciones pueden cambiar sin previo
aviso por razones de perfeccionamiento del producto.
安全上のご注意
ご使用の前にこの「安全上の注意」をよくお読みのうえ、正し
くお使いください。お読みになった後は、お使いになる方がい
つでも見られる所に必ず保管してください。
●表示について
製品を安全に正しくお使いいただき、あなたや他の人への危害
や
財産への損害を未然に防止するために、重要な内容を表示して
います。
その表示と意味は次のようになっています。
この表示を無視して、誤った取り扱い
をすると、
人が死亡または重傷を負う
可能性が想定される内容が記載されて
います。
この表示を無視して、誤った取り扱い
をすると、
人が傷害を負ったり、物的
損害の発生が想定される内容が記載さ
れています。
●絵表示の例
記号は禁止(行ってはいけない)の行為であるこ
とを告げるものです。図の中や近くに具体的な
禁止事項(左図の場合は分解禁止)が描かれてい
ます。
記号は強制(必ず実行して欲しい)したり指示す
る内容があることを告げるものです。図の中や
近くに具体的な行為(左図の場合は差込みプラ
グをコンセントから抜いてください)が描かれ
ています。
〉〉〉以下の指示を必ず守って下さい。〈〈〈
警告
この機器を分解・修理・改造しない。故障・ショー
トの原因になります。
水滴のついた手で、スイッチ操作をしない。
ショート・感電の恐れがあります。
電池を火の中に入れない。破裂・発熱・発火の恐
れがあります。
警告
注意
JAM TUNER Accordatore Metronomo Rhythm
RU10
LIBRETTO DI ISTRUZIONI
Attenzione
●Per evitare cortocircuiti, scosse elettriche e anomalie
di funzionamento:
Non smontare l’accordatore a scopo di riparazione.
Non posizionare l’accordatore in luoghi umidi e ad alta tem-
peratura (ad es. in prossimità di riscaldamenti elettrici, alla
luce diretta del sole, nel bagno, su pavimenti bagnati).
Non posizionare l’accordatore laddove sono presenti ecces-
sive vibrazioni.
Non posizionare l’accordatore in luoghi polverosi o sporchi.
Non toccare l’accordatore con mani bagnate.
●Per evitare guasti
Nel manipolare i controlli (tutti), non fare troppo forza.
Non far cadere l’accordatore.
●Pulizia
Non utilizzare diluenti o alcool a scopo di pulizia.
Utilizzare solo un panno asciutto e pulito.
●Per prevenire lo scaricamento delle batterie
Rimuovere le batterie quando l’accordatore non è utilizzato
per molto tempo.
Disattivare il pulsante dell’alimentazione quando
l’accordatore non è utilizzato.
Funzioni e caratteristiche
1POWER
Spostare il selettore POWER per accendere o spegnere l'unità.
2VOLUME
Controlla il volume delle funzioni Tuner, Metronome, Rhythm
Play e AUX Input (ingresso AUX).
3GAIN
Regola la quantità di distorsione. Ruotando la rotella in senso
orario fino a udire uno scatto è possibile disattivare il distorsore
interno.
4LIVELLO
Utilizzare questa manopola per regolare il livello del suono
di chitarra indipendentemente dal livello specificato per le
funzioni METRONOME o RHYTHM PATTERN.
5MODE
Premendo il pulsante MODE è possibile selezionare i modi
operativi TUNER, METRONOME e RHYTHM PLAY. Il modo
TUNER permette di far funzionare l'unità come un
accordatore cromatico.
6FUNCTION
●In modo TUNER
Premere il pulsante FUNCTION per alternare le funzioni
PITCH e FLAT.
●In modo METRONOME
Premere il pulsante FUNCTION per alternare le funzioni
BEAT, TEMPO, TAP e RHYTHM.
●In modo RHYTHM PLAY
Premere il pulsante FUNCTION per alternare le funzioni
TEMPO e RHYTHM PATTERN.
7SOUND/MUTE
●In modo TUNER
Premendo il pulsante SOUND, il display LCD indicherà
"NOTE" e l'altoparlante interno emetterà la nota dell'altezza
selezionata. Per cambiare l'altezza della nota, utilizzare il
pulsante .
Premendo il pulsante FUNCTION per selezionare FLAT,
l'altoparlante emetterà la nota bemolle entro l'intervallo
~per la nota selezionata.
L'icona SPEAKER mostrata sul display LCD indica che l'unità
RU10 sta producendo dei suoni.
●In modo METRONOME
Il pulsante può essere utilizzato per la funzione di MUTE
(silenziatore dei suoni).
L'icona SPEAKER mostrata sul display LCD indica che
l'unità RU10 sta producendo dei suoni.
●In modo RHYTHM PLAY
Il pulsante imposta lo stato ON/OFF del suono in uscita
dall'altoparlante interno (suono del pattern ritmico). L'icona
SPEAKER mostrata sul display LCD indica che l'unità
RU10 sta producendo dei suoni.
8ADJUST
Utilizzare i pulsanti ADJUST per impostare i valori del modo
selezionato.
● In modo TUNER
PITCH : 435Hz~445Hz
FLAT : ~
● In modo METRONOME
BEAT 0 ~7 battute
TEMPO : = 40~208 battute al minuto
TAP :Viene indicato il tempo rilevato tra
le pressioni del pulsante
RHYTHM :
● In modo RHYTHM PLAY
TEMPO : Quarto = 40~208 battute
RHYTHM PATTERN : 20 pattern ritmici pre-registrati.
(Descritti nell'Appendice)
9LED di guida all’accordatura
Il LED verde nel centro si illumina quando la nota dello
strumento corrisponde alla nota visualizzata. Il LED rosso sulla
sinistra si illumina se la nota dello strumento è bassa, e il LED
rosso sulla destra si illumina se la nota dello strumento è alta.
Funzionamento
[TUNER]
Spostare il selettore POWER ON/OFF in posizione ON per
accendere l'unità.
Premere il pulsante TUNER per entrare in modo TUNER
(accordatore).
In questo modo, l'unità RU10 opera come accordatore cromatico.
Collegare l'uscita dello strumento al jack di ingresso. Selezionare
la funzione PITCH o FLAT mediante il pulsante FUNCTION, e
utilizzare i pulsanti per modificare l'impostazione
corrispondente. All'accensione, l'unità RU10 è automaticamente
impostata con un valore di PITCH=440 Hz. Utilizzando il
microfono interno è possibile accordare anche una chitarra
acustica o uno strumento simile.
Se lo strumento dista più di 50 cent dall'intonazione corretta,
accordare lo strumento fino a far apparire sul display la nota di
destinazione e far accendere uno dei LED guida. Con una
differenza di intonazione dello strumento compresa entro i 50
cent dalla nota di riferimento, controllare la scala numerata e
accordare lo strumento fino a far fermare l'ago in posizione "0".
Lo strumento è accordato correttamente quando l'ago indica la
posizione "0" e il LED centrale è acceso.
● Accordatura a orecchio
Premere il pulsante SOUND; sul display, il campo NOTE
indicherà la nota "A" e l'unità emetterà la nota "A" (La).
Se necessario, utilizzare il pulsante FUNCTION e i pulsanti
per modificare l'impostazione dei parametri NOTE e/o FLAT in
base ai criteri desiderati, e accordare lo strumento.
[METRONOME]
Spostare il selettore POWER ON/OFF in posizione ON per
accendere l'unità.
Premere il pulsante MODE per entrare in modo METRONOME.
In questo modo, l'unità RU10 opera come metronomo.
Utilizzando il pulsante FUNCTION e i pulsanti è possibile
modificare le impostazioni dei parametri BEAT, TEMPO, TAP e RHYTHM.
● Impostazioni di BEAT
Utilizzare il pulsante FUNCTION per selezionare BEAT, e
utilizzare per specificare una battuta (valore di metrica) in
un intervallo compreso tra 0 e 7 battute.
● Impostazione del TEMPO
Utilizzare il pulsante FUNCTION per selezionare TEMPO, e
utilizzare per regolare il valore di tempo in un intervallo
compreso tra 40 e 208 battute al minuto.
● Impostazione di TAP
Utilizzare il pulsante FUNCTION per selezionare TAP. Premere
quindi più volte il pulsante per ottenere la frequenza
desiderata. L'unità RU10 rileverà il tempo corrispondente e lo
mostrerà sul display.
Nel caso in cui il tempo rilevato sia inferiore a 40, il display
indicherà "LO".
Con un valore di tempo rilevato pari o superiore a 209, il display
indicherà "HI".
● Impostazioni di RHYTHM
Utilizzare il pulsante FUNCTION per selezionare RHYTHM, e
utilizzare il pulsante per specificare il ritmo desiderato.
[RHYTHM PLAY]
Spostare il selettore POWER ON/OFF in posizione ON per
accendere l'unità.
Premere il pulsante MODE per entrare in modo RHYTHM PLAY.
In questo modo è possibile suonare la chitarra insieme ai
RHYTHM PATTERN (pattern ritmici) pre-registrati.
● Impostazione di TEMPO
Utilizzare il pulsante FUNCTION per selezionare TEMPO, e
utilizzare per regolare il valore di tempo in un intervallo
compreso tra 40 e 208 battute al minuto.
● Impostazione di RHYTHM PATTERN
Sono disponibili 20 pattern ritmici pre-registrati. Utilizzare
per selezionare il pattern ritmico desiderato.
Collegare la chitarra all'ingresso INPUT dell'unità RU10 e suonare
insieme ai pattern ritmici. Se necessario, utilizzare anche l'effetto
DISTORTION per ottenere un suono più aggressivo.
※SPEAKER
Il suono di chitarra in uscita da RU10 è prodotto dal mini
altoparlante interno.
Con un livello elevato di uscita dei magneti della chitarra, il suono
in uscita potrebbe risultare distorto anche con il parametro GAIN
della distorsione disattivato.
Montaggio e sostituzione della batteria
Specifiche
●TUNER
Gamma di accordatura A0 (27,50 Hz) - C8 (4.186 Hz)
Note A, A#, B, C, C#, D, D#, E, F, F#, G, G#
Accordatura Flat , , ,
Precisione +/-1 cent
Calibrazione 435~445 Hz
Display LCD, LED
●METRONOME
Gamma tempo 40 - 208 temps par minute
Gamma battute 0 ~7 beats
Gamma ritmo
●RHYTHM PLAY
Gamma tempo 40~208 battute al minuto
Pattern ritmici
●Ingressi INPUT, MICROPHONE, AUX IN
●Uscite SPEAKER, PHONE
●
Alimentazione
9V 006P x 1
Alimentatore CA Ibanez AC109
* Utilizzare esclusivamente un alimentatore CAIbanez AC109. In
caso contrario, è possibile causare un malfunzionamento o
danneggiare l'accordatore.
●Dimensioni 115(L) x 74(P) x 29.2(A) mm
●Peso 158 g (batterie incluse)
* Il design e le specifiche sono soggette a modifiche di
miglioramento del prodotto, senza preavviso. AUG08685
The RU10 fully conforms to the protection
requirements of the following EC Council
Directives.
2004/108/EC : ELECTROMAGNETIC
COMPATIBILITY
1. Prima di sostituire la batteria
si deve spegnere
l'apparecchio.
2. Tirare il coperchio del vano
batteria nella direzione
indicata dalla freccia per
rimuoverlo.
3. Inserire la batteria rispettando
la corretta polarità, e
ricollocare nuovamente in
sede il coperchio.
電池交換の場合は、必ず電源
をOFF にしてから交換を
行ってください。
下部に有るバッテリーカ
バーを外すために矢印の方
向へ引いてください。
3. 電池を正しい極性で入れ、
バッテリーカバーをしてく
ださい。
2.
1.
1. Antes de reemplazar la
pila desconecte la
alimentación deslizando el
interruptor POWER ON/
OFF.
2. Retire la tapa de la pila en
la dirección de la flecha.
3. Introduzca la pila con la
polaridad correcta y vuelva
a colocar la tapa.
1 Rock 1
2 Rock 2
3 Rock 3
4 Rock 4
5 Metal 1
6 Metal 2
7 Metal 3
8 Metal 4
9 POP 1
10 POP 2
No.
Category
11 Ballad 1
12 Ballad 2
13 Dance 1
14 Dance 2
15 Dance 3
16 Blues
17 Fusion
18 Country
19 Rockabily
20 Disco
No.
Category
1 Rock 1
2 Rock 2
3 Rock 3
4 Rock 4
5 Metal 1
6 Metal 2
7 Metal 3
8 Metal 4
9 POP 1
10 POP 2
No.
Category
11 Ballad 1
12 Ballad 2
13 Dance 1
14 Dance 2
15 Dance 3
16 Blues
17 Fusion
18 Country
19 Rockabily
20 Disco
No.
Category
1 Rock 1
2 Rock 2
3 Rock 3
4 Rock 4
5 Metal 1
6 Metal 2
7 Metal 3
8 Metal 4
9 POP 1
10 POP 2
No.
Category
11 Ballad 1
12 Ballad 2
13 Dance 1
14 Dance 2
15 Dance 3
16 Blues
17 Fusion
18 Country
19 Rockabily
20 Disco
No.
Category

Other Ibanez Tuner manuals

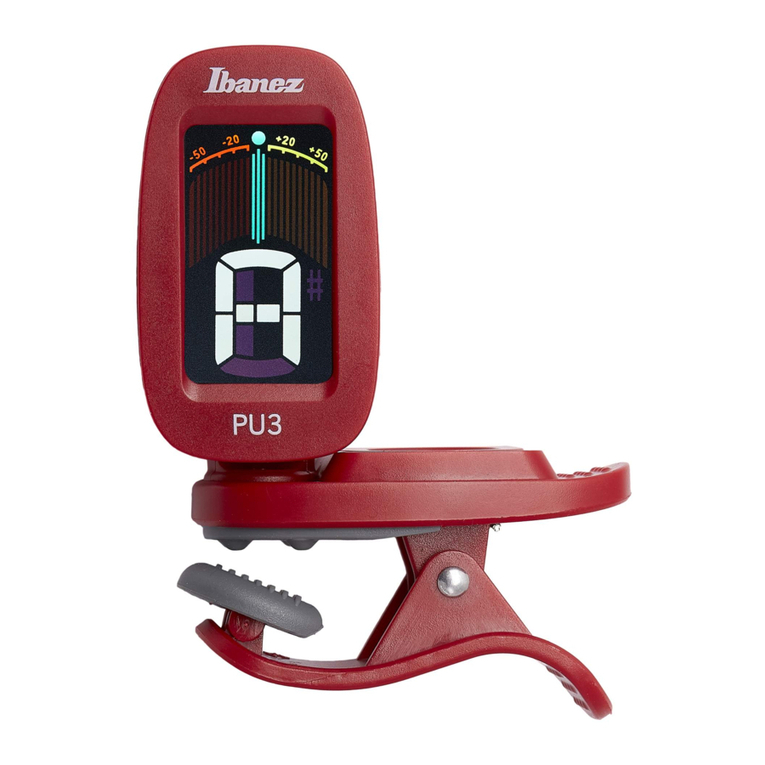
Ibanez PU3 User manual

Ibanez

Ibanez PU3 User manual

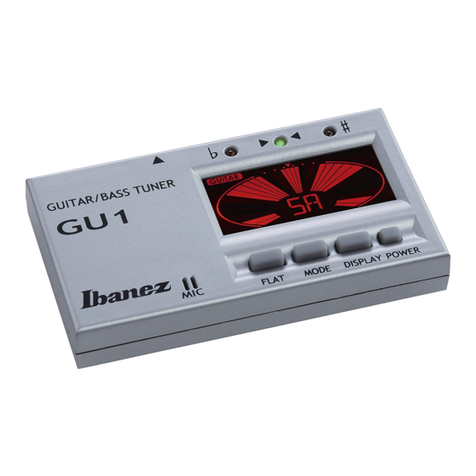
Ibanez GU1 User manual

Ibanez

Ibanez GU1 User manual

Ibanez GU20 User manual

Ibanez

Ibanez GU20 User manual

Ibanez PU3 User manual

Ibanez

Ibanez PU3 User manual

Ibanez GU30 User manual

Ibanez

Ibanez GU30 User manual

Ibanez PU3 User manual

Ibanez

Ibanez PU3 User manual

Ibanez LU30 User manual

Ibanez

Ibanez LU30 User manual

Ibanez PU10 User manual

Ibanez

Ibanez PU10 User manual

Ibanez LU10 User manual

Ibanez

Ibanez LU10 User manual

Ibanez GU40 User manual

Ibanez

Ibanez GU40 User manual

Ibanez MU30 User manual

Ibanez

Ibanez MU30 User manual

Ibanez GU20 User manual

Ibanez

Ibanez GU20 User manual

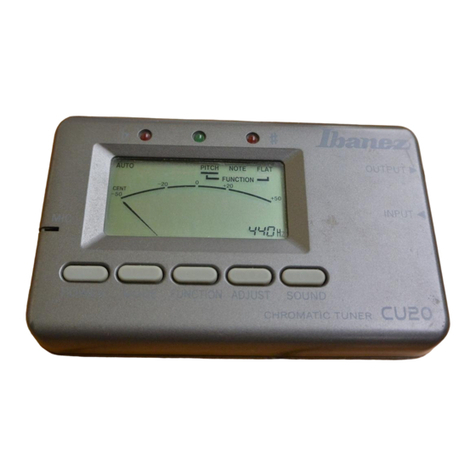
Ibanez CU20 User manual

Ibanez

Ibanez CU20 User manual

Ibanez CU30 User manual

Ibanez

Ibanez CU30 User manual

Ibanez MU2 User manual

Ibanez

Ibanez MU2 User manual

Ibanez GU40 User manual

Ibanez

Ibanez GU40 User manual

Ibanez MU2 User manual

Ibanez

Ibanez MU2 User manual

Ibanez MU40 User manual

Ibanez

Ibanez MU40 User manual

Ibanez PU10 User manual

Ibanez

Ibanez PU10 User manual

Ibanez PU1G User manual

Ibanez

Ibanez PU1G User manual

Ibanez PU20 User manual

Ibanez

Ibanez PU20 User manual

Ibanez LU20 User manual

Ibanez

Ibanez LU20 User manual

Ibanez TuNano User manual

Ibanez

Ibanez TuNano User manual

Ibanez CU40 User manual

Ibanez

Ibanez CU40 User manual

Popular Tuner manuals by other brands

NAD C422 Specifications

NAD

NAD C422 Specifications

Yamaha TX-77 owner's manual

Yamaha

Yamaha TX-77 owner's manual

System Fidelity ST-250 Instruction manuals

System Fidelity

System Fidelity ST-250 Instruction manuals

Motorola HDT100 user guide

Motorola

Motorola HDT100 user guide

Akai AT-2400 Service manual

Akai

Akai AT-2400 Service manual

Mooer CT-01 owner's manual

Mooer

Mooer CT-01 owner's manual

Tibo TI430 user guide

Tibo

Tibo TI430 user guide

NAD C445 datasheet

NAD

NAD C445 datasheet

Yamaha T-7 owner's manual

Yamaha

Yamaha T-7 owner's manual

Yamaha CT-7000 owner's manual

Yamaha

Yamaha CT-7000 owner's manual

Russound ST2 Smart Tuner datasheet

Russound

Russound ST2 Smart Tuner datasheet

Technics ST-7300 operating instructions

Technics

Technics ST-7300 operating instructions

QUAD FM4 Instruction book

QUAD

QUAD FM4 Instruction book

Myryad mt 100 owner's manual

Myryad

Myryad mt 100 owner's manual

Onkyo T-22 Service manual

Onkyo

Onkyo T-22 Service manual

Marantz AV7702mkII Service manual

Marantz

Marantz AV7702mkII Service manual

Sony WRR-805A Service manual

Sony

Sony WRR-805A Service manual

Strings.ie T1 instruction manual

Strings.ie

Strings.ie T1 instruction manual

manuals.online logo
manuals.online logoBrands
  • About & Mission
  • Contact us
  • Privacy Policy
  • Terms and Conditions

Copyright 2025 Manuals.Online. All Rights Reserved.