manuals.online logo
Brands
  1. Home
  2. •
  3. Brands
  4. •
  5. Ibanez
  6. •
  7. Tuner
  8. •
  9. Ibanez LU20 User manual

Ibanez LU20 User manual

CHROMATISCHES BODEN-STIMMGERÄT
LU20
BEDIENUNGSANLEITUNG
Attention
1Pour éviter des courts-circuits, des
électrocutions oudes dysfonctionnements :
N'essayez jamais de démonter ou réparer cet
appareil.
Evitez de placer cet appareil dans des
endroits soumis à une chaleur ou une
humidité excessive (p. ex. près d'un
radiateur, en plein soleil, dans une salle de
bains ou sur un sol humide).
Evitez de soumettre cet appareil à de fortes
vibrations.
Evitez de placer cet appareil dans des
endroits poussiéreux ou sales.
N'utilisez pas cet appareil avec des mains
humides.
2
Pour éviter des dommages
N'appliquez pas trop de pression sur les
commutateurs et autres commandes.
Ne laissez pas tomber cet appareil.
3
Nettoyage
N'utilisez pas de détergent, de benzène ou
d'autres solvants pour nettoyer cet appareil.
4
Pour économiser la pile
Si vous n'utilisez pas cet appareil pendant
une période prolongée, retirez la pile.
Fonctionnement
1 L'appareil est mis automatiquement sous ten-
sion lorsque vous insérez une fiche dans la
prise d'entrée (Input).
2 Lorsque vous appuyez sur le bouton CALIB,
le premier chiffre qui s'affiche indique le dia-
pason sur lequel l'accordeur LU20 est réglé,
c'est-à-dire : 6 = 436 Hz, 7 = 437 Hz···., 0 =
440z = 0 ···. jusqu'à 5 = 445 Hz .
Si vous appuyez plusieurs fois sur le bouton
CALIB, vous pouvez augmenter la valeur de
1 Hz à la fois (l'accordeur LU20 est réglé sur
la valeur par défaut de A = 440 Hz à la sortie
d'usine).
3
Lorsque vous appuyez sur le bouton FLAT en
premier, aucune information ne s'affiche sur
l'indicateur. Mais si vous appuyez de nouveau,
le segment supérieur s'allume, indiquant un
bémol ( ). Si vous appuyez plusieurs fois sur
le bouton FLAT, vous pouvez changer la hau-
teur de l'accord, comme indiqué ci-dessous.
4
Transmettez le signal de votre guitare dans la
prise d'entrée (Input). Si vous connectez la prise
de sortie sans effets (Dry out) à un amplificateur,
la guitare reste branchée à l'amplificateur même
si vous ne l'accordez pas.
Si vous préférez ne pas envoyer en sortie un
son de votre amplificateur pendant l'accord,
utilisez le signal depuis la prise de sortie (Out-
put) de votre amplificateur. Vous pourrez
activer/désactiver le signal à l'aide du
commutateur au pied.
5 Pour commencer à accorder votre guitare,
jouez une note ; le nom de la note la plus
proche s'affiche sur l'indicateur. Accordez-la
jusqu'à ce que la note correcte s'affiche. Puis,
accordez-la de manière plus précise en
ACCORDEUR CHROMATIQUE AU PIED
LU20
MANUEL DE L’UTILISATEUR
fonction des témoins indicateurs. Le côté
jaune indique que la hauteur correspond à
un bémol [
] et le côté rouge indique que la
hauteur est aiguë [#]. Une fois la guitare
accordée correctement, le témoin indicateur
bleu central s'allume.
6 Utilisation de l'adaptateur secteur
Si vous souhaitez utiliser un adaptateur
secteur, choisissez uniquement le modèle
Ibanez AC109. Si vous utilisez un autre
adaptateur secteur, vous risquez
d'endommager l'accordeur LU20 ou de
provoquer des dysfonctionnements.
Connexions
Utilisation des piles
En utilisation normale, l'accordeur LU20
fonctionne environ 50 heures avec une pile.
Toutefois, si vous l'utilisez sur scène, nous vous
recommandons d'utiliser un adaptateur secteur.
1 Desserrez la vis du couvercle du logement
de pile situé au bas de l'accordeur LU20 et
retirez le couvercle en le faisant glisser.
2 Retirez la pile usagée de son emplacement.
3
Placez la pile neuve dans l'emplacement
correspondant (veillez à respecter la polarité
+/-).
4 Une fois la pile en place, remettez le couvercle
du logement de pile et resserrez la vis.
Remarque :
Retirez la pile si vous n'utilisez pas
l'accordeur LU20 pendant une
période prolongée. Vous éviterez
ainsi des accidents tels qu'une fuite
au niveau de la pile.
Fiche technique de l'accordeur LU20
Puissance Pile 006P 9 V ou adaptateur
secteur Ibanez AC109
Consommation 15 mA maximum
Fréquences
reconnues
C1 (32,70 Hz)--B5 (987,77 Hz)
Précision +/-1 cent
Calibrage 436 Hz--445 Hz
Prise Entrée, Sortie, Sortie sans
effets, Alimentation c.c.
Dimensions 145 (L) x 45 (H) x 82 (P) mm
Poids 430 g
*
L'aspect et les caractéristiques sont susceptibles
d'être modifiés sans avis préalable pour
l'amélioration du produit.
Caution
1
To avoid short circuit, electric shock, or mal-
function
Do not disassemble or attempt to repair this
unit.
Do not place this unit in locations of high tem-
perature or high humidity (such as nearby
heating equipment, in direct sunlight, in a
bathroom, or on a wet floor).
Do not place this unit where it will be sub-
jected to heavy vibration.
Do not place this unit in dusty or dirty loca-
tions.
Do not operate this unit with wet hands.
2
To avoid damage
Do not apply excessive force to the switches
or other controls.
Do not drop this unit.
3
Cleaning
Do not use thinner, alcohol, or other solvents
to clean this unit.
4
To prevent battery failure
Remove the battery if you won't be using this
unit for an extended time.
Operation
1 The power will turn on automatically when you
insert a plug into the Input jack.
2 When you press the CALIB button, the first
digit of the pitch currently LU20 is set, will be
displayed in the indicator. I.e., from 436Hz =
6, 437Hz =7···., 440Hz = 0 ···. up to 445Hz = 5.
By pressing the CALIB button additional
times, you can increment the number by 1
Hz at a time. (LU20 is set to the default value
of A = 440 Hz when it is shipped out of the
factory.)
3 When you press the Flat button first, nothing
will be shown in the indicator. But when you
press it again, top segment will be lit, mean-
ing one flat (
). By pressing Flat button addi-
tional times, you can change the tuning pitch
as below.
4 Input the signal from your guitar into the In-
put jack. By connecting the Dryout jack and
an amplifier, the guitar will stay connected
with the amp even if you are not tuning.
If you prefer not to output sound out of your
amplifier during tuning, use the signal from
Output jack for your amp. You will be able to
switch on/off the signal by the Foot Switch.
5 To start tuning your guitar, play a note; the
name of the closest note will be shown in the
indicator. Tune so that the correct note is
shown. Then, tune more precisely according
to the LEDs. The yellow side indicates that the
pitch is flat [
], and the red side indicates that
the pitch is sharp [#]. When the tuning is cor-
rect, the center blue LED will be lit.
CHROMATIC PEDAL TUNER
LU20
OWNER’S MANUAL
6 Using the AC adaptor
If you would like to use an AC adaptor, use
only the Ibanez AC109. Using any other AC
adaptor may cause damage to LU20 or oper-
ate incorrectly.
Connections
Using batteries
In normal use, the LU20 will operate for approxi-
mately 50 hours on battery. However if you're
using it on stage, we recommend that you use
an AC adaptor.
1 Loosen the screw of the cover of the battery
compartment at the bottom of LU20, and slide
the cover off.
2 Detach the old battery from the battery snap.
3 Attach the new battery to the battery snap.
(Make sure the correct +/- polarity.)
4 After setting the battery in place, put the bat-
tery cover back, and tighten the screw.
Note : Remove the battery if you won't be using
the LU20 for an extended period of time.
This will prevent accidents such as bat-
tery leakage.
LU20 specifications
Power 9V 006P battery or
Ibanez AC109 AC adaptor
Current
consumption Maximum 15 mA
Tuning range
C1 (32.70 Hz)--B5 (987.77 Hz)
Accuracy +/-1 cent
Calibration 436 Hz--445 Hz
Jack Input, Output, Dryout,
DC power
Dimensions 145 (W) x 45 (H) x 82 (D) mm
Weight 430g
* Appearance and specifications are subject to
change without notice for improvement.
Vorsicht
1
Um Kurzschlüsse, elektrische Schläge oder
Funktionsstörungen zu vermeiden
Nehmen Sie das Gerät nicht auseinander und
versuchen Sie nicht, es zu reparieren.
Platzieren Sie dieses Gerät nicht an extrem
heißen oder feuchten Orten (zum Beispiel in
der Nähe von Heizungen, in direktem
Sonnenlicht, im Bad oder auf einem feuchten
Fußboden).
Setzen Sie dieses Gerät keinen starken
Erschütterungen aus!
Platzieren Sie dieses Gerät nicht an
staubigen oder schmutzigen Orten!
Bedienen Sie dieses Gerät nicht mit nassen
Händen!
2
Um Beschädigungen zu vermeiden
Üben Sie keine übermäßigen Druck auf die
Schalter oder andere Bedienungselemente
aus.
Lassen Sie dieses Gerät nicht fallen!
3
Reinigung
Verwenden Sie zum Reinigen keine
Lösungsmittel, Alkohol oder andere
Reinigungsmittel.
4
Um Schäden an der Batterie zu vermeiden
Nehmen Sie die Batterie heraus, wenn Sie
das Gerät längere Zeit nicht benutzen.
Bedienung
1
Das Gerät schaltet sich automatisch ein, wenn
Sie einen Stecker an der Eingangsbuchse (In-
put) anschließen.
2
Wenn Sie die Taste CALIB drücken, erscheint
die letzte Ziffer der momentan im LU20
eingestellten Bezugstonhöhe in der Anzeige.
D. h. bei 436 Hz = 6, bei 437 Hz = 7
···
, bei 440
Hz = 0
···
und bei 445 Hz = 5.
Indem Sie die Taste CALIB mehrfach drücken,
können Sie die Bezugstonhöhe in Schritten
von 1 Hz erhöhen. (Das LU20 ist ab Werk auf
den Wert A = 440 Hz voreingestellt.)
3 Wenn Sie zuerst die Taste Flat (vermindert)
drücken, wird nichts angezeigt. Wenn Sie die
Taste nochmals drücken, leuchtet das
oberste Segment, was eine Verminderung um
einen Halbton bedeutet ( ). Indem Sie die
Taste Flat mehrfach drücken, können Sie die
Stimmungstonhöhe wie folgt ändern.
4
Führen Sie das Signal von Ihrer Gitarre zur
Eingangsbuchse (Input). Wenn Sie die
Direktausgangsbuchse (Dryout) mit Ihrem
Verstärker verbinden, bleibt die Gitarre mit dem
Amp auch dann verbunden, wenn Sie sie nicht
stimmen.
Wenn Sie stimmen möchten, ohne dass die
Gitarre über den Verstärker erklingt, führen
Sie das Signal von der Ausgangsbuchse (Out-
put) zu Ihrem Amp. In diesem Fall können Sie
das Signal mit dem Fußschalter ein- und
ausschalten.
5 Um Ihre Gitarre zu stimmen, spielen Sie
zunächst einen Ton. Der Name der Note, die
diesem Ton am nächsten liegt, erscheint in
der Anzeige. Stimmen Sie die Saite, bis die
richtige Note angezeigt wird. Stimmen Sie
dann genauer mithilfe der LEDs. Die gelbe
Seite bedeutet, dass die Tonhöhe zu niedrig
ist
[
]
, die rote Seite bedeutet, dass die
Tonhöhe zu hoch ist [#]. Bei korrekter
Stimmung leuchtet die mittlere, blaue LED
auf.
6 Verwenden des Netzadapters
Wenn Sie einen Netzadapter anschließen
möchten, verwenden Sie nur den AC109 von
Ibanez. Die Verwendung eines anderen
Netzadapters kann Schäden am LU20 oder
Fehlfunktionen verursachen.
Anschlüsse
Verwenden von Batterien
Bei normalem Gebrauch läuft das LU20 etwa 50
Stunden mit Batterie. Wenn Sie es jedoch bei
Auftritten verwenden, empfehlen wir den Einsatz
eines Netzadapters.
1 Lösen Sie die Schraube der
Batteriefachabdeckung unten am LU20, und
öffnen Sie die Abdeckung.
2 Nehmen Sie die alte Batterie aus der
Halterung heraus.
3 Befestigen Sie die neue Batterie an der
Halterung. Achten Sie auf korrekte Polarität
(+/-).
4 Nachdem Sie die neue Batterie eingelegt
haben, schließen Sie die
Batteriefachabdeckung wieder und ziehen
Sie die Schraube fest.
Hinweis: Nehmen Sie die Batterie heraus, wenn
Sie das LU20 für längere Zeit nicht
benutzen. Dies vermeidet Schäden
durch eine auslaufende Batterie.
Technische Daten LU20
Stromversorgung 9V-Batterie der Größe
006P oder Netzadapter
AC109 von Ibanez
Stromverbrauch Maximal 15 mA
Stimmbereich C1 (32,70 Hz) bis B5
(987,77 Hz)
Genauigkeit +/-1 Cent
Kalibrierung 436 Hz bis 445 Hz
Buchsen Input (Eingang), Output
(Ausgang), Dryout
(Direktausgang),
DC (Spannungsversorgung)
Abmessungen 145 (B) x 45 (T) x 82 (H) mm
Gewicht 430 g
* Erscheinungsbild und technische Daten können
sich aus Gründen der Weiterentwicklung ohne
Ankündigung ändern.
This is to certify that Chromatic Tuner LU20 is in
conformity with : Council Directive 89/336/EEC
(EMC Directive)
Applicable Standards :
EN55013 : 2001 + A1 : 2003
Electromagnetic Compatibility-Generic emission
standard.
Part 1 :
Residential, commercial and light industry.
EN55020 : 2002 + A1 : 2003
Electromagnetic Compatibility-Generic immunity
standard.
Part 1 :
Residential, commercial and light industry.
注意
1ショート、感電、故障の防止
本製品を分解・修理しないでください。
高温、多湿の場所(暖房器具の近く、直射日光
の当たる場所、浴室、濡れた床など)に置かな
いでください。
振動の多い場所に置かないでください。
ほこりや汚れの多い場所に置かないでください。
濡れた手で本製品を操作しないでください。
2破損の防止
スイッチ類に無理な力を加えないでください。
本製品を落とさないでください。
3お手入れ
お手入れにシンナー、アルコール類を使用しな
いでください。
4電池消耗の防止
本製品を長時間使用しない時は、電池を外して
ください。
安全上の注意
操作方法
1 InputJackにプラグを入れると、電源がOnに
なります。
2 CALIBボタンを押すと最初に、その時点で設定
されているPitchの下一桁が表示されます。(6=
436,7=437……….0=440,…….5=
445Hzとなります。)もう一度CALIBボタンを
押すと、押すたびに1ずつ増えて行きますので、
数字を選んでください。(LU20は、工場出荷時
にA=440Hzにセットされています)
ACCORDATORE CROMATICO A PEDALE
LU20
LIBRETTO DI ISTRUZIONI
AFINADOR CROMÁTICO DE PEDAL
LU20
MANUAL DEL USUARIO
Precaución
1
Para prevenir cortocircuitos, descargas
eléctricas o fallos
No desmonte ni intente reparar el aparato.
Evite los lugares de elevada temperatura o
humedad (cerca de aparatos de calefacción,
luz solar directa, cuartos de baño, suelos
húmedos).
Evite los lugares donde el aparato pueda
recibir vibraciones fuertes.
Evite los lugares sucios o con presencia de
polvo.
No utilice el aparato con las manos mojadas.
2
Para prevenir daños
No fuerce los interruptores u otros mandos.
No deje caer el aparato.
3
Limpieza
No utilice diluyente, alcohol u otros
disolventes para limpiar el aparato.
4
Para preservar las baterías
Quite las baterías cuando no vaya a utilizar
el aparato durante un periodo prolongado.
Funcionamiento
1 El afinador se enciende automáticamente al
introducir una clavija en la toma de entrada
Input.
2 Cuando pulse el botón CALIB, el indicador
mostrará el primer dígito del tono que esté
seleccionado en ese momento en el LU20.
Es decir, de 436 Hz = 6, 437 Hz = 7···, 440 Hz
= 0 ··· hasta 445 Hz = 5.
Cada vez que vuelva a pulsar el botón CALIB
aumentará la cifra en incrementos de 1 Hz.
(El LU20 sale de fábrica con el valor
predeterminado de A = 440 Hz).
3 Cuando pulse el botón FLAT por primera vez,
el indicador no mostrará nada. Pero cuando
lo vuelve a pulsar, el segmento superior se
ilumina, lo que significa un bemol (
).
Volviendo a pulsar el botón Flat puede
cambiar el tono de afinación como se indica
a continuación.
4 Introduzca la señal de la guitarra por la toma
de entrada Input. Al conectar la toma Dryout
y un amplificador, la guitarra permanecerá
conectada al amplificador aunque no la esté
afinando.
Si prefiere que no salga sonido del
amplificador durante la afinación, utilice la
señal de la toma de salida Output del
amplificador. Con el interruptor de pedal
podrá activar/desactivar la señal.
5 Para comenzar a afinar la guitarra, toque una
nota; el indicador muestra el nombre de la
nota más próxima. Afine la guitarra hasta que
aparezca la nota correcta. A continuación,
afine con más precisión conforme a las
indicaciones de las luces LED. El lado amarillo
indica que el tono es bemol [
] y el lado rojo
indica que el tono es sostenido [#]. Cuando
la afinación es correcta, se ilumina el LED azul
del centro.
6 Uso del adaptador de corriente alterna
Si desea usar un adaptador de corriente
alterna, utilice únicamente el Ibanez AC109.
El uso de cualquier otro adaptador de
corriente alterna puede dañar el LU20 o
provocar un funcionamiento incorrecto.
Conexiones
Uso de las baterías
En utilización normal, el LU20 funciona
aproximadamente durante 50 horas con la
batería. No obstante, en un escenario
recomendamos usar un adaptador de corriente
alterna.
1 Afloje el tornillo de la tapa del compartimento
de la batería situado en la parte inferior del
LU20 y extraiga la tapa.
2 Suelte la batería vieja de su sujeción a
presión.
3 Coloque la batería nueva en la sujeción a
presión. (Verifique que la polaridad +/- sea
correcta).
4 Una vez instalada la batería, vuelva a colocar
la tapa y apriete el tornillo.
Nota: extraiga la batería cuando no vaya a
utilizar el LU20 durante un periodo
prolongado. Con ello evitará accidentes,
como por ejemplo fugas de líquido de la
batería.
Especificaciones del LU20
Alimentación
Batería 006P de 9 V o adaptador de
corriente alterna Ibanez AC109
Consumo Máximo 15 mA
Margen
C1 (32,70 Hz) -- B5 (987,77 Hz)
de afinación
Precisión +/-1 centava
Calibrado 436 Hz -- 445 Hz
Tomas Input (entrada), Output (salida),
Dryout (salida directa), DC Power
(alimentación en corriente continua)
Dimensiones 145 (A) x 45 (Alt) x 82 (F) mm
Peso 430 g
*
El aspecto y las especificaciones pueden cambiar
sin previo aviso por razones de perfeccionamiento
del producto.
Attenzione
1
Per evitare cortocircuiti, scosse elettriche e
anomalie di funzionamento
Non smontare o cercare di riparare l’unità.
Non posizionare l’unità in luoghi molto umidi
e ad alta temperatura (ad es. in prossimità
di apparecchi di riscaldamento, alla luce
diretta del sole, in bagno, o su pavimenti
bagnati).
Non posizionare l’unità laddove sono
presenti eccessive vibrazioni.
Non posizionare l’unità in luoghi polverosi o
sporchi.
Non toccare l’accordatore con mani
bagnate.
2
Per evitare guasti
Non applicare forza eccessiva agli switch o
ad altri comandi.
Non far cadere l’unità.
3
Pulizia
Non utilizzare diluenti, alcool o altri solventi
a scopo di pulizia.
4
Per prevenire lo scaricamento delle pile
Rimuovere le pile quando l’unità non è
utilizzata per molto tempo.
Funzionamento
1
L'apparecchio si accende automaticamente
quando si inserisce uno spinotto nell'ingresso jack.
2 Quando si preme il tasto CALIB, sulla spia
viene indicata l'ultima cifra relativa all'altezza
alla quale è attualmente impostato
l'accordatore LU20. Esempio: 6 = 436Hz, 7=
437Hz,... 0 = 440Hz,... fino a 5 = 445Hz.
Premendo il tasto CALIB diverse volte, si in-
crementa la cifra di 1 Hz per volta. (LU20 è
impostato in fabbrica al valore predefinito di
A = 440 Hz.)
3 Quando si preme la prima volta il tasto Flat (=
bemolle), sulla spia non viene indicato nulla.
Ma quando lo si preme nuovamente, la parte
superiore si illumina, indicando un bemolle
( ). Premendo diverse volte il tasto Flat, si
può modificare l'altezza di accordatura come
sotto indicato.
4 Collegate il segnale della chitarra all'ingresso
jack. Collegando il jack Dryout a un
amplificatore, la chitarra rimane collegata
all'amplificatore anche quando non si sta
accordando.
Se si preferisce che non vengano emessi suoni
dall'amplificatore durante l'accordatura, usare
il segnale dall'uscita Output dell'amplificatore.
È possibile accendere/spegnere il segnale con
l'interruttore a pedale.
5 Per iniziare ad accordare la chitarra, suonare
una nota; sulla spia sarà indicato il nome della
nota più vicina. Accordare in modo che sia
visualizzata la nota corretta. Quindi,
accordare più precisamente seguendo i LED.
Il lato giallo indica che l'altezza è bemolle [
], e il lato rosso indica che l'altezza è diesis
[#]. Quando l'accordatura è corretta, si
illumina il LED blu centrale.
6 Uso dell'adattatore CA
Se si vuole usare un adattatore CA, usare solo
il modello Ibanez AC109. L'uso di altri adattatori
CA potrebbe danneggiare l'accordatore LU20
o provocare funzionamenti anomali.
Connessioni
Uso delle batterie
Con un uso normale, l'accordatore LU20
funzionerà all'incirca per 50 con l'alimentazione
a batteria. Tuttavia, se lo si usa in concerto,
consigliamo di usare un adattatore CA.
1 Allentare la vite del coperchio della sede della
batteria sulla parte inferiore del LU20 ed
estrarre il coperchio facendolo scivolare.
2 Staccare la vecchia batteria dall'attacco a
scatto.
3 Attaccare la nuova batteria sull'attacco a
scatto. (Accertarsi che sia rispettata la
corretta polarità +/-.)
4 Dopo aver inserito la batteria nella sua sede,
riporre il coperchio e stringere la vite.
Nota: Estrarre la batteria se non si usa
l'apparecchio LU20 per un periodo di
tempo prolungato. Ciò eviterà
inconvenienti, quali la perdita di liquido
dalla batteria.
Specifiche LU20
Potenza
Batteria 006P 9V o adattatore CA
Ibanez AC109
Consumo Massimo 15 mA
Gamma di
accordatura
C1 (32,70 Hz)--B5 (987,77 Hz)
Precisione +/-1 cent
Calibrazione 436 Hz--445 Hz
Terminale Ingresso, uscita, dryout,
a jack alimentazione CC
Dimensioni
145 (Larg.) x 45 (Alt.) x 82 (Prof.) mm
Peso 430 g
* Aspetto e specifiche sono soggette a modifiche
migliorative senza preavviso.
CHROMATIC PEDAL TUNER
LU20
取扱説明書
3 最初にFlatボタンを押すと何も表示されていませ
んが、もう一度押すとIndicatorの最上段が点灯
しこれはOneFlat(
 
)を意味します。更にボタ
ンを押していくと、以下のように表示されますの
で、お好みの状態に設定ください。
4 Guitarからの信号はInputJackに入力してくだ
さい、その信号をそのまま出力したい場合は
DryoutとAmpを接続して頂ければ、いつでも入
力された音と同じ音がAmpより得られます。
AmpをOutputJackと接続していただいた場
合には、FootSwitchによりMute(On/Off)す
ることが出来ます。
5 まずGuitarをLU20につないで弾くと、Indica-
torに音程が表示されますので、LED表示を用い
て更に正確にTuningしてください。黄色側であ
れば低く、赤側であれば音程が高いので更なる調
整が必要です。正しくTuningされると中央の
LEDが点灯します。
6 AC電源で使用する場合は、必ずIbanez社のAC
AdapterAC119を使用してください。他のAC
Adapter等を使用した場合、正常な動作をしな
かったり、故障の原因となります。
接続の仕方
電池の使用
通常の使用であれば、電池で約50時間使用できま
すが、長時間使用する時はACAdapterをおすす
めします。
1 本体底部の電池収納蓋のネジを外し、スライドし
て取り外してください。
2 古い電池を電池スナップより外してください。
3 新しい電池を電池スナップへ接続してください
(この時に+、−をよく確認してください。)
4 電池を収納したら電池収納蓋をスライドして確実
にしめてください。
注意 長時間使用しない場合は、電池を外してお
いてください、これは電池の液漏れなどに
よる故障を防止する為です。
主な仕様
電源 9V006P(一個)、
ACAdapterIbanezAC119
消費電流 最大15mA
測定範囲 C1(32.70Hz)---B5(987.77Hz)
精度 ±1cent
基準ピッチ 436Hz--445Hz
端子 InputJack,Output,DryOutput,
DCJack
外形寸法 145(W)x45(H)x82(D)mm
重量 430g
* 規格及び外観は改良の為に予告なく変更するこ
とがありますのでご了承願います。
ご使用の前にこの「安全上のご注意」をよくお読みのうえ、正しくお使
いください。
お読みになった後は、お使いになる方がいつでも見られる所に必ず保管
してください。
警告
この機器を分解・修理・改造しない。
故障・ショートの原因になります。
水滴のついた手で、スイッチ操術をしない。
ショート・感電の恐れがあります。
電池を火の中に入れない。
破裂・発熱・発火の恐れがあります。
注意
電池は+−を正しく装着する。
故障の原因になります。
次のような場所での使用や保存はしない。
故障の原因になります。
・湿気が極端に高い場所(直射日光の当たる場所、暖房の近く、
発熱する機器の上など)
・水気の近く(風呂場、洗面台、濡れた床など)や湿度の高い場所
・ホコリの多い場所
・振動の多い場所
電池は長時間使用しないときは外す。
漏液等で故障の原因になります。
落としたり、強くぶつけたりしない。
故障・けがの原因になります。
お手入れにはシンナー・アルコール類は使用しない。
故障の原因になります。

Other Ibanez Tuner manuals

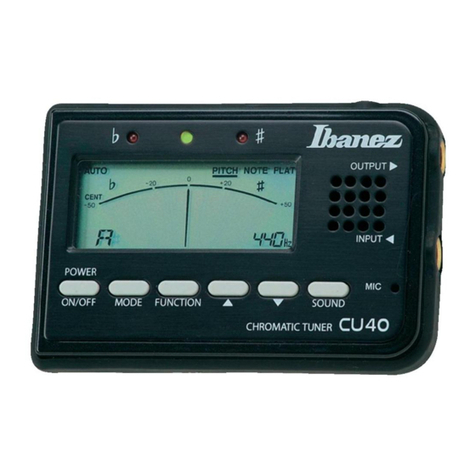
Ibanez CU40 User manual

Ibanez

Ibanez CU40 User manual

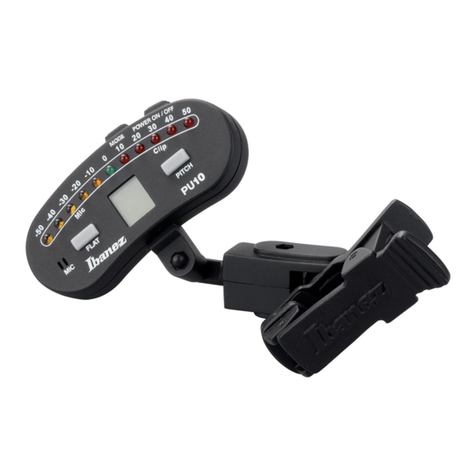
Ibanez PU10 User manual

Ibanez

Ibanez PU10 User manual

Ibanez MU2 User manual

Ibanez

Ibanez MU2 User manual

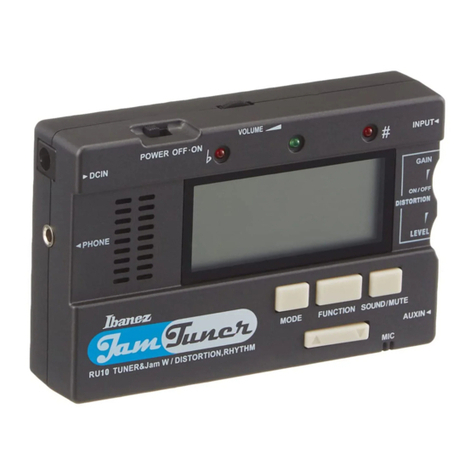
Ibanez RU10 User manual

Ibanez

Ibanez RU10 User manual

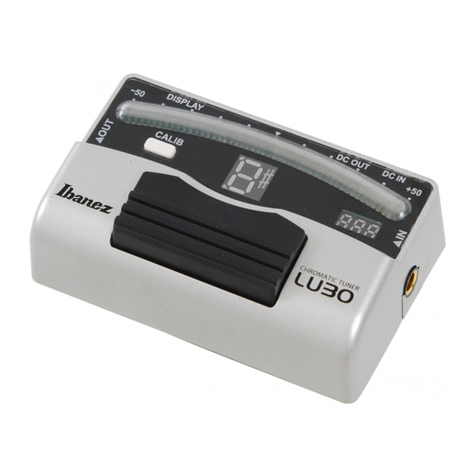
Ibanez LU30 User manual

Ibanez

Ibanez LU30 User manual

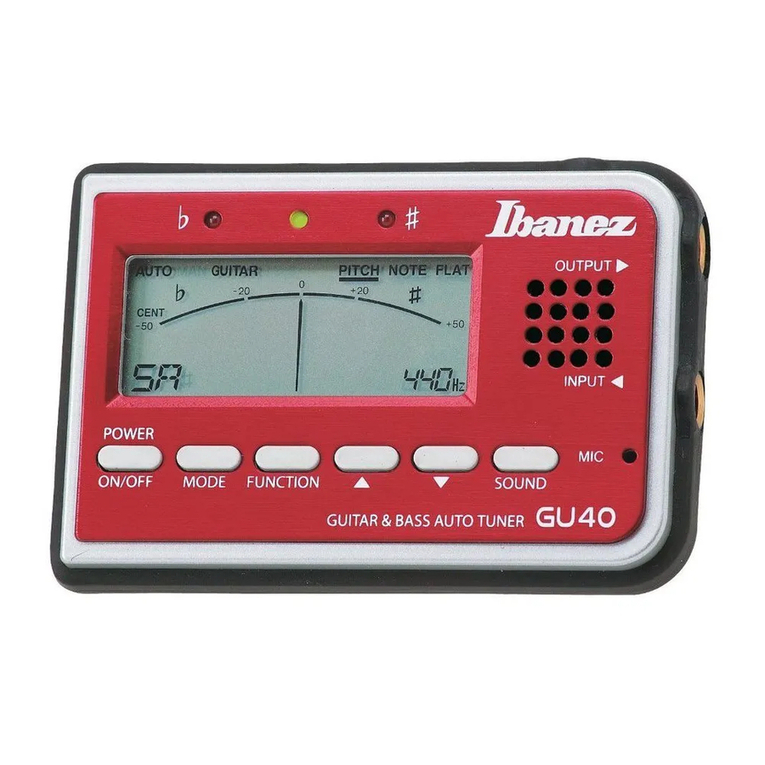
Ibanez GU40 User manual

Ibanez

Ibanez GU40 User manual

Ibanez CU20 User manual

Ibanez

Ibanez CU20 User manual

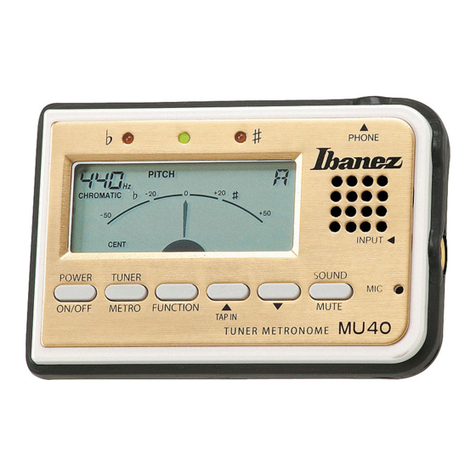
Ibanez MU40 User manual

Ibanez

Ibanez MU40 User manual

Ibanez GU20 User manual

Ibanez

Ibanez GU20 User manual

Ibanez GU30 User manual

Ibanez

Ibanez GU30 User manual

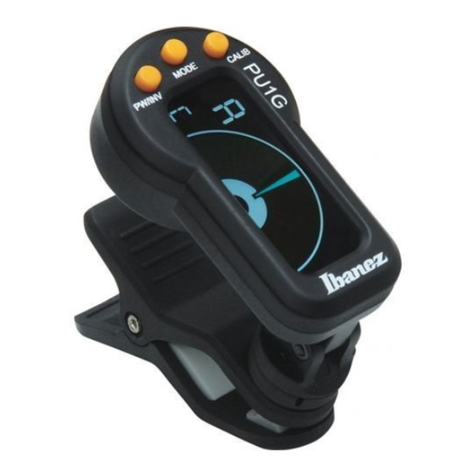
Ibanez PU1G User manual

Ibanez

Ibanez PU1G User manual

Ibanez PU20 User manual

Ibanez

Ibanez PU20 User manual

Ibanez MU2 User manual

Ibanez

Ibanez MU2 User manual

Ibanez GU20 User manual

Ibanez

Ibanez GU20 User manual

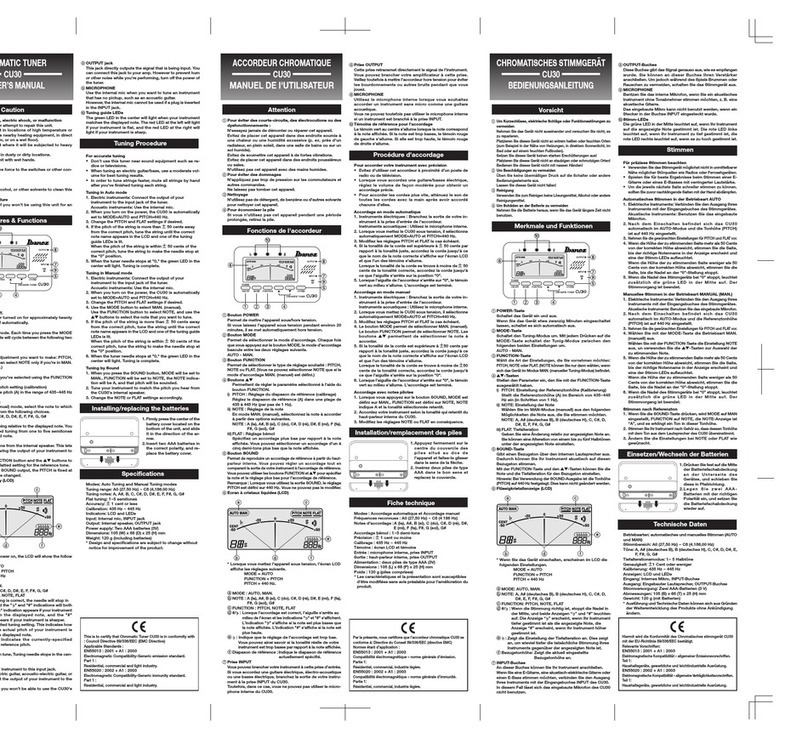
Ibanez CU30 User manual

Ibanez

Ibanez CU30 User manual

Ibanez GU1 User manual

Ibanez

Ibanez GU1 User manual

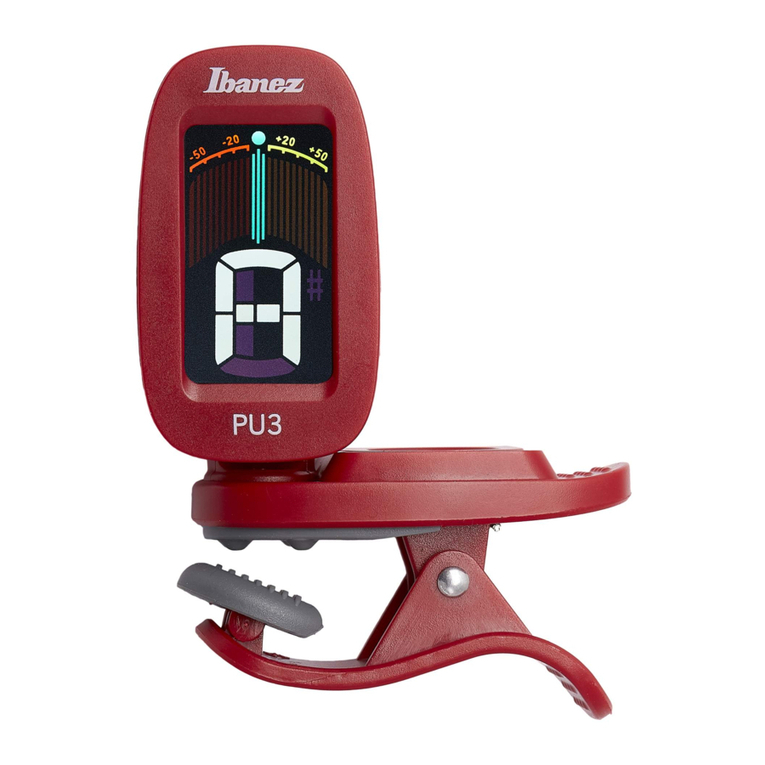
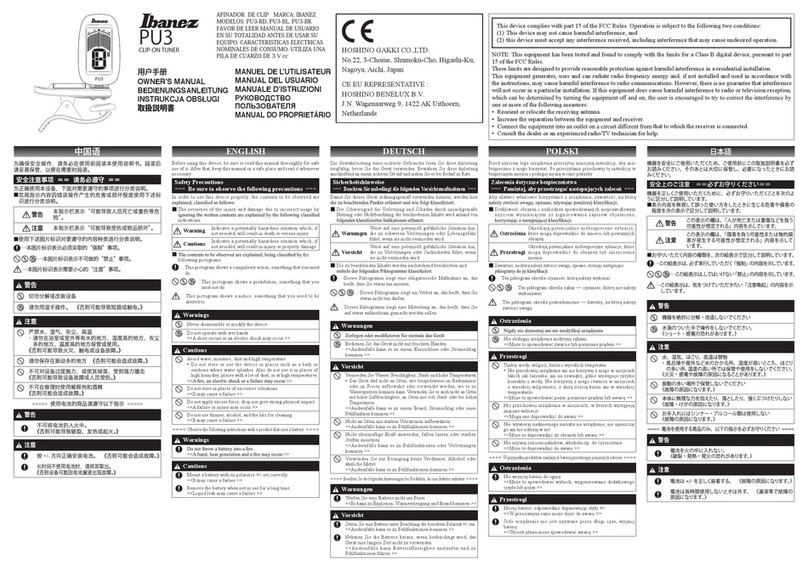
Ibanez PU3 User manual

Ibanez

Ibanez PU3 User manual

Ibanez PU10 User manual

Ibanez

Ibanez PU10 User manual

Ibanez PU3 User manual

Ibanez

Ibanez PU3 User manual

Ibanez PU3 User manual

Ibanez

Ibanez PU3 User manual

Ibanez TuNano User manual

Ibanez

Ibanez TuNano User manual

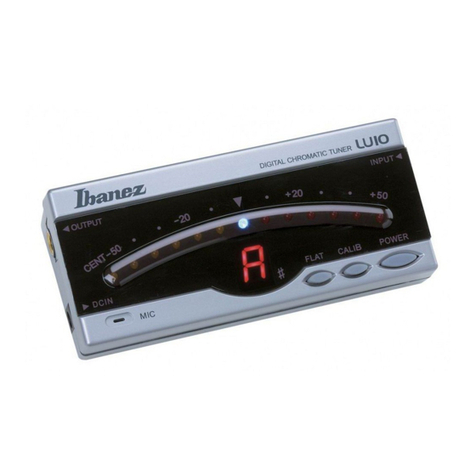
Ibanez LU10 User manual

Ibanez

Ibanez LU10 User manual

Ibanez GU40 User manual

Ibanez

Ibanez GU40 User manual

Ibanez MU30 User manual

Ibanez

Ibanez MU30 User manual

Popular Tuner manuals by other brands

Kenwood KTC-9090DAB instruction manual

Kenwood

Kenwood KTC-9090DAB instruction manual

LDG AT-100Pro Operation manual

LDG

LDG AT-100Pro Operation manual

Snark S-1 instructions

Snark

Snark S-1 instructions

MFJ IntelliTuner MFJ-993 instruction manual

MFJ

MFJ IntelliTuner MFJ-993 instruction manual

Motorola HF-SSB T1961A Installation procedures

Motorola

Motorola HF-SSB T1961A Installation procedures

Snark SN-10 instruction manual

Snark

Snark SN-10 instruction manual

DX Engineering DXE-MBV-ATU-1 manual

DX Engineering

DX Engineering DXE-MBV-ATU-1 manual

Technics QUARTZ ST-X999L Service manual

Technics

Technics QUARTZ ST-X999L Service manual

Crestron PT-AMFM quick start guide

Crestron

Crestron PT-AMFM quick start guide

Alpine TUA-T550HD - HD Radio Tuner owner's manual

Alpine

Alpine TUA-T550HD - HD Radio Tuner owner's manual

Grace Digital GDI-IRDT200 user manual

Grace Digital

Grace Digital GDI-IRDT200 user manual

Panasonic TU-PTA500U operating instructions

Panasonic

Panasonic TU-PTA500U operating instructions

Sony MB-8N Features & specifications

Sony

Sony MB-8N Features & specifications

Yamaha CT-600 owner's manual

Yamaha

Yamaha CT-600 owner's manual

Sony DSX-A300DAB operating instructions

Sony

Sony DSX-A300DAB operating instructions

Crestron C2N-TFM Operation guide

Crestron

Crestron C2N-TFM Operation guide

N2VZ Enterprises Turbo Tuner Operating and installation instructions

N2VZ Enterprises

N2VZ Enterprises Turbo Tuner Operating and installation instructions

Inter-m PT-9107S operating manual

Inter-m

Inter-m PT-9107S operating manual

manuals.online logo
manuals.online logoBrands
  • About & Mission
  • Contact us
  • Privacy Policy
  • Terms and Conditions

Copyright 2025 Manuals.Online. All Rights Reserved.