IBM Wireless Keyboard and Mouse User manual

IBM Wireless
Keyboard and Mouse
User’s Guide
OPTIONS
by IBM

Note: Before using this information and the product it supports, read the information
under Appendix C, “Product warranties and notices” on page C-1.
First Edition (February 2001)
© Copyright International Business Machines Corporation 2001. All rights reserved.
US Government Users Restricted Rights – Use, duplication or disclosure restricted by
GSA ADP Schedule Contract with IBM Corp.

Safety
Before installing this product, read the Safety Information.
Antes de instalar este produto, leia as Informações de Segurança.
Pred instalací tohoto produktu si prectete prírucku bezpecnostních instrukcí.
Læs sikkerhedsforskrifterne, før du installerer dette produkt.
Ennen kuin asennat tämän tuotteen, lue turvaohjeet kohdasta Safety
Information.
Avant d’installer ce produit, lisez les consignes de sécurité.
Vor der Installation dieses Produkts die Sicherheitshinweise lesen.
Prima di installare questo prodotto, leggere le Informazioni sulla Sicurezza.
Lees voordat u dit product installeert eerst de veiligheidsvoorschriften.
Les sikkerhetsinformasjonen (Safety Information) før du installerer dette
produktet.
© Copyright IBM Corp. 2001 iii

Antes de instalar este produto, leia as Informações sobre Segurança.
P
red inštaláciou tohto zariadenia si pečítaje Bezpečnostné predpisy.
Antes de instalar este producto lea la información de seguridad.
Lässäkerhetsinformationen innan du installerar den här produkten.
iv IBM Wireless Keyboard and Mouse: User’s Guide

Contents
Safety........................iii
About this book ....................vii
Registering your option ..................vii
Installation and user’s guide................1-1
Product description ...................1-1
Getting started .....................1-2
Installing the USB, keyboard, and mouse ............1-2
Installing the USB receiver ................1-2
Installing the keyboard and mouse .............1-3
Changing the USB receiver channels ..............1-4
Installing the software ..................1-4
Using the Rapid Access buttons ...............1-5
Customizing the keyboard buttons .............1-5
Labeling the buttons ..................1-6
Customizing the on-screen display ..............1-7
Changing the on-screen display ..............1-7
Disabling the on-screen display ..............1-7
Enabling the on-screen display...............1-7
Disabling Rapid Access Buttons ...............1-7
Maintaining the keyboard .................1-8
Customizing the ScrollPoint Wireless Mouse ...........1-8
Customizing each window ................1-8
Cleaningthemouse..................1-11
Appendix A. Troubleshooting ...............A-1
CommonProblems...................A-1
You cannot find the selection you are looking for when you customize
the Rapid Access Buttons ...............A-1
The Standby button does not work correctly. ..........A-1
The Help button does not work correctly. ...........A-2
The CD/DVD, Volume, or Mute control buttons do not work. ....A-2
None of the Rapid Access Buttons work. ...........A-3
Your computer game locks up or is interrupted when you use the
Rapid Access Buttons. ................A-3
You press a button once, but the computer responds as if you pressed it
twice. ......................A-3
You cannot type with keyboard or mouse cursor does not move. Here A-4
You cannot use the advanced keyboard functions (“hot buttons”)or
advanced mouse functions (“scroll stick”)..........A-4
You are experiencing poor keyboard performance ........A-4
You are experiencing poor mouse performance .........A-4
© Copyright IBM Corp. 2001 v
Your keyboard or mouse data transmission LED is constantly
illuminated on the Dual Wireless Receiver...........A-5
Themousedoesnotmovethecursor.............A-5
The advanced mouse functions (scroll stick) do not work. .....A-5
You are experiencing poor mouse performance .........A-5
The mouse data transmission LED on the Dual Wireless Receiver is
constantly illuminated. ................A-5
You have a problem not listed in this section. .........A-5
Appendix B. Help and service ...............B-1
Online technical support..................B-1
Telephone technical support ................B-1
Appendix C. Product warranties and notices ..........C-1
WarrantyStatements...................C-1
IBM Statement of Limited Warranty for United States, Puerto Rico, and
Canada (Part 1 - General Terms) ..............C-1
IBM Statement of Warranty Worldwide except Canada, Puerto Rico,
Turkey, United States (Part 1 - General Terms) .........C-5
Part 2 - Worldwide Country-Unique Terms ...........C-8
Notices .......................C-13
Trademarks .....................C-14
Federal Communications Commission (FCC) statement .......C-15
vi IBM Wireless Keyboard and Mouse: User’s Guide

About this book
This manual contains instructions for installing, configuring, and
troubleshooting the IBM®Rapid Access
™
Wireless Keyboard, IBM ScrollPoint
™
Wireless Mouse, and the IBM Dual Wireless Receiver. The manual is divided
into two parts:
Part 1: Installation and user’s guide
This guide contains abbreviated installation instructions.
This guide also contains the product description and expanded installation
instructions in the following languages:
vEnglish
vFrench
vSpanish
vItalian
vBrazilian Portuguese
vTraditional Chinese
vJapanese
Part 2: Appendixes
The appendixes contain problem solving and help and service information. It
also contains the product warranties and notices.
Note: The illustrations in this manual might be slightly different from your
hardware.
Registering your option
Thank you for purchasing OPTIONS by IBM. Please take a few moments to
register your product and provide us with information that will help IBM to
better serve you in the future. Your feedback is valuable to us in developing
products and services that are important to you, as well as in developing better
ways to communicate with you. Register your option on the IBM Web site at
http://www.ibm.com/pc/register
IBM will send you information and updates on your registered product unless
you indicate on the Web site questionnaire that you do not want to receive
further information.
© Copyright IBM Corp. 2001 vii

viii IBM Wireless Keyboard and Mouse: User’s Guide

Installation and user’s guide
This section contains a product description, hardware and software installation
instructions, and product use and maintenance information for the IBM Rapid
Access Wireless Keyboard, ScrollPoint Wireless Mouse, and Dual Wireless
Receiver. For information on troubleshooting, see Appendix A. For additional
information on using this product, visit the IBM Healthy Computing Web site
at:
vhttp//www.ibm.com/pc/healthycomputing
Product description
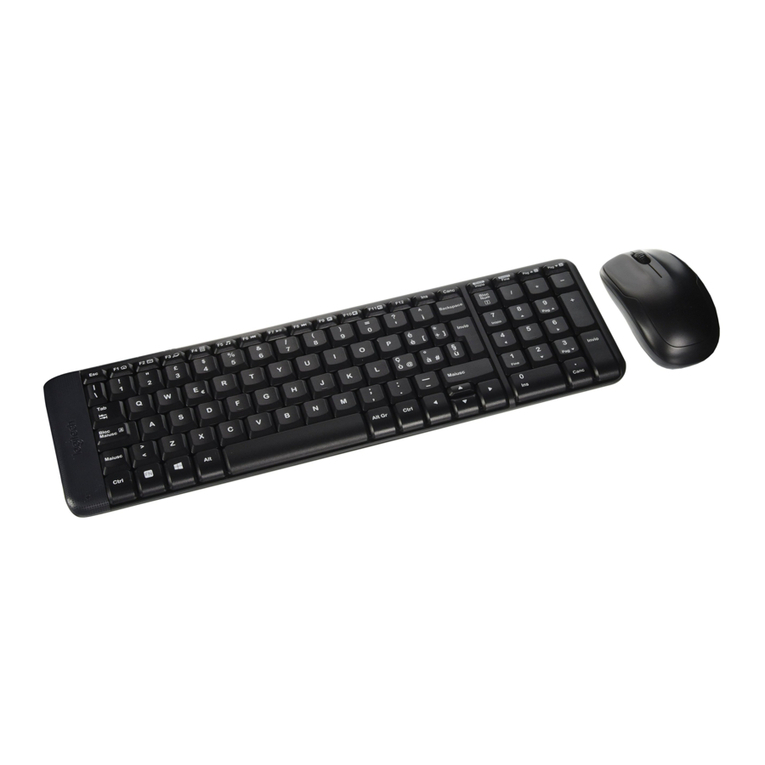
The IBM Rapid Access Wireless Keyboard and ScrollPoint Wireless Mouse
provide wireless access to your most commonly used keyboard and mouse
tasks. There are two buttons for navigating through Web pages, seven buttons
for multimedia control, and eight color-coded buttons, several of which are
preset to useful Web sites.
In addition to this book, this option package contains the following:
vRapid Access Wireless Keyboard
vScrollPoint Wireless Mouse
© Copyright IBM Corp. 2001 1-1

vDual Wireless Receiver
vGetting Started card
vCD with customization software
You can use the Quick Start card instructions to install the software, connect
your keyboard, mouse, and receiver. The following sections provide more
detailed installation instructions.
Getting started
Before installing the Rapid Access Wireless Keyboard, ScrollPoint Mouse, and
Dual Wireless Receiver, do the following:
1. Turn off your computer and all attached devices.
2. Insert new, alkaline AAA batteries into the Rapid Access Wireless Keyboard
and ScrollPoint Wireless Mouse.
3. Connect the Dual Wireless Receiver to a USB port.
Installing the USB, keyboard, and mouse
The following sections describe how to install the Rapid Access Wireless
Keyboard, ScrollPoint Mouse, and Dual Wireless Receiver.
Installing the USB receiver
To install the Dual Wireless Receiver, do the following:
1. Plug the receiver into your computer’s USB port.
2. Start your computer.
3. Click Next on all the prompts.
4. Click Finish in the final prompt.
1-2 IBM Wireless Keyboard and Mouse: User’s Guide

Microsoft Windows Millennium (Me) and Windows 2000 Professional will
automatically recognize the USB receiver. Windows 98 will require manual
prompting.
Installing the keyboard and mouse
The keyboard and mouse will be automatically recognized once the receiver is
installed.
To check that the keyboard and mouse are being recognized, do the following:
1. Press the Windows key1 on your keyboard to confirm functionality.
2. Move the mouse 2 to confirm movement on the display screen.
3. If either device is not recognized, see Appendix A for trouble shooting
procedures.
Installation and user’s guide 1-3

Changing the USB receiver channels
To confirm and change the channels on your USB dual receiver, do the
following:
1. Make sure the USB connector 1 is properly inserted into your computer.
2. Press one of the blue buttons, 2 or 3, on the bottom of the Dual
Wireless Receiver.
3. Note that the device icon LED will be on.
4. Press the blue button on the bottom of the Dual Wireless Receiver that
corresponds to the device icon (shown above as mouse 2, keyboard 3).
5. The LED flashes off.
6. Press the Windows key on your keyboard or move the mouse to confirm
functionality.
7. Repeat the above steps for the other device.
Installing the software
To install the software, do the following:
1. Click Start.
2. Select Run.
3. Type x:\setup, where x is the letter of your CD-ROM drive.
4. The keyboard setup program begins. You will be prompted for selections.
5. Click Next.
6. Click Next.
7. Click Finish.
8. The mouse setup program begins. You will be prompted for selections.
9. Click Next.
1-4 IBM Wireless Keyboard and Mouse: User’s Guide

10. Select the position of the mouse, either to the right or the left of your
monitor, whether you are right- or left-handed. Click Next.
11. Click Next.
12. Click Finish.
Using the Rapid Access buttons
The Rapid Access Wireless Keyboard contains quick launch buttons, commonly
called “hot buttons.”This section contains information on using these buttons.
The keyboard in the previous illustration has the following button features:
vAn Internet button, a Standby button, and five buttons that you can
customize to access a file, program, or Web site.
vA plastic cover that holds the button label.
vMultimedia control buttons that you can use to control playback and adjust
volume on audio CDs and some DVDs.
vA Mute button that you can use to mute audio playback.
vA button that navigates forward through Web pages in an Internet browser.
vA button that navigates backward through Web pages in an Internet
browser.
Customizing the keyboard buttons
The first time you press one of the customizable buttons, the. window opens
and prompts you to follow the on-screen instructions to customize the buttons.
You can customize each of the five buttons for use as a shortcut to a computer
program, a file, or a Web site.
To change the customization of your Rapid Access Buttons at a later time, open
the customization window using the following procedure:
1. Click Start --> Settings --> Control Panel.
2. Double-click Keyboard (Rapid Access) to open the Rapid Access Wireless
Keyboard Customization window. If a program has already been assigned
to a button, the program name appears in the label area above that button
on the screen. If a program has not been assigned to a button, the label area
above the button will be blank.
3. Click the button you want to customize.
4. Click one of the following options:
vView all programs
vView all files
vEnter Internet address
5. If you clicked View all programs or View all files, click the desired
program or file. If you clicked Enter Internet address, type the Internet
address of a Web site into the box.
Installation and user’s guide 1-5

Note: If you enter a Web site address into the box, you can verify that it is
correct by clicking Tes t. You must be connected to an Internet Service
Provider or an Intranet to use the Tes t function.
The name of the selected program, file, or Web site appears in the label
box. You can edit the information in the label box.
6. Click Apply. The information for your selection appears in the label area
above the button.
7. To customize another button, repeat the steps above. If you have completed
customizing the buttons, click OK.
After you have customized any buttons, you can use the Rapid Access
Keyboard software to create a new button label.
Labeling the buttons
You might want to change the button label at the top of the keyboard if you
have changed the file, program, or Web site assigned to a customizable button.
When you use the Rapid Access Wireless Keyboard Customization window to
change a button assignment, the software automatically creates a new button
label.
To print the new button label, do the following:
1. Be sure paper is in the printer, and the printer is turned on.
2. Follow steps 1 and 2 in Customizing the Rapid Access Buttons on page 1-4
to open the Rapid Access Wireless Keyboard Customization window.
3. Click Print Label... to open the Rapid Access Keyboard Print Label
window.
4. Click the check box for black text on a white background or the check box
for white text on a black background.
5. Click OK.
6. Select the correct printer in the Print window and click OK.
7. When the label has been printed, review the label information; then cut the
label to the correct size.
Note: You do not need to remove the clear plastic cover at the top of the
keyboard when you replace a label.
To replace the button label at the top of the keyboard, do the following:
1. Grasp the middle of the old label near the cover indent and slide the old
label out from under the clear plastic cover.
2. Slide the new printed label under the clear plastic cover. You might need to
trim the edges of the label so that it fits under the cover.
1-6 IBM Wireless Keyboard and Mouse: User’s Guide

Customizing the on-screen display
The Rapid Access Wireless Keyboard comes with the on-screen display setting
enabled. When the on-screen display is enabled, the name of a function or
program assigned to a Rapid Access Button briefly displays on the screen
when you press the button.
You can use the Rapid Access Wireless Keyboard software to make changes to
the on-screen display, and to either disable or enable the display.
Changing the on-screen display
To change the font, the font size, or the font color used in the on-screen
display, do the following:
1. Follow steps 1 and 2 in Customizing the Rapid Access Buttons on page 1-4
to open the Rapid Access Wireless Keyboard Customization window.
2. Click Preferences to open the Rapid Access Preferences window.
3. Click Font.
4. In the Font dialog box, select the preferred settings then click OK.
5. Click OK.
6. Click OK to exit the program.
Disabling the on-screen display
To disable the on-screen display, do the following:
1. Follow steps 1 and 2 in Customizing the Rapid Access Buttons on page 1-4
to open the Rapid Access Wireless Keyboard Customization window.
2. Click Preferences to open the Rapid Access Keyboard Preferences window.
3. Under On-Screen Display toggle Disable.
4. Click OK.
Enabling the on-screen display
To enable the on-screen display, do the following:
1. Follow steps 1 and 2 in Customizing the Rapid Access Buttons on page 1-4
to open the Rapid Access Wireless Keyboard Customization window.
2. Click Preferences to open the Rapid Access Keyboard Preferences window.
3. Under On-Screen Display toggle Enable.
4. Click OK.
Disabling Rapid Access Buttons
The keyboard comes with the Rapid Access Buttons already enabled. To
disable the buttons, do the following:
Installation and user’s guide 1-7

1. Follow steps 1 and 2 in Customizing the Rapid Access Buttons on page 1-4
to open the Rapid Access Keyboard Customization window.
2. Click Preferences to display the Rapid Access Buttons Preference window.
3. Under Rapid Access Buttons toggle Disable.
4. Click OK.
Maintaining the keyboard
You can prevent damage to your keyboard or computer by properly
maintaining the keyboard. For basic maintenance guidelines to care for your
keyboard, do the following:
vUnplug the keyboard before cleaning.
vClean the keyboard with a soft cloth moistened with a solution of water and
mild soap.
vDo not spill liquids on the keyboard. Liquids might damage your keyboard
or cause it to function improperly.
For more information about labeling the buttons, setting up preferences, setting
up your work area, and troubleshooting, click the Help button at the bottom of
the Rapid Access Wireless Keyboard Customization window.
Customizing the ScrollPoint Wireless Mouse
To customize the ScrollPoint Wireless Mouse, do the following:
1. Double-click My Computer.
2. Double-click Control Panel.
3. Double-click the Mouse icon to open the Mouse Properties Window.
4. Click the setting tab at the top of the Mouse Properties window and make
changes in the setting window that opens.
Customizing each window
The following sections describe how to customize settings for each window.
Buttons
The Buttons window is where you can customize the functions of the buttons
and the mouse stick. To customize the buttons and the mouse stick, do the
following:
1. Select the mouse stick or a button by clicking it in the graphic of the mouse
or by selecting it in the Button pull-down menu.
2. From the Function pull-down menu, select the function that you want to
assign to the stick or a button.
3. YOu must designate a t least one button as the Primary Mouse Button.
4. Click OK or Apply.
1-8 IBM Wireless Keyboard and Mouse: User’s Guide

5. If you want to reset to the default setting for the mouse buttons and the
mouse stick, click Use Default.
Pointers
The Pointers window is where you can select a cursor icon scheme for the
mouse pointing functions. To customize the cursor icon scheme fro the mouse
pointing functions, do the following:
1. From the Scheme pull-down menu, select a cursor icon scheme.
2. If you want to change the default name of the scheme, go to the next step.
3. Click OK or Apply.
Motion
The Motion window is where you can change the pointer speed or customize
the pointer to automatically go to the default button in a window. To change
the pointer speed, do the following:
1. In the Pointer speed panel, place the cursor on the slider.
2. Drag the slider to the left to make the pointer speed slower or to the right
to make the pointer speed faster.
3. Click OK or Apply.
To customize the pointer to automatically go to the default button in a
window, do the following:
1. Place a check in the Snap mouse to the default button in dialogs check
box.
2. Click OK or Apply.
Double-Click
The Double-Click window is where you can change the double-click speed for
the mouse. To change the double-click speed for the mouse, do the following:
1. In the Double-Click Speed panel, place the cursor on the slider.
2. Drag the slider to the left to make the double-click speed slower or to the
right to make the double-click speed faster.
3. You can test the double-click speed by double-clicking the icon in the Test
Area panel.
4. Click OK or Apply.
Orientation
The Orientation window is where you can change the orientation of the mouse.
The default orientation for the scrolling mouse is vertical, with the buttons at
the top. If you want to hold the mouse in a different position, do the
following:
1. Click Set Orientation.
2. Follow the on-screen instructions.
3. Click OK or Apply.
Installation and user’s guide 1-9

ScrollPoint
The ScrollPoint window is where you enable the Universal Scrolling mode. The
ScrollPoint window is also where you can adjust the scrolling speed, adjust the
activation force for the mouse, and enable 360°scrolling.
To change the scrolling speed for the mouse, do the following:
1. In the Scroll Speed panel, place the cursor on the slider.
2. Use the cursor to drag the slider to the left to make the scrolling speed
slower or to the right to make the scrolling speed faster.
3. Click OK or Apply.
To change the force needed to click or double-click with the mouse, do the
following:
1. In the Activation force panel, place the cursor on the slider.
2. Use the cursor to drag the slider to the left so that less force is required or
to the right so that more force is required to initiate scrolling.
3. Click OK or Apply.
The 360°-scrolling feature enables you to move the pointer diagonally,
horizontally, or vertically. To enable the 360°-scrolling feature, place a check in
the Enable 360 Degree Scrolling check box and then click OK or Apply.
Pointer Utility
The Pointer Utility window is where you can customize the following
functions for the pointer:
vPointer Wrap
If you want the point to reappear on the other side of the computer screen
when it reaches the edge of one side of the screen, place a check in the
Pointer Wrap check box and then click OK or Apply.
vPointer Vanish
If you do not want the pointer to display when you are typing in text, place
a check in the Pointer Vanish check box, and then click OK or Apply.
vSonar
If you want help finding a pointer on the screen, place a check in the Sonar
check box. After clicking OK or Apply, press and release the Ctrl key to use
the Sonar function to surround the pointer with a radar screen-type circle.
vSlow Motion
If you want to slow down the pointer movement temporarily to position the
pointer more precisely, place a check in the Slow Motion check box. After
clicking OK or Apply, press and hold the Shift key to use the Slow Motion
function.
vX Focus
1-10 IBM Wireless Keyboard and Mouse: User’s Guide

If you want to make a window active by moving the pointer over the title
bar, place a check in the X Focus check box, and then click OK or Apply.
The X Focus function enables you to move the pointer from window to
window without clicking.
Mouse Suite
In the Mouse Suite window, you can place a mouse icon in the taskbar,
uninstall the mouse Suite software, or go to the IBM Web site for more
information on the mouse.
To place a mouse icon in the taskbar, place a check in the Show Mouse Icon in
Task Bar check box, and then click OK.
To uninstall the Mouse Suite software, click Uninstall.
To visit the IBM Web site for more information on the mouse, click the
displayed Internet address.
Cleaning the mouse
If the cursor skips or moves erratically, you might need to clean the mouse. To
clean the mouse, do the following:
1. Turn off the computer
Installation and user’s guide 1-11

2. Turn the mouse over, with the top side down, and look carefully at the
bottom. Twist the retainer 1ring to the unlocked position to remove the
ball.
3. Place your hand over the retainer ring and ball 2, and then turn the
mouse over, top side up, so that the retainer ring and ball fall out into your
hand.
4. Wash the ball in warm, soapy water then dry it with a clean cloth. Blow air
carefully into the ball-cage4to dislodge dust and lint.
5. Look for a build-up of dirt on the plastic rollers 3 inside the ball-cage.
This build-up usually appears as a stripe running across the middle of the
rollers.
6. If the rollers are dirty, clean them by using a cotton swab soaked in
isopropyl (rubbing) alcohol. Turn the rollers with your finger and continue
swabbing them until all the dirt is removed. Be sure the rollers are still
centered in their channels after you clean them.
7. Remove any fibers from the swab that might be remaining on the rollers.
8. Replace the ball and the retainer ring.
9. Turn your computer back on.
1-12 IBM Wireless Keyboard and Mouse: User’s Guide
Table of contents
Other IBM Computer Accessories manuals

IBM
IBM THINKPAD 92P1836 User manual

IBM
IBM ThinkPad Dock I User manual

IBM
IBM IBM ThinkPad Multi-Burner PlusUltrabay Enhanced... User manual

IBM
IBM 29 CARD PUNCH - User manual

IBM
IBM 29 CARD PUNCH - User manual

IBM
IBM Multimedia Kit for RS/6000 Manual

IBM
IBM THINKPAD A30 Installation and operation manual

IBM
IBM 77 User manual

IBM
IBM WAVV 2004 User manual
Popular Computer Accessories manuals by other brands

Rocket Fish
Rocket Fish RF-CMBO Guía De Instalación Rápida

Silvercrest
Silvercrest STMS 2017 A1 User manual and service information

Modecom
Modecom 5200C user manual

Tripp Lite
Tripp Lite NB1007GY Specifications

Rocket Fish
Rocket Fish RF-RCMBO2 Quick setup guide

MRHANDSFREE
MRHANDSFREE BLUE iCOVER user manual