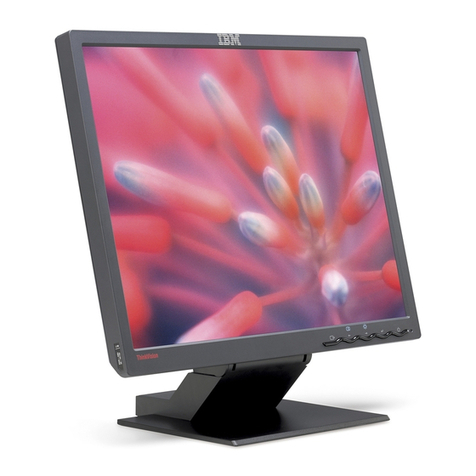
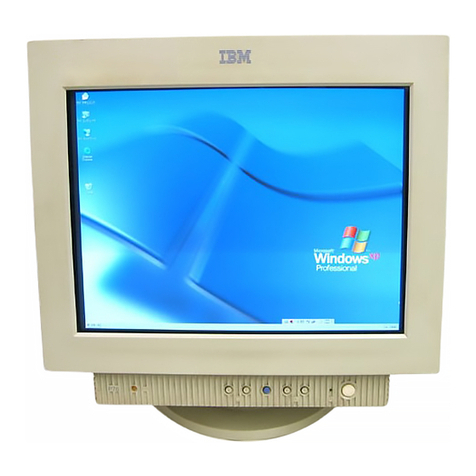
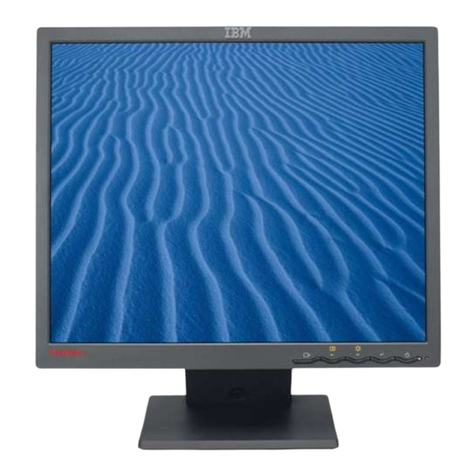
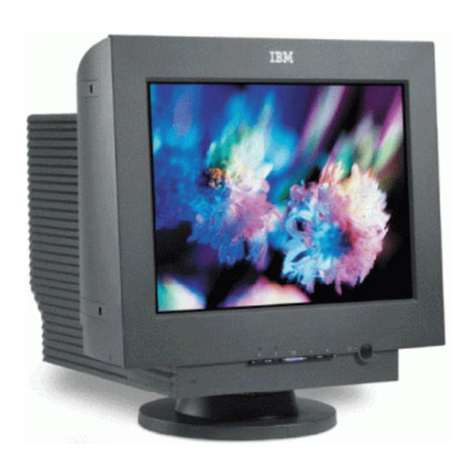
IBM P260 Original operating instructions

Operating Instructions
Mode d’emploi
Bedienungsanleitung
Manual de instrucciones
Istruzioni per l’uso
P260
Color Monitor
F
EN
D
ES
I


i
DANGER
To avoid shock hazard:
• Do not remove the covers.
• Do not operate this product unless the stand is attached.
• Do not connect or disconnect this product during an electrical storm.
• The power cord plug must be connected to a properly wired and grounded power outlet.
• Any equipment to which this product will be attached must also be connected to properly wired and grounded power
outlets.
• To isolate the monitor from the electrical supply, you must remove the plug from the power outlet. The power outlet should
be easily accessible.
Handling:
• Your color monitor is heavy, so handle it with care. IBM recommends that this monitor is moved or lifted by two people.
DANGER
Pour éviter les risques d’électrocution :
• Ne retirez pas les capots du moniteur.
• N’utilisez pas ce produit si le socle n’est pas fixé.
• Ne connectez, ni ne déconnectez ce produit pendant un orage.
• Le câble d’alimentation doit être connecté à une prise électrique correctement mise à la terre et en bon état de marche.
• Tout équipement auquel ce produit est relié doit être également connecté à une prise correctement mise à la terre et en bon
état de marche.
• Pour isoler le moniteur de la source d’alimentation électrique, vous devez le débrancher de la prise électrique. Cette prise
doit être facile d’accès
Manutention:
• Votre moniteur couleurs est lourd et doit donc être manipulé avec soin. IBM vous conseille de le déplacer ou de le porter à
deux.
GEFAHRENHINWEIS
Um die Gefahr eines elektrischen Schlags zu vermeiden, folgendes beachten:
• Unter keinen Umständen die Abdeckungen abnehmen.
• Das Produkt nicht in Betrieb nehmen, wenn der Sockel nicht montiert ist.
• Das Gerät nicht während eines Gewitters an eine Steckdose anschließen oder von ihr trennen.
• Das Netzkabel ist an eine ordnungsgemäß verdrahtete und geerdete Steckdose anzuschließen.
• Jedes Gerät, mit dem dieses Produkt verbunden wird, muß ebenfalls an eine ordnungsgemäß verdrahtete und geerdete
Steckdose angeschlossen werden.
• Um den Monitor von der Stromversorgung zu trennen, muß der Stecker aus der Steckdose gezogen werden. Die Steckdose
sollte leicht zugänglich sein.
Handhabungshinweis:
• Ihr Farbbildschirm ist schwer. Sie sollten daher beim Transport vorsichtig vorgehen. IBM empfiehlt Ihnen, den Bildschirm
zu zweit anzuheben bzw. zu tragen.
GEVAAR
Ga als volgt te werk om het gevaar van een elektrische schok te voorkomen:
• Verwijder in geen enkel geval de kap.
• Stel dit produkt alleen in werking als de voet is bevestigd.
• Sluit dit apparaat niet aan op, of verbreek de aansluiting van dit apparaat niet van een contactdoos tijdens onweer.
• Het netsnoer moet worden aangesloten op een geaarde contactdoos met correcte bedrading.
• Ook alle apparatuur waarop dit produkt wordt aangesloten moet zijn aangesloten op een contactdoos met correcte
bedrading.
• Om het beeldscherm te ontkoppelen van de netvoeding, dient u de stekker uit de contactdoos te trekken. De contactdoos
dient goed toegankelijk te zijn.
Verplaatsing:
• Uw kleurenmonitor is zwaar, ga er dus voorzichtig mee om. IBM raadt aan dat het tillen of verplaatsen ervan door twee
mensen gebeurt.

ii
PELIGRO
Para evitar riesgos de descargas eléctricas:
• No retire bajo ningún concepto las cubiertas.
• No maneje el monitor sin antes acoplar el soporte.
• No conecte ni desconecte el equipo de una toma de alimentación durante una tormenta eléctrica.
• El cable de alimentación debe estar conectado a un enchufe debidamente cableado y con toma de tierra.
• Cualquier equipo al que se vaya a conectar este producto también debe estar conectado a tomas de alimentación cableadas y
conectadas a tierra correctamente.
• Para aislar el monitor del suministro eléctrico, debe retirar el enchufe de la toma de alimentación. Esta toma deberá ser de
fácil acceso.
Movimentazione del monitor:
• Il monitor a colori è pesante, si consiglia quindi di maneggiarlo con attenzione. IBM raccomanda che il monitor venga mosso
o sollevato da due persone.
PERICOLO
Per evitare il rischio di scariche elettriche:
• Non rimuovere nessuna parte del telaio.
• Non accendere il prodotto se il piedistallo non è stato montato.
• Non collegare o scollegare il prodotto nel corso di un temporale.
• La spina del cavo di alimentazione deve essere collegata ad una presa di corrente con messa a terra, installata in maniera
appropriata.
• Le apparecchiature a cui il prodotto viene attaccato devono essere collegate a prese di corrente con messa a terra, installate
in maniera appropriata.
• Per isolare il monitor dalla corrente elettrica, staccare la spina dalla presa di alimentazione, che deve essere facilmente
accessibile.
Manipulación:
• El monitor de color es pesado, por lo que debe manipularlo con cuidado. IBM recomienda moverlo con la ayuda de dos
personas.
PERIGO
Para evitar o perigo de choques eléctricos:
• Não retire as coberturas.
• Não utilize este produto antes de montar a base.
• Não ligue nem desligue este produto durante uma tempestade eléctrica.
• O cabo de alimentação deve ser ligado a uma tomada eléctrica devidamente ligada à terra.
• Qualquer equipamento ligado a este produto deve estar ligado a tomadas eléctricas devidamente ligadas à terra.
• Para isolar o monitor da fonte de alimentação, retire a ficha do cabo de alimentação da tomada eléctrica. A tomada eléctrica
deve ser de fácil acesso.
Manuseio:
• Seu monitor colorido é pesado, então manuseie-o com cuidado. A IBM recomenda que o monitor seja movido ou carregado
por duas pessoas.
FARE
Sådan undgår du elektrisk stød:
• Kabinettet må under ingen omstændigheder fjernes.
• Undgå at anvende dette produkt, uden at vippe/drejefoden er monteret.
• Undgå at tilslutte eller frakoble dette produkt i tordenvejr.
• Netledningen skal være tilsluttet en korrekt jordet stikkontakt med korrekt ledningsføring.
• Alt udstyr, som tilsluttes dette produkt, skal også være tilsluttet korrekt jordede stikkontakter med korrekt ledningsføring.
• For at isolere skærmen fra strømforsyningen, skal stikket tages ud af stikkontakten. Stikkontakten bør være let tilgængelig.
Håndtering:
• Farveskærmen er tung, så den skal håndteres forsigtigt. IBM anbefaler, at skærmen flyttes eller løftes af to personer.

iii
FARE
Slik unngår du fare for elektrisk støt:
• Ikke ta av dekslene.
• Ikke bruk produktet dersom sokkelen ikke er montert.
• Ikke koble produktet til eller fra under tordenvær.
• Pluggen på strømledningen må kobles til korrekt montert og jordet strømuttak.
• Utstyr som dette produktet eventuelt blir koblet til, må også kobles til korrekt montert og jordet strømuttak.
• For å isolere skjermen fra strømkilden må du ta ut pluggen fra strømuttaket. Strømuttaket bør være lett tilgjengelig.
Käsittely:
• Värinäyttö on painava, joten käsittele sitä varoen. IBM suosittelee, että kaksi henkilöä siirtää tai nostaa sitä.
Varning - livsfara
För att undvika risk för elektriska stötar måste du tänka på följande:
• Ta inte bort några skyddskåpor.
• Använd inte den här produkten innan du har satt fast stativet.
• Anslut inte produkten till ett eluttag under åskväder. Koppla inte heller ur produkten från ett eluttag under åskväder.
• Strömkabeln måste anslutas till ett felfritt och jordat uttag.
• All utrustning som den här produkten kopplas till måste också anslutas till felfria och jordade uttag.
• För att bryta strömmen till bildskärmen måste du dra ut kontakten. Vägguttaget bör vara lätt att komma åt.
Hantering:
• Färgskärmen är tung och bör därför hanteras försiktigt. IBM rekommenderar att den flyttas eller lyfts av två personer.
VAARA
Sähköiskun vaaran välttämiseksi:
• Älä avaa laitteen kansia missään tilanteessa.
• Älä käytä laitetta, ellei jalustaa ole kiinnitetty.
• Älä kytke laitetta pistorasiaan tai irrota sitä pistorasiasta ukonilman aikana.
• Virtajohto on kytkettävä asianmukaisesti johdotettuun ja maadoitettuun pistorasiaan.
• Kaikki muutkin laitteet, joihin tämä tuote on liitetty, on kytkettävä asianmukaisesti johdotettuihin pistorasioihin.
• Kun haluat erottaa näyttimen sähköverkosta, sinun pitää irrottaa sen verkkojohto pistorasiasta. Pistorasian pitäisi olla
mahdollisimman lähellä näytintä ja vaivattomasti käsillä.
Håndtering:
• Värimonitorinne on painava, joten käsitelkää sitä varovasti. IBM suosittelee, että monitorin siirtämiseen tai kantamiseen
käytetään kahta henkilöä.
ΚΙΝ∆ΥΝΟΣ
Για την αποφυγή κινδύνου ηλεκτροπληξίασ:
•Μην αφαιρείτε τα καλύµµατα.
•Μη θέτετε το προϊν αυτ σε λειτουργία χωρίσ να είναι στερεωµένη η βάση του.
•Μη συνδέετε ή αποσυνδέετε το προϊν αυτ κατά τη διάρκεια ηλεκτροθύελλασ.
•Το φισ του καλωδίου ρευµατολήπτη πρέπει να συνδεθεί σε µια πρίζα µε σωστή καλωδίωση και γείωση.
•Κάθε συσκευή στην οποία συνδεθεί αυτ το προϊν πρέπει επίσησ να συνδεθεί σε πρίζα µε σωστή καλωδίωση και
γείωση.
•Για να αποµονώσετε την οθνη απ την παροχή ρεύµατοσ, πρέπει να αφαιρέσετε το φισ απ την πρίζα. Η πρίζα
πρέπει να είναι σε σηµείο εύκολα προσβάσιµο.
Χειρισµσ:
•Η έγχρωµη οθνη σασ είναι βαριά, γι’αυτ χειριστείτε την µε προσοχή. Η IBM συνιστά η οθνη να µεταφέρεται ή
να σηκώνεται απ δύο άτοµα.

iv
TEHLİKE
Elektrik çarpması tehlikesinden kaçınmak için:
•Kapakları çıkarmayınız.
•Bu cihazı kaidesine takılı durumda değilken çalıştırmayınız.
•Bu cihazı elektriksel fırtına sırasında prize takmayınız veya prizden çıkarmayınız.
•Elektrik kablosunun fişi, elektrik ve toprak bağlantıları usulüne uygun olarak yapılmış bir prize takılmalıdır.
•Bu cihazın bağlanacağı diğer tüm cihazlar da elektrik ve toprak bağlantıları usulüne uygun olarak yapılmış prize takılmış
olmalıdır.
•Monitörün elektrikle bağlantısını kesmek için fişini prizden çekmeniz gereklidir. Priz, kolayca erişilebilecek bir yerde olmalıdır.
Kaldırma:
•Renkli monitörünüz ağırdır; kaldırırken dikkatli olunuz. IBM, monitörün iki kişi tarafından taşınmasını veya kaldırılmasını
tavsiye etmektedir.

EN
English

Edition 1
Thispublicationcouldcontaintechnicalinaccuraciesortypographicalerrors.Changesaremadeperiodicallytothe
informationherein;thesechangeswillbemadeinlatereditions.IBMmaymakeimprovementsand/orchangesinthe
product(s)and/orprogram(s)atanytime.
Itispossiblethatthispublicationmaycontainreferenceto,orinformationabout,IBMproducts(machinesandprograms),
programming,orservicesthatarenotannouncedinyourcountry.
RequestsforcopiesofthispublicationandfortechnicalinformationaboutIBMproductsshouldbemadetoyourIBM
AuthorizedDealerorIBMRetailer.
Nopartofthispublicationmaybereproducedordistributedinanyformorbyanymeanswithoutpriorpermissioninwriting
fromtheInternationalBusinessMachinesCorporation.
ReferencesinthispublicationtoIBMproducts,programs,orservicesdonotimplythatIBMintendstomaketheseavailablein
allcountriesinwhichIBMoperates.AnyreferencetoanIBMproduct,programorserviceisnotintendedtostateorimplythat
onlyIBM’sproduct,program,orservicemaybeused.Anyfunctionallyequivalentproduct,program,orservicethatdoesnot
infringeanyofIBM’sintellectualpropertyrightsorotherlegallyprotectablerightsmaybeusedinsteadoftheIBMproduct,
program,orservice.Evaluationandverificationofoperationinconjunctionwith otherproducts,programs,orservices,except
thoseexpresslydesignatedbyIBM,aretheuser’sresponsibility.
IBMmayhavepatentsorpendingpatentapplicationscoveringsubjectmatterinthisdocument.Thefurnishingofthis
documentdoesnotgiveyouanylicensetothesepatents.
Trademarks
Thefollowingterms,usedinthispublication,aretrademarksorservicemarksoftheIBMCorporationintheUnitedStatesor
othercountries:
IBM VGA HelpCenter
•ENERGYSTARisaU.S.registeredmark.
• Trinitron®isaregisteredtrademarkofSonyCorporation.
• DDCisatrademarkoftheVideoElectronicsStandardAssociation.
• VESAisatrademarkofVideoElectronicsStandardAssociation.
• Allotherproductnamesmentionedhereinmaybethetrademarksorregisteredtrademarksoftheirrespectivecompanies.
• Furthermore,“™”and“®"arenotmentionedineachcaseinthismanual.
© Copyright International Business Machines Corporation 1999.
All rights reserved.

1
EN
TABLE OF CONTENTS
Getting started
Precautions ............................................................................................................................2
Identifying Parts and Controls ...........................................................................................3
Setup .......................................................................................................................................4
Selecting the Input Signal ....................................................................................................5
Automatically Sizing and Centering the Picture .............................................................5
Customizing Your Monitor
Selecting the On-screen Display Language ......................................................................6
Adjusting the Picture Brightness and Contrast ................................................................6
Introducing the On-screen Display System ......................................................................6
Using the SIZE/CENTER On-screen Display ............................................................7
Using the GEOMETRY On-screen Display .................................................................8
Using the CONVERGENCE On-screen Display ........................................................9
Using the SCREEN On-screen Display .....................................................................10
Using the COLOR On-screen Display.........................................................................11
Using the LANGUAGE On-screen Display ...............................................................13
Using the OPTION On-screen Display......................................................................13
Resetting the Adjustments ................................................................................................15
Technical Features
Damper Wires .....................................................................................................................15
Plug & Play ..........................................................................................................................15
Preset Modes .......................................................................................................................16
Power Saving Function ......................................................................................................16
Displaying the Monitor’s Information.............................................................................16
Additional Information
Warning Messages..............................................................................................................17
Troubleshooting ..................................................................................................................18
Self-diagnosis Function ......................................................................................................20
Specifications .......................................................................................................................20

Getting Started
2
Use of the Tilt-Swivel
This monitor can be adjusted within the angles shown
below. To find the center of the monitor’s turning radius,
align the center of the monitor’s screen with the centering
dots on the stand.
Hold the monitor at the bottom with both hands when you
turn it horizontally or vertically. Be careful not to pinch
your fingers at the back of the monitor when you tilt the
monitor up vertically.
Note
Do not remove the tilt-swivel base from the monitor.
Warning on power connection
• Use an appropriate power cord for your local power
supply.
Examples of plug types:
• Before disconnecting the power cord, wait at least 30
seconds after turning off the power to allow the static
electricity on the CRT display surface to discharge.
• After the power has been turned on, the CRT is
demagnetized (degaussed) for about 2 seconds. This
generates a strong magnetic field around the metal frame,
which may affect the data stored on magnetic tapes and
disks near the bezel. Place magnetic recording equipment,
tapes, and disks away from this monitor.
The equipment should be installed near an easily
accessible electrical outlet.
Precautions
Installation
• Prevent internal heat build-up by allowing adequate air
circulation. Do not place the monitor on surfaces (rugs,
blankets, etc.) or near materials (curtains, draperies) that
may block the ventilation holes.
• Do not install the monitor near heat sources such as
radiators or air ducts, or in a place subject to direct
sunlight, excessive dust, mechanical vibration, or shock.
• Do not place the monitor near equipment which generates
magnetism, such as a transformer or high voltage power
lines.
Maintenance
• Clean the cabinet, panel and controls with a soft cloth
lightly moistened with a mild detergent solution. Do not
use any type of abrasive pad, scouring powder, or
solvent, such as alcohol or benzine.
• Do not rub, touch, or tap the surface of the screen with
sharp or abrasive items such as a ballpoint pen or
screwdriver. This type of contact may result in a scratched
picture tube.
• Clean the screen with a soft cloth. If you use a glass
cleaning liquid, do not use any type of cleaner containing
an anti-static solution or similar additive as this may
scratch the screen’s coating.
Transportation
When you transport this monitor for repair or shipment, use
the original carton and packing materials.
Getting started
for 100 to 120 V AC for 200 to 240 V AC for 240 V AC only
90°
90°
15°
5°
Centering dots
3
EN
Getting Started
AC IN
(HD15)1(DVI) 2
Identifying Parts and Controls
See the pages in parentheses for further details.
Front Rear
Pin No.
1
2
3
4
5
6
7
Pin No.
8
9
10
11
12
13
14
15
Signal
Red
Green
(Sync on Green)
Blue
ID (Ground)
DDC Ground*
Red Ground
Green Ground
Signal
Blue Ground
DDC + 5V*
Ground
ID (Ground)
Bi-Directional
Data (SDA)*
H. Sync
V. Sync
Data Clock(SCL)*
* Display Data Channel (DDC) Standard of VESA
1?(reset) button (page 15)
Resets the adjustments to the factory settings.
2ASC (auto sizing and centering) button
(page 5)
Automatically adjusts the size and centering of the
picture.
3Input switch (page 5)
Selects the INPUT 1 (video input 1 connector: J1) or
INPUT 2 (video input 2 connector: J2) video input
signal.
4¨(brightness) down and up (./>) buttons
(pages 6 – 15)
Adjust the picture brightness.
Function as the (./>) buttons when adjusting other
items.
5(menu) button (pages 6 – 16)
Displays the MENU OSD.
6>(contrast) left and right (?//) buttons
(pages 6 – 14, 20)
Adjust the contrast.
Function as the (?//)buttons when adjusting other
items.
7u(power) switch and indicator (pages 16,
20)
Turns the monitor on or off.
The power indicator lights up in green when the
monitor is turned on, and either flashes in green and
orange, or lights up in orange when the monitor is in
power saving mode.
8AC IN connector (page 4)
Provides AC power to the monitor.
9Video input 1 connector (HD15) (J1)
(page 4)
Inputs RGB video signals (0.700 Vp-p, positive) and
sync signals.
5 4 3 2 1678910 1112131415
1- -2

Getting Started
4
AC IN
(HD15)1(DVI) 2
AC IN
(HD15)1(DVI) 2
AC IN
(HD15)1(DVI) 2
Setup
This monitor works with platforms running at horizontal
frequencies between 30 and 121 kHz.
Step 1: Make sure the computer and
monitor are switched off
Step 2: Connect the monitor to the
computer
Connect the video signal cable to the video output of the
computer.
Notes
• Do not short the pins of the video signal cable.
• When connecting the video signal cable, check the alignment of
the connector. Do not force the connector in the wrong way or
the pins might bend.
Step 3: Connect the power cord
With the monitor switched off, connect one end of the
proper power cord for your local supply to the monitor and
the other end to a power outlet.
Step 4: Turn on the monitor and computer
To a computer
with an HD15
video output
rear side
forward side
To a computer
with a DVI
video output forward side
rear side
to a power outlet
to AC IN
Power cord
Rear
* Display Data Channel (DDC) Standard of VESA
Pin No.
C1
C2
C3
C4
C5
1
2
3
4
5
6
7
8
9
Pin No.
10
11
12
13
14
15
16
17
18
19
20
21
22
23
24
Signal
Red
Green
Blue
H. Sync
Ground (R/G/B)
–
–
–
–
–
Data Clock(SCL)*
Bi-Directional
Data (SDA)*
V. Sync
–
Signal
–
–
–
–
DDC + 5V*
Ground
Hot Plug Detect
–
–
–
–
–
–
–
–
12345678
C1 C2
C5
C3 C4
9 10121314151617
17 18 19 20 21 22 23 24
0Video input 2 connector (DVI) (J2) (page
4)
Connected to a computer with a DVI video output.

5
EN
Getting Started
Step 5: Adjust the monitor’s controls
according to your personal
preference
The installation of your monitor is complete.
Note
If no picture appears on the screen and “NO INPUT SIGNAL” or
“OUT OF SCAN RANGE” appears on the screen, see “Warning
Messages” on page 17.
Workplace Preparation
Positioning the Monitor
Choose a suitable place to position the monitor where it is
not near fluorescent desk lighting or any equipment that
produces magnetic fields that could cause interference.
Ensure that the furniture or equipment can support the
weight of the monitor. Allow at least 2 inches (50mm)
ventilation space around the monitor.
Height
The monitor should be positioned so that the top of the
screen is slightly below your eye level when you sit at your
workstation.
Orientation
Choose a position that gives the least reflection from lights
and windows, usually at a right angle to any windows. The
monitor should be positioned directly in front of you so that
you do not have to twist your body. Tilt the monitor to a
comfortable viewing angle.
Working Practices
Rest
Take regular breaks. Vary your posture, and stand up and
stretch occasionally as prolonged use of computer
workstations can be tiring.
Back
You should sit back in the chair and use the backrest.
Hands
Use a light touch on the keyboard, keeping your hands and
fingers relaxed. Allow a space in front of the keyboard to
rest your wrists when not typing. Consider using a
wristpad.
Eyesight
Working with monitors, in common with any kind of
prolonged close work, can be visually demanding. Look
away from the screen periodically and have your eyesight
checked regularly.
Screen settings
Set the screen brightness and contrast to a comfortable level.
You may have to adjust this as the lighting changes during
the day. Many application programs let you select color
combinations which can help you to view in comfort.
Selecting the Input Signal
You can connect two computers to this monitor using the
video input 1 (J1) and video input 2 (J2) connectors. To
select one of the two computers, use the input switch.
Move the input switch.
The selected connector appears on the screen for 3 seconds.
“INPUT 1” (video input 1 connector: J1) or “INPUT 2”
(video input 2 connector: J2) appears on the screen.
Note
If no signal is input to the selected connector, “NO INPUT
SIGNAL” appears on the screen. After a few seconds, the monitor
enters the power saving mode. If this happens, switch to the other
connector.
Automatically Sizing and
Centering the Picture
You can easily adjust the picture to fill the screen by
pressing the (auto sizing and centering) button.
Press the button.
The picture automatically fills the screen.
Notes
• This function is intended for use with a computer that provides
a full-screen picture. It may not work properly if the background
color is dark or if the input picture does not fill the screen to the
edges.
• Pictures with an aspect ratio of 5:4 (resolution: 1280 ×1024) are
displayed at their actual resolution and do not fill the
screen to the edges.
• The displayed image moves for a few seconds when the
button is pressed. This is not a malfunction.
12

Customizing Your Monitor
6
Introducing the On-screen
Display System
Most adjustments are made using the MENU OSD.
MENU OSD
Press the button to display the MENU OSD.
This MENU OSD contains links to the other OSDs described
below.
1EXIT
Closes the MENU OSD.
2SIZE/CENTER
Displays the SIZE/CENTER OSD for adjusting the
picture’s size, centering, or zoom.
3GEOMETRY
Displays the GEOMETRY OSD for adjusting the picture
rotation and pincushion, etc.
4CONVERGENCE
Displays the CONVERGENCE OSD for adjusting the
picture’s horizontal and vertical convergence.
5SCREEN
Displays the SCREEN OSD for adjusting the picture’s
quality. You can adjust the landing and moire
cancellation effect.
6COLOR
Displays the COLOR OSD for adjusting the color
temperature.
7LANGUAGE
Displays the LANGUAGE OSD for selecting the
language.
8OPTION
Displays the OPTION OSD for adjusting the OSD
position, degaussing the screen, etc.
9The horizontal and vertical frequencies of
the current input signal
The horizontal and vertical frequencies of the current
input signal are displayed.
0The resolution of the current input signal
If the signal matches one of this monitor’s factory preset
modes, the resolution is displayed.
EX I T
SI ZE/CENTER
GEOMETRY
CONVERGENCE
SCREEN
COLOR
LANGUAGE
OPT I ON
MENU
OK
68.7kHz/ 85Hz
1024x 768
Adjusting the Picture Brightness
and Contrast
Once the setting is adjusted , it will be stored in memory for
all input signals received.
1Press the ¨(brightness) ./>or >(contrast) ?//
buttons.
The BRIGHTNESS/CONTRAST OSD appears.
2For brightness adjustment
Press the ¨./>buttons.
>. . . for more brightness
.. . . for less brightness
For contrast adjustment
Press the >?//buttons.
/. . . for more contrast
?. . . for less contrast
The OSD automatically disappears after about 3 seconds.
To reset, press the ?(reset) button while the OSD is on.
The brightness and contrast are both reset to the factory
settings.
If you are using the sRGB mode
If you selected the sRGB mode in the COLOR OSD, the
following BRIGHTNESS/CONTRAST menu appears on the
screen.
For more information about using the sRGB mode, see
“Using the COLOR On-screen Display” on page 11.
The menu automatically disappears after about 3 seconds.
Customizing Your Monitor
Before adjusting
• Connect the monitor and the computer, and turn them on.
Selecting the On-screen Display
Language
If you need to change the OSD language, see “Using the
LANGUAGE On-screen Display” on page 13.
The default setting is English.
26 26
BRIGHTNESS/CONTRAST
56 76
sRGB : 56 76
BRIGHTNESS/CONTRAST

7
EN
Customizing Your Monitor
Using the SIZE/CENTER On-
screen Display
The SIZE/CENTER settings allow you to adjust the
picture’s size, centering, or zoom.
Once the setting is adjusted, it will be stored in memory for
the current input signal.
1Press the button.
The MENU OSD appears.
2Press the ./>buttons to select “ SIZE/CENTER”
and press the button again.
The SIZE/CENTER OSD appears.
3Press the ./>buttons to select the item you want to
adjust.
Select
(Horizontal Sizing)
(Vertical Sizing)
(Horizontal Centering)
(Vertical Centering)
(Zoom)
To
adjust the horizontal size of the
picture
adjust the vertical size of the picture
adjust the horizontal centering of the
picture
adjust the vertical centering of the
picture
enlarge or reduce the picture
4Press the ?//buttons to adjust the settings.
Select
(Horizontal Sizing)
(Vertical Sizing)
(Horizontal Centering)
(Vertical Centering)
(Zoom)
Press the button once to return to the MENU OSD, and
twice to return to normal viewing. If no buttons are pressed,
the OSD closes automatically after about 30 seconds.
To reset, press the ?(reset) button while the OSD is on.
The selected item is reset to the factory setting.
Note
The (Zoom) adjustment stops when the horizontal or vertical
size reaches its maximum or minimum value. The horizontal
adjustment value is not displayed in the menu.
To
/. . . to increase picture width
?. . . to decrease picture width
/. . . to increase picture height
?. . . to decrease picture height
/. . . to move the picture right
?. . . to move the picture left
/. . . to move the picture up
?. . . to move the picture down
/. . . to enlarge the picture
?. . . to reduce the picture
26
SI ZE/CENTER

Customizing Your Monitor
8
For
(Rotation)
(Pincushion)
(Pin Balance)
(Keystone)
(Key Balance)
Using the GEOMETRY On-
screen Display
The GEOMETRY settings allow you to adjust the shape and
orientation of the picture.
Once the (Rotation) is adjusted, it will be stored in
memory for all input signals received. All other adjustments
will be stored in memory for the current input signal.
1Press the button.
The MENU OSD appears.
2Press the ./>buttons to select “ GEOMETRY” and
press the button again.
The GEOMETRY OSD appears.
3Press the ./>buttons to select the item you want to
adjust.
Select
(Rotation)
(Pincushion)
(Pin Balance)
(Keystone)
(Key Balance)
To
adjust the picture rotation
adjust the picture sides
adjust the picture side balance
adjust the picture width
adjust the picture shape balance
Press
/. . . to rotate the picture clockwise
?. . . to rotate the picture counterclockwise
/. . . to expand the picture sides
?. . . to contract the picture sides
/. . . to expand the picture sides to the
right
?. . . to expand the picture sides to the left
/. . . to increase the picture width at the
top
?. . . to decrease the picture width at the
top
/. . . to move the top of the picture to
the right
?. . . to move the top of the picture to
the left
4Press the ?//buttons to adjust the settings.
Press the button once to return to the MENU OSD, and
twice to return to normal viewing. If no buttons are pressed,
the OSD closes automatically after about 30 seconds.
To reset, press the ?(reset) button while the OSD is on.
The selected item is reset to the factory setting.
26
GEOMETRY

9
EN
Customizing Your Monitor
Using the CONVERGENCE On-
screen Display
The CONVERGENCE settings allow you to adjust the
quality of the picture by controlling the convergence.
The convergence refers to the alignment of the red, green,
and blue color signals.
If you see red or blue shadows around letters or lines, adjust
the convergence.
Once the setting is adjusted, it will be stored in memory for
all input signals received.
1Press the button.
The MENU OSD appears.
2Press the ./>buttons to select “ CONVERGENCE”
and press the button again.
The CONVERGENCE OSD appears.
3Press the ./>buttons to select the item you want to
adjust.
Select
(Horizontal Convergence)
(Vertical Convergence)
TOP
V CONVER TOP
BOT
V CONVER BOTTOM
To
adjust the horizontal convergence
adjust the vertical convergence
adjust the vertical convergence at the
top of the screen
adjust the vertical convergence at the
bottom of the screen
4Press the ?//buttons to adjust the settings.
Press
/. . . to shift red shadows to the right
and blue shadows to the left
?. . . to shift red shadows to the left
and blue shadows to the right
/. . . to shift red shadows up and blue
shadows down
?. . . to shift red shadows down and
blue shadows up
/. . . to shift red shadows up and
blue shadows down at the top of
the screen
?. . . to shift red shadows down and
blue shadows up at the top of
the screen
/. . . to shift red shadows up and blue
shadows down at the bottom of
the screen
?. . . to shift red shadows down and
blue shadows up at the bottom
of the screen
Press the button once to return to the MENU OSD, and
twice to return to normal viewing. If no buttons are pressed,
the OSD closes automatically after about 30 seconds.
To reset, press the ?(reset) button while the OSD is on.
The selected item is reset to the factory setting.
For
(Horizontal Convergence)
(Vertical Convergence)
TOP
V CONVER TOP
BOT
V CONVER BOTTOM
TOP
BOT
26
CONVERGENCE

Customizing Your Monitor
10
To
reduce any color irregularities in the
screen’s top left corner to a minimum.
reduce any color irregularities in the
screen’s top right corner to a minimum.
reduce any color irregularities in the
screen’s bottom left corner to a
minimum.
reduce any color irregularities in the
screen’s bottom right corner to a
minimum.
turn the moire cancellation function ON
or OFF.
(MOIRE ADJUST) appears in the
menu when you select ON.
adjust the degree of moire cancellation
until the moire is at a minimum.
* Moire is a type of natural interference which produces
soft, wavy lines on your screen. It may appear due to
interference between the pattern of the picture on the
screen and the phosphor pitch pattern of the monitor.
Example of moire
Note
The picture may become fuzzy when CANCEL MOIRE is set to
ON.
Using the SCREEN On-screen
Display
The SCREEN settings allow you to adjust the quality of the
picture by controlling the moire and landing.
• If the color is irregular at the corners of the screen, adjust
the landing.
• If elliptical or wavy patterns appear on the screen, cancel
the moire.
The CANCEL MOIRE and MOIRE ADJUST settings are
stored in memory for the current input signal. All other
settings are stored in memory for all input signals.
1Press the button.
The MENU OSD appears.
2Press the ./>buttons to select “ SCREEN” and
press the button again.
The SCREEN OSD appears.
3First press the ./>buttons to select the item you
want to adjust. Then press the ?//buttons to
adjust the settings.
Select
LANDING
LANDING
LANDING
LANDING
CANCEL MOIRE*
MOIRE ADJUST

11
EN
Customizing Your Monitor
EASY mode
1First press the ./>buttons to select the color
temperature row 1, then press the ?//buttons
to select a color temperature.
The preset color temperatures are 5000K, 6500K, and
9300K. Since the default setting is 9300K, the whites will
change from a bluish hue to a reddish hue as the
temperature is lowered to 6500K and 5000K.
2If necessary, fine tune the color temperature.
First press the ./>buttons to select the color
temperature adjustment row 2, then press the ?/
/buttons to fine tune the color temperature.
If you fine tune the color temperature, the new color
settings are stored in memory for each of the three color
temperatures and item 1of the on-screen menu
changes as follows.
• [5000K]n[1]
• [6500K]n[2]
• [9300K]n[3]
EXPERT mode
You can make additional adjustments to the color in greater
detail by selecting the EXPERT mode.
1Press the ./>buttons to select the color
temperature row 1, then press the ?//buttons
to select a color temperature.
2Press the ./>buttons to select the adjustment item
2, then press the ?//buttons to adjust the BIAS
(black level).
This adjusts the dark areas of an image.
Using the COLOR On-screen
Display
The COLOR settings allow you to adjust the picture’s color
temperature by changing the color level of the white color
field. Colors appear reddish if the temperature is low, and
bluish if the temperature is high. This adjustment is useful
for matching the monitor’s color to a printed picture’s
colors.
1Press the button.
The MENU OSD appears.
2Press the ./>buttons to select “ COLOR” and
press the button again.
The COLOR OSD appears.
3Press the ?//buttons to select the adjustment
mode.
There are three types of adjustment modes, EASY,
EXPERT and sRGB.
4First press the ./>buttons to select the item you
want to adjust. Then press the ?//buttons to
adjust the settings.
Adjust the selected mode according to the following
instructions.
EASY EXPERT s BGR
5000K 6500K 930 K0
50 K00
COLOR
RETURN ON
COLOR
EASY EXPERT s BGR
5000K 6500K 930 K0
R BIAS 05
G BIAS 05
B BIAS 05
RGAIN 05
GGAIN 05
BGAIN 05
COLOR

Customizing Your Monitor
12
Note
Your computer and other connected products (such as a printer),
must be sRGB compliant.
Restoring the color from the EASY or sRGB menus
The colors of most display monitors tend to gradually lose
brilliance over several years of service. The COLOR
RETURN feature found in the EASY and sRGB menus
allows you to restore the color to the original factory quality
levels. The explanation below explains how to restore the
monitor’s color from the EASY menu.
1Press the ?//buttons to select EASY or sRGB
mode.
2First press the ./>buttons to select (COLOR
RETURN), then press the /button.
The picture disappears while the color is being restored
(about 2 seconds). After the color is restored, the picture
reappears on the screen again.
Notes
• Before using this feature, the monitor must be in normal
operation mode (green power indicator on) for at least 30
minutes. If the monitor goes into power saving mode, you must
return the monitor to normal operation mode and wait for 30
minutes for the monitor to be ready. You may need to adjust
your computer’s power saving settings to keep the monitor in
normal operation mode for the full 30 minutes. If the monitor is
not ready, the following message will appear.
• The monitor may gradually lose its ability to perform this
function due to the natural aging of the picture tube.
3Press the ./>buttons to select the adjustment item
3, then press the ?//buttons to adjust the GAIN
(white level).
This adjusts the light areas of an image.
You can adjust the R (red), G (green), B (blue)
component of the input signal when making changes to
items 2and 3.
If you fine tune the color temperature, the new color
settings are stored in memory for each of the three color
temperatures and item 1of the on-screen menu change
as follows.
• [5000K]n[1]
• [6500K]n[2]
• [9300K]n[3]
Setting the color temperature for each of the video
input connectors
You can set the fine tuning of the color temperature in EASY
or EXPERT mode for each of the video input connectors
(INPUT 1 and INPUT 2).
1Select the same adjustment mode and color
temperature in the COLOR OSD for both INPUT 1 and
INPUT 2.
2Fine tune the color temperature in each OSD for
INPUT 1 and INPUT 2.
The settings are stored in memory for each of the INPUT
1 and INPUT 2 connectors.
For information on how to select the connector, see page 5.
sRGB mode
The sRGB color setting is an industry standard color space
protocol designed to correlate the displayed and printed
colors of sRGB compliant computer products. To adjust the
colors to the sRGB profile, simply select the sRGB mode in
the COLOR OSD. However, in order to display the sRGB
colors correctly (γ=2.2, 6500K), you must set your computer
to the sRGB profile and adjust the brightness ( ) and
contrast (>) to the numbers shown in the menu. For
information on how to change the brightness ( ) and
contrast (>), see page 6.
EASY EXPERT s BGR
:56 :76 FOR s BGR
COLOR
RETURN ON
COLOR
EASY EXPERT s BGR
5000K 6500K 930 K0
50 K00
COLOR
RETURN
AVAI LABLE
AFTER WARM UP
COLOR
Other manuals for P260
1
Table of contents
Languages:
Other IBM Monitor manuals
Popular Monitor manuals by other brands

Motrona
Motrona DZ 270 operating instructions

Mitsubishi Electric
Mitsubishi Electric MDT321S Specification sheet

Hatteland
Hatteland HD 12T21 STD-xxx-Fxxx user manual

Azure
Azure NetworkTV NTVPIPSW user guide

NEC
NEC LCD19WMGX - AccuSync - 19" LCD Monitor Brochure & specs

Advantech
Advantech IDS-3221W Series user manual