IBT Technologies CI7BM User manual

CI7BM Series
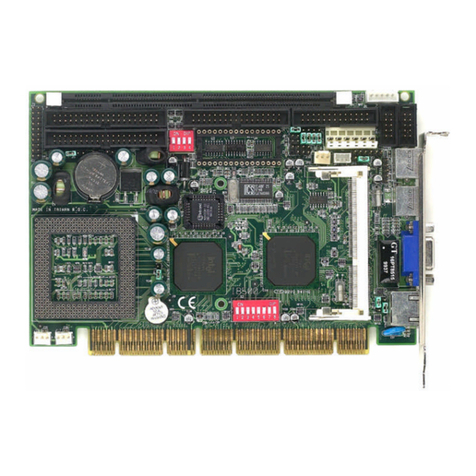
Full-Size Socket 370 All-in-one CPU Card
Version 1.0D
Industrial CPU Card
PC-Based Computer Boards for Industrial Automation
User’s Manual

ii CI7BM User’s Manual
Copyright Notice
This publication is protected by copyright and all rights are reserved. No
part of it may be reproduced or transmitted by any means or in any form,
without prior consent of the original manufacturer.
The information in this document has been carefully checked and is
believed to be accurate. However, the original manufacturer assumes no
responsibility for any inaccuracies that may appear in this manual. In no
event will the original manufacturer be liable for direct, indirect, special,
exemplary, incidental, incidental or consequential damages resulting
from any defect or omission in this manual, even if advised of possibility
of such damages. The material contained herein is for informational
purposes only.
Acknowledgments
Award is a registered trademark of Award Software International, Inc.
IBM and PS/2 are trademarks of International Business Machines
Corporation.
C&T is a trademark of Chips and Technologies Inc.
Intel and Pentium are registered trademarks of Intel Corporation.
Microsoft Windows is a registered trademark of Microsoft Corporation.
All other product names or trademarks are properties of their respective
owners.

Contents
CI7BM User’s Manual iii
CI7BM Series Comparison Table
Model CI7BM CI7BM+ CI7BMV
Processor Intel Pentium II Intel Pentium II Intel Pentium II
Processor Socket Socket 370 Socket 370 Socket 370
Chipset Intel 440BX Intel 440BX Intel 440BX
BIOS Award Award Award
L2 cache CPU Integrated CPU Integrated CPU Integrated
Max. SDRAM 768MB 768MB 768MB
Memory Sockets 3 x DIMM 3 x DIMM 3 x DIMM
VGA CRT/LCD C&T 69000 C&T 69000 C&T 69000
Watchdog Timer 16-level 16-level 16-level
PC/104 Connector yes Yes yes
Multi I/O Chip Winbond 83977 Winbond 83977 Winbond 83977
Enhanced IDE yes yes yes
2S/1P yes yes yes
USB yes yes yes
IrDA yes yes yes
Ultra2 SCSI no AIC 7890 no
Audio on board CT2511 CT2511 no
Ethernet
(10/100Mbps)Intel 82558B Intel 82558B no
H/W Monitoring Winbond W83781D Winbond W83781D Winbond W83781D
Board Size 338mm x 122mm 338mm x 122mm 338mm x 122mm

Contents
iv CI7BM User’s Manual
Contents
Chapter 1 Introduction.............................................1
Checklist.....................................................................2
Description.................................................................2
Features......................................................................3
Specifications.............................................................3
Intelligence.................................................................5
Board Dimensions .....................................................7
Chapter 2 Installations .............................................8
CPU Installation........................................................9
Memory Installation................................................10
Jumpers on the CI7BM...........................................12
Connectors on the CI7BM......................................17
Watchdog Timer Configuration ............................36
Chapter 3 BIOS Configuration..............................38
Chapter 4 Intel PIIX Bus Master IDE Driver
Installation................................................................64
Chapter 5 VGA Driver Installation.......................68
Chapter 6 Audio Driver Installation.....................71
Chapter 7 LAN Driver Installation Guide............74
Chapter 8 System Monitor Utility.........................80
Chapter 9 LANDesk Client Manager.................... 88
Chapter 10 SCSI Installation Guide...................... 96
Appendix.................................................................107
A. I/O Port Address Map
B. Interrupt Request Lines (IRQ)

Chapter 1 Introduction
CI7BM User’s Manual 1
1
Introduction
This manual is designed to give you information on the CI7BM CPU
card. It is divided into the following sections:
Checklist ..............................................................................2
Description...........................................................................2
Features................................................................................3
Specifications.......................................................................3
Intelligence...........................................................................5
Board Dimensions................................................................7
The topics covered in this chapter are as follows:
Checklist
Description
Features
Specifications
Layout of Key Components and Dimensions

Chapter 1 Introduction
2 CI7BM User’s Manual
Checklist
Please check that your package is complete and contains the items below.
If you discover damaged or missing items, please contact your dealer.
•
••
•
The CI7BM Industrial CPU Card
•
••
•
This User’s Manual
•
••
•
1 IDE Ribbon Cable
•
••
•
1 Floppy Ribbon Connector
•
••
•
2 Serial Port Ribbon Cable and 1 Parallel Port Attached to a
Mounting Bracket
•
••
•
One 68-pin Ultra2 SCSI cable (applies for CI7BM+)
•
••
•
1 Diskette Containing Intel PCI IDE Driver and Flash Memory
Utility
•
••
•
2 Diskettes Containing C&T 69000 VGA Driver (applies for
CI7BM and CI7BM+)
•
••
•
2 Diskettes Containing Intel 82558B LAN Driver (applies for
CI7BM and CI7BM+)
•
••
•
1 Diskette Containing System Monitor utility
•
••
•
1 Optional CD containing Intel LANDesk Client Manger
•
••
•
4 Diskettes Containing Adaptec Ultra2 SCSI Driver (applies for
CI7BM+)
•
••
•
8 Diskettes Containing Creative Labs CT2511 Driver (applies for
CI7BM, CI7BM+ and CI7BMV)
Description
The CI7BM is an Industrial CPU card based on the Intel 440BX chipset
and is fully designed for harsh industrial environment. It features a
Socket-370 processor connector that is compatible with Intel Celeron
processors. This card accommodates up to 768MB SDRAM
configuration.
The CI7BM comes with Winbond’s W83781D hardware monitoring
device that monitors system and CPU temperature, system voltages, and
CPU and chassis fan speeds to prevent system crashes by warning the
user of adverse conditions. The power management feature provides
power savings by slowing down the CPU clock, turning off the monitor
screen and stopping the HDD spindle motor.

Chapter 1 Introduction
CI7BM User’s Manual 3
Features
•
••
•
Intel Celeron support (Coppermine is supported on CI7BM with
PCB version 1.10 or above)
•
••
•
Bus Speed 66MHz/100MHz
•
••
•
Intel 440BX AGPset
•
••
•
Up to 768 SDRAM system memory, ECC function supported
•
••
•
C&T 69000 VGA chipset for LCD & CRT displays
•
••
•
Creative Labs CT2511 16-bit audio controller
•
••
•
Adaptec AIC 7890 Ultra 2 SCSI controller
•
••
•
COM1 and COM2 serial ports configurable as RS232 and
RS232/422/485 respectively
•
••
•
16 level programmable watchdog timer, from 0-30 seconds
•
••
•
High speed bi-directional SPP/ECP/EPP parallel port
•
••
•
PC/104 extension
•
••
•
Hardware Monitoring, Windows shut-off, Modem ring-on
•
••
•
10/100M Base-T Ethernet interface, Novell NE2000 Compatible
Specifications
•
••
•
Processor Socket: Socket 370 connector
•
••
•
Processor:
Intel Celeron, 66MHz FSB (Coppermine/100MHz FSB is
supported on CI7BM with PCB version 1.10 or above)
•
••
•
Chipset: Intel 440BX AGPset with PCI EIDE and RTC built-in
•
••
•
Secondary Cache: CPU integrated
•
••
•
Memory Sockets:
Three 168-pin DIMM sockets
Third DIMM socket optional as 64MB SDRAM on board
Max. 768MB SDRAM
Memory type: SDRAM (Synchronous DRAM)
NOTE: Only SDRAM modules that support SPD (Serial
Presence Detect) should be use. Use PC100 modules when
running 100MHz CPU bus speed and use PC66/PC100 modules
when running 66MHz CPU bus speed.

Chapter 1 Introduction
4 CI7BM User’s Manual
•
••
•
BIOS: Award BIOS, PnP support
•
••
•
FLASH EEPROM (256KB) for BIOS update
•
••
•
ISA Plug and Play (PnP) extension
•
••
•
Power management
•
••
•
DMI BIOS Support:
Desktop Management Interface (DMI) allows users to download
system hardware-level information such as CPU type, CPU
speed, internal/external frequencies and memory size.
•
••
•
Multi I/O: Winbond W83977TF
•
••
•
Parallel Port: One high-speed parallel port, SPP/EPP/ECP mode
•
••
•
Serial Port: Two 16550 UART compatible ports with COM1 as
RS232 and COM2 jumper configurable as RS232/422/485
•
••
•
Enhanced IDE: Two Bus Mastering EIDE mode, up to 4 devices,
Two EIDE interfaces for up to four devices, support PIO Mode 3/4
or Ultra DMA/33 IDE Hard Disk and ATAPI CD-ROM.
•
••
•
FDD Interface: Two floppy drives (360KB, 720KB, 1.2MB,
1.44MB, 2.88MB, LS-120)
•
••
•
CRT/LCD: C&T 69000 chipset
•
••
•
Embedded 2MB SDRAM display memory
•
••
•
Simultaneous CRT & LCD display
•
••
•
LCD panel supports DSTN/TFT
•
••
•
1280x1024x8bpp colors CRT resolution
•
••
•
Up to 1280x1024x8bpp colors resolution for color active
matrix TFT panels (12, 18, and 24bit analog) or (12+12),
(18+18) double pixel/CLK interface
•
••
•
USB Interface: Two USB pin-header connectors, compliant with
USB Specification Rev. 1.0
•
••
•
DiskOnChip: The M-Systems flask disk supports systemboot and
storage capacity from 2MB to 72MB.
•
••
•
Watchdog Timer: 16-level, programmable
•
••
•
I/O port 0443H to enable watchdog.
•
••
•
I/O port 0441H to disable watchdog.
•
••
•
Time-out timing select 0/2/4/6/8/10/12/14/16/18/20/22/
24/26/28/30 seconds (+/-20%).
•
••
•
Green Function: Power management via BIOS, activated through
mouse/keyboard movement

Chapter 1 Introduction
CI7BM User’s Manual 5
•
••
•
Ultra2 SCSI: The Adaptec AIC-7890 is a 32-bit single-chip host
adapter delivering Ultra2 SCSI data transfer rates up to
40Mbyte/sec in 8-bit mode and 80Mbyte/sec in 16-bit mode to
address emerging bandwidth-hungry applications, such as
real-time video, data mining, and scientific modeling and
simulation.
•
••
•
PCI Bus Ethernet Interface: Intel 82558B chipset
•
••
•
PCI local bus Ethernet controller
•
••
•
Supports IEEE802.3u auto-negotiation for automatic speed
selection
•
••
•
support 10/100Mbps operation in a single port PCI bus
master architecture
•
••
•
Keyboard and Mouse Connectors: PS/2 type mini-DIN that
supports PC/AT; supports a 5-pin external keyboard connector
•
••
•
IrDA Interface: Pin-header connector for the optional IrDA
external connector
•
••
•
PICMG Compliance: Fully compliant to PICMG standards
•
••
•
Environmental and Mechanical:
•
••
•
Power Supply: 10A @+5V(max), ±12V:100mA(max)
•
••
•
Temperature: 0°C to 60°C
•
••
•
Humidity: 5% to 95%
•
••
•
Dimensions: 338mm x 122mm
Intelligence
•
••
•
Temperature Monitoring and Alert: A sensor for the CPU
temperature on the CI7BM monitors the CPU temperature and
alerts the user through the speaker or buzzer when temperature
exceeds the safe heat level.
•
••
•
Windows 95 shut-off: Allows shut-off control from within
Windows 95 and through an ATX power supply.
•
••
•
Modem ring-on: Allows system powering on through an external
modem and through an ATX power supply.
•
••
•
Year 2000 Compliant BIOS: The onboard Award BIOS is Year
2000 Compliant and will pass software applications that have the
tendency to invoke INT1AH function 04H such as year2000.exe
utility released by NSTL.

Chapter 1 Introduction
6 CI7BM User’s Manual
•
••
•
Wake On LAN: Through an ATX power supply and network
connection, systems can be turned on from the power-off state.

Chapter 1 Introduction
CI7BM User’s Manual 7
Board Dimensions

Chapter 2 Installations
8 CI7BM User’s Manual
2
Installations
This chapter provides information on how to use the jumpers and
connectors on the CI7BM in order to set up a workable system. The
topics covered are:
CPU Installation...................................................................9
Memory Installation ...........................................................10
Jumpers on the CI7BM.......................................................12
Connectors on the CI7BM..................................................17
Watchdog Timer Configuration..........................................36

Chapter 2 Installations
CI7BM User’s Manual 9
CPU Installation
The CI7BM Industrial CPU Card supports a Socket 370 connector
processor socket for Intel Celeron processors.
The Socket 370 connector comes with a lever to secure the processor.
Before inserting the CPU, make sure the lever is raised perpendicular to
the socket and the notch on the corner of the CPU corresponds with the
notch on the inside of the socket.
After you have installed and lock the processor into place, check if the
jumpers for the CPU type and speed are correct.
NOTE: Ensure that the CPU heat sink and the CPU top surface are in
total contact to avoid CPU overheating problem that would
cause your system to hang or be unstable.

Chapter 2 Installations
10 CI7BM User’s Manual
Memory Installation
The CI7BM Industrial CPU Card supports two three 168-pin DIMM
sockets for a maximum total memory of 768 SDRAMs. A manufacturing
option replacesthe DIMM3 socket as 64MB SDRAM memory on board.
The memory modules can come in sizes of 16MB, 32MB, 64MB,
128MB and 256MB SDRAMs.
In populating the DIMM sockets, any of the DIMM banks can be
populated first. Refer to the following table on how to configure the
memory.
NOTE: Use SDRAM modules with PC100 specification when running
100MHz CPU bus speed. With 66MHz CPU bus speed,
SDRAM modules with PC66 or PC100 specification can be
used. You have to install the Pentium II processor before
installing the memory modules.
168-pin DIMM (3.3V) Unbuffer SDRAM
Bank0
(DIMM3) Bank1
(DIMM2) Bank2
(DIMM1)
Total Memory
8MB ----- ----- 8MB
16MB ----- ----- 16MB
32MB ----- ----- 32MB
64MB ----- ----- 64MB
128MB ----- ----- 128MB
8MB 8MB ----- 16MB
16MB 8MB ----- 24MB
32MB 8MB ----- 40MB
64MB 8MB ----- 72MB
128MB 8MB ----- 136MB
8MB 8MB 8MB 24MB
16MB 8MB 8MB 32MB
32MB 8MB 8MB 48MB
64MB 8MB 8MB 80MB
128MB 8MB 8MB 144MB
16MB 16MB ----- 32MB
32MB 16MB ----- 48MB
64MB 16MB ----- 80MB
128MB 16MB ----- 144MB

Chapter 2 Installations
CI7BM User’s Manual 11
Bank0
(DIMM3) Bank1
(DIMM2) Bank2
(DIMM1)
Total Memory
16MB 16MB 8MB 40MB
32MB 16MB 8MB 56MB
64MB 16MB 8MB 88MB
128MB 16MB 8MB 152MB
16MB 16MB 16MB 48MB
32MB 16MB 16MB 64MB
64MB 16MB 16MB 96MB
128MB 16MB 16MB 160MB
32MB 32MB ----- 64MB
64MB 32MB ----- 96MB
128MB 32MB ----- 160MB
32MB 32MB 8MB 72MB
64MB 32MB 8MB 104MB
128MB 32MB 8MB 168MB
32MB 32MB 16MB 80MB
64MB 32MB 16MB 112MB
128MB 32MB 16MB 176MB
32MB 32MB 32MB 96MB
64MB 32MB 32MB 128MB
128MB 32MB 32MB 192MB
64MB 64MB ----- 128MB
128MB 64MB ----- 192MB
64MB 64MB 8MB 136MB
128MB 64MB 8MB 200MB
64MB 64MB 16MB 144MB
128MB 64MB 16MB 208MB
64MB 64MB 32MB 160MB
128MB 64MB 32MB 224MB
64MB 64MB 64MB 192MB
128MB 64MB 64MB 256MB
128MB 128MB ----- 320MB
128MB 128MB 8MB 264MB
128MB 128MB 16MB 272MB
128MB 128MB 32MB 288MB
128MB 128MB 64MB 320MB
128MB 128MB 128MB 384MB

Chapter 2 Installations
12 CI7BM User’s Manual
Jumpers on the CI7BM
The jumpers on the CI7BM allow you to configure your CPU card
according to the needs of your applications. If you have doubts about the
best jumper configuration for your needs, contact your dealer or sales
representative. The following table lists the connectors on CI7BM and
their respective functions.
Jumper Locations on the CI7BM........................................13
DSW1 (3): CPU Bus Speed Selector .................................13
DSW1 (5-8): CPU Frequency Selector ..............................13
JP1: LCD Power Setting.....................................................14
JP4: DiskOnChip BIOS Expansion Address Select ...........15
JP5: Clear CMOS Content .................................................15
JP7: External Battery Connector........................................15
JP8: On Board VGA Enable/Disable .................................14
JP9: RS232/422/485 (COM2) Selection............................16
JP12: On Board LAN Enable/Disable................................15
NOTE: Jumpers J16 and J21 are for manufacturer testing use only.

Chapter 2 Installations
CI7BM User’s Manual 13
Jumper Locations on the CI7BM

Chapter 2 Installations
14 CI7BM User’s Manual
DSW1 (3): CPU Bus Speed Selector
Bus Speed DSW1 (3) Bus Speed DSW1 (3)
100MHz
off
66MHz
on
DSW1 (5-8): CPU Frequency Selector
The table below shows the correct settings to match the CPU frequency.
Frequency
Multiplier
CPU
Frequency
(66MHz)
CPU
Frequency
(100MHz)
DSW1(5-8)
4.5X 300MHz 450MHz
xx xx xx xx on off off on
5X 333MHz 500MHz
xx xx xx xx off on on on
5.5X 366MHz 550MHz
xx xx xx xx off off off on
6X 400MHz 600MHz
xx xx xx xx on on on off
6.5X 433MHz 650MHz
xx xx xx xx on on off off
7X 466MHz 700MHz
xx xx xx xx on off off on
7.5X 500MHz 750MHz
xx xx xx xx on off off off
8X 533MHz 800MHz
xx xx xx xx off on on off
Note: The settings for 650MHz, 700MHz, 750MHz, and 800MHz
frequencies are for reference only. As of the time of the printing of this
page, these CPUs were not available for testing and are not guaranteed
to work properly on the CPU card.

Chapter 2 Installations
CI7BM User’s Manual 15
JP1: LCD Power Setting
The CI7BM XGA interface supports 5V and 3.3V LCD displays. Use
JP1 to change between 5V (default) and 3.3V panel video signal level.
3.3V Setting 5V Setting
2 4 6
1 3 5
2 4 6
1 3 5
JP4: DiskOnChip BIOS Expansion Address Select
JP4 Address
1 3D0000-D7FFF
13 D8000-DFFFF (default)
JP5: Clear CMOS Content
JP5 Setting Function
1 3Pin 2-3
Short/Closed Clear CMOS Content
1 3 Pin 1-2
Short/Closed Normal Operation
JP7: External Battery Connector
JP7connects to an external battery to maintain the information stored in
the CMOS RAM in case the built-in battery malfunctions.
Pin # Signal Name
1 Vcc
2 N.C.
3 Battery GND
4 Ground
14
Internal Battery (default)
14
External Battery
JP8: On Board VGA Enable/Disable
The on board VGA jumper, by default, is set to VGA Enable (pin 1-2
short). To disable the VGA, short pin 2-3.

Chapter 2 Installations
16 CI7BM User’s Manual
JP9: RS232/422/485 (COM2) Selection
COM1 is fixed for RS-232 use only.
COM2 is selectable for RS232, RS-422 and RS-485.
The following table describes the jumper settings of this connector.
COM2
Function RS-232 RS-422 RS-485
Jumper
Setting
(pin closed)
all
jumpers
open
1-2
3-4
5-6
7-8
11-12
15-16
17-18
19-20
23-24
1-2
3-4
5-6
7-8
9-10
11-12
13-14
15-16
17-18
19-20
21-22
1 •
•2 1
••2 1
••2
3 •
•4 3
••4 3
••4
5 •
•6 5
••6 5
••6
7 •
•8 7
••8 7
••8
9 •
•10 9
•
•10 9
••10
11 •
•12 11
••12 11
••12
13 •
•14 13
•
•14 13
••14
15 •
•16 15
••16 15
••16
17 •
•18 17
••18 17
••18
19 •
•20 19
••20 19
••20
21 •
•22 21
•
•22 21
••22
23 •
•24 23
••24 23
••24
Jumper
Illustration
JP9 JP9 JP9
JP12: On Board LAN Enable/Disable
JP12 Setting On Board LAN
Open Enable
Short Disable
This manual suits for next models
1
Table of contents
Other IBT Technologies Computer Hardware manuals
Popular Computer Hardware manuals by other brands

Orban
Orban OPTIMOD 5750 operating manual

Dolby Laboratories
Dolby Laboratories CP45 Installation and alignment manual

Hama
Hama USB 2.0 / Fire Wire Combo Operating instruction

TAG MCLAREN AUDIO
TAG MCLAREN AUDIO AV192R Manufacturing Instructions

ioSafe
ioSafe 1513+ quick start guide

McIntosh
McIntosh MX123 owner's manual