ICA Duster 3000 Manual

Duster 3000
Operations & Maintenance Manual

Congratulations!
By choosing the Island Clean Air Duster 3000, you have acquired a lifetime of clean
air! The Duster 3000 was developed after years of research and development to find
a solution to the problem of poor indoor air quality. Constructed of only the highest
stage filtration process represent a dramatic breakthrough in the application of
modern air cleaning technology. The instructions on the following pages will walk
you through the setup and operation of the Duster 3000.
Parts Diagram
Parts List
1: Housing Assembly
2: Lexan Top Filter Shroud
3: Power Cord
4: Motor
5: Blower
6: On/Off Power Switch
7: 2 Light Indicator Panel
8: Digital Airflow Gauge
9: Quick Release Latches
10: Rubber Filter Seals
11: Green Pre-Filter Pad
12: HP90 Pleated Intake Filter
13: CF2R Activated Carbon Filter
14: MP85 Top Filter (or optional AC24
Activated Carbon Top Filter)

Warnings Before Use:
The operation of this unit does not exclude the proper use of industry approved
respirators and Island Clean Air Inc. cannot guarantee health benefits.
This machine is not to be used in hazardous locations, where explosive,
combustible, corrosive, or conductive dust, vapors, or gases are present.
Use of the Duster 3000 without filters or with non-ICA branded filters will void
the warranty.
Duster 3000 Setup Step 1: Uncrate the Duster 3000
Remove all
front wooden panels with a #2 Philips screwdriver or power tool.
.
Roll the Duster 3000 off the skid.
Remove the plastic bag.
Duster 3000 Setup Step 2: Install the Intake Filters
Remove the three intake filters from their boxes.
Insert the intake filters in front of the preinstalled carbon filters. Make sure that
the black Velcro pull tabs attached to the carbon filters are not pinched
between the filters.
Secure the intake filters with the Velcro tabs located on both sides of each filter.
Correct
Incorrect
Proper sealing of the intake filters will prevent dirty air from bypassing the
metal framed intake filters. Improper sealing will plug up the carbon filters and
the top filter.
Duster 3000 Setup Step 3: Plug in the Duster 3000
Locate an electrical outlet that is capable of handling the Duster 3000:
110-120Vac, 12A, 60Hz, 1Ph
If connected to a circuit
Make sure your electrical power panel is capable of handling a 12A load in
addition to your current usage. Overloading your panel may not allow the
Duster 3000 to function correctly or to its full airflow capacity.
Roll the Duster 3000 into position, plug it in, and turn it on.

Digital Airflow Gauge / Operating Lights
The digital readout indicates the airflow volume in cubic feet per minute (CFM).
Optimal airflow with clean filters should be over 3000 CFM.
As the filters trap particles, the CFM will drop.
The green light indicates that the machine is on and is in good working order.
The yellow light indicates that the filters are dirty and need cleaning or
replacing.
The Duster 3000 will automatically shut down when the yellow light comes on
to prevent permanent damage to the motor.
The yellow light has been factory preset to go off around 2300 CFM or lower.

Island Clean Air Filters
Each ICA filter has been engineered to provide maximum filtration with calibrated
velocities to capture harmful airborne particulates. Using non-ICA branded filters in
the Duster 3000 will: not seal properly, impede airflow, jeopardize employee
safety, int
void the warranty. Be sure to turn the Duster 3000 off before removing or cleaning
any filters.
*** Proper Cleaning & Maintenance
Will Prolong Filter Life ***
Lower Filters
The Duster 3000 has three sets of filters around the base of the unit. These
perform the majority of the air filtration and require routine maintenance.
Green Pre-Filter Pad (Part #11703)
Filters dust and large particles.
Clean daily or weekly.
Clean by vacuuming the front of the green pad.
Remove from intake filter and blow out with
compressed air. Do not pressure wash.
Pleated Intake Filter (Part #11204)
Filters dust and particles down to 1 micron.
Clean daily or weekly.
Clean by unhooking the Velcro straps on the sides
and removing from the Duster 3000. Remove
green pad. Vacuum pleats and/or blow with
compressed air.
Activated Carbon Filter (Part #11406)
Absorbs VOCs, fumes, and odors.
Not cleanable.
Replace when it weighs over 25lbs.

Top Filters
The Duster 3000 has two options for the top filter. The standard unit has the MP85
Top Filter and the Fume Control unit has the AC24 Activated Carbon Top Filter for
additional fume absorption.
MP85 Top Filter (Part #11602)
Filters smaller particles down to 0.3 microns.
Not cleanable. As it gets dirty, it will slowly
change color from white to dark gray.
Replace when airflow is too restricted.
AC24 Activated Carbon Top Filter (Part #11401)
Absorbs VOCs, fumes, and odors.
Not cleanable.
Replace when it weighs over 47lbs.
Top Filter Replacement
1. Open the four latches located on the sides of the Duster 3000
2. Lift and remove the Lexan top filter shroud.
3. Lift and remove the old top filter and replace with new top filter.
4. Reinstall Lexan top filter shroud.
5. Close the four latches.
General Maintenance
Once a year, we recommend a general cleaning by removing all filters and
using compressed air to blow out any accumulated dust on and in the Duster
3000.
The metal surfaces and Lexan top filter shroud can be wiped with warm water
and detergent, avoiding the electronic components.

Troubleshooting
The Duster 3000 is designed to run when connected to an adequate power supply
and with all filters installed and cleaned. Most issues can be solved by:
Ensuring adequate power is supplied to the unit (15A at 110V). We highly
suggest using an isolated circuit so that the unit does not have to share power
with other equipment.
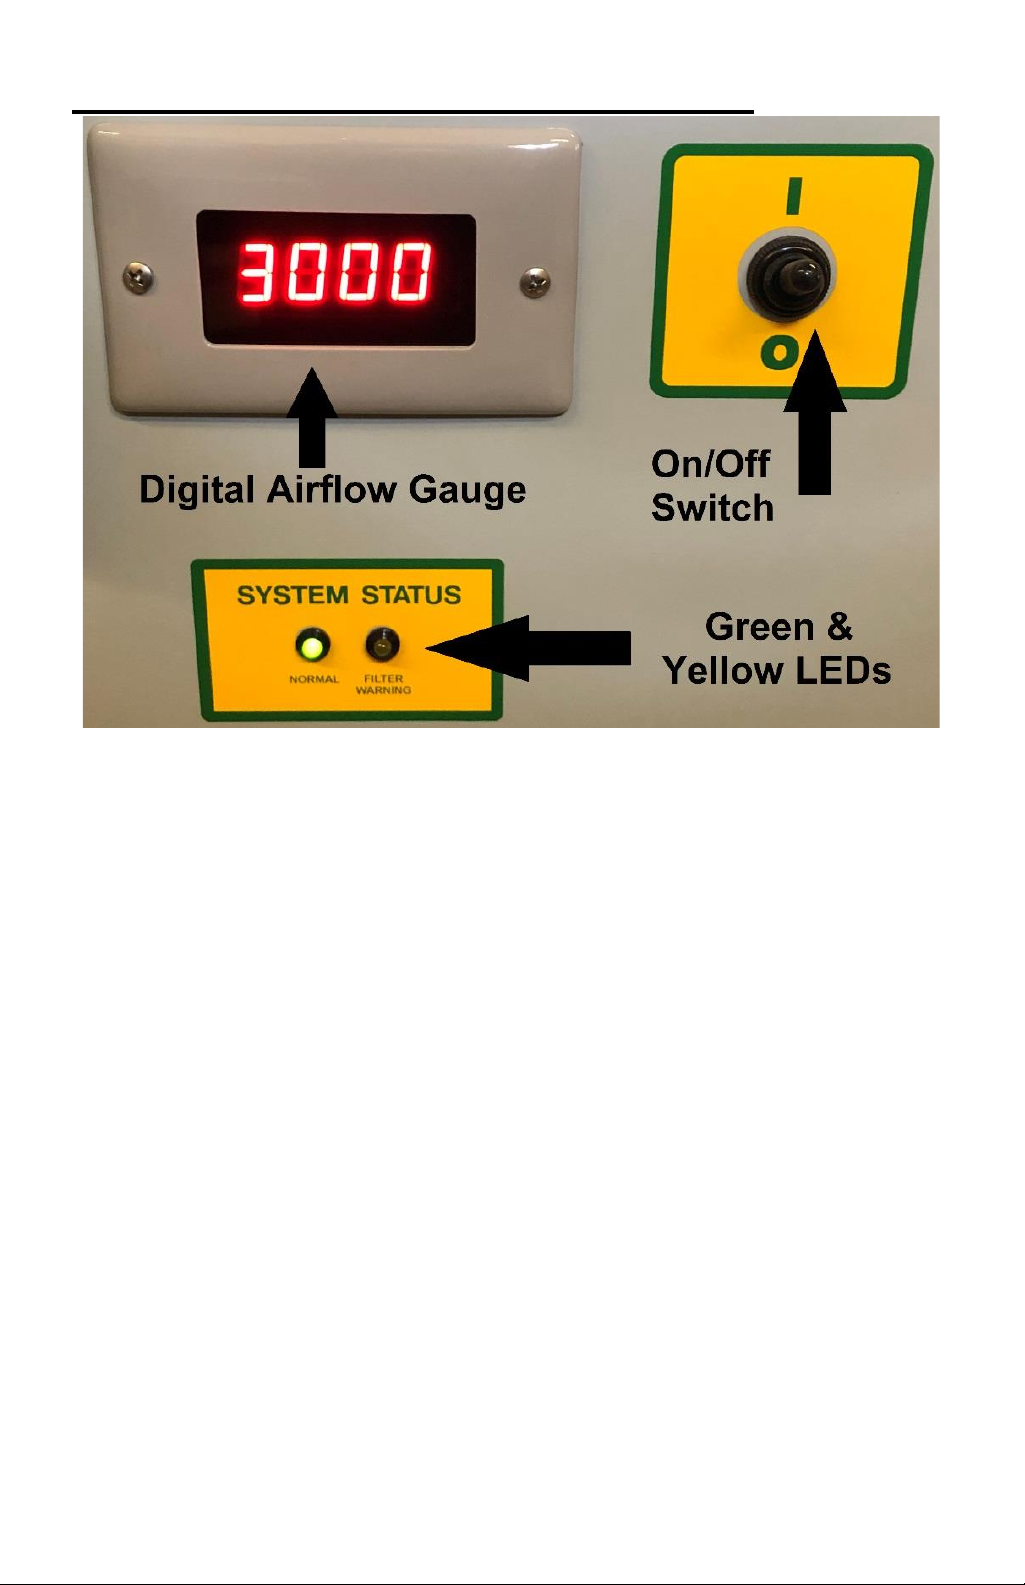
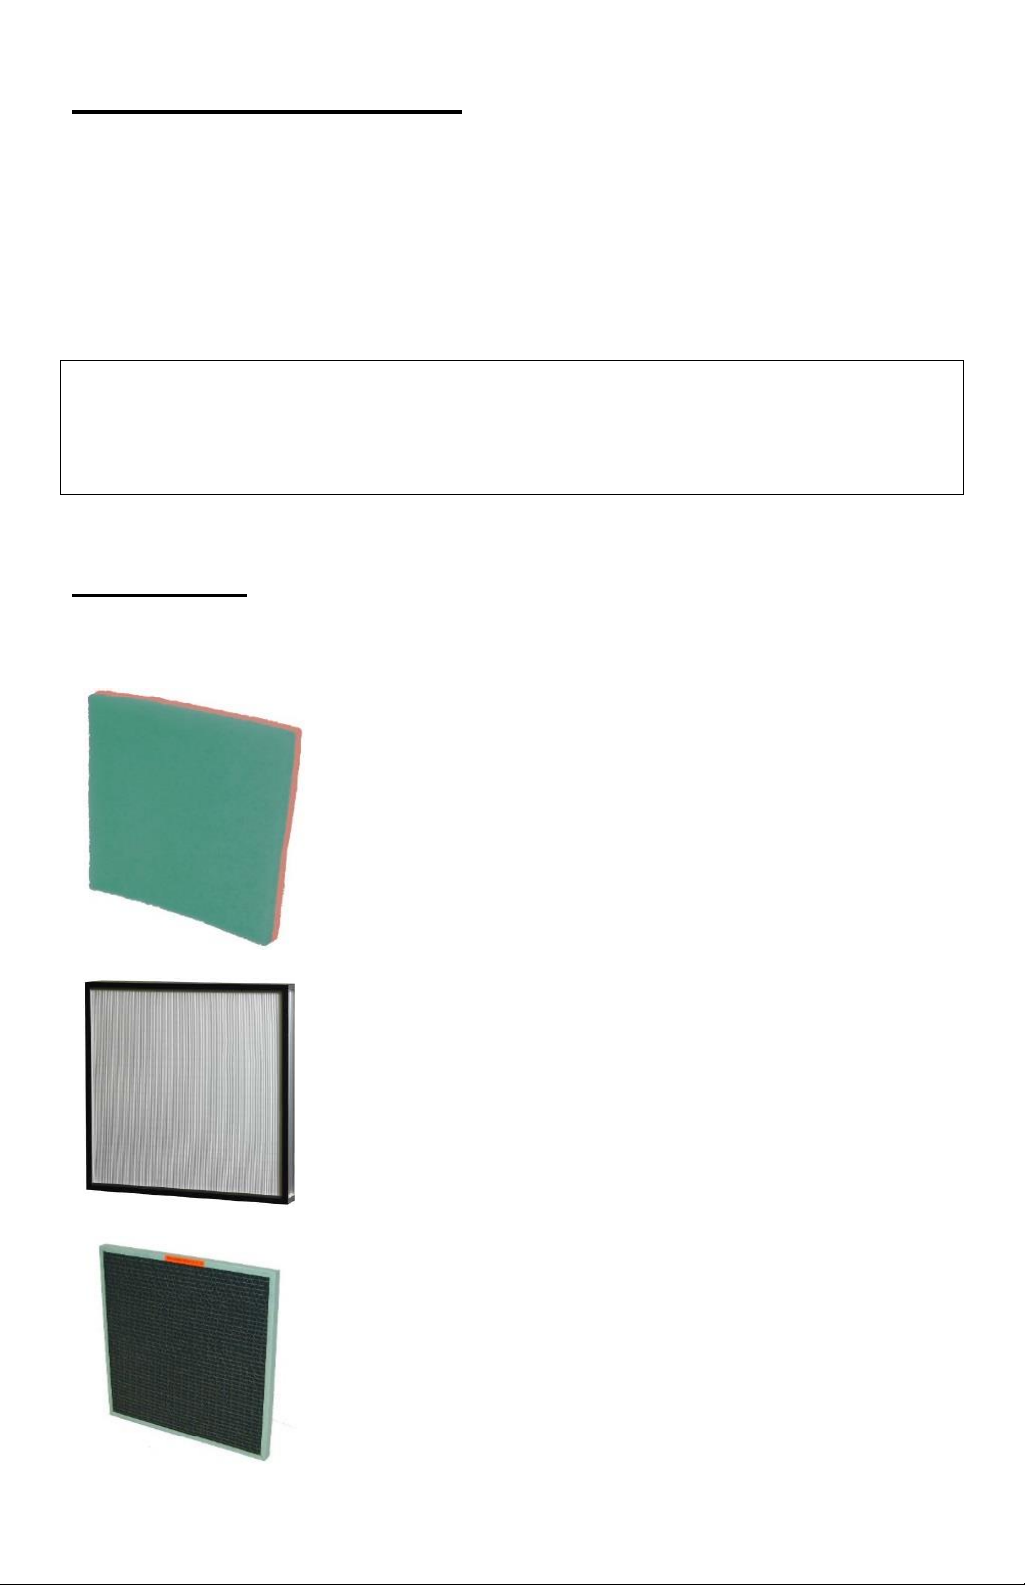
Ensuring all filters are installed correctly.
Ensuring all filters are adequately cleaned and replaced when necessary.
If the above does not solve the issue, please contact ICA at 1-800-661-8211.
Warranty
In order to validate your warranty, the Warranty registration card must be
completed and returned to ICA.
All products made by ICA are warranted to be free of defects in materials and
workmanship for a period of one (1) year from the date of original purchase.
This limited warranty does not include filters, cleaning, or damages caused by
neglect or misuse and will cease if the product is resold, rented, or otherwise
disposed of. Only factory original filters are recommended for use with this
product. The use of any other filters not specifically approved of or sold by ICA
may affect the performance and safety of the product and will void this warranty.
In no event shall ICA be liable for any indirect, incidental or consequential
damages from the sale or use of this product. ICA does not guarantee health
benefits. This applies both during and after the term of this warranty.

ISLAND CLEAN AIR INC.
#101 - 326 E. Kent Avenue South
Southbridge Business Park, Vancouver, BC, V5X 4N6, Canada
Tel: (604) 322--8674
www.islandcleanair.com
Committed to Green
ATEX Approved
CSA Certified
Air Resources Board
Printed in Canada Specifications subject to change without notice May 2020
Table of contents
Other ICA Air Cleaner manuals
Popular Air Cleaner manuals by other brands

Lifebreath
Lifebreath Lifebreath TFP3000HEPA Operation and installation manual

Loctite
Loctite LOCTITE 97612 operating manual

turbionaire
turbionaire abitat silk instruction manual

Johnson & Johnson
Johnson & Johnson Ethicon MEGADYNE Smoke Evacuator Performance guide

Vork Health
Vork Health VK-6059AW user manual

Sunbeam
Sunbeam 2585 owner's manual

Hunter
Hunter 37711 owner's manual

Kampmann
Kampmann KA-520 XL quick start guide

Sharper Image
Sharper Image EVSI-AR60 Instruction manual and warranty information

DH Lifelabs
DH Lifelabs Aaira Mini quick start guide

Daikin
Daikin MC40YPVM Operation manual

Airius
Airius AIR PEAR Series PRODUCT INFORMATION & INSTALLATION GUIDE