ICARO paragliders PICA 2 User manual

Page 1
Version 2 / PPG / 2022
MANUAL
Version 2/PPG/2022

Page 2
Version 2 / PPG / 2022
TABLE OF CONTENTS
TO GET TO KNOW YOUR PICA 2 ...................................................................................................5
FLYING WITH THE PICA 2 ....................................................................................8
FLIGHT PREPARATION............................................................................................................................ 8
LAUNCH PREPARATIONS ........................................................................................................................9
LAUNCH................................................................................................................................................9
ACTIVE FLYING....................................................................................................................................10
FLYING WITH ACCELERATOR ................................................................................................................11
TURNING ............................................................................................................................................11
LANDING.............................................................................................................................................11
DESCENT TECHNIQUES.....................................................................................12
BIG &SMALL EARS .............................................................................................................................12
B-LINE-STALL .....................................................................................................................................12
SPIRAL DIVE .......................................................................................................................................12
WINGOVER .........................................................................................................................................13
WHAT HAPPENS WHEN IT HAPPENS?.............................................................13
KNOTS AND TANGLES ..........................................................................................................................13
DEEP /PARACHUTE STALL...................................................................................................................13
ASYMMETRIC COLLAPSE......................................................................................................................14
SYMMETRIC COLLAPSE........................................................................................................................14
EMERGENCY STEERING.......................................................................................................................14
NEGATIVE SPIN...................................................................................................................................14
FULL STALL ........................................................................................................................................14
FLYING WITH MOTOR (PPG)..............................................................................15
CARE INSTRUCTIONS, REPAIRS, INSPECTION ..............................................19
CARE INSTRUCTIONS...........................................................................................................................19
REPAIRS.............................................................................................................................................20
TERMS OF THE WARRANTY..............................................................................21
ANNEX..................................................................................................................23
WARRANTY CARD ...............................................................................................................................23
USERS NEEDS FOR INSPECTIONS .........................................................................................................23
INSPECTION INSTRUCTIONS .................................................................................................................23
PART LIST ...........................................................................................................................................24
LINE PLAN ALL OVER (ALL SIZES) ..........................................................................................................25
LINE TYPE,LENGTH AND TITLE (ALL SIZE)...............................................................................................25
DESCRIPTION OF THE RISERS...............................................................................................................29
DESCRIPTION OF THE CANOPY .............................................................................................................30

Page 3
Version 2 / PPG / 2022
Congratulations on buying your PICA 2
and welcome to the family of ICARO - pilots!
Before you get to know your glider please read the
manual, there is important information inside.
Your PICA 2 is pattern tested in A. Therefore, the glider is a “paraglider with good
passive safety and forgiving flight characteristics. It is relatively resistant to
abnormal flight conditions. It is appropriable for all pilots including pilots of all
training levels.”
The flight maneuvers during the certification process should not be
overrated. Certification results provide only little information when you are
flying in thermically active and turbulent air because the glider classifications
serve to inform solely regarding the performance of a paraglider during
extreme flight maneuvers in stable air conditions.
The PICA 2 in the sizes S, M, ML and L are registered by the Direction générale
de l'aviation civile (DGAC) and can therefore be used as a motor-driven paraglider
(PPG). It may be only used for those purposes described in this manual.
It is strictly prohibited to fly the PICA 2
•under the influence of drugs or alcohol,
•in insufficient experience or training of pilots,
•without guilty license,
•beyond the minimum and maximum recommended Take Off- Weight,
•with damaged glider, lines, risers or harness
•in the rain, in snow, in the clouds and fog and in turbulent weather
conditions,
•with motor drive (except size S, M, ML and L)
•tandem- flying and Aerobatics.
PICA 2 with the motorized risers may only be used for flights without motor if
the riser is attached to the lower attachment point, the trimmers are closed
and the straps A, A1, B and C are the same length.
The trimmers may not be used to increase the speed in flight without motor,
otherwise the EN type test is no longer valid. Only the accelerator is to be
used for this.
If you cannot keep your glider under control, use the rescue system in good time.
Always pay attention to ground distance.
Our products are made with great care and state of the art. Each glider before it is
delivered to the dealer or flight school is checked by ICARO paragliders (incoming
test). This date is entered in the identification plate and as well guarantee as the
first 2-year-check period starts.
On that score an approved ICARO dealer or teacher at the flight school must
inflate a new ICARO paraglider in the wind or should carry out the first flight
before the wing is handed over to you. This date is entered in the
identification plate and as well warranty as the first 2-year-check period

Page 4
Version 2 / PPG / 2022
starts. If this seal is missing, it must be assumed that this glider is not
identical in construction with the model tested at the specification center.
The use of this paraglider is entirely at your own risk. Every pilot bears the
responsibility of his/her own safety.
To get to know your glider, we recommend that you practice with your glider on the
ground. Pulling up in flat gradients is great practice for fine tuning your launch
techniques. Here you can get to learn the reactions of your glider without any stress
and hectic. Ground practice pays off in the air.
All technical data and instructions were drawn up with great care.
ICARO paragliders cannot be made responsible for any possible errors in this
manual.
Important information in this manual is written in fat cursive writing. Any important
changes to this manual will be published in our homepage
(www.icaro-paragliders.de).
Any modification to the paraglider (lines, canopy, risers) is dangerous and
can lead to unwanted reactions of the paraglider. When our paragliders leave
production, they are within the allowable tolerance range. This is very narrow
and must not be changed under any circumstances, as the optimal
relationship between performance, handling and safety is no longer
guaranteed, no longer corresponds to the type-tested paraglider and is
therefore no longer type-tested.
You can only fly your glider with a valid flying license and in accordance with local
rules and regulations. The manufacturer or distributor assumes no responsibility for
accidents occurring while using it.
Every pilot must ensure that the glider is properly checked at regular intervals.
Many countries have specific regulations or laws regarding paragliding activity. It’s
your responsibility to know and observe the regulations of the region where you fly.
Occasionally flown extreme flight or Acro maneuvers do not pose any danger
to the structure and strength of the material. However, frequent extreme loads
accelerate the aging process considerably, so that a check must be carried
out earlier on gliders that are frequently subjected to these maneuvers. The
same applies to gliders that are flown at sea or in salty air for a longer period.
Environmental aspects:
The materials of which a paraglider is made require a special waste disposal.
So please send disused gliders back to us. We will care about a professional waste
disposal without costing for you.
Please do our nature-near sport in a way which does not stress nature and
environment!
Please do not walk beside the marked ways, do not leave your litter, do not make
unnecessary loud noises, and respect the sensitive balance in the mountains.

Page 5
Version 2 / PPG / 2022
To get to know your PICA 2
Allowed for training
yes
Certified / allowed for aerobatics
no
Certified / allowed for flying with passengers
no
Certified / allowed for towing
yes
Certified / allowed for flying with motor drive (only size S, M, ML and L)
yes
Technical data
XS
S
M
ML
L
Certification LTF/ EN
A
A
A
A
A
Number of cells
38
38
38
38
38
Number of risers
3+1
3+1
3+1
3+1
3+1
Riser length
mm
480
480
520
520
520
Maximum way of the accelerator
mm
90
90
110
110
110
Trimmer
mm
none
none
yes
yes
yes
Weight of the glider
kg
3,7
3,9
4,3
4,5
4,9
Wing Area flat
m²
20,5
22
25,5
27,5
29
Wing Area projected
m²
17,4
18,7
21,6
23,3
24,6
Wingspan flat
m
10,1
10,5
11,3
11,7
12,1
Wingspan projected
m
7,9
8,2
8,8
9,1
9,4
Aspect Ratio
5,0
5,0
5,0
5,0
5,0
Aspect Ratio projected
3,6
3,6
3,6
3,6
3,6
Take of weight.
kg
56-75
65-85
80-105
95-115
110-130
DGAC Homologation
---------
yes
yes
yes
yes
DGAC Weight range (PPG)
kg
---------
60-105
80-115
95 - 125
110 - 140
Length of motor risers
mm
---------
520
520
520
520
Trimmer
---------
yes
yes
yes
yes
Maximum way of the trimmer
mm
---------
100
100
100
100
Accelerator
---------
yes
yes
yes
yes
Maximum way of the accelerator
mm
---------
Maximum power
kW
25
30
30
30
Check interval
24 months or 150 operating hours,
depending on what occurs sooner.
PICA 2 is a single-seated paraglider. The PICA 2 has good resistance to abnormal flight
conditions and is suitable for pilots of all training levels who place value on the highest
possible level of passive device safety. For pilots with less than 15 to 20 flight hours per

Page 6
Version 2 / PPG / 2022
year, only EN A-classified paragliders are recommended. He is neither suitable for
aerobatics nor pattern tested.
In normal flight, the flight and control behavior of the PICA 2 requires mastery of the flight
techniques taught in the basic training. Mastering active flying is essential for safe thermal
flights.
In the event of malfunctions, it is advantageous to have the basic theoretical knowledge of
how to avoid and control malfunctions learned in the training course, although devices in
this category do not place any significant demands on the pilot.
It is therefore recommended to learn and practice both troubleshooting and rapid
descent aids during safety training.
The PICA 2 is neither suitable nor approved for aerobatics. All maneuvers in which a bank
angle of 60° or a pitch angle of 30° are exceeded are considered aerobatic, as well as flight
maneuvers in which the canopy is flown from behind.
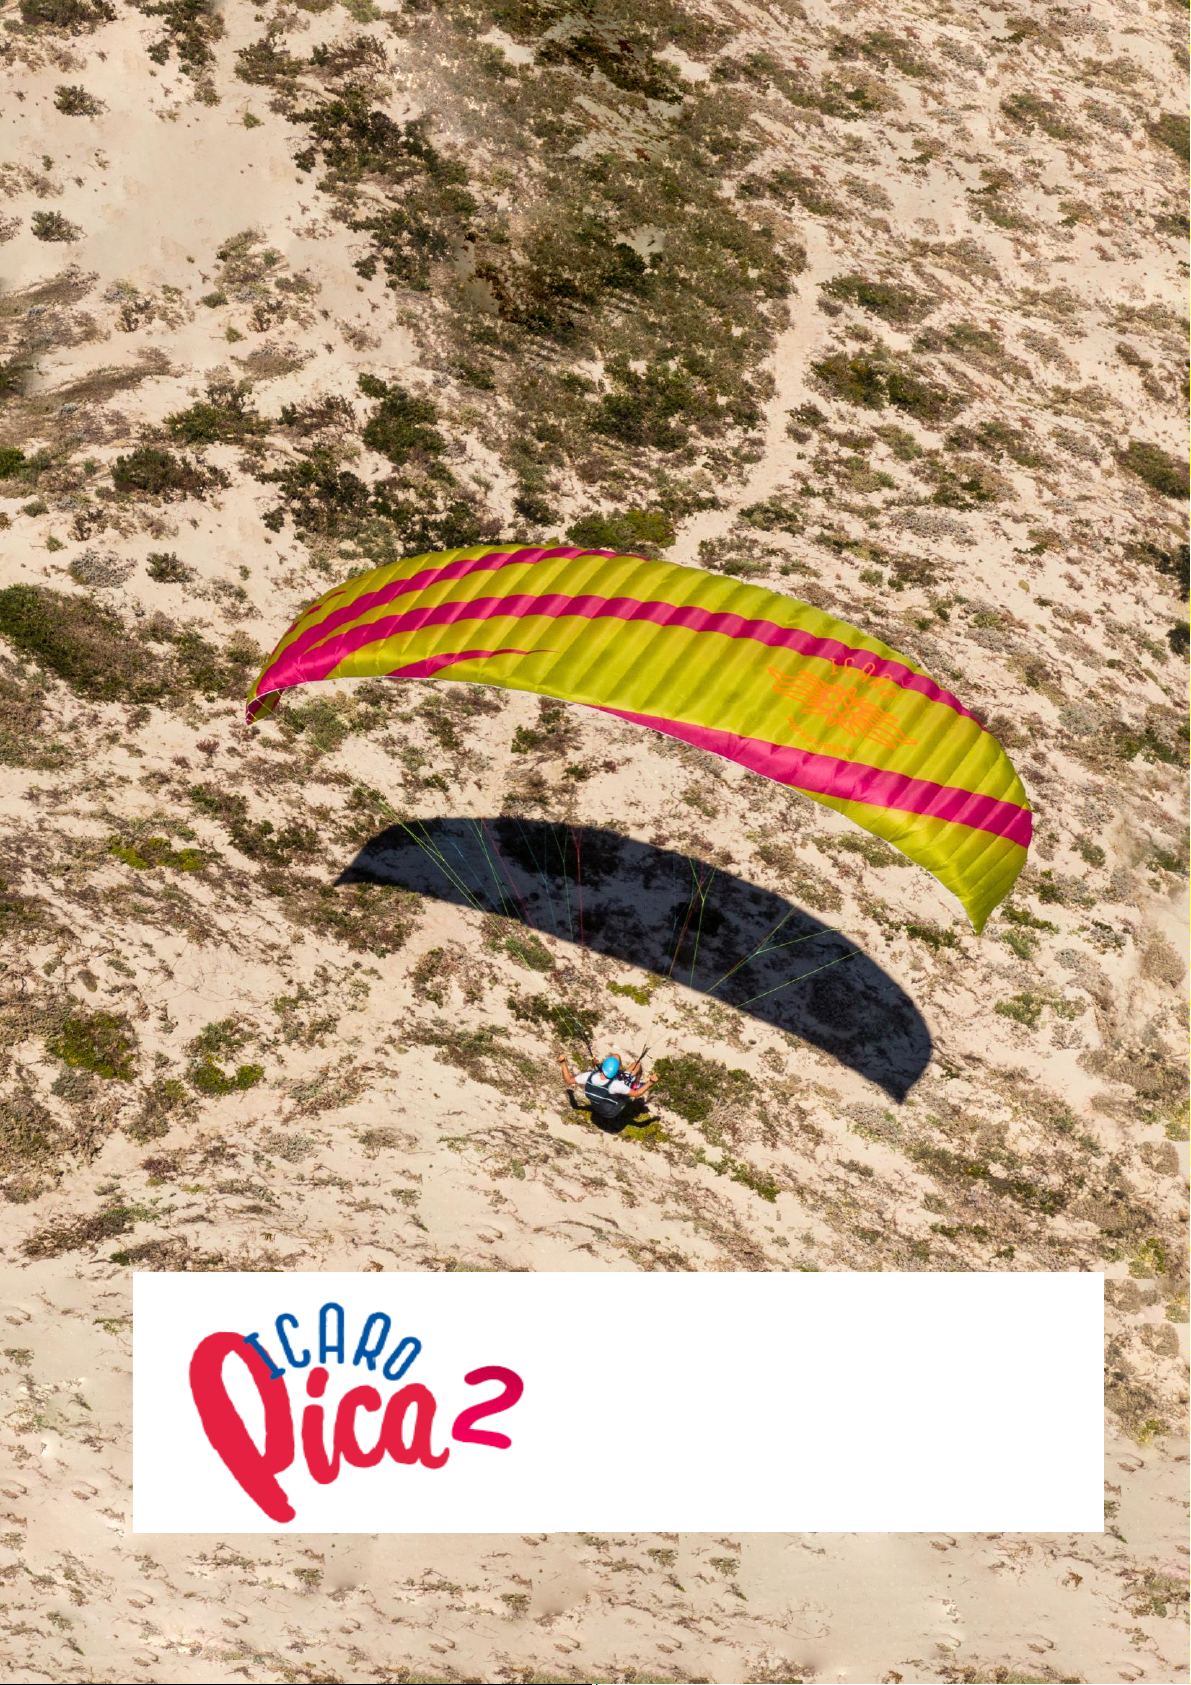
The PICA 2 in sizes S, M, ML and L is registered by the Direction générale de l'aviation
civile (DGAC) and approved as a motorized paraglider. You can find additional information
about flying with a motor under a separate article.
Canopy
The conventionally constructed profile nose with rods and the rearwardly offset
suspension points on the A-level with a newly calculated performance profile and the
mixed material Skytex 38 and STA 15 Techfiber Services Inc. are the essential features
of the new PICA 2.
The advantages that this new profile offers the pilot are:
•The glider starts better and easier, which makes training operations much easier.
•A better dynamic pressure is achieved over the entire range of the angle of attack,
because: the higher this is, the more stable the canopy is over the entire speed
range.
•The paraglider, stalls later, and gives the pilot a larger control line area.
•In high-speed flight, the profile is more dimensionally accurate than with
conventional profiles and
•The reduced air resistance results in better gliding and climbing performance. In
addition, different fabric materials on the upper and lower sail reduce the weight, but
still guarantee the highest form and aerodynamic stability and strength. The dirt
outlet openings on both sides of the leech make it easier to clean the inside of the
canopy. The coating makes the fabric water-repellent, UV-stabile and air-
impermeable. Between the single groups of main lines are taut ribbons sewn in,
which are regulating the tension of the sail.
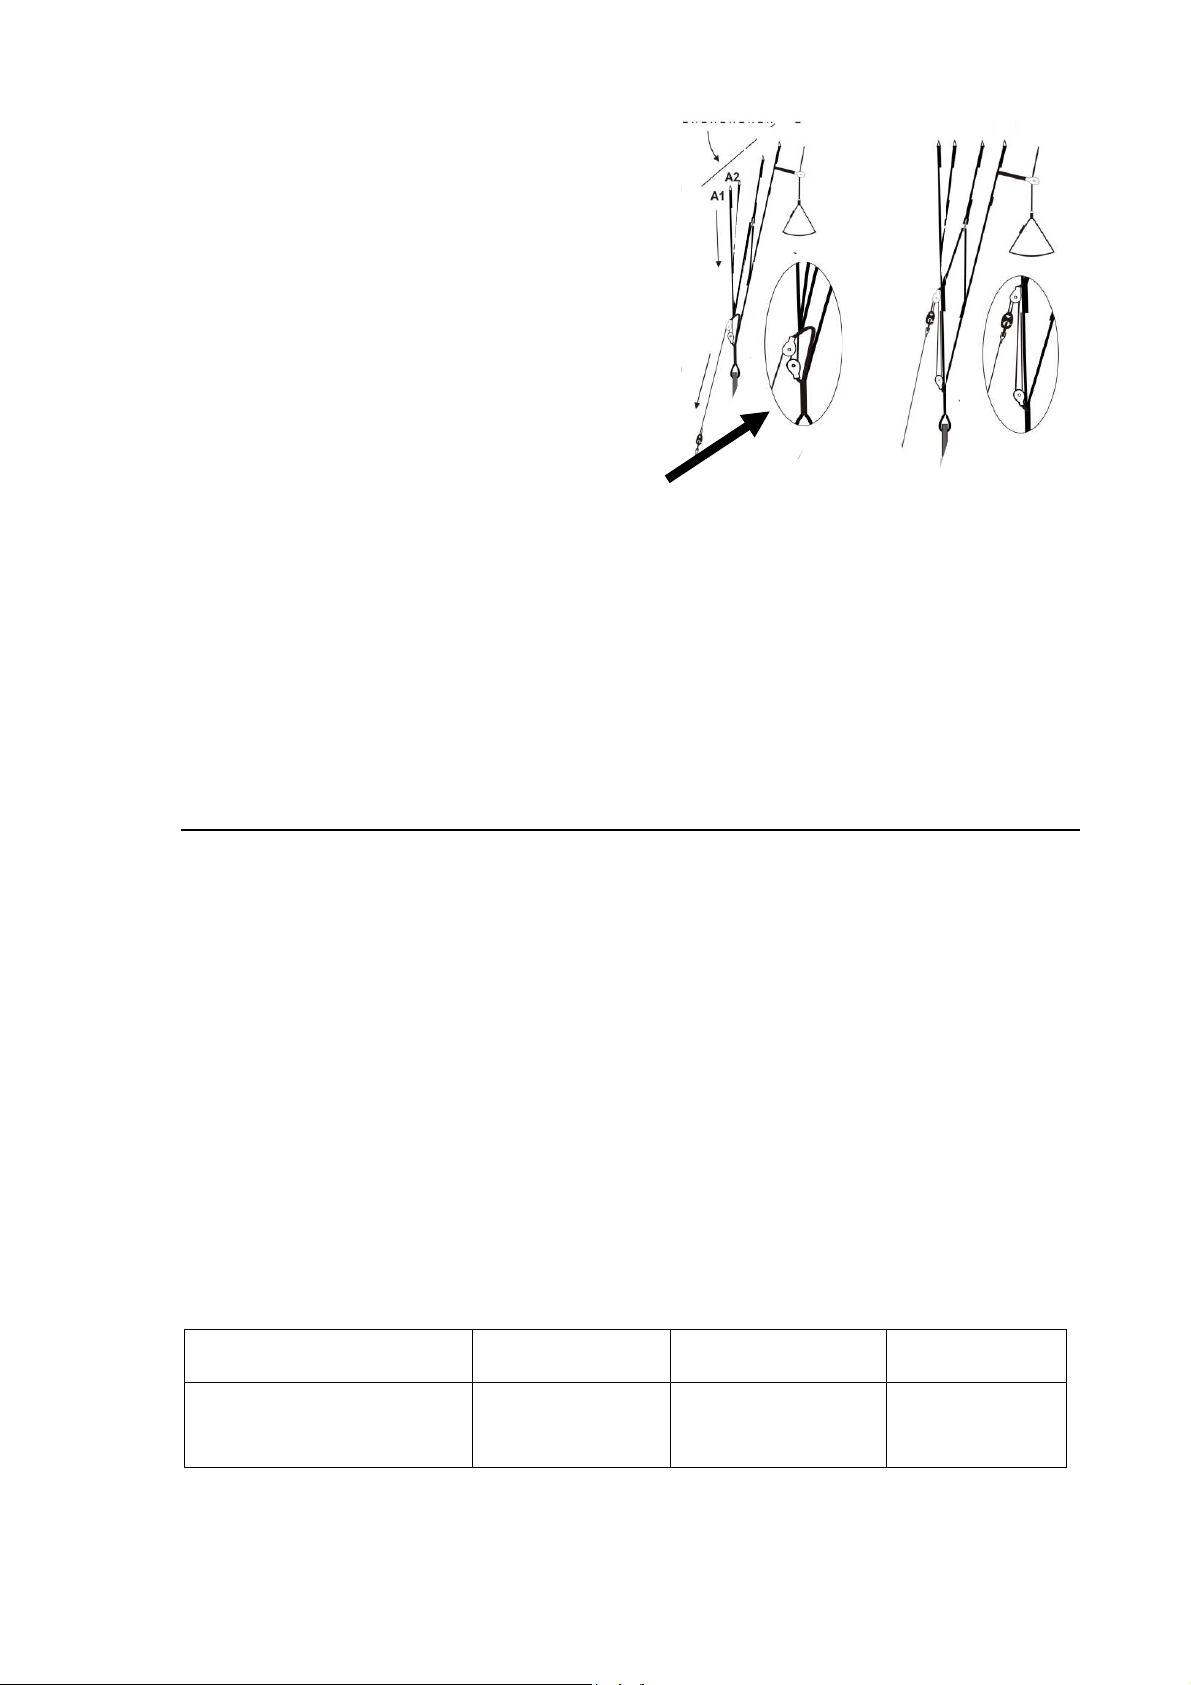
Lines
The entire line system is formed from individual lines, which are
sewn and looped at both ends. The lines and stitching are
subject to rigorous production controls, to ensure high and
consistent manufacturing quality.
Upon delivery, the PICA 2 is provided with an “anchor stitch”
trim loop on the C level. These are used to compensate for the
unavoidable changes in length of the lines, which depend, among other things, on
climatic conditions, the storage of the glider, maneuvers, the type of line used, etc.

Page 7
Version 2 / PPG / 2022
As a rule, the A and B planes stretch slightly due to the higher load in the front area
of the canopy, while the C-level mostly remains unchanged or even shrinks a little
under certain circumstances. This makes the glider a little slower due to the higher
angle of attack.
The first signs of a trim change are
• worse start
•Changed flight behavior, the glider is slower and more sluggish or
•Tending to deep stall when flying with big ears.
After the first 15 to 20 flight hours, the lines stretch or shrink the
most, so that ICARO Paragliders recommends that an initial trim
check be carried out by an authorized workshop.
If one of these possibilities occurs, we recommend opening
the trim loops on the C level step by step to counteract these
effects (first, instead of the anchor stitch, use a double loop
. I
f
nothing changes in the above properties, then open the
double loop and hang the line in the line lock).
If there is still no improvement, the glider must be checked and measured by
qualified personnel. He has the option of either trimming the canopy without
changing the lines or, in the worst case, replacing the affected lines with new
ones.
If you are not sure or have any questions, please contact your dealer.
The PICA 2 is delivered from the factory with the best brake position for most
pilots. But tall or short pilots, or those with a harness with non-standard attachment
points might consider it necessary to change the position of the brake handles.
If the brakes are to be shortened, it is extremely important to avoid the adjustment
affecting the glider's trim speed. There must always be some slack in the brakes
when they are fully released. This can be checked with the glider inflated above the
pilot's head. There should be a noticeable bow in the brake lines, and the brakes
should be having no effect on the shape of the trailing edge.
If you need to change the brake line lengths, do it maximum
5 cm at a time, and check it at an easy training hill. Check especially that both lines
are the same length, as any asymmetry will lead to tiring and possible dangerous
flying characteristics.
Check with ICARO paragliders before you intend to change the length of the
lines. Any unauthorized change to the length of the lines (including the
control lines) that is not approved by ICARO paragliders is dangerous, leads
to unwanted reactions of the paraglider, and the loss of the type test and is
therefore prohibited.
Risers
The Glider has 3-fold risers with separated A-risers an acceleration system which
will be activated with a foot bar.
A special riser with trimmer and accelerator is optionally available for PPG.
The PICA 2 with the motorized risers may only be used for flights without
motor if the riser is attached to the lower attachment point, the trimmers are
closed and the straps A, A1, B and C are the same length.

Page 8
Version 2 / PPG / 2022
Acceleration system
When flying normal all risers have the
same length. When using the accelerator
system, the risers are shortened by a
constructive exactly defined length.
Therefore, the angle of attack of the
canopy is smaller and speed increases.
The length of the accelerator is adjusted to
the left and right of the foot pedal so that
when your leg is fully extended, then the
acceleration is at maximum –both rollers
are touching.
Please pay attention that the glider will not be pre-accelerated, while the
accelerator is loosened, when the acceleration ropes are set too short.
Assembling the accelerator is reliant upon the harness, e.g., numbers of
return pulleys, rope guide …
The more turbulent the weather conditions and when near the ground, the
less acceleration should be used.
Do not use the acceleration system and brakes at the same time! It is very
dangerous to use both simultaneously as it can result in serious collapses.
Flying with the PICA 2
Harness
The PICA 2 is certified for use with harnesses GH type. Practically all modern
harnesses are GH type harnesses. Older harnesses with fixed cross belts (GX type)
are not certified and should not be used.
The adjustment of the harness chest strap controls the distance between karabiners
and affects the handling and stability of the glider. Excessive tightening the chest
strap increases stability but also the risk of twists following glider collapse, and it
also increases the frequency of getting collapses due to poor feedback from the
glider.
The risk of twisting is also strongly affected by the seating position of pilot. Flying in
a laid back (reclined) position makes it much more difficult to react in time to prevent
riser twisting. With the chest strap in a more closed position the glider also has
more tendency to maintain a stable spiral, lengthening of the chest strap gives more
feedback from the glider but decreases stability.
ICARO paragliders recommends following settings:
Take-off weight
< 80kg
80 kg -100 kg
> 100kg
Horizontal distance of
the main karabiners
38 cm –42 cm
42 cm –46 cm
46 cm –50 cm
B
C
A2
A1
B
C

Page 9
Version 2 / PPG / 2022
Flight preparation
•When choosing an area to lay out the glider before launching, try to find
somewhere that is relatively free of stones and sharp rocks. Pay particular
attention to the top surface, where the canopy touches the ground.
•Never step on your glider –stepping on it will weaken the cloth.
•We recommend keeping an eye on other pilots, spectators, and smoking people
near of the glider. Many of them do not appreciate the fragility of the lines and
cloth.
•Whilst unfolding your paraglider check the canopy and cell walls for damage.
Always take into consideration that the paraglider may have become damaged
during transportation.
•Make sure that no sand, stones, or snow get inside the canopy as the extra
weight collected in the trailing edge may slow down or even stall the glider.
Sharp edges damage the canopy.
•Check the lines for knots, twisting and damage, the brake lines for knots, kinks
and their symmetric. Loose or incorrect brake knots can cause serious accidents
through loss of the steering of the glider!
•Separate the line groups carefully and bring the risers in order. All lines must run
freely from harness to canopy. It is equally important that the lines are
unhindered and cannot get caught up during the launch.
•There should not be any lines underneath the canopy. If the lines wrap around
the canopy, this can result in injury or death!
•Check the rescue system (handle’s pins fixed in the loops and the closed cover
of your harness).
•Check your harness and make sure that all connections to pilot are correctly
closed. Check that all karabiners are closed and can not be opened accidentally
in flight and the risers are not twisted.
•Check canopy (all cells are open), wind direction and airspace.
Do not launch if there are any defects!!!
Launch preparations
Before every launch you should carry out the standard 5-point checking procedure.
Do the checks following the same sequence every time.
1. Helmet, harness, carbines closed.
2. Lines, risers, and accelerator/ trimmer, ok?
3. Leading edge open?
4. Wind direction and strength, ok?
5. Airspace and start area, ok?
Launch
The most important thing during the take-off is, like at all other gliders too, not the
force but the constancy of the pull.
At the start advice to fix the accelerator with the Velcro which is attached at the front
of the sitting board, to avoid tripping while pulling up the glider or when starting up.
Hold only the middle A risers and the handles of the brakes. When you pull on the
A-risers, the lines in the middle of the wing should be under tension before the lines

Page 10
Version 2 / PPG / 2022
on the wing ends. This ensures an even easier start. Use progressive pressure on
the A risers and the energy of our own bodies weight until the wing is fully inflated
overhead. The canopy is inflated quickly due to the super short lines. When there is
no pull from the lines and the wing is overhead, use slight pressure on the brake.
Look up and make sure that the canopy is fully inflated. After a few accelerating
steps and at the same time let go of the brakes gently, you will take off. Then use
slight pressure again on the brakes to fly at a speed with minimal sink rate.
When there is strong wind the reverse launch technique is recommended. Holding
the brakes, turn around to face the wing passing one set of risers over your head as
you turn. We suggest building a "wall" by partially inflating your glider on the ground,
thus sorting out the lines thoroughly.
Towing
•When towing, pay attention to the country-specific regulations and ensure that
the towing is only carried out by competent personnel.
•Before towing you should read the safety instructions for the towing equipment. •
For winch towing you must use a tow release that has been specially built and
approved for this purpose.
•Connect the tow release to the main attachment point for the carabiners
according to the manufacturer's recommendation.
•Direction corrections during the take-off phase and before reaching the safe
altitude are to be avoided.
•Care must be taken to descend at a shallow angle from takeoff to safety height.
•Do not overbrake during the towing process and always steer carefully, as the
glider flies with an increased angle of attack.
Active flying
Active flying in normal flight means that the wing is always kept at a safe angle of
attack and, if possible, vertically above the pilot. The moving air affecting the wing
often changes the angle of attack in an unwanted way. When flying into an upwind
the paraglider often bucks, the wing drops back, the angle of attack increases,
getting closer to a stall. In upwind the canopy pitches forward, the angle of attack is
reduced and there is the risk of a collapse. Both can occur symmetrically, on both
sides or asymmetrically, on one side only. It is impossible to control the angle of
attack by looking to the canopy. Look in the direction you are flying, changes in the
horizon inform the pilot about the canopy’s movements.
Braking is also an absolute must! If the canopy pitches forward, the angle of attack
decreases. In the case of strong forward pitching there is a risk of the canopy
collapsing due to its insufficient angle of attack. The pilot must therefore prevent the
canopy from pitching forward by pulling the controls down on both sides. Inversely,
the angle of attack increases if the wing drops back behind the pilot, e.g. when
entering into a thermal. The canopy is closer to stalling.
In these flight situations a significant braking movement by the pilot can lead to a
spin or a stall. When the wing drops back, the pilot therefore must not brake and/or
if the pilot is already holding the controls low, he must release them accordingly.

Page 11
Version 2 / PPG / 2022
Any change in the angle of attack immediately transfers in to a change in the control
pressure of the brakes. The control pressure presents the pilot with immediate
information on the angle of attack and on what the canopy is doing or about to do.
Flying with accelerator
When using the accelerator, be careful. The accelerator should be employed, to
compensate for high angles of attack and the associated potential risk of a stall. Do
not step too quickly because your glider will dive down from the strong change in
angle of attack. Put equal pressure on the speed bar with your feet until the pulley
touches the A-riser, and the glider will quickly gain speed and the sink speed
remains very moderate from beginning up to full speed.
The more turbulent the weather conditions and when near the ground, the
less acceleration should be used. Using the accelerator decreases the angle
of attack and can make the glider more prone to collapse.
Do not use the acceleration system and brakes at the same time! It is very
dangerous to use both simultaneously as it can result in serious collapses.
In flight without engine, trimmers must not be used, otherwise the EN type
approval is no longer valid.
Turning
A combined steering technique is suitable for every situation. The glider is agile and
reacts to steering impulses quickly and directly. Strong, one sided pulling of the
brakes brings the glider into an obvious side angle and the glider flies fast steep
curves until spiral dive begins.
If the brake lines are pulled too fast or too far the glider will be stalled!
A one-sided stall is signalized clearly by: The curves inner side of the wing is getting
soft, and nearly stops. In this case you have to release the brake lines!
Landing
Always stand up in the harness in the landing position very early to be able to react
as fast as possible to sudden events. Set up your final landing leg to face into the
wind to minimize groundspeed. If you leave the inflated leading-edge bang on the
ground, this can cause the cell walls to burst!
Do not brake too much, to avoid a stall of the glider in this very low altitude!
Do not reduce height by “pumping” with the brakes.

Page 12
Version 2 / PPG / 2022
Descent techniques
The methods described here can stress the material and structure of the
paraglider and the pilot to their physical and psychological limits. They
should therefore only be used for training and in emergency situations.
•Training of descent techniques and simulation of flight incidents (SFI)
should only take place at professional safety training seminars with
professional trainer and only while flying over water.
•Before inducing any exercise control the airspace beneath.
•During the exercises stay in contact with the canopy.
•If the glider is out of control, use your reserve parachute.
Big & Small Ears
The aim of this exercise is to descend in strong thermals. Only take the outer lines
of the A-risers in your hand, without releasing the brakes and pull down leaving it
run through your hands (use gloves!).
Sink rate increases but not the forward speed. If you use the acceleration system,
then higher sink speeds can be achieved.
Reopen the wing by pushing up with your hands and if necessary, then pump the
brakes with short symmetric movements. For directional control while using the big
ears, you should use weight shift.
Never attempt tight turns or spirals with Big Ears, as the A-lines will be over
stressed.
B-Line-Stall
B-Line-Stall is not so effective, furthermore stresses the material of the glider and
reduces operating life of the canopy. To enter and hold a B-line-stall requires
considerable strength.
It is very dangerous performing a B-line-stall incorrectly and following errors
must be avoided:
•pulling too far on the B-line-stall aid, so that the A-lines are pulled too,
•exit is too slow,
•releasing the B-line-stall aid without simultaneously pushing up with your
hands,
•using brakes during or directly after exiting,
•Brakes must not be shortened by twisting around your hand during the
exercise.
Spiral Dive
In a controlled spiral dive, the pilot applies an active flying technique in the same
way as when circling in thermals. The strong centrifugal forces in a spiral dive,
however, change the control pressure. It increases by a multiple of the force.
Even in moderate spirals, the pilot reaches double acceleration of gravity (2G).
Subsequently, the control pressure also doubles.
To initiate a spiral dive, look in the direction you want to go, roll your body weight in
that direction and at the same time smoothly pull down on the inside brake. The
PICA 2 will start to turn, and then drop into a spiral.

Page 13
Version 2 / PPG / 2022
In the spiral dive an uncontrolled acceleration of the canopy must be prevented. As
the canopy always accelerates via the outside of the wing, the spiral speed is
controlled via the outside brake by applying the active flying technique.
If the speed increases in an unwanted manner, pull the brakes further to slow
down. If the wing becomes too slow, it can be speeded up by releasing the outside
control.
If you pull abruptly and too far on the brakes, the canopy may enter a negative
spin. When entering a spiral dive keep the brake on the outer curve released.
The glider does not have a tendency for stable spiral dive.
If under certain conditions, it should go into a stable spiral dive then actively exit the
maneuver by bringing your weight into a neutral position, release the brakes of the
inner curve side and brake gently on the outer curve side until you notice that the
wing starts to level out. Then gently brake on the inside curve for several turns until
normal flights returns.
Wingover
The PICA 2 is an agile glider, and it is quite easy to get to an excessively high angle
of bank in just a few turns. Practice wingovers gently at first, as there is a chance of
quite large collapses at high bank angles.
What happens when it happens?
Knots and tangles
The best way to avoid knots and tangles is to inspect the lines before you inflate the
wing for take-off. If you notice a knot before, take off, immediately stop running and
do not take-off.
If you have taken-off with a knot you will have to correct the drift by leaning on the
opposite side of the knot and gently apply the brake line on that side too. You can
gently try to pull on the brake line to see if the knot becomes unfastened or try to
identify the line with the knot in it. Try to pull the identified line to see if the knot
releases. If the knot is too tight and you cannot remove it, carefully and safely fly to
the nearest landing place.
Be very careful when trying to remove a knot. When there are knots in the
lines or when they are tangled, do not pull too hard on the brake lines, there is
an increased risk of the wing to stalling or negative turn being initiated.
Deep / Parachute Stall
Your glider has been carefully designed to resist entering deep stall. Before exiting
a deep stall, please ensure that the brakes are fully released. Actively exit the deep
stall by reaching up and push forward with both palms on the A-risers or pull on
them. Avoid flying in very humid air or in rain. A wet canopy may have very
unpredictable flying characteristics, one of which is a radically increased risk of
deep stall.
Never pull the brake-lines during a parachute stall, because the glider would
go into a full stall immediately. If you find yourself flying in unavoidable rain
we strongly recommend that you avoid any sudden movements or radical

Page 14
Version 2 / PPG / 2022
brake line input, that you do not pull Big Ears or B-Line-Stall, and that you
steer clear of turbulence and avoid a deep flare on landing.
Asymmetric Collapse
While flying in turbulent conditions it may occur that a portion of your glider deflates.
However, just like in flying in turbulences, please pull gently on both brakes. Re-
inflation is speeded up by counteracting the turning movement of the canopy until
normal forward flight return. Then pump the brake line on the collapsed side.
If the canopy is in front of the pilot after an asymmetrical collapse, the pilot must
immediately and decisively break down the open side to prevent an uncontrolled
rotation. The same rule applies here: If the wing is ahead, braking is a must.
Sometimes, however, the angle of attack on the open, not-collapsed side is
relatively high and the wing is behind the pilot. Then a significant control movement
would cause a stall and its potentially extreme reactions.
If the collapsed part of the canopy is very big, you have to brake the open
side very dosed (not too much!) to avoid a stall.
Symmetric Collapse
Your PICA 2 normally re-inflates promptly in a symmetric collapse without pilot
input. Applying the brakes symmetrically will speed things up.
Emergency Steering
Should it no longer be possible to steer your glider, for example due to a broken
line, the glider may be steered by gently pulling on either rear riser.
By steering this way airspeed is reduced hardly. Therefore, for landing you
must change to the rear risers to control your glider. Handling will be more
direct so being careful not to pull too hard.
Negative Spin
If the pilot abruptly applies full brake to one side of the glider while the other side is
at zero brake, the faster side may fly around the braked and stalled side resulting in
a spin. Alternatively, if flying very slowly with almost full brakes on both sides, if one
hand releases one brake suddenly, while the other continues with full brake, the
glider may enter a negative spin. To exit a spin just do “hands up” to release the
brakes and the glider will return to normal flight.
If you do not have control over your glider and you are running out of altitude,
immediately deploy your reserve parachute.
Front stall
After a front stall of the canopy, the wing moves backwards while the pilot with his
higher mass moves further ahead. Wing behind, pilot ahead, significantly high angle
of attack –there is only one thing to do:
Do not brake or you run the risk of a dangerous stall.
The pilot must not pull the control lines before the canopy is at least above
him again. If the canopy then shoots forward dynamically, it is absolutely vital
to stop the motion in a consistent and decisive manner via the brakes.
Full Stall
Spin and full stall are both dangerous and somewhat unpredictable exercises.
Do not stall or spin your paraglider on purpose.

Page 15
Version 2 / PPG / 2022
To initiate a full stable stall, apply both brakes to maximum arm extension. If
possible, grasp the seat of your harness to assist keeping your arms locked. The
pilot will swing back under the canopy and finally the canopy will stabilize to a full
stall. Once in a stable stall, the exercise can be completed. Release the brakes just
a little and let the glider fill until it regains shape. Then release the brakes fully and
your glider will return to normal flight.
It is imperative that the pilot fully completes this exercise and holds on, as a
premature release while the glider is still falling back may cause the glider to
rapidly dive ahead past the pilot. There is a possibility of the pilot landing in
or entangling in the glider.
Flying with motor (PPG)
In this appendix to the PICA 2 manual, you will find all relevant information about
flying with a motor. This supplements the 3 chapters
•"Flying with the PICA 2",
•"How do I get back down?", and
•"What do I do if it happens?"
because these are basically also valid for flights with a motor.
Application area
The PICA 2 is ideal for powered flight due to its good all-round properties.
For this, however, the optionally available motor risers must be used, which
can also be used for flying without a motor.
Engine compatibility
The necessary test flights were carried out with a commercially available engine of
the medium power class (30 kW). Other engine models should, if they do not
exceed this maximum output, show largely the same reactions.
Risers and assembly of the motor risers
ICARO paragliders are always delivered with the standard risers. At special request
of the customer, however, we can assemble these before delivery and include the
standard risers separately.
If you want to assemble the risers by yourself, there are a few things to
consider.
As can be seen in the below picture, both risers are the same in structure and
length, the difference is that the motor riser additionally has a trimmer and a
second main suspension.
Carry out the conversion in the following order:
1. Remove the safety clips from all line locks
2. Loosen the screw connection of the line locks on both risers so that you can
loosen them completely with your fingers (open-end wrench MW 7).
3. Open the line lock A1, take out the line and put it into the line lock A1 of the
motor riser and screw the line lock with your fingers as far as you can.

Page 16
Version 2 / PPG / 2022
4. Then open the line locks A2, B and C in the following order, take the respective
lines out of the line lock and put them into the respective line lock of the motor
riser; Attention: pay attention to the order!!!!!!
5. Tighten the line lock with your fingers.
Next, open the knot on the brake handle, guide the
brake line through the pulley and put it from above
(coming from the canopy) through the pulley of the
motor riser, then through the swivel of the brake
handle and knot the brake line (a bowline is
recommended as this is can also be opened again
under tension).
Now go to a free field and pull your paraglider up several times to check that all
lines are installed in the correct line locks and in the correct order.
Then carefully tighten all line locks with the open-end wrench (make sure that you
do not overtighten them) and secure them with the plastic clips.
If you use the upper main suspension, make sure that you also shorten the
brakes by this length (difference between the upper and lower main
suspension), otherwise the braking distance will be longer.
With the trimmers the torque of the motor can be balanced, the additional
accelerator pedal is intended to change the angle of attack and thus to accelerate
the paraglider.
The default setting of the trimmer is always closed and will be used
•for starting,
•for landing,
Motor risers Standard risers
riser
riser
Breakhandle
Breakhandle
Brummelhook
Brummelhook
Accelerator
Accelerator
Upper main suspension
Lower main suspension
Main suspension
Return pulley break
Return pulley break
trimmer

Page 17
Version 2 / PPG / 2022
•when climbing with motor,
•for maneuvers intended to aid descent, and
•if the air is turbulent.
The handling is best in the standard setting. In addition, in the event of a
malfunction, the glider is in the optimal trim to recover as quickly as possible.
Flying with the trimmers open changes the behavior of the wing; Curves
destroy more height and are steeper, the reopening of a side collapse is more
dynamic. Therefore, we do not recommend using the trimmer and the
accelerator at the same time to increase speed.
Always set the trimmers to the default setting in turbulent air or before
descending.
The trimmers may not be used to increase the speed in flight without motor,
otherwise the EN type test is no longer valid. Only the accelerator is to be
used for this.
The PICA 2 with the motorized risers may only be used for flights without
motor if the riser is attached to the lower attachment point, the trimmers are
closed and the straps A, A1, B and C are the same length.
Start
Always lay out your paraglider on the leeward side of the engine. Never leave your
engine or the paraglider with the engine on the leeward side of the paraglider
connected when your equipment is unattended.
At the start, choose a sufficiently long, flat or gently sloping meadow without
obstacles. Thanks to the excellent take-off behavior of the PICA 2, the trimmers do
not have to be opened during take-off because this increases the take-off speed
and thus the take-off distance.
If you fly the PICA 2 in the weight range for powered flight, it also has an increased
trim speed. The associated higher take-off and landing speed is particularly
noticeable when there is little wind.
Wait until the umbrella is over you and gently accelerate. If the engine is used too
early, it could inhibit the wing's inflation characteristics, causing the wing tips to
come up faster. Try to walk upright and accelerate until the canopy takes off.
Climb calmly and avoid flying over trees, power lines or the like so that you can
always land safely in the event of an engine failure. It must always be possible to
get to a decent landing site, even if the engine is on strike.
Climb
Once you are in the air, you should keep going upwind to gain altitude. If the
trimmers are set to their default settings, you will get the best climb.
•Do not try to climb steeper and faster with the use of the brakes, because this
makes the paraglider more susceptible to interference and the pendulum effect
can also become extreme.
•Do not change direction unless you have enough altitude and speed.
•Avoid low turns with the wind at low speed.
Flight behavior
The flight behavior of the PICA 2 when flying with a motor is largely identical to
flying without a motor with the same wing loading.

Page 18
Version 2 / PPG / 2022
Although the PICA2 is dampened in its rolling movements, you can create a
“rocking movement”with a combination of propeller torque and pilot weight shift and
/ or use of the brakes.
To stop that
•gently remove the gas,
•Make sure you are centered with your weight and
•the brakes are free.
At full throttle, torque is what makes your wing want to make a slight turn. The best
countermeasure is to adjust the trimmer.
Since a higher wing loading is possible for powered flight due to the higher take-off
weight (see table), the maneuvers are more dynamic. The same applies to flying
with the trimmer open and accelerating, because this reduces the angle of attack.
Although the PICA2 is very stable, the trimmers should remain closed when flying
through turbulent air.
Avoid abruptly accelerating or taking it away, as this can cause the glider to rock.
This can be stopped by applying the brakes.
Landing
Always land against the wind and always with the engine at a standstill!
On the final approach, fly your paraglider straight ahead and at trim speed until you
are about three feet above the ground. Pull the brakes slowly and progressively to
flare the paraglider out.
Make sure not to flair too hard or too fast, as your paraglider could rise again a little
before the current breaks off. Choose an approach that suits the landing field and
conditions. In light winds you have to flair strong, long and progressive in order to
reduce your speed over the ground as much as possible.
In strong winds you have to turn towards your paraglider. Then pull the brakes
symmetrically and evenly to stall him.
Sample check
The PICA 2 is type-tested in all sizes for the foot start EN / LTF.
For powered flight, sizes S, M, ML and L have been registered by the French DGAC
(Direction générale de l'aviation civile).
The EN / LTF type test of the PICA 2 is only upright for the flight without a
motor with the motor risers if the glider is attached to the lower attachment
point and the trimmers are closed (The risers A, A1, B and C must be the
same length).

Page 19
Version 2 / PPG / 2022
Care instructions, repairs, inspection
Care Instructions
•A new wing supplied from the factory is often compressed hard. The
compression serves to reduce shipping costs but should not be repeated once
the wing has been unpacked and flown for the first time.
•Note that the glider bag should not be used as a seat.
•Even with good care and maintenance, just like any item exposed to the
elements, your glider can wear out after a certain amount of use. This can
change flight behavior and safety. We recommend a regular safety inspection of
the canopy and all lines.
•If you clean your glider, it is best to use warm water and a soft sponge.
•Store your glider in a dry and dark place, ideally between 5° and 30° Celsius and
humidity between 55 and 65%. Do not store it near chemicals or petrol.
•If you will not fly for longer period, store the glider releasing all compression
straps and take it out of its backpack so that the fabric is not compressed,
creased or stretched.
•Avoid storing your glider for days at a time in a hot car.
•Unpack your paraglider shortly before launch and pack away immediately after
landing to avoid any unnecessary UV exposure.
•When unfolding the paraglider ensure that neither the canopy nor the lines
become too dirty. Dirt particles can damage the material and lines.
•Never use chemical cleaning agents, brushes, or hard sponges on the material,
as these destroy the coating and affect the strength of the cloth. The canopy will
become porous and will lose structural strength.
•Never attempt to clean your paraglider in a washing machine. Even without
using detergents the simple mechanical abrasion will quickly finish the canopy
and render it useless.
•If you are flying near the sea most the wing may age faster because the air is
humid and salty. In this case we suggest you have it checked more often than
prescribed in this manual.
•Also avoid dipping it in a swimming pool; the chlorine will damage the cloth.
•If you must rinse or clean your glider do so with fresh water. Frequent cleaning
will accelerate the ageing process.
•If the glider has become wet, lay it out so that air can get to all areas of the
fabric.
•After landings in trees or on water you should check the length of the lines and
the canopy.
•Flying all the descent or acrobatic exercises will not normally pose a structural
problem but freestyle training accelerates the ageing process dramatically.
•There is no special method packing your glider. ICARO paragliders commends
the “Cell to Cell-method bag because the reinforcements of the leading edge
stay flex-free on top of each other and do not fold.

Page 20
Version 2 / PPG / 2022
•When folding your glider make sure that there are no insects inside the canopy.
Many insect species contain acids that could damage the cloth. Grasshoppers
gnaw their way out of a folded canopy, making it full of holes in the process.
•When you did not fly for a longer period ICARO commends to check the glider
(e.g., mildew stains, splice of the lines, corrosion of the shackles and carbines).
If you are not convinced of the glider’s airworthiness, please send your glider to
an authorized ICARO dealer to check your glider. The same is commended for
harnesses.
Repairs
Only use original ICARO parts for repairing your glider. If you don’t you lose
the warranty for your glider.
Small holes in the canopy (max. 20x20 mm) can be repaired by the pilot by using
self-adhesive sailcloth on both sides of the perforation.
Damage to the lines or any other repairs should only be carried out at an authorized
ICARO center.
If your glider needs to be repaired, please contact your local ICARO paragliders
dealer.
Inspection
It is important to have your glider inspected by a trained ICARO technician, but it is
also allowed to check your glider for yourself.
In the annex you find the regulations for checks of certified gliders and items in
order to perform a paraglider inspection you need.
Inspection interval
24 months or 150 operating hours, depending on what occurs sooner.
Without regular certified inspections, your glider will lose its pattern test
result and warranty.
ICARO recommends having wings that are often used for training of descent
exercises, acrobatics or flying in salty ore sandy conditions subjected to checkups
all 100 operating hours or 12 months.
It is also important, that ground handling also will be considered. All gliders,
especially gliders manufactured with light and thin material are mechanically more
stressed than other gliders. Therefore, ICARO recommends multiplying ground
handling time with the factor 1, 5.
Not only gliders have a recurrent inspection interval. Airworthiness of harnesses
and rescue systems must also be verified. Generally, it is recommended to change
aluminum snap hooks after 24 months or 200 operating hours.
According to German and Austrian aeronautical legislation the owner of a glider can
check the airworthiness by his own or order a third person (for example
manufacturer/importer) to do this.
To perform your own airworthiness check, ICARO paragliders must give you a
briefing. Should you decide to check the wing by yourself you must make sure that
our guidelines are adhered to. Failing to do so will void the certification.
ICARO paragliders highly recommend that you let the manufacturer or authorized
supplier/ person do the check of airworthiness.
All inspections and repairs must be documented (manual page 2).
Table of contents
Other ICARO paragliders Aircraft manuals

ICARO paragliders
ICARO paragliders CYBER TE User manual

ICARO paragliders
ICARO paragliders SPEEDUP User manual

ICARO paragliders
ICARO paragliders XEMA light User manual

ICARO paragliders
ICARO paragliders ICE User manual

ICARO paragliders
ICARO paragliders Nikita 2 User manual

ICARO paragliders
ICARO paragliders MAVERICK 2 User manual

ICARO paragliders
ICARO paragliders CLOU User manual

ICARO paragliders
ICARO paragliders OXYGEN User manual

ICARO paragliders
ICARO paragliders Pandion User manual

ICARO paragliders
ICARO paragliders Sitta User manual