ICARO paragliders Xema Light-2 User manual

Page 1
Version 1/2022
MANUAL
Version 1/2022
2
2
2

Page 2
Version 1/2022
TABLE OF CONTENTS
TABLE OF CONTENTS ...................................................................... 1
TO GET TO KNOW YOUR YOUR XEMA LIGHT 2 ............................. 4
TECHNICAL DATA ................................................................................... 5
SPEED SYSTEM ..................................................................................... 6
RELAX -BAR ......................................................................................... 7
QUICK-OUT SNAP-HOOKS ....................................................................... 7
CAMEL BAG........................................................................................... 7
ADJUSTMENT OF XEMA LIGHT 2..................................................... 7
Adjustment of the back position .......................................................... 7
Adjustment of shoulder straps............................................................. 8
Adjustment of chest straps.................................................................. 8
Seat position adjustment..................................................................... 8
FITTING THE RESCUE SYSTEM ...................................................... 8
ATTACHMENT OF THE CONNECTION BELT WITH THE HARNESS ..................... 9
INSERT THE PARACHUTE IN THE HARNESS CONTAINER.............................. 10
COMPATIBILITY-CHECK ........................................................................ 11
FLYING WITH THE XEMA LIGHT 2...................................................11
CORRECT HANDLING OF THE RESCUE SYSTEM......................................... 12
Folding the harness, inserting the paraglider and using the rucksack 13
CARE AND REPAIR INSTRUCTIONS .............................................. 13
CARE INSTRUCTIONS ........................................................................... 13
REPAIRS............................................................................................. 13
INSPECTION ........................................................................................ 14
TERMS OF WARRANTY .................................................................. 14
ANNEX ............................................................................................. 15
CHECK SHEET ................................................................................ 17

Page 3
Version 1/2022
Congratulations on buying your
XEMA LIGHT 2
and welcome to the family of ICARO - pilots!
Before you get to know your system please read the manual,
there is important information inside.
Your harness is made with great care and state of the art.
Before delivery to our dealers and flight schools, every single harness is piece
checked by ICARO paragliders.
Our team also carries out check flights with individual devices, but only on a
random basis. For this reason, each new ICARO harness must be checked again
by the dealer or the flight school before delivery and this date must be entered on
the nameplate. From this point in time, both the deadline for the first 2-year check
and the term of the warranty begins. This manual gives you information on the
entire specific and general characteristics of the harness.
It is tested according to European Standards EN 1651: in the currently valid
version, and Notification of the Federal Aviation Administration of Germany.
It may only be used for the purposes described in this manual.
The use of this harness is at your own risk and must not be flown:
•outside the specified weight range
•with damaged carbines, belts, buckles, or protector
•with motor and in aerobatics.
Before starting for the first time, you should set up your harness with the help of a
simulator, then not only put on your paraglider to check compatibility with your
harness, but also carry out the first start and handling exercises.
Ground handling trains and refines the start-up technique. You can consciously
and stress-free get to know the reactions of your paraglider in combination with
your harness, and then deal with it in the air better, more effectively and safely.
During the first flights you should do the last fine adjustments to your harness
because only with optimal seating comfort you can not only fly stress-free but also
optimize the flight characteristics of your paraglider.
All technical data and instructions in this manual were drawn up with great care.
ICARO Paragliders cannot be made responsible for any possible errors in this
manual.
Should you decide to sell this harness later, please pass on this manual to the new
owner.
All technical data and instructions in this manual were drawn up with great care.
ICARO Paragliders cannot be made responsible for any possible errors in this
manual.
Important information in this manual is written in fat cursive writing. Any
important changes to this manual will be published in our homepage
(www.icaro-paragliders.de).

Page 4
Version 1/2022
Every pilot bears the responsibility of his/her own safety. The manufacturer or
distributor assumes no responsibility for accidents occurring while using it.
No warranty of any kind can be made against accidents, injury, equipment failure,
and/or death. It is assumed that the pilot is in possession of the necessary
qualifications and provisions of any relevant laws are observed.
Any changes to the harness (e.g., straps, shackles, protector) are dangerous
and can lead to unwanted reactions of the paraglider. When our harnesses
leave production, they are within the permissible tolerance range. This is
very narrow and must not be changed under any circumstances, as this no
longer warranties the optimum balance between performance, handling and
safety, no longer conforming to the sample-tested harness and thus no
longer being type-tested.
Environmental aspects:
After we are concerned not only with quality but also with environmental
protection, we also want to provide our active contribution here.
The materials of which a harness is made require a special waste disposal. So
please send disused ICARO - harnesses back to us. We will care about a
professional waste disposal without costing for you.
Please do our nature-near sport in a way which does not stress nature and
environment!
Please do not walk beside the marked ways, do not leave your litter, do not make
unnecessary loud noises and respect the sensitive balance in the mountains.
Especially at the launch site consideration is needed!
ICARO paragliders
Hochriesstraße 1, D-83126 Flintsbach
Telefon: +49 (0)8034 909700
Telefax: +49 (0)8034 909701
Email: office@icaro-paragliders.com
This manual is copyrighted. Partial reproduction is allowed only after prior approval by ICARO paragliders,
all other rights are reserved.

Page 5
Version 1/2022
To get to know your Your XEMA LIGHT 2
Allowed for training
yes
Allowed /certified for flying with passengers
yes/ not tested
Allowed /certified for aerobatics
no/ no
Allowed /certified for flying with motor drive
no / no
Technical data
Designated use
GH
Safety- system
Get - Up
Size
S, M, L, XL
Distance between karabiners
36-47 (S); 36-48 (M), 36-49 (L); 36-50 (XL)
Distance karabiner and seat (cm)
43 (S), 45 (M), 47 (L), 49 (XL)
Pilot size (cm)
S:150-165; M:165-180, L:180-195, XL:190-205
This information is for reference only. The right size depends on leg
and back length as well as buttocks width. It is possible that due to
these three factors a different size of harness will fit you here.
Total weight without rescue system
with protector and karabiners (kg)
2,6 (S), 2,8 (M), 3,0 (L), 3,2 (XL)
Maximum load (kg)
120
Rescue system- container
Integrated container under the seat,
handle right
Volume of the rescue container (ccm)
4750
Protector- system
Airbag
Check interval
24 month / 150 operating hours
Seat (cm)
Size
Width front
Width rear
Depth
S
30
33
35
M
32
35
37
L
34
37
39
XL
36
39
41
With our new XEMA LIGHT 2, we have succeeded in realizing a harness that has
been optimized once again in tried and tested cooperation with Woody Valley.
There have contributed
• new materials and construction systems,
• the high-performance airbag as well
• the newly designed geometry of the belt system
The result is even more precise and fluid control compared to our XEMA light, with
further improved passive safety.
Its high seating comfort also tempts you to take longer flights without your legs or
other body parts are falling asleep. Not only students and beginners, but also

Page 6
Version 1/2022
experienced pilots who prefer a seated flight position will be enthusiastic when
they have made their first flights.
The XEMA LIGHT 2 harness is available only with Get-Up straps which is the
lightest forget-proof safety system for closing a harness.
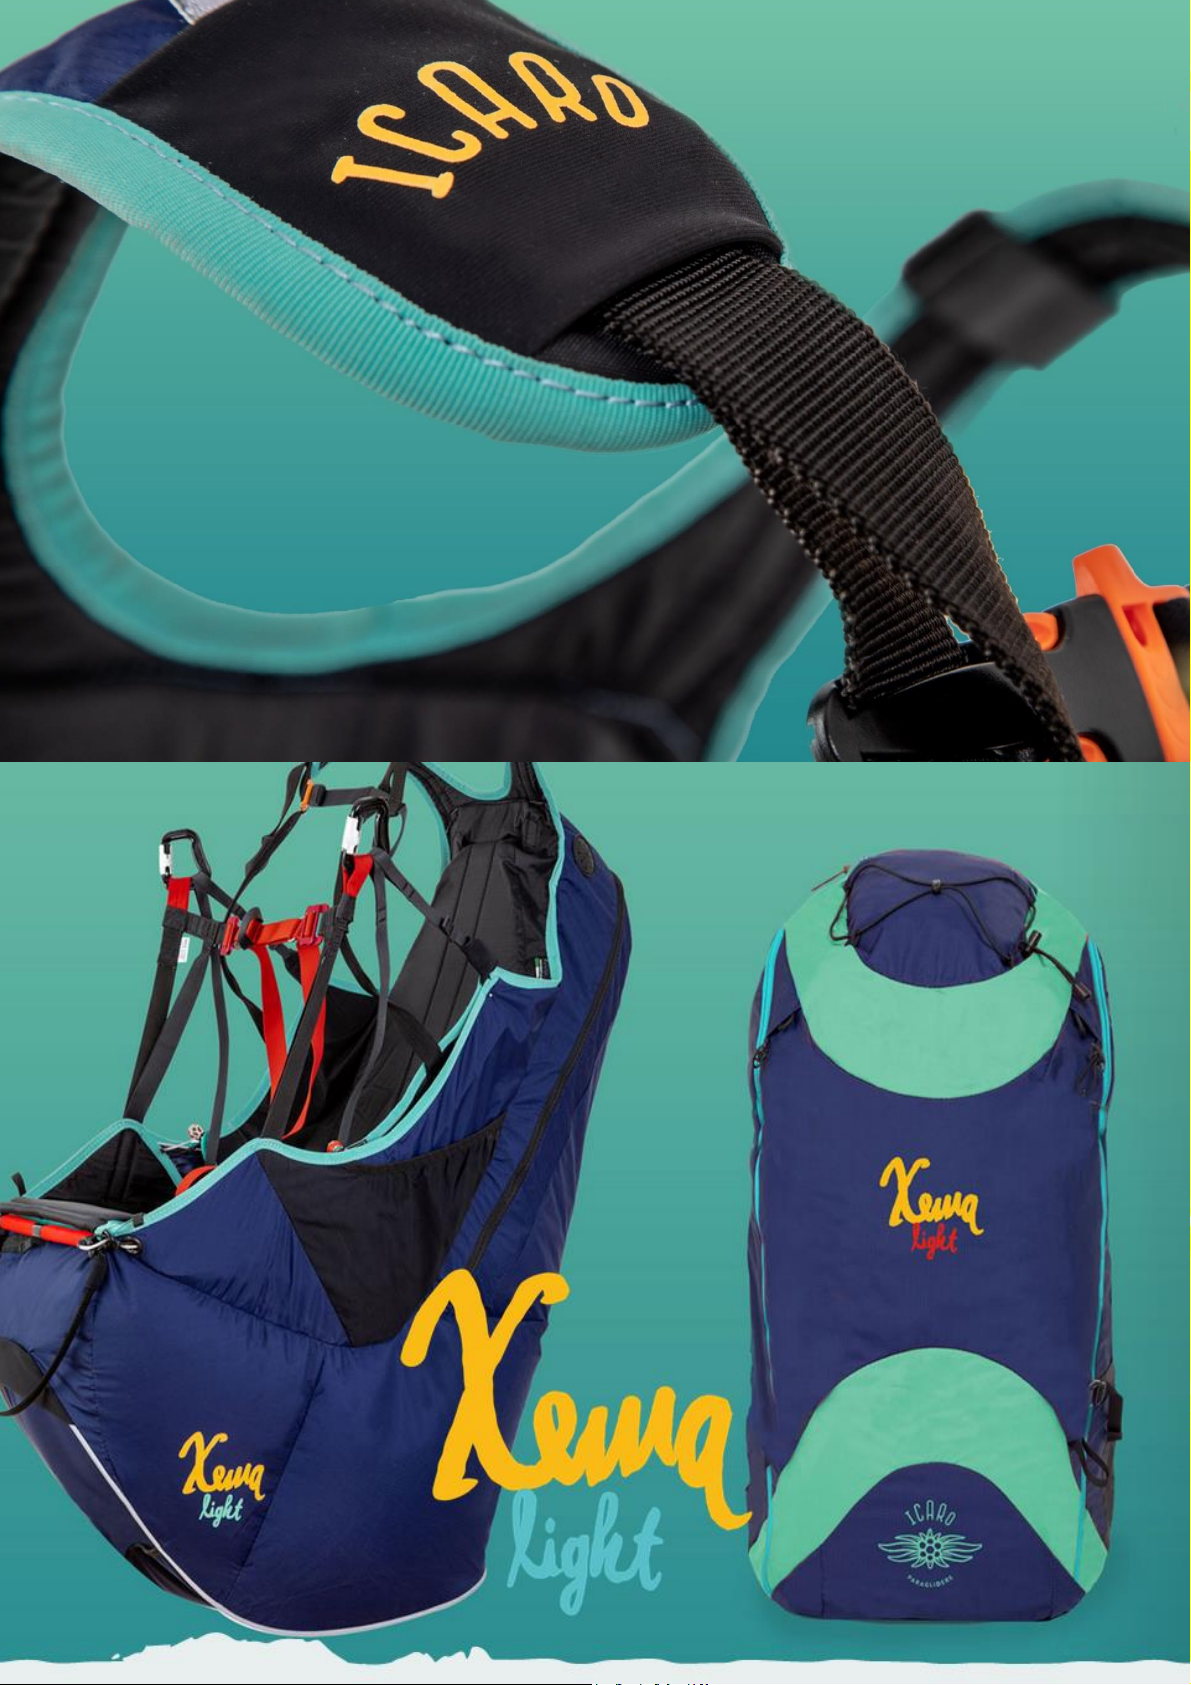
The red SOS- label with white lettering is readily visible in a pocket on the right
shoulder -strap padding. It is easy to pull out, and it is fastened to the harness to
prevent it from being lost.
On the back of this label, you can write the information that you think should be
given to rescue personnel in case of accident.
The XEMA LIGHT 2 has a spacious dorsal pocket and two side pockets,
positioned respectively on the sides of the harness with zips to close them.
The right and left side of the main suspension are marked by eyelets in different
colors. The carabiners are made of aluminum and loadable up to 2.4 tons.
Speed system
After having adjusted the sitting position to the optimum configuration, the
accelerator must be adjusted. This harness is compatible with all normal types of
speed-system accelerators.
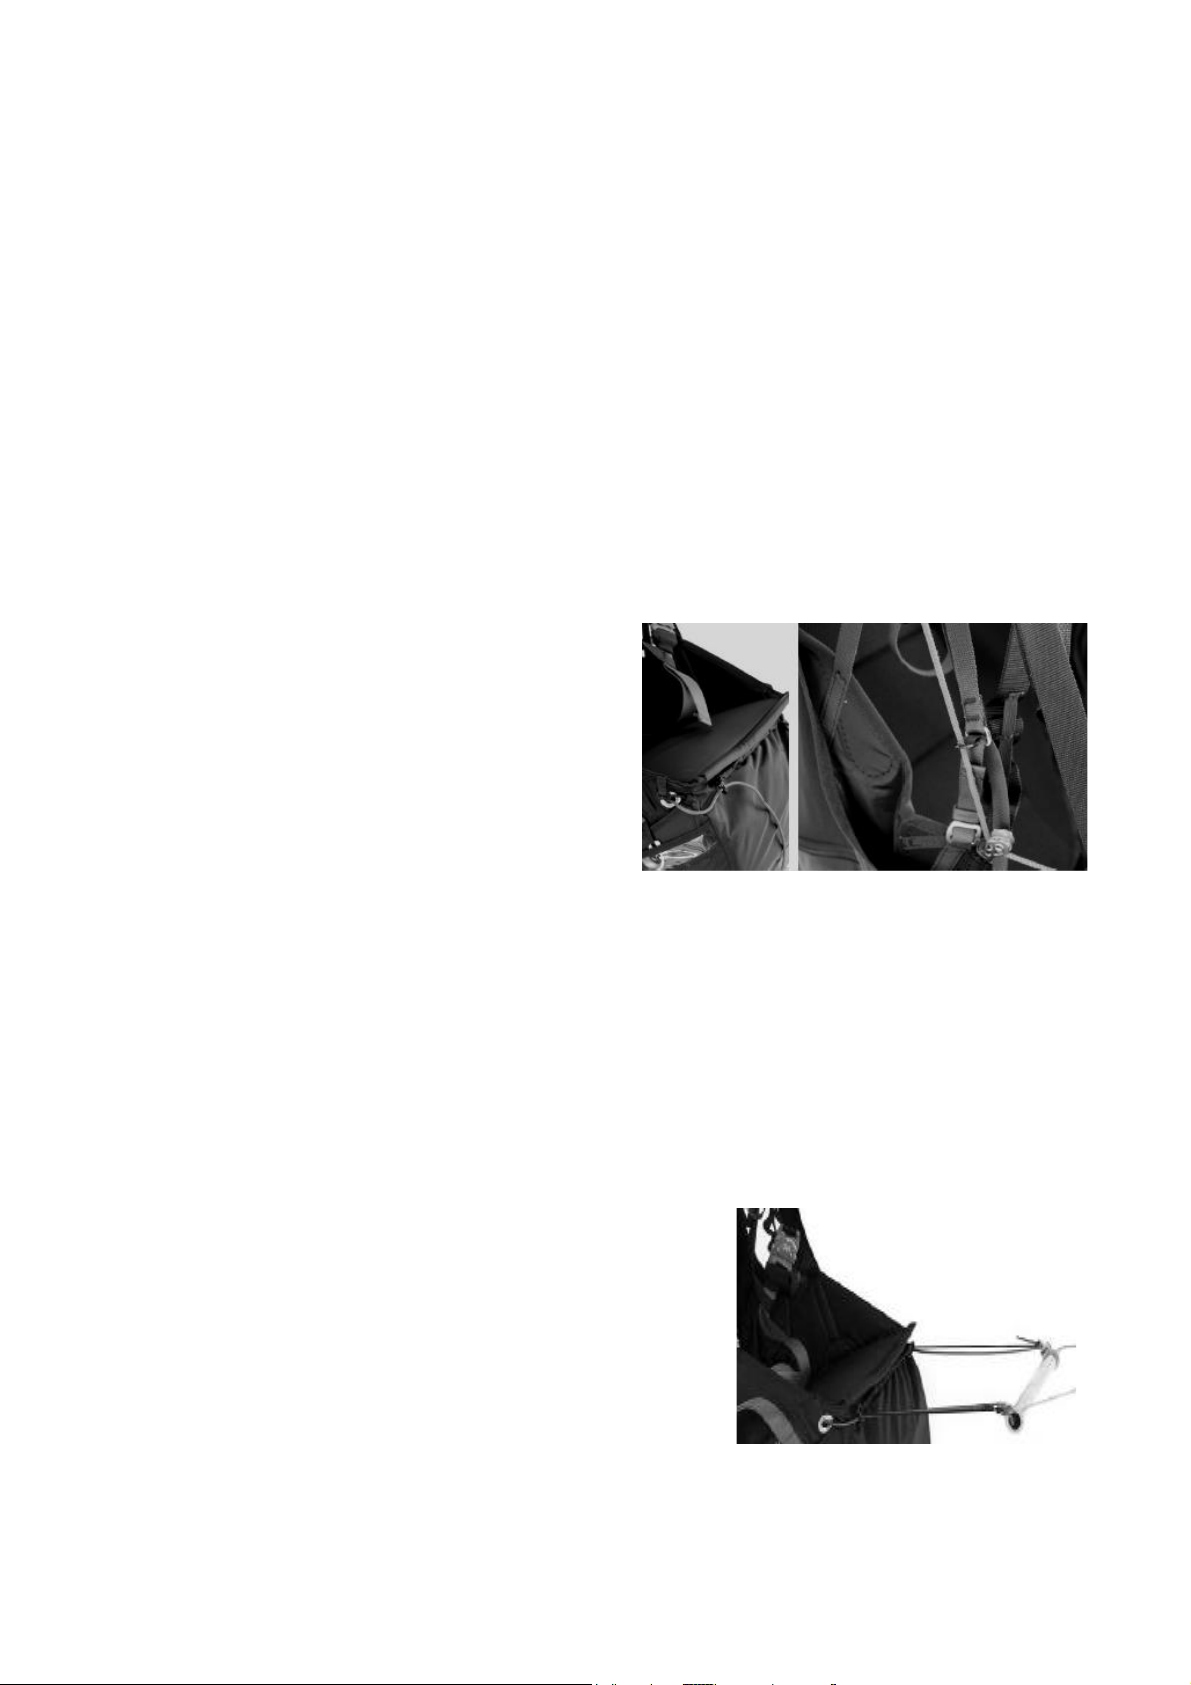
The elastic in front of the board that
retains the speed-bar keeps the handle
of your reserve parachute from
becoming tangled in the event it is
deployed. The speed bar cords should
be passed first through the rings fixed
to the elastic in front of the board, then
in the harness through the eyelets near
the front corners of the seat, then
through the pulleys located near the rear corners of the seat.
To adjust the system correctly, the pilot must adopt a flying position in the harness,
suspended from a flight simulator, and hook into the risers of the paraglider.
Another person then helps by supporting the risers, so the pilot can adjust the
length of the speed-system cords. When no pressure is exerted on the speed bar,
the bar must be at a distance no greater than 10 cm below the front of the
harness.
If the speed-bar cord is too short, it could cause a constant force on the bar
during flight, so that the accelerator is unintentionally engaged at all times in
flight.
It is safest to take off with the speed-bar a little
too long, progressively shortening it during the
next flights.
To retain the speed-bar during the take-off run
use the straps located in front of the seat that
close with magnets. This system also allows you
to use the speed-bar straps with adjustment of
the central ropes.
Remember that all adjustments have to be performed symmetrically, on both
sides.

Page 7
Version 1/2022
Relax - bar
The relax-bar is used to keep the legs stretched out and the feet resting on a
support. Some pilots consider this flying position more comfortable than the classic
seated position with legs hanging. To attach the optional relax bar to the harness,
follow the instructions provided in the relax-bar instruction manual.
Quick-out snap-hooks
The XEMA LIGHT 2 provides the possibility of using ‘‘quick-out’’ snap-hooks. For
correct installation see the use booklet provided with the snap-hooks themselves.
Camel bag
A container for a camel -bag is fitted in the rear pocket. Position your camel-bag in
the container pocket located in the rear pocket.
Pass the hose through the hole which is already predisposed at the top left of the
rear pocket, pass it under the Lycra cover of the left shoulder-pad and bring it out
the front from the specific hole (signed with H2O).
Adjustment of XEMA LIGHT 2
Before making any adjustments to the harness, the reserve parachute must
be deployed. To find the optimal position, we advise you to clip in the
harness and simulate the flight position and conditions as realistically as
possible, including stuffing the rear pocket with everything you would
normally take with you on the flight.
The XEMA LIGHT 2 can be adjusted in many ways to the individual needs and
likings of each pilot. We advise each pilot to take time to get acquainted to the
harness.
This will reward the pilot with an excellent sitting comfort. To carry out the
adjustments we advise to hang the harness in a simulator.
Upon delivery, the XEMA LIGHT 2 is already set to a standard ergonomics (except
for the size of the pilot). Therefore, we recommend only adapting the harness in
size to the pilot and leaving the other settings as they have been made in the
factory.
If you adjust belt, then you can always put it back to the red factory settings.
Conduct the adjustments with the rescue system installed.
Adjustment of the back position
This adjustment allows you to select the inclination of the
torso with respect to the vertical flight axis.
To change the setting, you must first remove the strap
from the lock (see photos below), then you can adjust the
inclination of the torso to make it more vertical by pulling
the strap forward, or more reclined by pulling the light grey
strap in the opposite direction.
A sitting position ensures a low inertia and thus prevents twisting. The
horizontal position reduces aerodynamic drag and allows best glide in
accelerated flight.

Page 8
Version 1/2022
Adjustment of shoulder straps
Shoulder-strap adjustment enables the harness to be adjusted to the pilot’s height.
The adjustment buckle is situated low down, near the rear edge of the seat.
The shoulder-straps also support part of the torso weight to improve comfort. After
that you have determined the correct position for the seat and back, adjust the
shoulder straps so that they are in contact with your shoulders, neither too loose
nor too tight.
The adjustment of the shoulder straps is done while standing. They are dressed so
far that you can just stand upright.
The shoulder straps must be tightened in a relaxed position so that a light pull is
felt on the shoulders. Fine adjustments should be made during the first 2-3 flights.
Adjustment of chest straps
The chest strap controls the distance between the two karabiners. In flight, this
setting can be gradually opened/closed to your optimal setting and is adjustable
between 36 and 48 cm.
When the chest strap is shorter and tighter, stability is greater. An excessive
distance between karabiners does not improve glider performance and
tightening the chest strap excessively may exacerbate the ‘‘twist’’ effect that
may follow an asymmetric collapse of the glider.
There is also a small elastic clip at the extremity of the padded shoulder-straps.
This prevents the shoulders from slipping out of the straps during the launch run.
The plastic clip also includes a useful whistle that can be used in emergency
situations.
Seat position adjustment
This adjustment changes the angle between the thighs and the back (seat depth).
In this way, the loads are distributed between the seat and the lower back and the
pilot sits more comfortably.
Any adjustment to the harness must be done with the rescue parachute
installed and symmetrically on both sides!
Fitting the rescue system
The reserve container has a maximum capacity of 4750cc and is designed
for the latest generation of light reserve parachutes.
The parachute container has been revised so that larger reserve parachutes can
now be carried. The container is under the seat.
You must use its specific inner bag with the deployment handle that came
with the harness. No other type of inner bag and/or deployment handle can
be used.
Fold the emergency parachute to fit the dimensions of the inner bag. Refold the
emergency parachute cords on the side opposite the deployment handle. Close
the inner bag flaps.

Page 9
Version 1/2022
Attachment of the connection belt with the harness
There are three different methods of attaching the reserve parachute belt to the
harness belt.
First fixing method
For connecting the two belts use a fixable 24 KN- snap
hook with a diameter of 8 mm. It is very important that the
snap hook cannot twist to prevent traverse stress of the
snap hook. Therefore, use cable fixer, adhesive tape or
strong rubber bands and pull it above and below the snap
hook around the belts.
Second fixing method is to put the belt of the rescue system through the
connection belt of the harness and than the rescue system trough the harness belt
as shown in the photo.
It is just as very important that the knot is very tight fastened. Therefore, use cable
fixer, adhesive tape or strong rubber bands and pull it above and below the knot
around the belts.
Please pay attention to the symmetry of both lines. Neither side of the loop
must be longer than the other.
Third method (suitable for steerable or non-steerable parachutes with
double connection point) as follows:
If you are using a reserve parachute with directional
control and dual bridle, or if your reserve parachute
has a double -riser bridle, it can be connected to the
harness using the two loops positioned at the base of
the harness bridle near the padded shoulder straps.
In this case, the harness’s reserve parachute bridle
will not be used, and so it should be folded, fastened
using two elastic bands, and positioned under the
cover behind the pilot’s neck.
The two connections should be made using screw -lock karabiners with a breaking
strength of at least 1,400 kg.
In any case, it is important to verify that the length of the bridle is sufficient
to position the reserve parachute inside the harness pocket, and that there
is sufficient play to enable the parachute to be taken out of the pocket
without causing the reserve parachute deployment bag itself to open during
extraction.
To prevent anomalous lateral loads, the bridle should be attached to both
the loops on the shoulder straps. Not to just one of them.

Page 10
Version 1/2022
Insert the parachute in the harness container
Insert the parachute in the harness container with the handle visible toward the
outside and with the ropes facing downward.
Position the handle in its specific lodging and ensure that the Velcro sewn on the
handle attaches to the Velcro on the harness.
Introduce a thin rope (paragliding line or plastic strimmer cord type) into each
elastic loop which you will use to help close the container. Introduce the elastic
loops into the smallest of the eyelets under the handle.
Take the bridle cover zip and the second zip that closes the other end of the
container to their start point under the emergency parachute handle.
Close the zip on both sides about 20 cm.
Close the external part of the container as shown in the photo, taking care during
this phase that none of the zips open.
Insert the two plastic yellow pins into the elastic loops and then under the cover
arranged between the two.
After having closed all container parts, it is advisable to check that the two zips
under the opening system have been closed correctly.
The cord must be removed at the end of this phase, and must be extracted slowly
in order to avoid damaging the elastic loops due to excessive friction between the
parts.

Page 11
Version 1/2022
Finally, ensure the two zips are completely closed, with the tab of each zip
inserted under the cover at the end of each zip.
Remove the cords used to help pack the rescue system!
Compatibility- check
A control of every new combination of rescue system and harness/outer container
has to be carried out by either the producer of the harness or the rescue system or
an authorized person (dealer or flight instructor).
The activation of the rescue system in flight position has to be correct and in
conformity to the construction guidelines.
The check must be recorded in the documentation of the rescue system. The
throwing movement should be practiced every time the rescue system is
repacked.
The tensile force for triggering may be max. to 70N.
IMPORTANT POINTS TO LOOK OUT FOR:
Check (steady)
•connection of the rescue system to your harness
•connection of the harness and deployment handle
•the closing splint must be held with a special thread
•aluminum carabiners: aluminum might get micro cracks from impacts during
use
line from the fixing loops is removed (after each packing)
Check compatibility of rescue system and harness
Before each start with your glider, you have to check the container is
closed!!!
Flying with the XEMA LIGHT 2
For maximum safety, use a complete and consistent system of pre-flight
checks and repeat the same mental sequence every flight.
Check that
•all buckles are fastened. Take particular care in the case of ice or snow.
•always clean off snow or ice before fastening buckles.
•the reserve parachute handle is fastened in its correct position, and the pins
are firmly inserted.
•pockets and zips are closed.

Page 12
Version 1/2022
•the paraglider is connected correctly to the harness, and that both karabiners
are locked closed by means of their locking system.
•the speed bar is attached correctly to the glider.
Correct handling of the rescue system
It is important to feel the position of the rescue handle in normal flight from time to
time so that the sequence of movements in an emergency is instinctive. The
release technique is also an important factor in reducing the required release
force. Another problem can arise if the reserve handle has to be operated with
the other hand.
Therefore, we recommend to train (before repacking the rescue system,
during g-force trainer) these methods.
In emergency situations, the deployment procedure is as follows:
•look for the reserve parachute handle and grasp it firmly with one hand
•pull the handle outwards in order to extract the reserve parachute from the
harness container
•look for a clear area, and, in a continuous motion, throw the reserve parachute
away from yourself and the paraglider
To keep the paraglider from interfering with the rescue parachute, proceed as
follows opening:
•If the leading edge of the paraglider is facing upward, grip the back risers or
the brakes and pull them toward you to help deflate.
•If instead the leading edge of the paraglider is facing downward, pull the back
risers or a brake and rotate the paraglider with the leading edge upward and
then pull both brakes or back” risers to help deflate the paraglider wing
On landing, adopt an upright body position, and ensure that you perform a PLF
(Parachute Landing Fall) to minimize the risk of injury.
Before landing, slide your legs out and off the seat surface, so that you take up a
standing position. Never land in the seated position; it is very dangerous for your
back even if you have foam dorsal protection, which provides exclusively passive
protection. Standing up before landing is an active safety precaution, and it is
much more effective than passive forms of protection.
There are no specific problems connected to flying above water using a
XEMA LIGHT 2 harness, but in any case, landing in water is always dangerous.
ICARO Paragliders recommends using a suitable lifejacket when flying above
water.
The XEMA LIGHT 2 is basically very well suited and for use in double-seater
flying. It can be used for both the pilot and the passenger.
However, the passenger should not have installed a rescue device in his
harness, as a possible false triggering of the rescue device by the passenger
cannot be prevented by the pilot.
The XEMA LIGHT 2 harness can be used for towed launches. The tow bridle
release should be hooked directly to the main karabiners, ensuring that the
karabiners are positioned with the opening bar facing the rear. For further details,
refer to the documentation provided with your tow release, or ask a qualified
towing instructor at your flying site.

Page 13
Version 1/2022
Folding the harness, inserting the paraglider, and using the rucksack
To change from harness to backpack configuration,
•completely open the back pocket and enlarge the backpack inside.
•Turn the entire structure upside down and fold the seat against the harness
back, leaving the whole set of belts and buckles inside the sandwich that is
created between the back and seat.
•Put the previously folded paraglider above the harness airbag.
•Place the paraglider above the rear pocket and, finally, close the backpack. For
easier zipper closing, crush the backpack to remove remaining air inside the
paraglider and the airbag.
•Once all equipment has been packed away, tighten the four side belts if
necessary to compact contents.
Care and repair Instructions
Care Instructions
•Packing the harness is similar to all the other harnesses with the only
difference being in folding the rear part of the airbag which, in order to
keep it intact, should be folding last above the rear part of the harness.
•To maintain your harness in good condition, please ensure that the harness
does not get dragged along the ground, the karabiner does not get hit against
rocks and avoid over exposure to sunlight, heat or humidity.
•If you wish to clean your harness it is best to use warm water and a soft
sponge.
•Store your harness in a dry and dark place, ideally between 5° and 30° Celsius.
Do not store it near chemicals or petrol.
•If you will not fly for longer period, take it out of its pack.
•Avoid storing your harness for days at a time in a hot car.
•If the harness has become wet, lay it out so that air can get to all areas of the
fabric, also your rescue system. Before the next flight, it is essential to dry the
rescue equipment and repack it.
Drying your harness and rescue equipment can take several days and is
important for the material
•Prolonged exposure to UV radiation damages the harness. For this reason,
never leave it lying in the sun unnecessarily, but after flying, pack it back in its
backpack.
Repairs
Repairs and replacement of parts may only be carried out by an authorized
specialist or the manufacturer. Only original spare parts may be used! If any
damage is detected during control of the harness that affects airworthiness, the
harness should be returned to the manufacturer for repair. This also applies to
damage whose effects on the airworthiness of the system cannot be clearly
determined. ICARO Paragliders cannot be held liable for any errors made by
check-teams not authorized by ICARO paragliders or by persons performing
the check. They always work on their own responsibility!

Page 14
Version 1/2022
Any modifications to the harness other than those approved by the
manufacturer will result in forfeiture of the sample test of the equipment.
Inspection
Verification interval: 24 months or 150 hours, whichever comes first.
Without this inspection, the sample test of the harness will expire!
Recommendation: Aluminum carabiners should be exchanged after two
years at the latest, as they can get hairline cracks if
handled improperly and are therefore dangerous.
Terms of warranty
ICARO paragliders guarantees 24 months for the proper processing, an operation
within the allowable limits of proper operation and the fulfillment of the eligibility
criteria of harness equipment at the time of first delivery by ICARO paragliders.
Warranty is only valid for ICARO products with
LTF/ EN certification.
What is covered by the warranty?
Provided that ICARO paragliders accept the fault the warranty contains all
necessary spare parts related to the replacement or repair of defective parts and
working time.
ICARO paragliders accept no freight costs (outbound and return transportation).
What are the conditions of the warranty?
•ICARO paragliders needs to be informed immediately after the discovery of a
defect and the defective product must be sent to us for testing.
•The harness was used in normal circumstances and maintained according to
the instructions. This includes in particular the careful drying, cleaning and
storage.
•The harness were used only within the applicable guidelines and all rules have
been complied with all times.
•All flights must be accounted for within the flight book.
•There were only original spare parts used and checks, exchange and / or
repairs were conducted by an authorized dealer or by ICARO paragliders
company / person and properly documented.
•A fully and correctly completed warranty card must be sent at least 6 weeks
after buying the glider to ICARO paragliders commercial. Alternatively, can this
be sent via the appropriate online form on www.icaro-paragliders.com.
What is excluded from warranty?
•Harnesses
•that are used for training purposes, Acro or other official competitions,
•which were involved in an accident,
•which have been changed by yourself,
•that were not purchased from an authorized dealer / flight school,

Page 15
Version 1/2022
•where the required inspection intervals were not met, and the verification of
the harness was not conducted by a ICARO paragliders authorized
operation / person
•Damage
•which has occurred due to improper treatment (i.e. storage in humidity, heat
or direct sunlight)
•caused by solvents, salt water, insects, sun, sand, humidity or “debag-
jumps”.
•caused by force majeure.
•caused by the Para motor (Oil, fuel, damage in cause of the prop)
•Parts that need to be replaced due to normal wear and tear,
•Discoloration of the cloth material used,
In case of a concluded claim the period of warranty carries on. The period of
warranty and the connected claim are not prolongated and are only valid until the
original date of expiry. The freight costs (transport to and from) are not paid by
ICARO paragliders.
Annex
Please fill in the warranty card which you find on our homepage
www.icaro-paragliders,com and send it to us.
Inspection of ICARO harnesses
Each ICARO harness, irrespective of type, shall undergo a visual inspection,
including:
•Seat board for breakage or cracks, check straps for visible damage, cracks,
chafing or fraying or open seams. Check all buckles, carabiners and other
fastening and connection parts for corrosion, mechanical damage and proper
function.
•All accelerator pulleys should be checked for tightness and firmness, the return
rubber at the front of the seat area and the accelerator fixing rubber for
brittleness.
•In the case of airbag protectors, the entire air filling area must be checked for
cracks and other damage as well as for proper filling. For this you can use a
hair dryer (cold level) and blow in the opening to check the function of the
airbag and its tightness.
•For foam protectors, check all sizing of the jacket around the foam.
In the case of reversible harnesses, leak tightness and damage must also be
checked, especially on the area to be filled with air
Repairs to the protectors and load-bearing parts of the harness may only be
carried out by ICARO paragliders or a person / company authorized by
ICARO paragliders.
The 2-year check is to be confirmed after the check with date, name, and
signature. If the harness has been checked independently, from this point no
longer the sample test is valid. The same applies when selling the harness.
Confirmation of the inspection properly and according to the company's
instructions by a person authorized by ICARO paragliders is carried out by means

Page 16
Version 1/2022
of a stamp. This verification stamp must be completed in full (time of the next
inspection, place, date, and signature and name of the inspector.)
Checksheet
Client (Name, Address):
Type / size / year of construction:
Serial number:
Certification number:
Date of last inspection:
Memos
yes
no
Seat strap
system
Visible damages?
Areas of abrasion?
Seat board
Visible damages?
Positioning of the straps, ok?
Straps
Visible damages?
Course of the straps?
Seams, ok?
Buckles and
carbines
Visible damages?
Condition (closing properties,
operation) ok?
main carbines (condition, age)
Operativeness, ok?
Protectors
Airbag -/
Foamed
material
Visible damages?
Seams, ok?
Valve, ok?
Tightness airbag/ foam protector
sheeting?
Conditions of any reinforcements,
ok?
Speed bar
Visible damages?
Fixing rubber, ok??
Return pulleys, ok?
Lines, ok?
Rescue system
Visible damages?
Identification plate, ok?
V-lines
Handle fitted and connected?
Container properly closed?
Backpack
(Reversible
harnesses)
Visible damages?
Zip, ok?
Buckles, ok?
Seams, ok?
Compatibility check effected?
Additional repairs carried out? Which?
Type label affixed?
Inspection stamp affixed?
Overall result
Next inspection:
As new
Very good
Next inspection when using
the harness commercial:
Used
Much used
certification only for one year
not airworthy
Date, name and signature of the checker

Page 17
Version 1/2022
New extra stable frame geometry Camelbak pocket
Optional Lightshield back protection Simple and direct adjustments
More comfortable Get-Up strap system Side pockets with zip
thanks to added elastics
Table of contents
Other ICARO paragliders Aircraft manuals

ICARO paragliders
ICARO paragliders SPEEDUP User manual

ICARO paragliders
ICARO paragliders MAVERICK 2 User manual

ICARO paragliders
ICARO paragliders PICA 2 User manual

ICARO paragliders
ICARO paragliders ICE User manual

ICARO paragliders
ICARO paragliders CYBER TE User manual

ICARO paragliders
ICARO paragliders Sitta User manual

ICARO paragliders
ICARO paragliders Nikita 2 User manual

ICARO paragliders
ICARO paragliders GTO User manual

ICARO paragliders
ICARO paragliders Nikita 5 User manual

ICARO paragliders
ICARO paragliders XEMA light User manual