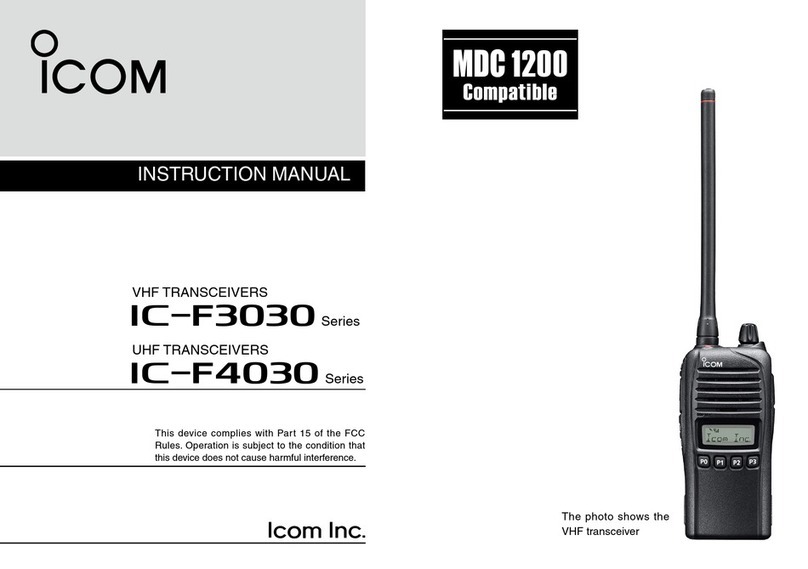
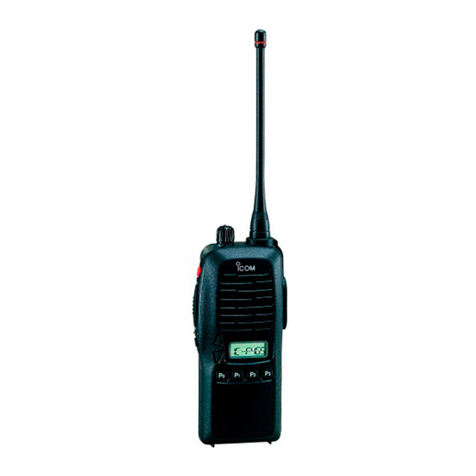
Icom IP110H User manual

i
INTRODUCTION
Thank you for choosing this Icom product.
This product is designed and built with Icom’s state of the art technology and craftsmanship.
With proper care, this product should provide you with years of trouble-free operation.
Icom, Icom Inc. and the Icom logo are registered trademarks of Icom Incorporated (Japan) in Japan, the United States, the
United Kingdom, Germany, France, Spain, Russia, Australia, New Zealand, and/or other countries.
The Bluetooth®word mark and logos are registered trademarks owned by the Bluetooth SIG, Inc. and any use of such marks by
Icom Inc. is under license.
Other trademarks and trade names are those of their respective owners.
Icom is not responsible for the destruction, damage to, or performance of any Icom or non-Icom equipment, if the
malfunction is because of:
• Force majeure, including, but not limited to, fires, earthquakes, storms, floods, lightning, other natural disasters,
disturbances, riots, war, or radioactive contamination.
• The use of Icom transceivers with any equipment that is not manufactured or approved by Icom.
IMPORTANT
FIRST, CAREFULLY READ INSTRUCTIONS that is
included with the transceiver.
SAVE THIS OPERATING GUIDE— This operating
guide contains additional important operating
instructions for the transceiver.
FEATURES
•
Complies with the IEEE802.11 n/a/b/g/ac standards.
• Transmits and receives voice and text messages*1
through the wireless LAN access points installed in
the IP network, using the Controller.
• Displays the status*1transmitted by the IP110H on
the screen of the Controller and the IP100FS.
• 2 types of communication, the Full Duplex mode
and the Simplex mode.*2
• Waterproof and Dust-Tight Durable Design.
(IP67/IP54)
*1The text message and status you can transmit
depend on the Controller settings.
*2Full Duplex mode: Simultaneously transmits and
receives like a telephone.
Simplex mode: Transmits (Talker) or receives
(Listener). Users have to take
turns to communicate.
NOTE:
• This operating guide is based on the IP110H
Version 1.05.
• The explanations in this guide assume that
the registration on the Controller* has been
completed. Ask your system manager for details.
* As of January 2022, the IP1000C and VE-PG4 can be
used as the controller of the IP110H. In this guide, the
IP1000C and VE-PG4 are written as “Controller.”
DO NOT OPEN, JOLT, SHORT, OR INCINERATE, AS THE BATTERY MAY IGNITE OR BURST.

Section 1
1-1
BEFORE USING
Attaching the belt clip �����������������������������������������������������������������������������1-2
Battery charging �������������������������������������������������������������������������������������1-2
Turning ON the transceiver ��������������������������������������������������������������������1-3
Adjusting audio output level��������������������������������������������������������������������1-3
Panel description������������������������������������������������������������������������������������1-4
Operating keys ���������������������������������������������������������������������������������������1-4
Function display��������������������������������������������������������������������������������������1-5
Battery warning beeps����������������������������������������������������������������������������1-6
Key Lock function �����������������������������������������������������������������������������������1-6

1BEFORE USING
1-2
Attaching the belt clip
TIP: When attaching a hand strap (User supplied)
22
22
11
11
22
11
Clip cover
Supplied
belt clip
When removing the belt clip, lift
the tab up 1, and slide the belt
clip in the direction of the arrow
2�
Slide the belt clip in the direction of the
arrow until the belt clip locks in place, and
makes a ‘click’ sound�
22
22
11
11
22
11
Clip cover Hand strap (User supplied)
Before attaching the belt clip, remove the
clip cover�
Battery charging
Fully charge the transceiver before using for the
first time, or if it has not been used for more than 2
months�
• The charger automatically restarts charging when the
battery voltage drops�
• Disconnect the AC adapter from the outlet when the
charger is not in use�
CAUTION: Read the ‛Battery caution’ and ‛Charging
caution’ on INSTRUCTIONS (supplied with the
transceiver) before charging�
NOTE:
• Use a 5 V/2 A output AC adapter�
• The charging time may differ, depending on the AC
adapter� When you use a low output AC adapter, it may
take longer to charge, or the transceiver may not be
charged�
• Before using the AC adapter, thoroughly read its
instructions�
LYou can charge up to 4 IP110Hs together by
using 4 BC-257 optional chargers and the BC-228
optional AC adapter� See page 5-4 for details�
AC adapter (User supplied)
Supplied USB cable
Connector
cover
Status indicator
Lights blue: Charging
Not lit: Charged
Turn OFF

1BEFORE USING
1-3
Turning ON the transceiver Adjusting audio output level
zHold down [ ] for 2 seconds�
• A beep sounds�
zPush [▲]/[▼] to adjust the audio output level.
LThe volume can be adjusted between 0 and 32�
NOTE: The explanations in this guide assume
that the registration on the Controller has been
completed� If no Standby screen is displayed, ask
your system manager�
LThe signal strength is displayed in 1 to 3 levels�
A beep may sound when it goes out of, or enters
into the service area, depending on the Controller
setting�
NOTE: If the output level is set to 0, the received
audio and beep do not sound�
Standby screen

1BEFORE USING
1-4
Panel description
NOTE: Instructions and screens on this guide may
differ, depending on the Controller settings�
LThe USB connector does not support USB Power
Delivery (USB PD)�
Clip cover
Jack cap
Status indicator
USB connector
(Type-C)
[MENU]
[ENT ]
[▲]/[▼]
[PTT]
Speaker
Function
display
Microphone
[ ]
[ CLR]
Operating keys
[PTT] switch
Hold down to transmit, release to receive�
[ ] key
Hold down for 2 seconds to turn the transceiver ON or
OFF�
[ CLR] key*
• In the Standby screen, push to display the ID List
screen�
LMay be usable, depending on the Controller setting�
• In the MENU screen, push to return to the previous
screen�
[▲]/[▼] key
• In the Standby screen, push to adjust the audio
level�
• In the MENU screen, push to select a setting item
or value�
[ENT ] key
• In the Standby screen, hold down for 1 second to
turn the Key Lock function ON or OFF�
• In the MENU screen, push to set the selected item
or option�
[MENU] key*
• In the Standby screen, push to display the MENU
screen�
• In the MENU screen, push to go back to the
Standby screen�
* One of the functions described on page 3-9 may
be assigned to the key, depending on the Controller
setting� Hold down the key for 1 second to use the
assigned function�
When connecting optional equipment:
• Be sure to turn OFF the transceiver before
connecting or disconnecting optional equipment to
or from the jack�
• Insert the plug securely when connecting the cable�
•
Remove the cable by holding the plug, not the cable�
CAUTION: Attach the jack cap when no optional
equipment is connected�
33
11
22
44
LUse a coin or standard screwdriver
to protect your fingernails�
Jack cap
About the Status indicator
• Lights red while transmitting�
• Lights green while receiving a call�
• Lights yellow while making a call in the Full Duplex
mode�

1BEFORE USING
1-5
Function display
An “F” blinks while updating the firmware:
• You cannot turn OFF the transceiver until the firmware download and update are finished� Place the transceiver in a good
signal level area�
• The transceiver will automatically restart when the update is finished�
• If the “F” does not blink, restart the transceiver�
• If the battery status indication is “ ” (nearing exhaustion) or “ ” (exhausted), the firmware update will not start� Charge
the battery, restart the transceiver, and then update the firmware�
Signal strength
• Displays the signal strength in 1 to 3 levels�
• “ ” blinks when you are out of a service area�
• “ ” is displayed if your transceiver is not
registered, or not connected to the Controller�
Area Call function* (p� 3-5)
Displayed when the Area Call function is ON�
Recording function* (p� 3-15)
• “ ” is displayed when the Recording function
is ON�
• “ ” blinks when there is new recorded data�
• “ ” blinks while recording audio�
Key Lock function (p� 1-6)
Displayed when the Key Lock function is ON�
Pocket Beep function* (p� 3-10)
•
Displayed when the Pocket Beep function is ON�
• Blinks when a call is received� This icon blinks
until the transceiver returns to the Standby mode
after a received signal disappears�
P-Bell function* (p� 3-10)
Displayed when the P-Bell function is ON�
Bluetooth function (p� 5-5)
• “ ” is displayed when the Bluetooth function is
ON�
• “ ” is displayed when a Bluetooth device is
connected to the transceiver�
VOX function* (p� 3-10)
Displayed when the VOX function is ON�
Receive-only*
Displayed when transmission is inhibited�
About the Call types
All/Group Call
Talkgroup Call* (pp� 3-6 ~ 3-8)
Individual Call
Phone Call
* May be usable, depending on the Controller setting�
Vibration function*
Displayed when the Vibration function is ON�
Mute function* (p� 3-9)
Displayed when the audio is muted�
USB connection
Displayed when a USB device is connected
through a USB cable�
Remaining battery capacity
• Displays the remaining capacity in 4 steps�
: The battery has sufficient capacity.
: The battery is a little exhausted.
: The battery is nearing exhaustion.
(Charging is necessary�)
: The battery is almost fully exhausted.
(Charging is required�)
• “ ” is displayed while charging�

1BEFORE USING
1-6
Battery warning beeps Key Lock function
When the battery is almost exhausted, the battery
status indicator “ ” starts blinking, and warning
beeps sound every 30 seconds� Charge the battery
immediately� (Section 5)
When the battery is nearly exhausted:
When “Low Battery” is displayed and beeps sound,
the transceiver will automatically turn OFF soon�
The Key Lock function prevents accidental function
access�
LAn Emergency call (p� 3-11) can be made, even
while the Key Lock function is ON�
zHold down [ENT ] for 1 second�
• A beep (Pi, Pi) sounds, and “ ” is displayed�
LHold down [ENT ] for 1 second to turn OFF the
function�
L[PTT], [ ], and [▲]/[▼] can be used, even while the
Key Lock function is ON�
Automatically turned OFF�
Pi- Pi- Pi-
Pi- PiPiPi ···
Blinks
Standby screen
When a key is pushed while the Key
Lock function is ON�
[PTT]
[ ] [ENT ]
[▲]/[▼]

Section 2
2-1
BASIC OPERATION
Transmitting and receiving ���������������������������������������������������������������������2-2
Using the Phone Book����������������������������������������������������������������������������2-4
Using a Call history entry������������������������������������������������������������������������2-5

2BASIC OPERATION
2-2
Transmitting and receiving
1. Transmitting a call
While holding down [PTT], speak into the microphone
at your normal voice level�
• The status indicator lights red while transmitting�
Calling tip:
Hold the transceiver 5 ~ 10 cm (2 ~ 4 inches) away
from your mouth, and speak at your normal voice
level� Talking too close to the microphone, or in a loud
voice, can distort your voice�
About the Time-out Timer:
When the continuous transmission period exceeds the
set period of time*, the Time-out Timer automatically
stops transmission to prevent an accidental prolonged
transmission�
Release [PTT], and then hold down again to resume
talking�
* Depending on the Controller setting�
About the key touch beep:
A confirmation beep may sound when you push a key,
depending on the Controller setting�
About the alert:
The alert that indicates that you are out of the service
area, or receiving a call may sound, depending on the
Controller setting�
About the Vibration function:
The Vibration function may indicate that a call is
received, depending on the Controller setting�
About the Mute function:
You may be able to mute the received audio by
holding down [ CLR] or [MENU] for 1 second,
depending on the Controller setting� (p� 3-9)
LThe notification tone is not muted�
2. Receiving a call
When a call is received, the audio is heard�
• The status indicator lights green while receiving�
Receiving an All call
All call is selected�
[PTT]
Microphone
Lights red Lights green
Speaker

2BASIC OPERATION
2-3
Transmitting and receiving
3. Talking while receiving a call
While receiving a call in the Full Duplex mode*, push
[PTT] to talk, just like making a telephone call�
LIn the Full Duplex mode, the status indicator lights yellow�
LPush [▲]/[▼] to adjust the audio output level. DO NOT
cover the speaker or microphone�
If howling occurs, turn down the output level�
* Depending on the Controller setting�
About the Simplex mode:
If the communication mode is set to Simplex, users
have to take turns to communicate:
Push [PTT] to talk, release to receive�
LPush [PTT] after the other person finishes talking�
LSaying “Over” at the end of your talk makes the
communication smooth�
About the Back Light function:
The Back Light function setting may differ, depending
on the Controller setting�
• Always OFF: The backlight does not light�
• Always ON: The backlight lights continuously�
• On operation: When a call is received, or a key is
pushed, the backlight lights, then
automatically turns OFF after 5 seconds�
Turning OFF the transceiver:
Hold down [ ] for 2 seconds�
• The last selected call-to party is saved, and then the
transceiver is turned OFF�
LDO NOT turn OFF the transceiver within 2 seconds after
you change the transceiver settings� Otherwise, the
changed settings may be lost�
[PTT]
Microphone
Lights yellow

2BASIC OPERATION
2-4
Using the Phone Book
The [ CLR] key may be usable, depending on the Controller setting�
1. Selecting a call-to party from the Phone Book
1� Push [ CLR]�
LYou can also open the Phone Book in the MENU screen� (p� 4-3)
2� Push [▲]/[▼] to select a call type, and then push [ENT ]�
(Example: Group)
LSee page 3-6 about Talkgroup�
3� Push [▲]/[▼] to select a tab, and then push [ENT ]� (Example: S)
4� Push [▲]/[▼] to select a call-to party, and then push [ENT ]�
(Example: Sales group1)
About the All or Group (Talkgroup) call:
Ask your system manager for the call type setting�
2. Transmitting a call
While holding down [PTT], speak into the microphone at your normal voice level�
• The status indicator lights red�
[ CLR] [ENT ]
[▲]/[▼]
[PTT]
Microphone
Lights red
TIP: The call-to parties are displayed in the “#” tab when:
• The party’s “Nickname” is not set in the Controller�
• All call-to parties’ “Nickname” start the same letter�

2BASIC OPERATION
2-5
Using a Call history entry
2. Transmitting a call
While holding down [PTT], speak into the microphone at your normal voice level�
• The status indicator lights red�
[PTT]
Microphone
Lights red
1. Selecting a call-to party from the Call history
1� Push [MENU]�
2� Push [▲]/[▼] to select “TX Log” or “RX Log,” and then push [ENT ]�
(Example: TX Log)
3� Push [▲]/[▼] to select a call history type, and then push [ENT ]�
(Example: TX Log)
4� Push [▲]/[▼] to select a call-to party, and then push [ENT ]�
(Example: Sales group1)
About the Call history log:
Up to 10 log entries can be saved� The oldest entry is automatically deleted when
you receive the 11th call�
[MENU]
[ENT ]
[▲]/[▼]
The Call history item may be usable, depending on the Controller setting�

2BASIC OPERATION
2-6
Using a Call history entry
Deleting history log entries:
1� Turn OFF the transceiver�
2� While holding down [ENT ], turn ON the transceiver�
3� Release [ENT ] when the Standby screen is displayed�
4� Push [MENU]�
5� Push [▲]/[▼] to select “Settings,” and then push [ENT ]�
6� Push [▲]/[▼] to select “Delete Log,” and then push [ENT ]�
7� Push [▲]/[▼] to select “OK,” and then push [ENT ]�
• All the entries except the recorded audio are deleted�
LSee page 3-16 for deleting the recorded audio�
[MENU]
[ENT ]
[▲]/[▼]
[ ]

Section 3
3-1
ADVANCED OPERATION
Sending a message��������������������������������������������������������������������������������3-2
Viewing received messages�������������������������������������������������������������������3-3
Sending a Presence (Status) Call ����������������������������������������������������������3-4
Area Call function �����������������������������������������������������������������������������������3-5
Talkgroup Call function ���������������������������������������������������������������������������3-6
DMultiplex Talkgroup�������������������������������������������������������������������������3-7
DSelecting a Talkgroup number from the MENU screen ������������������3-8
DSelecting a Talkgroup number from the Phone Book ���������������������3-8
About the Programmable keys ���������������������������������������������������������������3-9
Pocket Beep function����������������������������������������������������������������������������3-10
P-Bell function ��������������������������������������������������������������������������������������3-10
VOX function ����������������������������������������������������������������������������������������3-10
Emergency Call function�����������������������������������������������������������������������3-11
DStationary Detection function �������������������������������������������������������3-12
DMotion Detection function�������������������������������������������������������������3-12
DLone Worker function �������������������������������������������������������������������3-13
DMan Down function�����������������������������������������������������������������������3-14
Recording ���������������������������������������������������������������������������������������������3-15

3ADVANCED OPERATION
3-2
Sending a message
2. Selecting a message
1� Push [MENU]�
2� ]�
3� ]�
4�
•
5� Push [PTT] or [ENT ]�
• The selected message is transmitted�
1. Selecting a call-to party
1� Push [ CLR]�
LYou can also open the Phone Book in the MENU screen� (p� 4-3)
2� ]�
(Example: Group)
LSee page 3-6 about Talkgroup�
3� ]� (Example: S)
4� ]�
(Example: Sales group1)
[ CLR] [ENT ]
LYou can also select the call-to party from the Call history entries� (p� 2-5)
[MENU]
[ENT ]
[PTT]

3ADVANCED OPERATION
3-3
Viewing received messages
1� Push [MENU]�
2� ]�
3� ]�
•
4� ]�
•
[MENU]
[ENT ]

3ADVANCED OPERATION
3-4
Sending a Presence (Status) Call
1� Push [MENU]�
2� ]�
3� ]�
4�
5� Push [PTT] or [ENT ]�
• The selected status is transmitted�
NOTE: A transmitted status can only be confirmed with your system Controller or
� The transmitted status is not displayed on
the IP110H�
[MENU]
[ENT ]
[PTT]

3ADVANCED OPERATION
3-5
Area Call function
The Area Call function enables you to call the areas that the selected wireless Access Points cover�
1. Turning ON the Area Call function
1� Push [MENU]�
2� ]�
3� ]�
4� ]�
5� Push [MENU]�
• Exits the MENU screen�
•
2. Selecting a call-to party and transmitting a call
1� Push [ CLR]�
LYou can also open the Phone Book in the MENU screen� (p� 4-3)
2� ]�
(Example: Group)
LSee page 3-6 about Talkgroup�
3� ]� (Example: S)
4� ]�
(Example: Sales group1)
5�
[ CLR] [ENT ]
LYou can also select the call-to party from the Call History entries� (p� 2-5)
[MENU]
[ENT ]
[PTT]

3ADVANCED OPERATION
3-6
Talkgroup Call function
The Talkgroup Call function enables you to communicate with call-to parties in the same Talkgroup�
L
key in the Controller�
LAsk your system manager about whether or not to include the Talkgroup in All Call�
When Talkgroup is OFF
When Talkgroup is selected
All
All
Group 10001
Talkgroup 20001
Group 10002
Talkgroup 20002
00001 00002 00003 00004 00005 00006 00007 00008
Group 10001
Talkgroup 20001
Group 10002
Talkgroup 20002
00001 00002 00003
00008
00006
00004
00005 00007
Other manuals for IP110H
1
Table of contents
Other Icom Transceiver manuals

Icom
Icom ID-1 Installation and operating instructions

Icom
Icom IC-V3500 Setup guide

Icom
Icom IC-03AT User manual

Icom
Icom IC-505 User manual

Icom
Icom IC-M88 User manual

Icom
Icom IC-25A User manual

Icom
Icom IC-7300 Administrator Guide

Icom
Icom IC-iA210 User manual

Icom
Icom IC-V200T User manual

Icom
Icom dPMR446 User manual
Popular Transceiver manuals by other brands

Altronix
Altronix HubSat4WPiV installation guide

Uniden
Uniden UH785 Series owner's manual

Diehl Metering
Diehl Metering IZAR RADIO Extend installation guide

KTI Networks
KTI Networks KT-10B Specification sheet

alphatronics
alphatronics PSTN-2-IP GPRS Quick reference guide

Alinco
Alinco DJ-G7 instruction manual