Ideal Heating Halo User manual

i
d
e
a
l
h
e
a
t
i
n
g
.
c
o
m
For use with
H
a
l
o
H
e
a
t
&
S
y
s
t
e
m
U
s
e
r
G
u
i
d
e

USER GUIDE
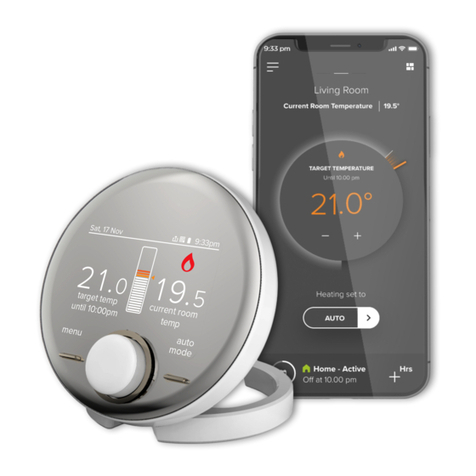
Welcome to your new Ideal Halo control. This thermostat will help you to control both your heating
temperature and the times that your heating and hot water is on.
Halo is a battery powered, wireless control for both
heating and hot water, that uses a protocol called
Zigbee to communicate with the Smart Interface
that wires into the boiler.
This user guide is applicable to both the Halo Heat
& System RF and Halo Heat & System Wi-Fi control.
Halo Heat & System RF is a non-connected control
(control is via the Halo Heat & System unit only).
Halo Heat & System Wi-Fi is a wireless heating
control that is connected to the internet. You can
download the Halo app on Google Play or the Apple
app store. You will not have to pay to use the app.
For more information on the features in your Halo
app visit the Help section of the app or visit our
website idealheating.com
If you have purchased or are upgrading a Halo Heat & System RF (non-connected control) you can upgrade
this to an internet heating control by downloading the Halo app and following the steps in the app to
connect your Halo control. You will be required to pay a connection fee to upgrade to app controlled heating.
The temperature
scale in the centre
will be orange
and red when the
heating is on
Central heating zone the
Halo Programmable Room
Thermostat (PRT) is controlling
Text relating to
left hand button
Target
temperature
Left hand button,
use this to enter
the menu Turn dial to adjust temperature or navigate menu.
Press dial to alternate between heating and hot water
The flame symbol
is present if the
heating is on
Orange dot shows if
the hot water is on
Current
temperature
is the current
temperature
in your home
Text relating to right
hand button - shows
whether the Halo is
in Auto, Manual or
Off mode
Right hand button,
use this to switch
between modes

MAIN FEATURES
HEATING
MODE SELECTION
You can choose to run your Halo
in Auto, Manual or Off mode.
Auto: runs your heating to
pre-set scheduled times and
temperatures.
Manual: you control the
temperature by manually
turning the dial, there are
no set schedules.
Off: your heating will be set to
a low temperature (default 5°C)
for frost protection.
Move between Auto, Manual
and Off modes using the right
hand side button, scroll down
the menu using the dial and
push to select.
The current mode is
displayed bottom right
Press the right hand button
to change the mode
Use the dial to scroll between
the different modes (Auto,
Manual and Off) and then
push the dial or press the
right hand button to confirm
your selection

MAIN FEATURES
HEATING
PLUS HOURS
If you are running a schedule
with pre-set times (Auto mode)
and you want to maintain the
current temperature of your
heating instead of moving to the
next setting simply press the dial.
A pop up menu will appear for
you to select how long you would
like to extend the temperature
for, turn and push the dial to
make your selection.
TOP TIP: You could use
this feature if you want to
keep your heating on for
longer than is scheduled.
Maybe you’re not going
to work today and you
want your heating to stay
on all morning.
Press and hold the dial to
extend the current heating
setting
Turn the dial to select how
long you would like to
extend your heating for
Push the dial or press the
right button to confirm
your selection
The home screen will
now display the override
icon above the current
temperature

MAIN FEATURES
HEATING
OVERRIDE
If you are running a schedule
with pre-set times (Auto mode)
and you want to adjust the
temperature of your heating
temporarily, simply turn the dial
to your desired temperature.
The new temperature will be
active until the next scheduled
change shown under the target
temperature.
The home screen will now display
the override icon above the target
temperature.
TOP TIP: You could use
this feature if you want
to boost your heating to
a higher temperature for
a period of time. Maybe
you’re feeling chilly or it’s
the weekend and you’re
staying up later than
when your heating is
scheduled.
Turn the dial to adjust
the target temperature
temporarily (this could be
up or down)

MAIN FEATURES
HEATING
SCHEDULES
Your Halo will come with
a pre-set schedule:
6:00am - 8:00am 21°C
8:00am - 4:00pm OFF
4:00pm - 10:00pm 21°C
10:00pm - 6:00am OFF
You can alter this schedule
by entering the “timed heating
schedule” section in the
main menu.
Each Halo unit is programmed
independently of the other.
TOP TIP: Schedules help
to balance comfort and
energy efficiency, so you are
heating your home to suit
your lifestyle. Don’t forget
you could set your weekend
schedules differently to
during the week if your
routine changes.
TOP TIP: If you want to
change more than one day
you can use the copy day
feature to copy the schedule
from one day to other days.
Turn the dial to move
between the different days
and view the schedule that
is set. To edit a day, push the
dial or right hand button
when the day is highlighted
in light blue.
Push the dial to edit
a heating time or
temperature when it is
highlighted in light blue.
You can also add an
additional heating period
by scrolling and pushing
on the “Add new heating
event” bar. You can have up
to 6 heating events per day
in your schedule.
Alter the start and end
times of the heating period
and the temperature by
scrolling and then pushing
the dial to edit. Then use
the dial to alter the time or
temperature and push to
confirm. Push the dial or the
right hand button to save
your changes.

HW
Hot water on
until 10:00pm
menu mode
autohot water
menu
Hot water control
Support
Heating Plus Hours
cancel
override
MAIN FEATURES
HOT WATER
To access the hot water
functions, when on the
heating home screen,
simply press the dial.
Alternatively press the menu
button, scroll to Hot Water
Control and press confirm.
To switch back to heating
from the hot water home
screen, press the dial again.
Push dial to alternate
between Central Heating
(CH) and Domestic Hot
Water (DHW)
The current mode is
displayed bottom right
Press the right hand button
to change the mode

HW
Hot water on
until 10:00pm
menu mode
autohot water
HW Menu
back confirm
Auto
Timed hot water on
Permanently On
MAIN FEATURES
HOT WATER
MODE SELECTION
You can choose to run your
Hot Water in Auto, On or Off
mode.
Auto: runs your hot water
to pre-set scheduled times
and temperatures.
ON: Your hot water is
permanently on.
OFF: Your hot water is
permanently off.
Move between Auto, ON and
OFF modes using the right
hand side button, scroll down
the menu using the dial and
push to select.
The current mode is
displayed bottom right
Press the right hand button
to change the mode
Use the dial to scroll between
the different modes (Auto,
On and Off) and then push
the dial or press the right
hand button to confirm
your selection

HW
Hot water on
until 10:00pm
menu mode
autohot water
HW
Hot water boost
on until 10:33pm
cancel
override
HW Menu
back confirm
2 hours
How long would you like
to boost hot water for?
1 hour
MAIN FEATURES
HOT WATER
BOOST
If you are running a schedule with
pre-set times (Auto mode) and
you want to boost your hot water
rather than wait for the next
setting simply turn the dial.
A pop up menu will appear for
you to select how long you would
like to boost your hot water for,
turn and push the dial to make
your selection.
TOP TIP: You could use
this feature if you’re home
early from work and want
hot water before the
scheduled time.
Turn the dial
Turn the dial to select how
long you would like to boost
your hot water for
Push the dial or press the
right button to confirm your
selection
The home screen will
now display the override
icon above the current
temperature

HW Schedule
back edit
To modify the hot water schedule for a
selected day press edit or the dial
8:00am
6:00pm
6:00am (tue)
4:00pm
6:00am
4:00pm
6:00pm
8:00am
to
to
to
to
o
o
on
back edit
o
o
on
on
8:00am
6:00pm
6:00am (wed)
4:00pm
6:00am
4:00pm
6:00pm
8:00am
to
to
to
to
Add new hot water event
Copy hot water schedule to other days
MAIN FEATURES
HOT WATER
SCHEDULES
Your Halo will come with
a pre-set schedule:
6:00am - 8:00am ON
8:00am - 4:00pm OFF
4:00pm - 6:00pm ON
6:00pm - 6:00am OFF
You can alter this schedule
by entering the “timed hot
water schedule” section in
the main menu.
TOP TIP: Schedules help to
balance comfort and energy
efficiency, so you are heating
your hot water to suit your
lifestyle. Don’t forget you
could set your weekend
schedules differently to
during the week if your
routine changes.
TOP TIP: If you want to
change more than one day
you can use the copy day
feature to copy the schedule
from one day to other days.
Turn the dial to move
between the different days
and view the schedule that
is set. To edit a day, push the
dial or right hand button
when the day is highlighted
in light blue.
Push the dial to edit a
hot water time when it
is highlighted in light
blue. You can also add an
additional hot water period
by scrolling and pushing
on the “Add new hot water
event” bar. You can have up
to 6 hot water events per
day in your schedule.
Alter the start and end
times of the hot water
period and the temperature
by scrolling and then
pushing the dial to edit.
Then use the dial to alter the
time or temperature and
push to confirm. Push the
dial or the right hand button
to save your changes.

HALO SMART INTERFACE
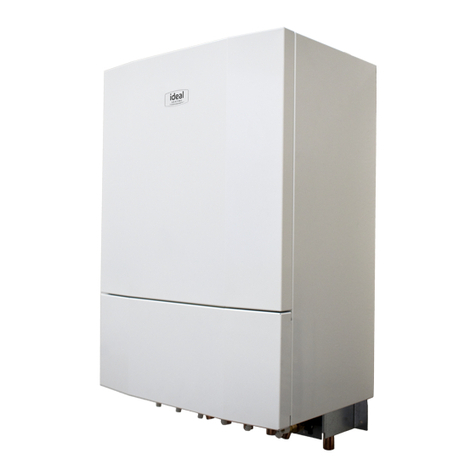
The Halo Smart Interface will be installed in the
aperture in the front of your Ideal boiler. It will
wirelessly communicate with your Halo control
and, in the case of an internet connected Halo,
your home Wi-Fi. In normal circumstances you will
not have to interact with the Halo Smart Interface,
however the LED indications can be useful in
diagnosing any technical issues that may arise.
The Halo Smart Interface has a Failsafe/Override
feature which can be used to switch your boiler on
if wireless communication between the Halo and
Smart Interface is lost.
Override LED lights up
if override is active
Pairing button is used
during the setup of your
Halo control
Power LED refers to
the power to the Halo
Smart Interface
Boiler LED refers to the
activity of the boiler and
will be green when the
boiler is active
Connectivity LED refers
to the connection to the
home Wi-Fi network if
the Halo is an internet
connected control
Override button
can be used
to switch the
boiler on if the
communication
between your
Halo control and
your Halo Smart
Interface fails
Zigbee LED refers
to the wireless
connection
between the
Halo control and
the Halo Smart
Interface

HALO SMART WIRING CENTRE
The Halo Smart Wiring Centre will wirelessly
communicate with your Halo Smart Interface, in
normal circumstances you will not have to interact
with the Halo Smart Wiring Centre, however the
LED indications can be useful in diagnosing any
technical issues that may arise.
The Halo Smart Wiring Centre has a Failsafe/
Override feature which can be used to open
your central heating zone valves if wireless
communication between the Halo Smart Wiring
Centre and Halo Smart Interface is lost.
The pair button allows
for connection to the
Smart Interface
Power LED refers both
to power (green) and to
override (flashing red)
Heating Zone 1 LED
refers to the demand
for heating in zone 1
Heating Zone 2 LED refers
to the demand for heating
in zone 2 (Only applicable
with 2-zone upgrade)
Pair LED refers to the
wireless connection
between the Smart
Interface and Smart
Wiring Centre
Hot water LED
refers to the
demand for
hot water
When in override these
buttons can be used
to manually open and
close the zone valves for
zones 1, 2 and hot water
Do not remove the cover unless
you are qualified to do so.
Important: Override is only available
if the Smart Wiring Centre loses
communication with the Smart
Interface. During normal operation
this function is not active.

ADDITIONAL FEATURES
Holiday Mode
To temporarily turn your heating and hot water off whilst you are on holiday,
select the holiday function in the menu and use the dial an buttons to set the
number of days.
Support Page Provides information for your installer or technical expert about your Halo such
as software version and wireless signal strength.
Child Lock
To lock the control to avoid it being altered press and hold the left and right hand
buttons at the same time until the icon appears. To remove child lock press and
hold the left and right hand buttons again.
Date & Time If the date and time seen across the top of the screen is incorrect you can alter
this in the date and time section of the menu.
Advanced
Settings
The advanced settings section of the menu allows your installer or a technical
expert to make adjustments and find information about your Halo.
Fault
Notification
If there is a fault then the fault symbol will show on the home screen of your
Halo. Press the left hand button to access further information about the fault.

PRT SYMBOL KEY
SYMBOL NAME EXPLANATION
Flame Indicates your heating is on.
Fault Indicates there is a fault with the boiler.
Child lock Childlock is set so the Halo cannot be altered.
Override Override or plus hours function is active.
Optimised start Optimised start is active.
Delayed start Delayed start is active.
Optimised stop Optimised stop is active.
Frost protection Frost protection is active.
Service due
Service due in:
- 60 days (grey)
- 30 days (amber)
- 0 days (red)
PRT description Indicates central heating mode.
Central heating Central heating scheduling screen.
Hot water Indicates the hot water mode.
OP
OP
D
S
Zone 1
CH
HW

SYMBOL NAME EXPLANATION
Hi Room temperature is above 40°C.
Lo Room temperature is below 0°C.
Target temp Temperature you want your heating to reach.
Current temp Room temperature in the location of your Halo.
Time Current time.
Date Current date.
Battery Battery status indication.
Zigbee Indicates that the Halo is communicating
with the Smart Interface.
Cloud*
Indicates that the Halo is communicating with internet and can
be controlled with the Halo app via your smart phone.
*Halo Combi Wi-Fi only
Hot water Indicates that the hot water demand is active.
Hot water
When icon is orange hot water demand is on.
When icon is yellow hot water boost is active.
When icon is white demand is off.

CHANGING THE BATTERIES IN YOUR
HALO CONTROL
A red, empty battery symbol means that your Halo
batteries need to be replaced.
Whether you have a desk or wall mounted unit you
will see the below symbol on the base of the unit.
There are also two finger grabs top and bottom as
shown below. Use the finger grabs to gently pull
the Halo away from the rear housing. Do not use a
screwdriver to separate.
Remove all the old batteries and replace with 4 new
AA Alkaline batteries. Check you have the correct
battery orientation then position the Halo back onto
the rear housing and gently push into place until you
feel a positive click.
The Halo will go through a short synchronisation
process while it reconnects with your Halo Smart
Interface. The Halo will then return to the home
screen.

TROUBLE SHOOTING
1. HALO NOT COMMUNICATING WITH HALO
SMART INTERFACE
If the below message shows on the Halo screen
then it is not communicating with the Halo Smart
Interface.
Please follow the on screen recommendations,
additionally for further help you can also visit
idealheating.com
Please note even without a signal between the
Halo and the Halo Smart Interface the heating will
continue to operate in Failsafe mode. In Failsafe
mode the schedule will still operate however the
output temperature of the boiler will be reduced
in heating. The output temperature will remain
unchanged during hot water demands.
You can also manually switch your boiler On
and Off by using Override button on the Smart
Interface. When the Override is pressed it will
disable failsafe mode and allow full manual control
of the boiler until the connection is restored. When
communication is restored both Failsafe and
Override modes are disabled.
2. SMART WIRING CENTRE NOT COMMUNICATION
WITH SMART INTERFACE
If the below message shows on the Halo screen then
the Smart Wiring Centre is not communicating with
the Smart Interface.
Please follow the on screen recommendations
additionally for further help you can visit
idealheating.com
During this fault condition your heating zone valves
will need to be manually operated via the buttons on
the Smart Wiring Centre. When communication is
restored this override mode is disabled.

TROUBLE SHOOTING CONT.
3. BOILER AND CONTROL FAULTS
If the fault icon appears in the home screen it means
there is a control or boiler fault. Press the left hand
key to view the fault and recommendations.
4. LOST PAIRING BETWEEN HALO AND HALO
SMART INTERFACE
In the unlikely event that the Halo loses pairing you
will see the following screen.
To re-pair go to section H in the Halo Heat & System
installation instructions. You can also find a copy of
the installation guide at idealheating.com

WARRANTY
Your Ideal Halo comes complete with a 2 year Ideal
Guarantee, subject to the following terms and
conditions.
During the period of the guarantee we will replace
free of charge, where it suffers a mechanical or
an electrical breakdown as a result of defective
workmanship or materials, subject to the following
conditions and exclusions;
1. The guarantee will commence from the date
of installation. Without proof of purchase the
guarantee will commence from the date of
manufacture (via serial number).
2. The Installation needs to be registered within 30
days of installation, it can be registered online by
visiting idealheating.com.
3. If the control suffers a mechanical or an electrical
breakdown we should be contacted on one of the
following numbers:
Northern Ireland:
T: 02890 331444
Elsewhere in the UK:
T: 01482 498660
Our normal working times,
excluding Bank Holidays, are:
8am – 6pm Monday to Friday
8am – 4pm Saturday
8am – 12 noon Sunday
4. The guarantee does not apply:
a. To any defect, damage or breakdown caused by
deliberate action, accident, misuse or third party
interference including modification or failed
batteries.
b. To any defect, damage or breakdown caused by
the design, installation and maintenance of the
central heating system.
d. To any other costs or expenses caused by or arising
as a result of the breakdown of the controls.
e. To any defect resulting from the incorrect
installation of the controls. To any costs incurred
during delays in fixing reported faults.
Our Ideal Guarantee is offered in addition to the
rights provided to a consumer by law. Details of these
rights can be obtained from a Trading Standards
Authority or a Citizens Advice Bureau.
Guarantor
Ideal Boilers Ltd, National Avenue, Hull, HU5 4JN.
Consumer Helpline
T: 01482 498660
Installer phone number:
This product contains free and open source software.
For more information about that software, the
licences and notices applicable to it, and (where
applicable) how to obtain a copy of the source code,
please see the licence document, a copy of which
can be downloaded from:
idealheating.com/open-source and which is
incorporated in this statement by reference.
For some components, we also offer to provide
the corresponding source andassociated install
information on a physical mediumwhere that
is referenced in the licence applicable to that
component.Formore information contact us
on[email protected]or
visit the link above.

HEATING
Hereby, Ideal Boilers Ltd declares that devices (model 222143 and 222141)
are in compliance with: Directive 2014/53/EU.
The full text of the EU declaration of conformity is available at the
following internet address idealheating.com
UIN: 227160 A01
Ideal Boilers Ltd
National Avenue
Hull, HU5 4JB
T: 01482 498660
E: enquiries@idealheating.com
RF frequency: 2405 – 2480MHz Max.
RF output power: 10dBm
Ideal Heating is a trading name of Ideal Boilers and associated Group Companies
idealheating.com | welcome to our ideology
Other manuals for Halo
2
Table of contents
Other Ideal Heating Heater manuals
Popular Heater manuals by other brands

Warmlite
Warmlite WL44005 instruction manual

Geko
Geko G80405 Translation of the original operating instructions

AKO
AKO H 350 TSM Assembly and operating instructions

Mosebach
Mosebach bk10l troubleshooting guide

Drazice
Drazice TJ 2" HP 9 kW OPERATING AND INSTALLATION Manual

WILMS
WILMS BV 135 operating manual

Modine Manufacturing
Modine Manufacturing IPT Installation and service manual

Prem-I-Air Elite
Prem-I-Air Elite EH1386 manual

CSA
CSA RA 350 installation manual

VOX electronics
VOX electronics OH-45F11 operating instructions

VonHaus
VonHaus 2500453 instructions

Sure Flame
Sure Flame S400 Service and maintenance manual