English
5
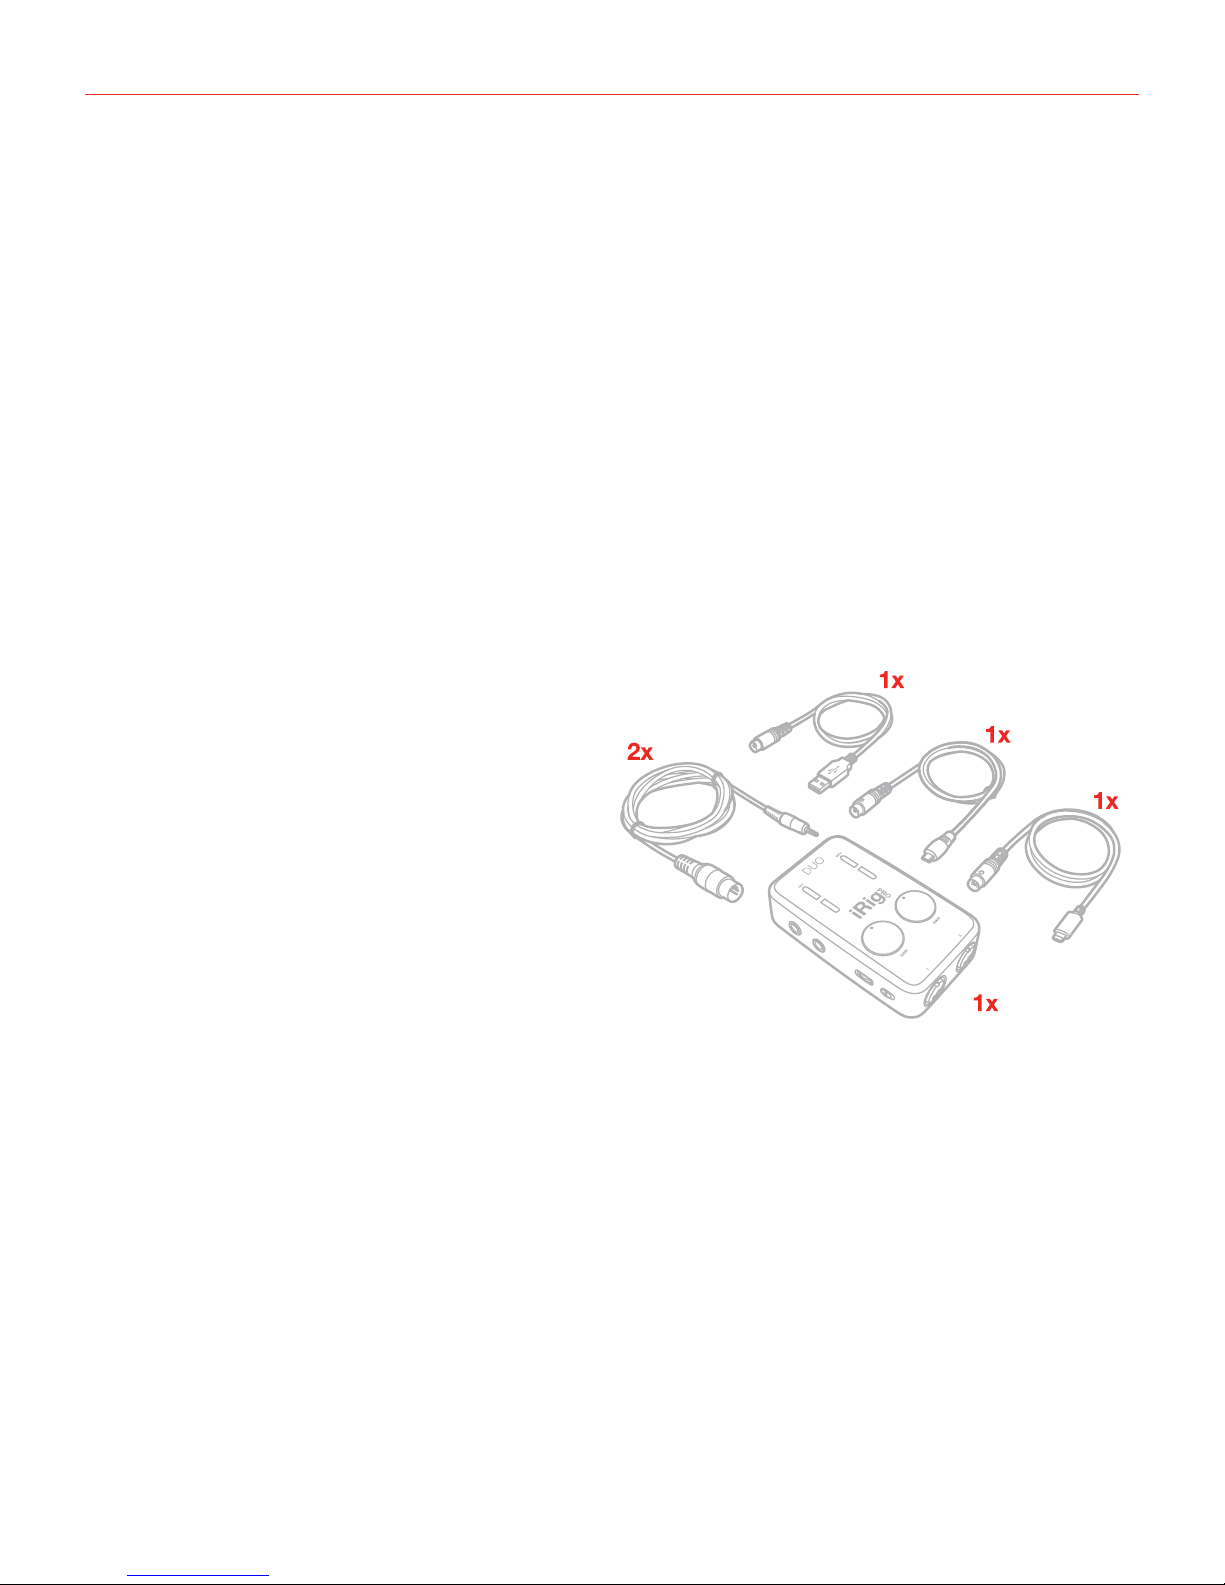
Installation and setup
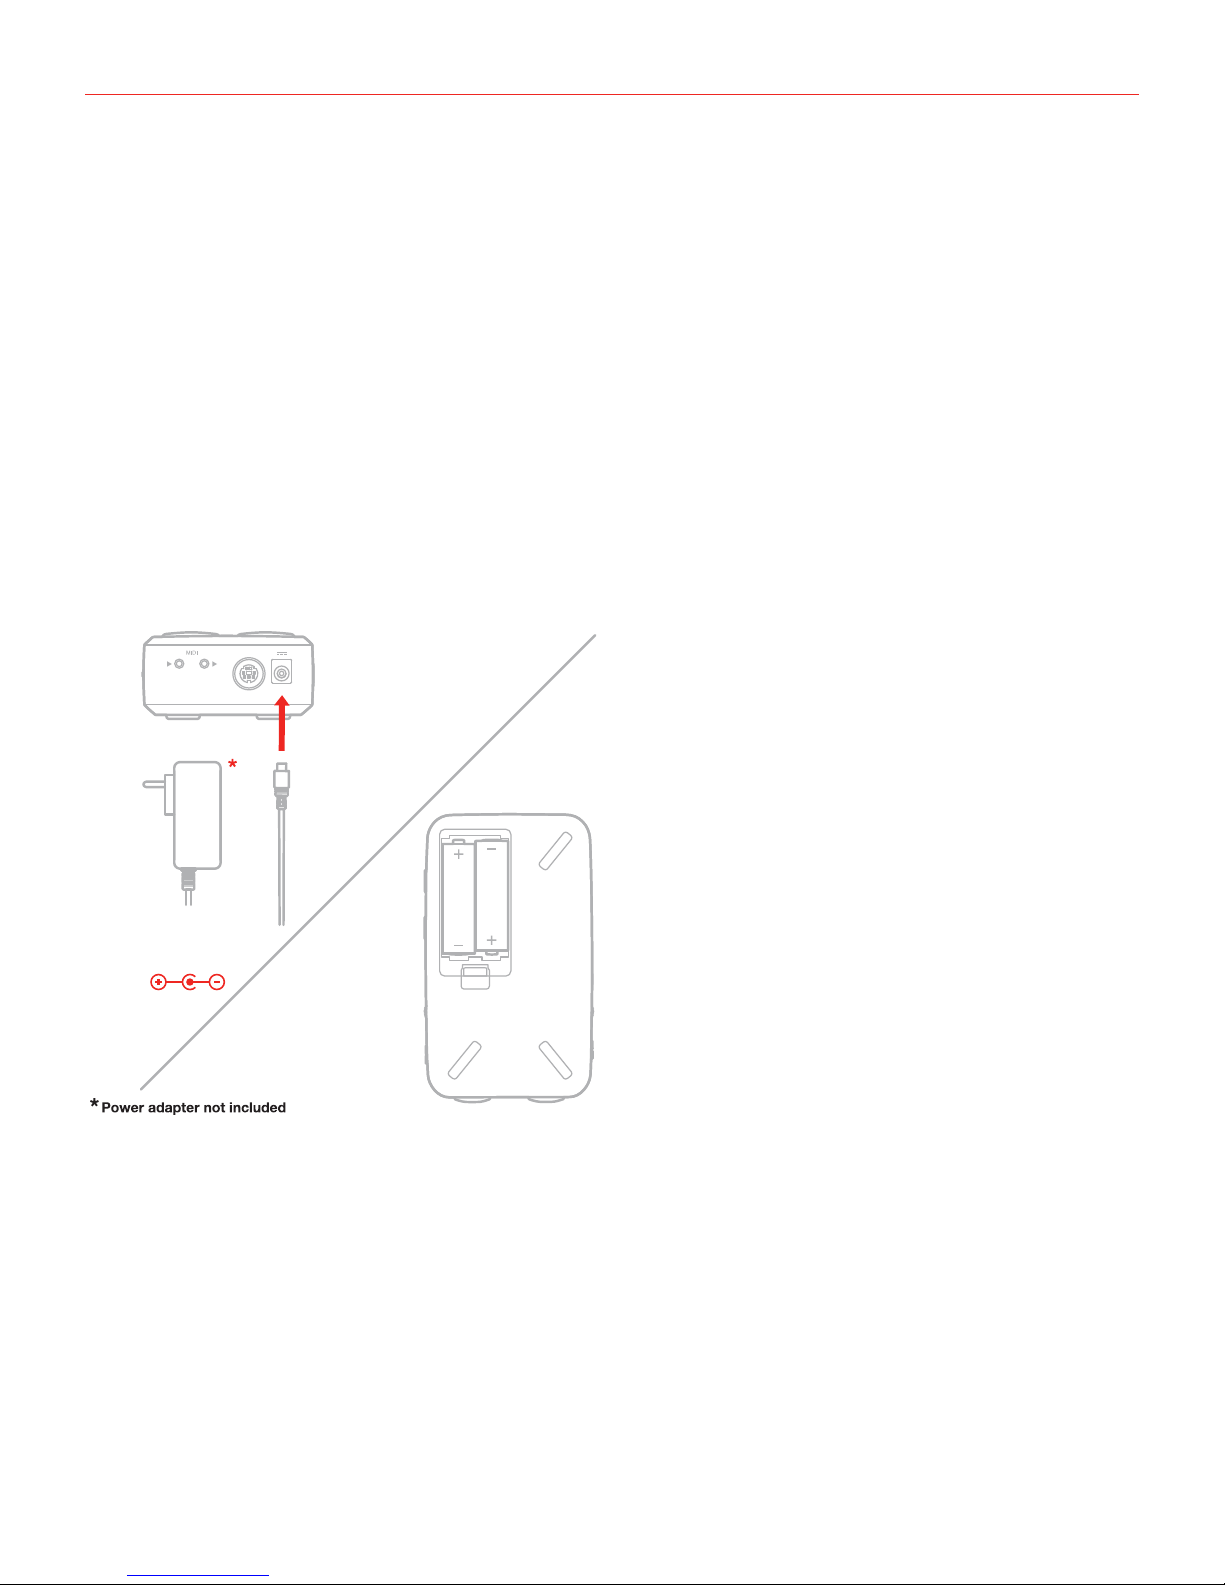
For iOS users: when working with iOS devices, iRig Pro DUO only works when powered by two AA batteries.
See specifications about battery life. Insert the included AA batteries in the battery compartment on the bottom
side of iRig Pro DUO. If you want to play for a long time, you can connect the DC In port on iRig Pro DUO to an
external 9VDC - 500mA (minimum) PSU, for unlimited playing time without a battery.
IMPORTANT: the external power supply will NOT charge the device’s battery.
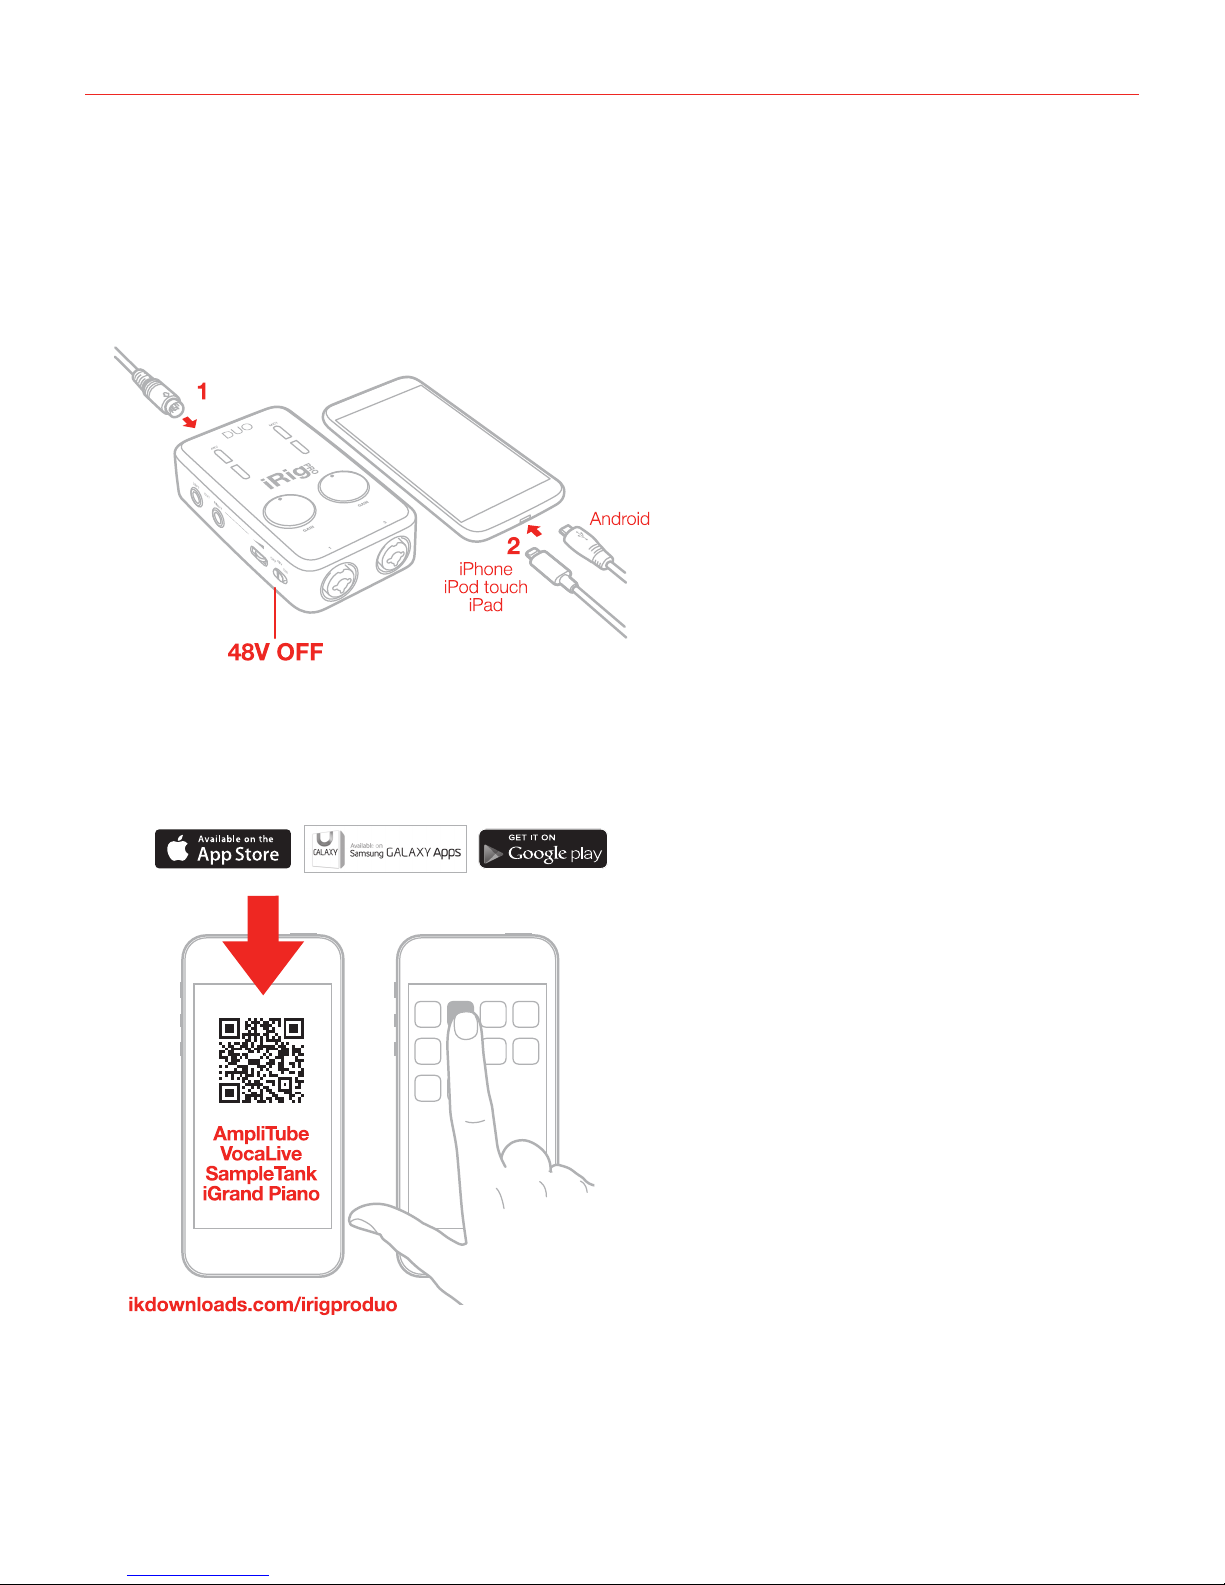
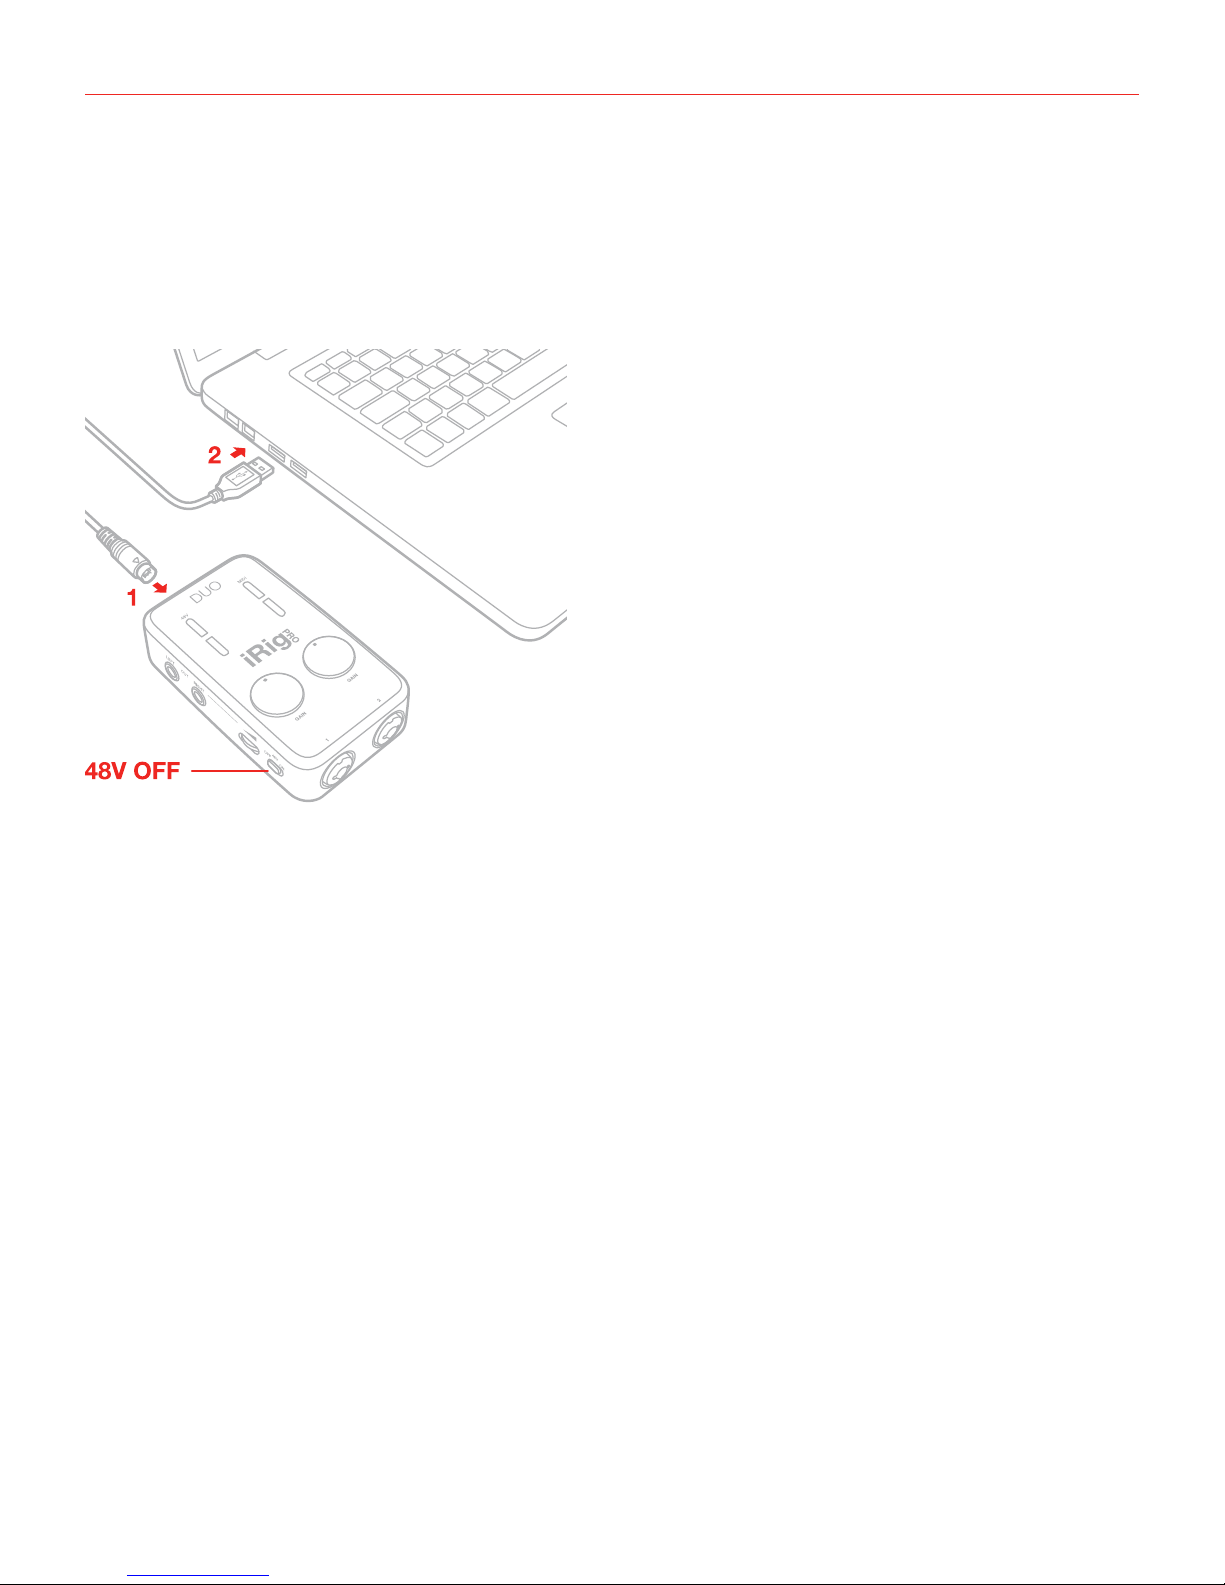
For MAC/PC and Android users: when connected to an USB class compliant host, iRig Pro DUO can be
powered as follow:
• By internal AA batteries;
• USB powered, ONLY if the host device is capable of providing enough current. When connected to Android
devices, we recommend that you use the internal batteries or the external PSU to avoid running out of
battery life;
• By external 9V PSU (no matter if batteries are installed).
Battery life
Recording - Max load*: 3 hours, 30 minutes (NiMH rechargeable); 45 minutes (Alkaline)
Playback - Min load**: 10 hours (NiMH rechargeable); 3 hours (Alkaline)
*Max load condition is as follow: both inputs connected to two 1,5mA phantom powered loads, input gains set
to maximum, outputs set to maximum.
**Min load condition is as follow: music playing, phantom power OFF.
IMPORTANT: iRig Pro DUO is powered by
batteries even when it is connected to a USB port.
This allows it to work even with USB ports that can
only provide a small amount of current. If you want
your iRig Pro DUO to be powered by the USB port
please remember to REMOVE the batteries from it.
9VDC
from 500mA up