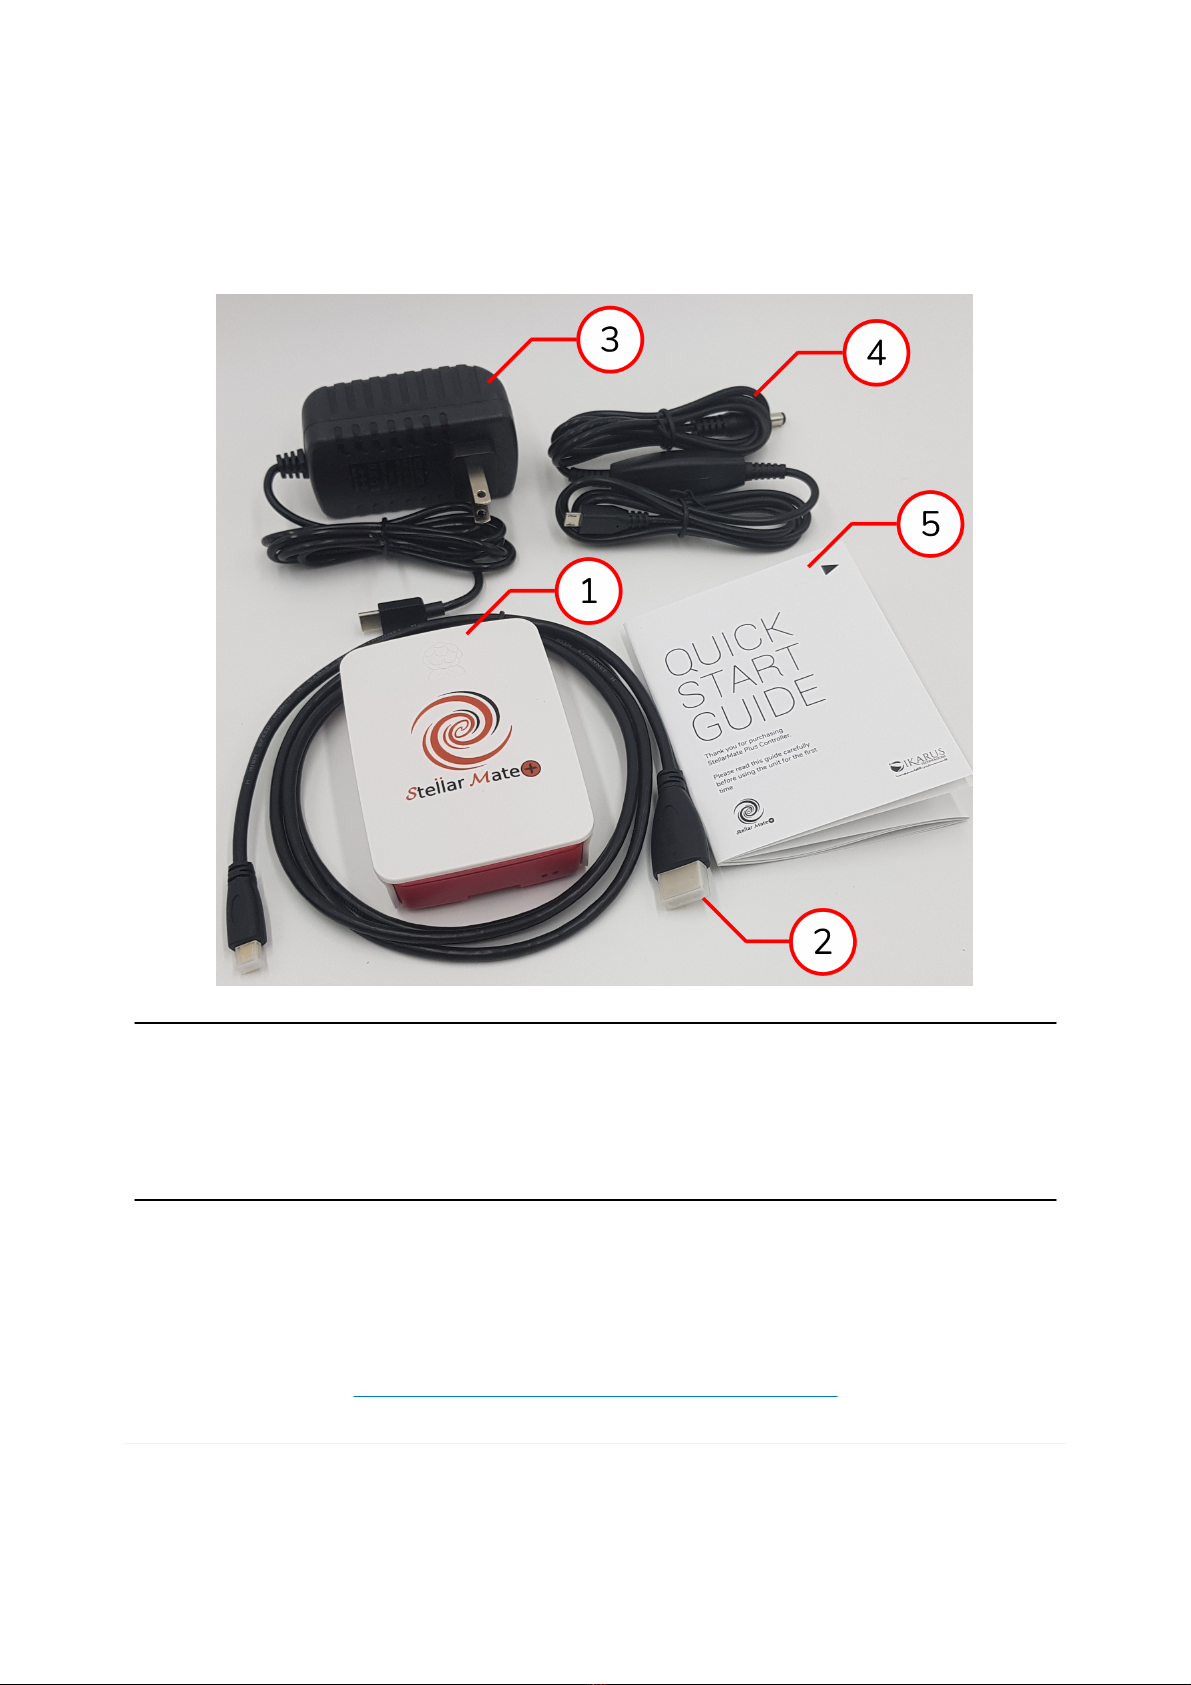
The StellarMate Plus Manual
3
/
227
Connecting your equipment
.....................................................................
132
Connecting from Ekos
.............................................................................
133
Ethernet Connection
...................................................................................
135
StellarMate Address
................................................................................
136
Connecting your equipment
.....................................................................
136
Downloading Ekos
..................................................................................
136
Connecting from Ekos
.............................................................................
136
WiFi Connection
.........................................................................................
136
HotSpot Connection
................................................................................
137
Infrastructure Connection
........................................................................
137
StellarMate Address
................................................................................
139
Connecting your equipment
.....................................................................
139
Downloading Ekos
..................................................................................
140
Connecting from Ekos
.............................................................................
140
VNC
..........................................................................................................
140
Connecting from Ekos via Ethernet/WiFi
........................................................
141
Direct Ethernet
...........................................................................................
145
Connecting Equipment Via Bluetooth
................................................................
145
Serial Port Assistant Bluetooth Wizard
...........................................................
146
Manual Pairing
...........................................................................................
149
Connecting CCDs
............................................................................................
150
Connecting DSLRs
..........................................................................................
151
Supported DSLRs
.......................................................................................
152
Canon
...................................................................................................
152
Nikon
....................................................................................................
153
Troubleshooting
.........................................................................................
154
Connecting Mounts
.........................................................................................
154
Mounts
......................................................................................................
155
Celestron
...............................................................................................
155
SkyWatcher
............................................................................................
156
Mount Connection Guide
.............................................................................
158
Serial to USB
..............................................................................................
161
Wired Network
...........................................................................................
161
Wireless Connection
....................................................................................
162
Connecting Focusers
.......................................................................................
162
Serial to USB
..............................................................................................
163
Connecting Filter Wheels
.................................................................................
163
USB & Serial to USB
....................................................................................
163
Operating Filter Wheel
................................................................................
164
Time & Location
.............................................................................................
164
Web Manager
.................................................................................................
167
Web Manager URL
......................................................................................
168
Device Information
.....................................................................................
169
Adding New Profile
.....................................................................................
169
Removing Profile
........................................................................................
170
Auto Start
..............................................................................................
170
Auto Connect
.............................................................................................
170
Starting & Stopping Server
..........................................................................
170
Serial Port Assistant
........................................................................................
170
USB
..........................................................................................................
171