IKEA ENHET kitchen User manual

ENHET kitchen
installation guide
A guide to
install a new
ENHET kitchen

2
Table of contents
The step-by-step guide
Installing your new ENHET kitchen correctly
This brochure is your guide to preparing and install-
steps to follow as well as useful tips and ideas. Use this
guide along with your IKEA assembly instructions to
make sure your kitchen is installed in the right way.
Before you begin
Go through this brochure before you begin to see
what stages are involved in putting in your new
kitchen and to organise what tools you’ll need.
To make sure you have everything for your new kitch-
en, compare the packages and parts you have at home
against the order list and the freight list. You should
only dismantle your old kitchen when you have all your
new parts and appliances.
Your kitchen parts and worktop should be stored in-
doors, with normal room temperature and humidity.
Before you remove your old kitchen you need to make
your gas, water and electricity.
You can do it yourself but you don’t have to
Although our kitchens are designed to be as simple as
possible for you to assemble and install yourself, it is
important to consider all aspects of a kitchen renova-
tion, where some key operations, such as safeguarding
a proper wall cabinet installation or cutting your work-
top, require more skill and experience than others.
delivery to complete kitchen installations. For more
details see the back page of this guide, kitchen section
of IKEA.xx or contact your local IKEA store.
The tools you’ll need............................................................................................... 03
Preparing your room.............................................................................................. 04
Assembling the cabinets and frames................................................................... 06
Installing the wall cabinets/frames....................................................................... 07
Installing the base cabinets/frames ..................................................................... 08
Installing the worktop ............................................................................................ 09
Installing the sink and tap ..................................................................................... 10
Installing the appliances ......................................................................................... 11
Installing the plinth................................................................................................. 12
Installing lighting, doors and drawers, fronts and handles .............................. 13
Building a kitchen island........................................................................................ 14
You’re done! Congratulations on your new kitchen! .......................................... 15
Services .................................................................................................................... 16

3
Tools and materials
Here is a summary of the basic tools you’ll need. In ad-
their respective assembly instructions.
Carpenter’s rule
(or tape measure)
Materials
Wooden strips (as
supporting strips for base
and wall cabinets)
FIXA drill template for
knobs/handles
(art# 00000000)
Masking tape, to be used
when adding the silicone
sealant
Sandpaper
G clamp Utility pliers Scissors Saw and Mitre box Protective gloves and
goggles
Electric screwdriver Electric drill Jigsaw Circular saw
Pencil Philips screwdriver Awl Hammer
Sanitary silicone sealant Try square Spirit level Step ladder
The right types of plugs
and screws for your walls
Sanitary silicone sealant

4
Whether you’re replacing an old kitchen or starting
from scratch, it’s key to understand that the proper-
ties of the room dictate how complex or smooth your
installation process will be. With this in mind it’s impor-
time to prime and paint your walls and change your
point since you will need to make markings and drill
holes in the walls. If you plan to have tiles or similar,
it’s best to install these after the cabinets and worktop
have been installed.
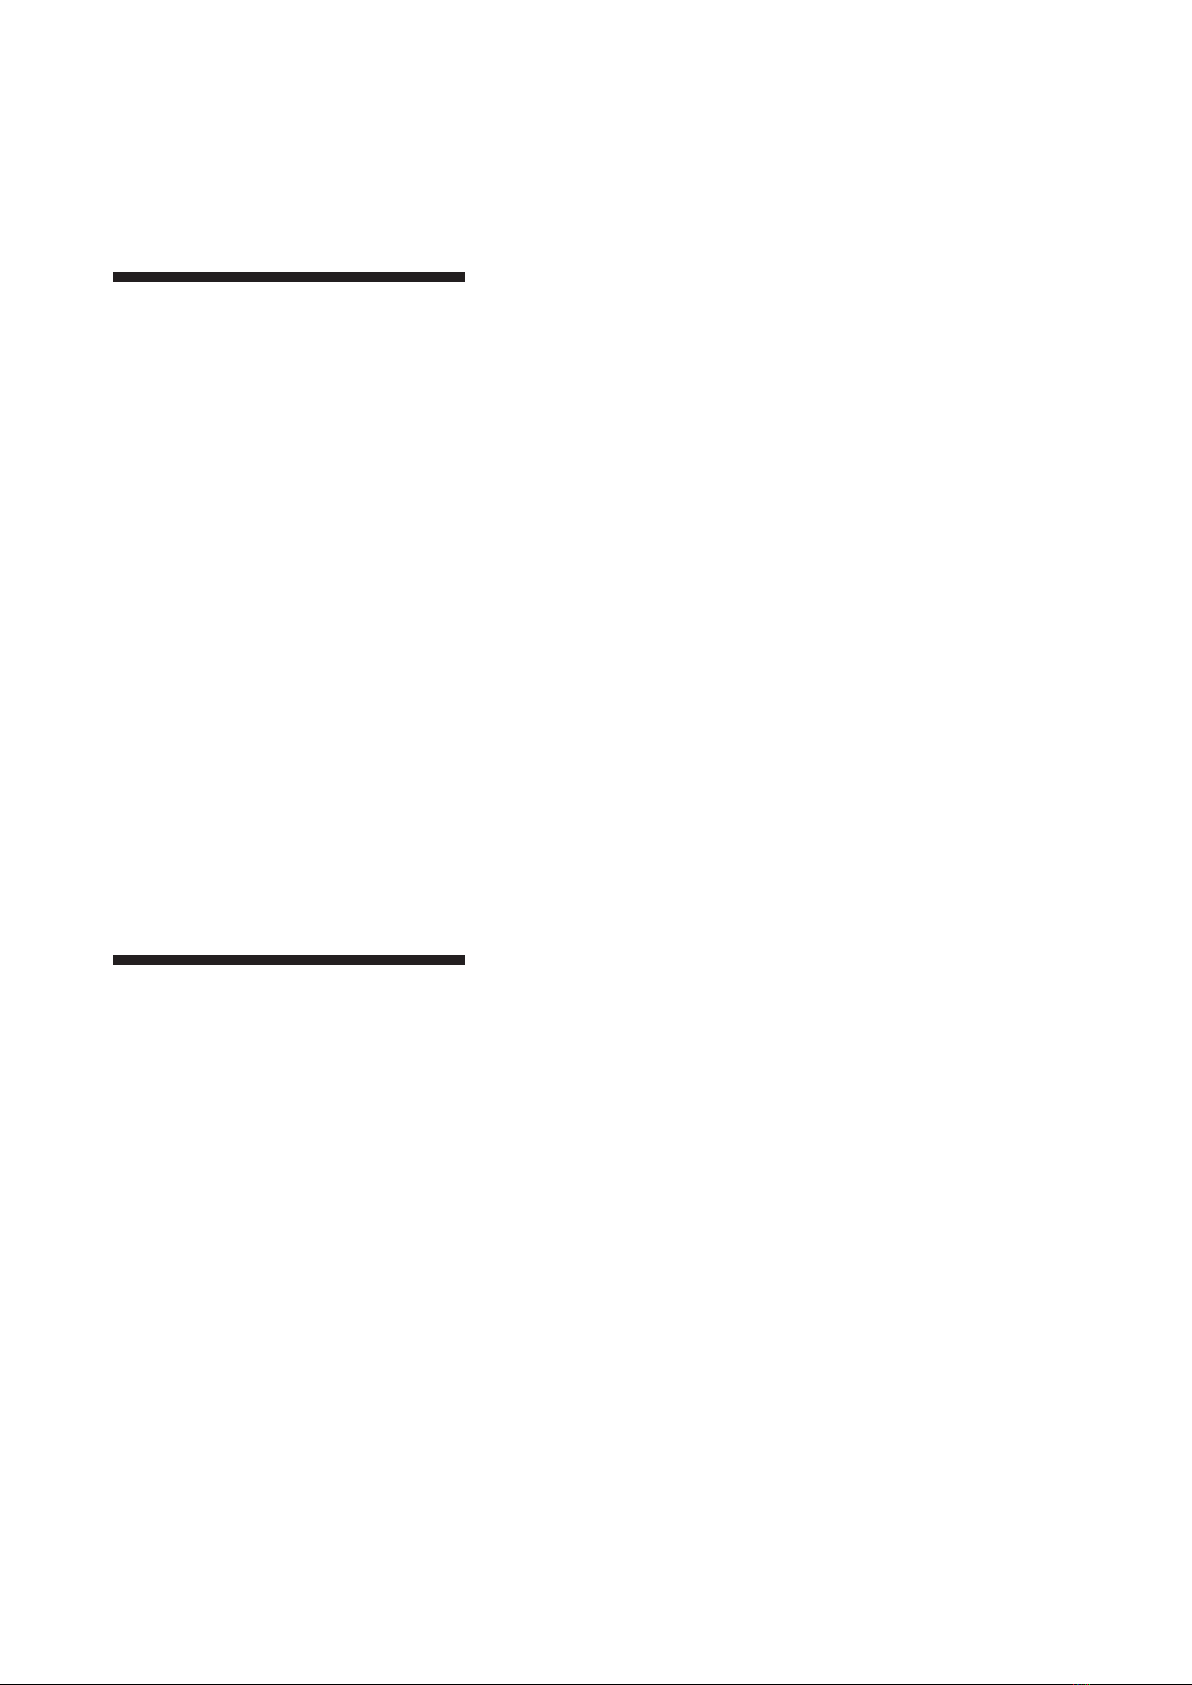
Assess your walls
Since your walls will hold the weight of your kitchen
cabinets and frames, start by evaluating the quality
and construction of your walls.
Marking cabinet positions
from your plan and that your electricity, water, gas and
ventilation connections are where you want them to
be.
Preparing your room
Check that your walls are strong enough to hold the
to install your cabinet onto a stud or support beam.
If you have a light wall construction with gypsum
(drywall) wall panels supported by studs, it’s not
board alone (not even using drywall anchors).
In order to provide proper support for the cabinets,
you need to add horizontal structural support
between the studs. As this requires the proper skills,
be sure to contact a professional for help.
the wall that is strong enough to carry the load of
cabinets.
Instead, you need to locate the studs inside the wall
the same position as the cabinets of the old kitchen,
it is important to secure that the walls have been
properly reinforced.
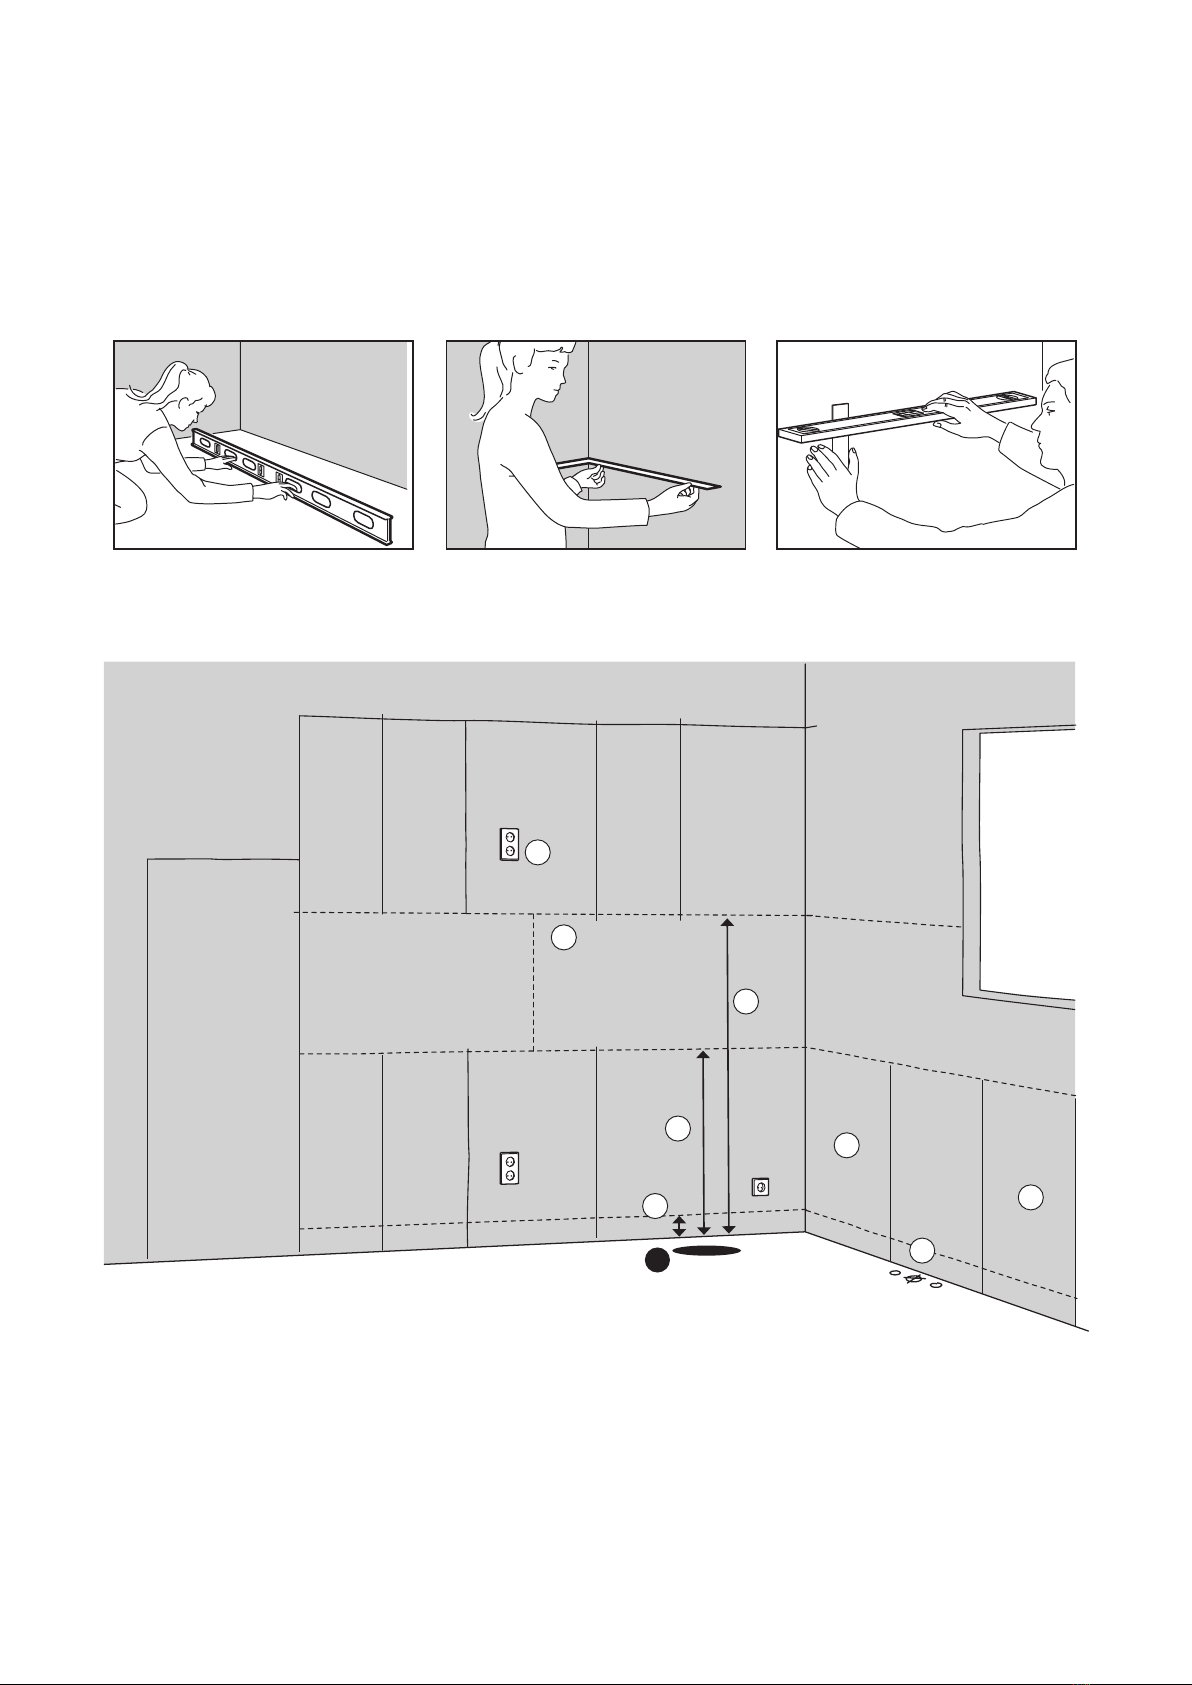
Find out what type of wall you’ll be working with. For
solid core materials like masonry that are hard to
penetrate and can support great loads, you need
special anchors and screws.
The wall studs, normally located 30, 45 or even 60 cm
apart, can carry the load of your wall cabinets.
and position of the studs won’t align.
It’s important that you use the proper type and
minimum screw thickness is 4.6 mm and the screw
needs to penetrate at least 38 mm into the wall stud
or solid core material. For advice, contact your local
specialised dealer.

5
3
4
5
A
1
125 mm
878 mm
1466 mm
6
7
2
4
1.
found at the very beginning and trace a horizontal
level line across your wall where the cabinets will
be placed. This base line represents the height of
the cabinet legs.
2.
as before. This is where the top of your base
cabinets will end up.
3.
markings. This line represents the bottom position
of the wall cabinets and frames.
4. With the lines marked, double-check that your
plan.
5. Pay attention to the required minimum distance
between hob and hood. This can be found in the
extractor hood assembly instruction.
6. The dishwasher should only be installed between
two cabinets or at least between a cabinet and the
wall. This in order to secure the appliance properly
and provide support for the worktop.
7. If you have a kitchen with a corner, you build
the corner base solution with a regular 80 cm
positioning of this solution, see page XX.
Marking key measurements
There are some critical measurements you need to consider and mark on your walls in order to secure proper
the space needed for doors and drawers to open properly, making sure there are no collisions with for instance
radiators or window sills as drawers and doors are opened.
the reference point from which to measure when
marking the key measurements (see below).
Prepare your space by making sure your corners are
try square for the corners and a spirit level for the
If your corner and/or walls aren’t straight you may
need to use distances to make sure your kitchen
cabinets and frames become level and align properly.
For advice contact you local specialised dealer.

6
Before you start assembling the
cabinets, try to set up a good work
area that is safe and where you
have enough room. Be sure to
you have the recommended equip-
ment/tools close-by.
Sort the packages into groups to
avoid confusion over which pieces
belong to the cabinet assembly
and which belong to appliances,
for example.
idea if you assemble all frames one
by one and push them aside until
the time comes to install them.
It’s helpful if you arrange your
cabinets in the order you will be
installing them. Use your packing
list and IKEA home planner draw-
ing to help you.
Assembling the cabinets and frames
ENHET cabinets can be installed with or without a plinth, depending on your personal preference.
See page 12 for info on how to assemble the legs if you choose to have a plinth.
To install the supporting base strip, align the top
strip to the studs you found behind your walls along
where your base cabinets will be located. Make sure
the strip does not go beyond where the last cabinet
ends or it will collide with your plinth at the end.
Note:
For the upper strips, align the top of the strip with
the 1466mm line. Then, screw the strips to the studs
you’ve located behind your wall. The upper strips
are only temporary and will be removed once you’ve
installed the cabinets.
Start by installing the supporting strips. You can use
any straight long piece of wood available at your local
hardware store.
Preparing your room

7
In most kitchens it’s best to install your wall cabinets
without base cabinets in the way.
Reminder
and plugs) are not included with the cabinets
-
fastening devices suitable for the walls in your
home. For advice on suitable fastening devices,
contact your local specialised dealer.
Start from the corner of your room. Place the cabinet
on top of the supporting strip and slide it into
position.
If you have an extractor hood placed under a cabinet,
you need to make some cut-outs in the cabinet
before you place it on the wall. Follow the assembly
instruction of the extractor hood to prepare the
required cut-outs. After you’ve made the required
cut-outs, remember to seal the open edges with
silicone.
Fix the cabinet using the appropriate length and type
of screw. (Throughout the installation process you
may need to loosen the screws a bit in order to make
smaller adjustments when aligning the cabinets and
frames.)
Proceed with the next cabinet, using a clamp to align
the two cabinets before you screw them together
with the screws enclosed with the cabinet.
As you place the cabinet adjusted for the extractor
hood, make sure you can access the electrical outlet
via the previously made cut-out.
Installing the wall cabinets/frames
When you have placed and and aligned all cabinets
and open frames, it is time to secure them in their
time, use the level to check that all angles are
straight.

8
Once all your base cabinets are installed, check that
they are level and that you are happy with the result,
before securing them by tightening the screws a
Once you are done with the installation of the wall
cabinets you move on to the base cabinets. Again,
start from the corner of the room and place the cabi-
net on the supporting wooden strip. If you build a line
kitchen, make sure you leave some space between the
wall and the cabinet to a allow for doors or drawers to
open properly.
If you have a corner kitchen, you build the corner base
solution with a 80 cm base cabinet in combination with
panel.
Note:
built-in hob or for a built-in oven.
As you proceed with the next cabinet, level and align
the two cabinets by using a clamp. Use the screws
provided to attach the adjacent cabinets.
The dishwasher, normally placed next to the sink
cabinet, stands on its own base so here there is no
need for a supporting strip. Leave a 60 cm wide gap
between the sink cabinet and the next cabinet.
If you build a corner base solution with a 40 cm door,
place the cabinet 268 mm from the wall (A). If you
build it with a 60 cm door, place the cabinet 468 mm
from the wall (A). In both cases, the adjacent cabinet
is placed 688 mm from the wall (B).
Make sure that the corner panel and the front edge
of the adjacent cabinet align.
Fix the cabinet using the appropriate type and
length of screw. (Throughout the installation process
you may need to loosen the screws a bit in order
to make smaller adjustments when aligning the
cabinets and frames.)
To install a cabinet after the dishwasher niche, make
sure the spirit level reaches both cabinets at the
front and at the back of the cabinets. Make sure the
distance at the front and back of the niche remains
the cabinet to the wall.
When you install an open base frame, you don’t use
a supporting strip. Instead, align the top of the open
frame with the top of the adjacent cabinet before
When you reach the place where you want your
for sink, which has a construction that allows for
Installing the base cabinets/frames

9
With your cabinets in place, it’s time to install your
worktop. Before you start, be sure to read the worktop
assembly instruction to learn about the things you
need to consider as you prepare and install it. When
mind that you are you are handling rather thick and
heavy material so make sure you have the proper work
space and tools. It’s helpful to use a pair of sawhorses
having a second person available, to help you carry
steps. If you need to customise your worktop for a sink
or hob, follow the assembly instruction of your sink or
hob.
For the hob cut-out, locate the mid point of the
hob cabinet. See the hob installation guide for the
cut-out dimensions and the minimum distances to
pay attention to.
Make sure that the cut-out perimeter doesn’t collide
with the top rail of the cabinet.
Installing the worktop
Use a circular saw and G clamps to keep a straight
line as you cut the worktop. To avoid splinter, cut
with the worktop underside facing up when using a
buzz or jig saw, but with the top facing up if using a
handsaw. A tip is to have a second person hold the
For a sink cut-out, you start by tracing the inner
boundaries of the sink cabinet on the underside of
the positioned worktop.
Place the worktop upside down, then place the
sink upside down within the previously marked
boundaries/lines, making sure there is equal space
all around. Trace the outline of the sink.
Then, follow the assembly instructrion of the sink to
mark the actual cutting line.
Start by placing the worktop on top of the base
cabinets and push it against the wall.
Once in position, measure the worktop from the side
edge of the cabinet underneath. With the addition
of at least a 1.5 cm overhang, make a mark on the
worktop.
After you have cut the worktop you need to seal the
cut raw edge. Open edges create a entry point for
humidity or water, which could cause swelling and
deterioration. Follow the assembly instruction of the
worktop to apply the edge band that comes with
each IKEA pre-cut worktop. If you do not have a lose
strip we recommend to seal the open edge using
silicone.
Use a jigsaw to cut out the space for your sink. It’s
helpful to drill a hole on the inside corners of your
outline before cutting. These holes, big enough to
jigsaw and enables you to make a cleaner cut.
For last steps on installing the
worktop, see next page

10
Before sliding the sink into position, follow the
assembly instruction of the sink and attach the
clamps that comes with it. Once in position, adjust
If you need to install the tap on the worktop, see the
assembly instruction of the tap for the dimension
of the hole. Once you’ve marked the position of the
hole, check that it doesn’t collide with the top rail of
the cabinet underneath. After you’ve drilled the hole,
clean and seal the hole with silicone.
Once the sink and tap are in place and secured, seal
the edges around them with silicone to secure a
water tight seal.
Installing the sink and tap
Before you start to install the kitchen mixer tap,
double-check that the connections between the water
performed in compliance with current local construc-
tion and plumbing regulations. If in doubt, contact a
professional.
While some of our sinks come with a pre-cut hole for
the tap, there are cases where you need to install the
tap on the worktop. If this is the case, make sure you
use a drill that is powerful enough to drill through the
worktop material.
Corners can be tricky so take your time and adjust
both pieces until they are perfectly aligned and
level. For small adjustments, use the adjustable feet,
or if necessary, shim between the cabinet and the
worktop.
Once the worktop pieces are level and align with
the worktop.
Installing the worktop
Clean the raw edges of the cut-out(s) and sand them
a little bit. Then apply silicone to prevent moisture
from penetrating the worktop. Let the silicone dry
before you install the sink and/or hob.

11
To install the hob, follow the assembly instruction
that comes with the hob. Attach the hob connectors
before you press the hob into the cut-out.
After the dishwasher has been connected to water
and electricity, follow the dishwasher installation
guide to adjust the height of the dishwasher.
In order to protect the bottom side and edges of the
worktop from the steam released when opening the
The oven cabinet has been prepared to hold the
built-in oven on top of the shelf. Keep in mind that
it requires two persons to carry and properly slide
the oven into position. Once in position, remember
to secure the oven, using the screws provided with
the oven.
Installing the appliances
Once the door is mounted, and the dishwasher is
level with the adjacent cabinets, you need to secure
the dishwasher by following the instructions in the
dishwasher installation guide.
Note: If you have a fully integrated dishwasher we
recommend that you wait to assemble the front onto
to the dishwasher until you mount the other kitchen
fronts. This makes it easier to align them.
When all worktop sections are secured and you’ve
given the silicone time to seal all raw edges of the
cut-outs, it’s time to start installing your appliances.
Throughout, be sure to follow the assembly instruc-
Note: All water, gas and electricity connections must
local safety regulations.
The extractor hoods at IKEA can be installed in two
ways: either in extraction mode (i.e. ducted to the
cabinet preparation is described in the assembly in-
struction of your extractor hood.
As you prepare for the dishwasher installation,
keep in mind that some countries require some
protection which holds some amount of water if the
water connections of the dishwasher should break.
Before you install your extractor hood, make sure
hob and extractor hood that is listed in the assembly
hood while you make the required preparations.

12
When two plinth sections meet, forming a corner,
you need to attach both plinth strips to the same leg.
In order to avoid the clips colliding, place the clips
upside down in one of the strips.
Note:
Installing the plinth
Generally, the base cabinets are supported by the sup-
porting strip along the wall and two legs in the front
of the cabinet. However, if you are going for a kitchen
with a plinth you also need to consider the following
steps:
Start with the plinth for the short side of the cabinet
sand the open edge before you apply the pre-glued
edge band that comes with the plinth.
For a plinth setup place the legs with the leg-plate
aligned to the cabinet edge. Since the plinth is
attached via the legs, you also need an additional leg
at the back of the open cabinet sides.
Follow the plinth assembly instruction to attach the
the leg since they will obstruct the attachment of
the plinth.
For the front plinth, place the plinth in position and
mark where you should cut it. After you’ve cut it,
repeat the process of attaching the edge band and

13
If you have a fully integrated dishwasher you
dishwasher. In these cases, the assembly instruction
Keep in mind that the front should be mounted after
the dishwasher has been slid into position. This to
prevent the dishwasher from tipping over when you
open it.
doors and install the drawers. Once the doors and
drawers are in position, you can adjust any potential
misalignment by adjusting the hinges and drawers.
Installing lighting, doors and drawers,
fronts and handles
With your cabinets, worktops and appliances in place,
it’s time to move onto installing your lighting as well as
Then, take your time assembling doors, fronts, knobs
and handles to make sure everything looks the way
you want.
Note: Always use your assembly instructions for help.
When installing your lighting, keep in mind that all
person.
If drilling holes, use a piece of wood to meet the drill
as it penetrates the surface to avoid the edges from
splintering.
Once you have decided on the placement of your
knobs and/or handles, we recommend that you
use the FIXA drilling template when assembling the
knobs and/or handles, for an easier process and a
better end result.

14
Min 120 cm
Building a kitchen island
When it comes to building a kitchen island, it is impor-
tant to consider some key aspects during the planning
and installation. Since the kitchen island will not be
supported by the walls, the frames need to be at-
island using the open frames along with the assembly
kit for kitchen island.
-
specialised dealer.
Measure and resize the worktop if needed. As you
place it on top of the island, make sure your have an
equal overhang all around. Then, attach it using the
brackets provided with your base unit.
Use the anchoring metal brackets included in the
assembly kit for kitchen island to secure the kitchen
After you have slid the legs into the anchoring
included with the frames. We recommend that you
use a large spirit level to check that the cabinets are
level in all directions. To make minor adjustments,
adjust the height of the legs.
Make sure you assemble the cabinet stabilisers onto
the frames according to the assembly instruction
that comes with the assembly kit for kitchen island.
Start by deciding where the island will be positioned.
We recommend that you leave 120 cm between the
island and the other kithen units to ensure a good
For a straight island that aligns with the rest of
the kitchen, use reference points in the room (for
example base cabinets).
Once you have positioned the frames, add some
temporary tape underneath each leg and mark the
perimeter of each leg sleeve as accurately, since this

15
Time to step back and admire your new kitchen. With
a little care and maintenance, your IKEA kitchen will
look great for many years to come.
Caring for your cabinets
Clean the doors, cabinet interiors and wood surfaces
with a soft, damp cloth. Only use cleaning products in-
with clean water, then dry with a clean, dry cloth.
Make sure to clean up spills quickly.
Keep your sink sparkling
After each use, wipe the sink clean with a cloth or
sponge damped in water or a non-abrasive detergent,
the sink with a dry cloth. Avoid scouring powder, steel
wool, or hard objects which can scratch the stainless
steel surface. The damp surface can be discoloured if
substances containing iron, such as steel wool, nails
is caused by the foreign material.
Long-lasting worktops
Keep your worktop in top condition by cleaning spills
quickly with water and a mild detergent. Be sure to
keep them as dry as possible after use. For wood and
-
ment oil. The oil protects the wood from marks, stains
and cracks, and prevents water from penetrating the
surface.
You’re done! Congratulations
on your new kitchen!

© Inter IKEA Systems B.V. 2022
step of the way, from measuring and planning to ordering and installing your new kitchen.
ENHET kitchen planner
of every detail and the entire kitchen will be displayed
immediately.
Print your plans and product list out at home or save them
on the IKEA website. At your IKEA store you can discuss your
design and get lots of advice from our kitchen experts. See
IKEA.be for more details.
are presented on this page. For more details about services, speak to a co-worker at your IKEA store or check out IKEA.be/
services.
KITCHEN PLANNING SERVICE DELIVERY
You can, of course, design your own
kitchen. Pop by the kitchen department
in your store to get started. Our co-
workers are always delighted to help
you. Or you can take it easy and use our
planning service. That saves you a lot
of time and you get a kitchen plan that
ticks all your boxes.
Most of our products are designed
and packaged so you can take them
with you. But, if you prefer, we can also
ASSEMBLY
We install your new kitchen and
coordinate the work from start to
last check to ensure the orders and
dimensions are completely right.
Trained kitchen installers take care of
the time-consuming jobs like putting
in the sinks and taps, and installing
the worktops and appliances. Your
kitchen is installed in accordance with
the strictest standards and there’s
installation.
Kitchen assembly comprises:
• Assembly and installation of all
cabinets
• Installation of worktops, including
cut-outs for
the sink/hob
• Installation and connection
of the sink, the tap with siphon, IKEA
electrical appliances to electricity and
gas and IKEA worktop lighting
• Installation of cover panels, handles
etc.)
OUR SERVICES
Table of contents
Other IKEA Indoor Furnishing manuals

IKEA
IKEA FORNBRO PEDESTAL TABLE 18" User manual

IKEA
IKEA BILLY BYOM GLASS 15 3/4x13 3/4" User manual

IKEA
IKEA ANVANDBAR User manual

IKEA
IKEA BILLY User manual

IKEA
IKEA GRUNDTAL User manual

IKEA
IKEA UPPSTA User manual

IKEA
IKEA DUNO AA-45683-6 User manual

IKEA
IKEA ENHET User manual

IKEA
IKEA GODMORGON WASH-STAND W/2 DRWS 47X15" User manual

IKEA
IKEA 365+ User manual
Popular Indoor Furnishing manuals by other brands

ZEITRAUM
ZEITRAUM AD ORE Assembly instructions

MIGROS
MIGROS 5255 Assembly instruction

Wilhelm Schildmeyer
Wilhelm Schildmeyer 627155 Assembly instructions

Southern Enterprises
Southern Enterprises Jayla JS701400TX Assembly instructions

Shanty 2 CHIC
Shanty 2 CHIC Kid's Floating Nightstand manual

Next
Next Sussex 786032 Assembly instructions