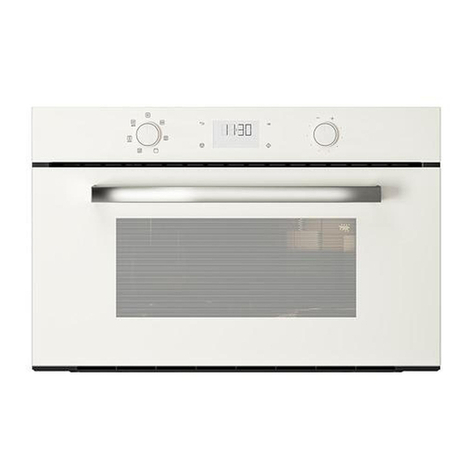
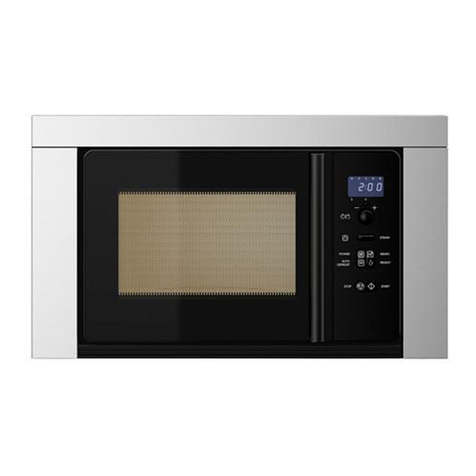
IKEA MATÄLSKARE User manual


ENGLISH 5
BAHASA MELAYU 15
25
34
INDONESIA BAHASA 42
For the IKEA appointed Authorized Service
Centre, please refer to the IKEA catalogue or
www.IKEA.com
and select your local store for phone
numbers and opening times.
Untuk Pusat Layanan Resmi yang ditunjuk
oleh IKEA, silakan lihat katalog IKEA atau
www.IKEA.com
dan pilih toko lokal di sekitar Anda untuk
nomor telepon dan jam buka.
如需IKEA指定授權服務中心的相關資訊,請參考
IKEA型錄或造訪
www.IKEA.com
並選擇當地分店以取得電話號碼和營業時間。
Untuk Pusat Servis Sah yang dilantik oleh
IKEA, sila rujuk katalog IKEA atau
www.IKEA.com
dan pilih kedai tempatan anda untuk
mendapatkan maklumat nombor telefon dan
waktu operasi.
www.IKEA.com

min 300 mm
min. 355 mm
564 mm
min 560 mm
min 355 mm
564 mm
min 560 mm
min 355 mm
568 mm
min 560 mm
min 355 mm
568 mm
10 0cm 80cm

Before using the appliance, read these
safety instructions. Keep them nearby for
future reference.
These instructions and the appliance itself
provide important safety warnings, to be
observed at all times. The manufacturer
declines any liability for failure to observe
these safety instructions, for inappropriate
use of the appliance or incorrect setting of
controls.
Very young children (0-3 years) should
be kept away from the appliance. Young
children (3-8 years) should be kept away
from the appliance unless continuously
supervised. Children from 8 years old and
above and persons with reduced physical,
sensory or mental capabilities or lack of
experience and knowledge can use this
appliance only if they are supervised or
have been given instructions on safe use
and understand the hazards involved.
Children must not play with the appliance.
Cleaning and user maintenance must
not be carried out by children without
supervision.
WARNING!: If the door or door seals are
damaged, the oven must not be operated
until it has been repaired – risk of injury.
WARNING!: Liquids and foods must not
be heated in sealed containers – risk of
explosion, heating of beverages can result
in delayed eruptive boiling, care must be
taken when handling the container – risk
of burn.
The microwave oven is intended for
heating food and beverages. Do not dry
food or clothing or heat warming pads,
slippers, sponges and similar - risk of re.
When heating food in plastic or paper
containers, remains vigilant on the oven -
risk of re.
Safety Information
Table of contents
The contents of feeding bottles and
baby food jars must be stirred or shaken
and their temperature checked - risk of
burn. Do not heat eggs in their shells and
whole hard-boiled eggs - risk of explosion.
Only use utensils that are suitable for
microwave cooking. Do not use metallic
containers - risk of injury.
Only use a temperature probe
recommended for this oven - risk of re.
If smoke is emitted switch o or unplug
the appliance and keep the door closed in
order to stie any ames.
If the appliance is installed 850 mm
or more above the oor, take care not to
displace the turntable when removing
containers – risk of injury.
Do not use your microwave oven for
deepfrying, because the oil temperature
can not be controlled.
Metallic containers for food and
beverages are not suitable during
microwave cooking.
Do not remove the microwave inlet
protection plates on the side of the cavity
walls (certain models only). They prevent
grease and food particles from entering
the microwave inlet channels.
PERMITTED USE
CAUTION: The appliance is not
intended to be operated by means of an
external switching device, such as a timer,
or separate remote controlled system.
This appliance is intended to be used
in household and similar applications
such as: sta kitchen areas in shops,
oces and other working environments;
farm houses; by clients in hotels, motels,
bed & breakfast and other residential
environments.
Safety Information 5
Product description 7
Control panel 7
Daily use 8
What to do if ... 11
Technical data 11
Installation 12
Electrical connection 12
Environmental concerns 13
IKEA GUARANTEE 14
GB
ENGLISH

This appliance is not for professional
use. Do not use the appliance outdoors.
INSTALLATION
The appliance must be handled and
installed by two or more persons - risk of
injury. Use protective gloves to unpack and
install - risk of cuts.
Installation, including water supply (if
any), electrical connections and repairs
must be carried out by a qualied
technician. Do not repair or replace any
part of the appliance unless specically
stated in the user manual. Keep children
away from the installation site. After
unpacking the appliance, make sure that it
has not been damaged during transport.
In the event of problems, contact the
dealer or your nearest Aftersales Service.
Once installed, packaging waste (plastic,
styrofoam parts etc.) must be stored out
of reach of children - risk of suocation.
The appliance must be disconnected from
the power supply before any installation
operation - risk of electric shock.
During installation, make sure the
appliance does not damage the power
cable - risk of re or electric shock. Only
activate the appliance when the installation
has been completed.
This appliance is intended to be used
built-in.
Do not use it freestanding or place into a
cabinet.
After unpacking the appliance, make sure
that the appliance door closes properly. In
the event of problems, contact the dealer
or your nearest After-sales Service.
ELECTRICAL WARNINGS
It must be possible to disconnect
the appliance from the power supply by
unplugging it if plug is accessible, or by
a multi-pole switch installed upstream of
the socket in accordance with the wiring
rules and the appliance must be earthed in
conformity with national electrical safety
standards.
Do not use extension leads, multiple
sockets or adapters. The electrical
components must not be accessible to
the user after installation. Do not use the
appliance when you are wet or barefoot.
Do not operate this appliance if it has
a damaged power cable or plug, if it is
not working properly, or if it has been
damaged or dropped.
If the supply cord is damaged, it must
be replaced with an identical one by the
manufacturer, its service agent or similarly
qualied persons in order to avoid a
hazard - risk of electric shock.

Product description
Accessories
Turntable support
x1
Glass turntable
x1
Steamer
x1
General
There are a number of accessories available on the market.
Before you buy, ensure they are suitable for microwave use.
Ensure that the utensils you use are oven proof and allow
microwaves to pass through them before cooking.
When you put food and accessories in the microwave oven,
ensure that they do not come in contact with the interior of the
oven.
This is especially important with accessories made of metal or
metal parts.
If accessories containing metal comes in contact with the oven
interior, while the oven is in operation, sparking can occur and
the oven could be damaged.
Always ensure that the turntable is able to turn freely before
starting the oven.
Turntable support
Use the turntable support under the Glass turntable. Never put
any other utensils on the turntable support.
- Fit the turntable support in the oven.
Glass turntable
Use the Glass turntable with all cooking methods. It collects the
dripping juices and food particles that otherwise would stain and
soil the interior of the oven.
- Place the Glass turntable on the turntable support.
Steamer
Use the steamer with the strainer in place for such foods as sh,
vegetables and potatoes.
Always place the steamer on the Glass Turntable.
1Stop button
2Power button
3Memo button
4Steam button
5+ /- button
(use this button to set time or weight)
6Jet Defrost button
7Start button
8Door button
(use this button to open the door)
Control panel
864321 75
1Control Panel
2Cavity Lamp
3Door
1
3
2

Start protection / Key lock
This automatic safety function is activated one minute after the
oven has returned to “stand by mode“. (The oven is in “stand by”
when the 24-hour clock is displayed or if the clock has not been
set, when the display is showing the two small dots between the
digits.
The door must be opened and closed e.g. putting food into
it, before the safety lock is released. Else the display will show
“DOOR“.
To pause or stop cooking
To pause cooking:
The cooking can be paused to check, turn or stir the food by
opening the door. The setting will be maintained for 10 minutes.
To continue cooking:
Close the door and press the Start button ONCE. The cooking is
resumed from where it was paused.
Pressing the Start button TWICE will increase the time by 30
seconds.
If you don’t want to continue cooking:
Remove the food, close the door and press the Stop button
A beep will signal once a minute for 10 minutes when the
cooking is nished.
Press the Stop button or open the door to cancel the signal.
NOTE: The oven will only hold the settings for 60 seconds if the
door is opened and then closed after the cooking is nished.
Cooling down
When a function is nished, the oven carries out a cooling
procedure. This is normal.
After this procedure the oven switches o automatically.
Kitchen timer
Use this function when you need a kitchen timer to measure
exact time for various purposes such as cooking eggs or letting
the dough rise before baking etc.
312
1. Press the +/- buttons to set the desired length of the timer.
2. Press the power button repeatedly to set the power to 0 W.
3. Press the Start button.
An acoustic signal will be heard when the timer has nished to
count down.
Clock
Keep the door open while setting the Clock. This gives you 5
minutes to complete the setting of the Clock. Otherwise, each
step must be accomplished within 60 seconds.
12 4 3 5
1. Press the Stop button (3 seconds) until the left-hand digit
(hour’s) icker.
2. Press the +/- buttons to set the hours.
3. Press the Start button. (The two right hand digits (minutes)
blink).
4. Press the +/- buttons to set the minutes.
5. Press the Start button again.
The Clock is set and in operation.
NOTE: When the appliance is rst plugged in or after a power
failure, the display is blank. If the clock is not set, the display will
remain blank until the cooking time is set.
If you wish to remove the Clock from the display once it has been
set, simply press the Stop button again for 3 seconds and then
press the Stop button once more.
To reinstate the Clock, follow the above procedure.
Cook and reheat with microwaves
Use this function for normal cooking and reheating, such as
vegetables, sh, potatoes and meat.
31
2
1. Press the +/- buttons to set the time.
2. Press the power button repeatedly to set the power.
3. Press the Start button.
Once the cooking process has been started:
The time can easily be increased in 30-second steps by pressing
the Start button. Each press increases the time with 30 seconds.
You may also alter the time by pressing the +/- buttons to
increase or decrease the time.
Pressing the power button may also change the power level. The
rst press will show you the current power level. Press the power
button repeatedly to change power level.
All settings can be changed during cooking if you so desire.
Power level
Microwaves only
Power Suggested use:
750 W
Reheating of beverages, water, clear soups, coee,
tea or other food with a high water content. If the
food contains egg or cream choose a lower power.
Cooking of sh, vegetables, meat etc.
500 W
More careful cooking e.g. high protein sauces,
cheese and egg dishes and to nish cooking
casseroles.
350 W
Simmering stews, melting butter.
160 W
Defrosting. Softening butter, cheeses. Softening Ice
cream.
0 W
When using the Timer only.
Jet start
This function is used for quick reheating of foods with a high
water content such as; clear soups, coee or tea.
Press to automatically start with full microwave power level
and the cooking time set to 30 seconds. Each additional press
increases the time with 30 seconds. You may also alter the time
by pressing the +/- buttons to increase or decrease the time after
the function has started.
Manual defrost
Follow the procedure for “Cook and reheat with microwaves” and
choose power level 160 W when defrosting manually.
Check and inspect the food regularly. Experience will give you
the times needed for various amounts.
Frozen food in plastic bags, plastic lms or cardboard packages
can be placed directly in the oven as long as the package has no
metal parts (e.g. metal twist ties).
The shape of the package alters the defrosting time. Shallow
packets defrost more quickly than a deep block.
Separate pieces as they begin to defrost.
Individual slices defrost more easily.
Shield areas of food with small pieces of aluminum foil if they
start to become warm (e.g. chicken legs and wing tips).
Turn large joints halfway through the defrosting process.
Boiled food, stews and meat sauces defrost better if stirred
Daily use

during defrosting time.
When defrosting it is better to under-thaw the food slightly and
allow the process to nish during standing time.
Standing time after defrosting always improves the result since
the temperature will then be evenly distributed throughout the
food.
Jet defrost
Use this function for defrosting Meat, Fish & Poultry ONLY. Jet
Defrost should only be used if the net weight is between 100 -
2Kg.
2 31
1. Press the Jet Defrost button.
2. Press the + / - buttons to set the weight of the food.
3. Press the Start button.
Midway through the defrosting process the oven stops and
prompts you to TURN FOOD.
- Open the door.
- Turn the food.
- Close the door and restart by pressing the Start button.
NOTE: The oven continues automatically after 2 min. if the food
hasn’t been turned. The defrosting time will be longer in this
case.
This function needs to know the net weight of the food. The
oven will then automatically calculate the needed time to nish
the procedure.
- Frozen foods:
If the food is warmer than deep-freeze temperature (-18°C),
choose lower weight of the food.
If the food is colder than deep-freeze temperature (-18°C),
choose higher weight of the food.
Food Hints
Meat
(100g - 2.0Kg)
Minced meat,
cutlets, steaks or
roasts.
Poultry
(100g - 2.0Kg)
Chicken whole,
pieces or llets.
Fish
(100g - 1.5Kg)
Whole, steaks or
llets.
For food not listed in this table and if the weight is lesser or
greater than recommended weight, you should follow the
procedure for “Cook and reheat with microwaves” and choose
160 W when defrosting.
Memory
1 2
The Memory function provides you with an easy way to quickly
recall a preferred setting.
The principle of the Memory function is to store whatever setting
that is currently displayed.
How to activate a stored memory:
1. Press the Memo button.
2. Press the Start button.
How to store a setting:
1. Select any function
2. Make the necessary settings
3. Press and keep the Memo button pressed for 3 seconds until
an acoustic signal is heard. The setting is now stored. You
may reprogram the memory as many times as you wish.
When the appliance is plugged in or after a power failure, your
Memo function will have stored - 1 minutes and 750 W as default
setting.
Steam
3 4
1 2
Use this function for such food as vegetables & sh.
Always use the supplied Steamer when using this function.
1. Press the Steam button.
2. Continue to repeatedly press the Steam button to set the
food class.
3. Press the +/- buttons to set the weight of the food.
4. Press the Start button.
Place the food on the steam grid.
Add 100 ml (1dl) water in the bottom part of the steamer.
Cover with the lid.
WARNING! The Steamer is designed to be used with
microwaves only!
Never use it with any other function at all.
Using the steamer in any other function may cause damage.
Always ensure that the turntable is able to turn freely before
starting the oven.
Always place the steamer on the Glass Turntable.

Cooking vegetables
Place the vegetables into the strainer.
Pour 100 ml water into the bottom part.
Cover with the lid and set the time.
Soft vegetables such as broccoli and leek require 2-3 minutes
cooking time.
Harder vegetables such as carrots and potatoes require 4-5
minutes cooking time.
Food Hints
Potatoes / Root vetables
(150g - 200g) Use even sizes.
Cut the vetgetables into
even pieces.
Allow to stand for 1 - 2
minutes, after cooking.
Vegetables
(Cauliower and Broccoli)
(150g - 500g)
Frozen vegetables
(150g - 500g)
Allow to stand for 1 - 2
minutes after cooking.
Fish lets
(150g - 500g)
Distribute llets evenly on
the steamgrid. Interlace
thin parts. Allow to stand
for 1 - 2 minutes, after
cooking.
WARNING: The appliance and its accessible parts become
hot during use. Care should be taken to avoid touching heating
elements. Young childern should be kept away.
During and after use, do not touch the heating elements or
interior surface of the appliance - risk of burns. Do not allow the
appliance to come in contact with cloths or other ammable
materials until all the components have cooled down completely.
WARNING: Do not heat or cook with sealed jars or containers in
the appliance.
The pressure that builds up inside might cause them to explode,
damaging the appliance.
WARNING: If the appliance is operated in the combination
mode, children should only use the appliance under adult
supervision due to the temperatures generated.
WARNING : Overheating the liquid beyond boiling point can
occur without evidence of bubbling. This could result in a
sudden boil over of the hot liquid. To prevent this possibility the
following steps should be taken :
1. Avoid using straight-sided containers with narrow necks.
2. Stir the liquid before placing the container in the appliance
and let the teaspoon remain in the container.
3. After heating, allow standing for a short time, stirring again
before carefully removing the container from the appliance.
WARNING: After heating baby food of liquids in a baby bottle or
in a baby food jar, always stir and check the temperature before
serving.

Problem Possible cause Solution
The appliance does not work. The mains power supply or the appliance
is not connected.
Check your fuses and ensure that there is
power avaliable.
The door isn’t closed. Open and then close the door before you
try again.
A message is displayed such as: F2, F3C,
F7 or Err2, Err3, Err5.
The oven has recognized that a fault has
occured in one of it’s sensors or similar.
Disconnect and wait 10 minutes before
reconnecting, then try to operate the oven
once more. If the problem persists: call
service.
The food is unevenly heated. Very thin parts such as chicken wingtips
and such are not shielded.
Shield the thinner parts with aluminum
foil.
The food was heated at a power level too
high.
Choose a lower power level.
The turntable has stopped. Check that the turntable and turntable
support is in place and the food is well
centered, not touching the cavity walls.
Food isn’t turning. The turntable has stopped. Check that the turntable and turntable
support is in place and the cavity bottom
is clean.
Authorized Service Centre
Before calling the Authorized Service Centre:
1. See if you can solve the problem on your own (see the “What to do if ...” table).
2. Switch the appliance o and on again to see if the problem has disappeared.
If the fault persists after the above checks, contact IKEA Authorized Service Centre.
Always specify:
- the type of fault;
- exact type and model of appliance;
- the Authorized Service Centre number (the number given after the word “Service” on the rating
plate) located on the inside edge of the oven cavity (visible when the door is open);
- your full address;
- your telephone number.
If any repairs are required, please contact IKEA Authorized Service Centre (to guarantee that original spare parts will be used and
repairs carried out correctly).
What to do if ...
Technical data
Supply Voltage 220-240 V/50 Hz
Rated Power Input 1300 W
Fuse 10 A (UK 13 A)
MW output power 750 W
Outer dimensions (HxWxD) 394 x 595 x 320
Cavity inner dimensions (HxWxD) 187 x 370 x 290
The technical informations are situated in the rating plate inside the appliance.
The International Electrotechnical Commission, SC. 59H, has developed a standard for
comparative testing of heating performance of dierent microwave ovens.
We recommend the following for this oven:
Test Amount Approx. time Power level Container
12.3.1 750 g 10 min 750 W Pyrex 3.227
12.3.2 475 g 5 ½ min 750 W Pyrex 3.827
12.3.3 900 g 14 min 750 W Pyrex 3.838
13.3 500 g 2 min 40 sec Jet Defrost
NOTE: this information is only for the qualied technician.

Mounting the appliance
Follow the supplied separate mounting instructions when
installing the appliance.
Children should not perform installation operations. Keep
children away during installation of the appliance. Keep the
packaging materials (plastic bags, polystyrene parts, etc.) out
of reach of children, during and after the installation of the
appliance.
Use protective gloves to perform all unpacking and installation
operations.
The appliance must be handled and installed by two or more
persons.The appliance must be disconnected from the power
supply before carrying out any installation operation.
After unpacking the appliance, make sure that it has not been
damaged during transport. In the event of problems, contact the
dealer or your nearest After-sales Service.
After unpacking the appliance, make sure that the appliance
door closes properly.
In the event of problems, contact the dealer or your nearest
After-sales Service. To prevent any damage, only remove the
oven
from its polystyrene foam base at the time of installation.
During installation, make sure the appliance does not damage
the power cable.
Installation
Prior to connecting
Check that the voltage on the rating plate corresponds to the
voltage in your home.
The rating plate is on the front edge of the oven (visible when
the door is open).
Do not remove the microwave inlet protection plates located on
the side of the oven cavity walls. They prevent grease and food
particles from entering the microwave inlet channels.
Ensure the oven cavity is empty before mounting.
Ensure that the appliance is not damaged.
Check that the oven door closes rmly against the door support
and that the internal door seal is not damaged. Empty the oven
and clean the interior with a soft, damp cloth. Do not operate
this appliance if it has a damaged mains cord or plug, if it is not
working properly, or if it has been damaged or dropped. Do not
immerse the mains cord or plug in water. Keep the cord away
from hot surfaces. Electrical shock, re or other hazards may
result.
After connecting
The oven can be operated only if the oven door is rmly closed.
Regulation require that the appliance is earthed.
The manufacturer will accept no responsibility for injury to
persons, animals or damage to objects arising from the
non-observance of this requirement.
The manufacturers are not liable for any problems caused by the
user’s failure to observe these instructions.
Failure to observe these instructions may lead to risks. The
Manufacturer declines any liability for injury to persons or
animals or damage to property if these advices and precautions
are not respected.
CAUTION: The appliance is not intended to be operated by
means of an external timer or separate remote control system.
After installation, the electrical components must not be
accessible to the user.
For installation to comply with current safety regulations, an
omnipolar switch with minimum contact gap of 3mm is required.
WARNING : The power cable must be long enough for
connecting the appliance, once tted in its housing, to the main
power supply.
Do not pull the power supply cable.
If the power cable is damaged it must be replaced with an
identical one. The power cable must only be replaced by a
qualied technician in compliance with the manufacturer
instruction and current safety regulations. Contact an authorized
service center.
Do not operate this appliance if it has a damaged mains cord or
plug, if it is not working properly, or if it has been damaged or
dropped. Do not immerse the mains cord or plug in water. Keep
the cord away from hot surfaces.
Do not touch the appliance with any wet part of the body and do
not operate it when barefoot.
For appliances with tted plug, if the plug is not suitable for you
socket outlet, contact a qualied technician.
Do not use extension leads, multiple sockets or adapters. Do
not connect the appliance to a socket which can be operated by
remote control.
Electrical connection

Environmental concerns
WARNING!: It is hazardous for anyone
other than a competent person to carry out
any service or repair operation that involves
the removal of a cover which give protection
against exposure to microwave energy.
WARNING!: Failure to maintain the oven in
a clean condition could lead to deterioration
of the surface that could adversely aect the
life of the appliance and possibly result in a
hazardous situation.
WARNING!: The oven shall be cleaned
regularly and any food deposits removed.
WARNING!: Ensure that the appliance is
switched o and disconnected from the power
supply before performing any maintenance
operation - risk of electrical shock. Never use
steam cleaning equipment.
WARNING!: Do not use harsh abrasive
cleaners or metal scrapers to clean the door
glass since they can scratch the surface, which
may result in shattering of the glass.
Ensure the appliance is cooled down before
any cleaning or maintenance. - risk of burn
WARNING!: Switch o the appliance before
replacing the lamp - risk of electrical shock.
DISPOSAL OF PACKAGING MATERIALS
The packaging material is 100% recyclable and is marked with the
recycle symbol.
The various parts of the packaging must therefore be disposed of
responsibility and in full compliance with local authority regulations
governing waste disposal.
SCRAPPING OF HOUSEHOLD APPLIANCES
This appliance is manufactured with recyclable or reusable materials.
Dispose of it in accordance with local waste disposal regulations.
For further information on the treatment, recovery and recycling
of household electrical appliances, contact your local authority,
the collection service for household waste or the store where you
purchased the appliance. This appliance is marked in compliance
with European Directive 2012/19/EU, Waste Electrical and Electronic
Equipment (WEEE). By ensuring this product is disposed of correctly,
you will help prevent negative consequences for the environment and
human health.
The symbol on the product or on the accompanying
documentation indicates that it should not be treated as domestic
waste but must be taken to an appropriate collection center for the
recycling of electrical and electronic equipment.
ENERGY SAVING TIPS
Only preheat the oven if specied in the cooking table or your recipe.
Use dark lacquered or enamelled baking trays as they absorb heat
better. Food requiring prolonged cooking will continue to cook even
once the oven is switched o.
n

IKEA GUARANTEE
How long is the IKEA guarantee valid?
This guarantee is valid for ve (5) years from the original date
of purchase of your appliance at IKEA. The original sales receipt,
is required as proof of purchase. If service work is carried out
under guarantee, this will not extend the guarantee period for
the appliance.
Who will execute the service?
IKEA service provider will provide the service through its own
service operations or authorized service partner network.
What does this guarantee cover?
The guarantee covers faults of the appliance, which have been
caused by faulty construction or material faults from the date
of purchase from IKEA. This guarantee applies to domestic use
only. The exceptions are specied under the headline “What is
not covered under this guarantee?” Within the guarantee period,
the costs to remedy the fault e.g. repairs, parts, labour and
travel will be covered, provided that the appliance is accessible
for repair without special expenditure. On these conditions the
EU guidelines (Nr. 99/44/EG) and the respective local regulations
are applicable. Replaced parts become the property of IKEA.
What will IKEA do to correct the problem?
IKEA appointed Service Provider will examine the product and
decide, at its sole discretion, if it is covered under this guarantee.
If considered covered, IKEA Service Provider or its authorized
service partner through its own service operations, will then, at
its sole discretion, either repair the defective product or replace
it with the same or a comparable product.
What is not covered under this guarantee?
• Normal wear and tear.
• Deliberate or negligent damage, damage caused by failure
to observe operating instructions, incorrect installation or by
connection to the wrong voltage, damage caused by chemical
or electrochemical reaction, rust, corrosion or water damage
including but not limited to damage caused by excessive
lime in the water supply, damage caused by abnormal
environmental conditions.
• Consumable parts including batteries and lamps.
• Non-functional and decorative parts which do not aect
normal use of the appliance, including any scratches and
possible color dierences.
• Accidental damage caused by foreign objects or substances
and cleaning or unblocking of lters, drainage systems or
soap drawers.
• Damage to the following parts: ceramic glass, accessories,
crockery and cutlery baskets, feed and drainage pipes, seals,
lamps and lamp covers, screens, knobs, casings and parts of
casings. Unless such damages can be proved to have been
caused by production faults.
• Cases where no fault could be found during a technician’s visit.
• Repairs not carried out by our appointed service providers
and/or an authorized service contractual partner or where
non-original parts have been used.
• Repairs caused by installation which is faulty or not according
to specication.
• The use of the appliance in a non-domestic environment i.e.
professional use.
• Transportation damages. If a customer transports the product
to his home or another address, IKEA is not liable for any
damage that may occur during transport. However, if IKEA
delivers the product to the customer’s delivery address, then
damage to the product that occurs during this delivery will be
covered by IKEA.
• Cost for carrying out the initial installation of the IKEA
appliance.
• However, if an IKEA appointed Service Provider or its
authorized service partner repairs or replaces the appliance
under the terms of this guarantee, the appointed Service
Provider or its authorized service partner will reinstall the
repaired appliance or install the replacement, if necessary.
How country law applies
The IKEA guarantee gives you specic legal rights, which cover
or exceed all the local legal demands. However these conditions
do not limit in any way consumer rights described in the local
legislation.
Area of validity
For appliances which are purchased in one EU country and
taken to another EU country, the services will be provided in
the framework of the guarantee conditions normal in the new
country.
An obligation to carry out services in the framework of the
guarantee exists only if the appliance complies and is installed in
accordance with:
- the technical specications of the country in which the
guarantee claim is made;
- the Assembly Instructions and User Manual Safety
Information.
The dedicated AFTER SALES for IKEA appliances
Please don’t hesitate to contact IKEA appointed Authorized
Service Centre to:
• make a service request under this guarantee;
• ask for clarications on installation of the IKEA appliance in
the dedicated IKEA kitchen furniture;
• ask for clarication on functions of IKEA appliances.
To ensure that we provide you with the best assistance, please
read carefully the Assembly Instructions and/or the User Manual
before contacting us.
How to reach us if you need our service
For the IKEA appointed Authorized Service
Centre, please refer to the IKEA catalogue or
www.IKEA.com
and select your local store for phone
numbers and opening times.
Before calling us, assure that You have to hand the IKEA
article number (8 digit code) and the Serial Number (8
digit code that can be found on the rating plate) for the
appliance of which you need our assistance.
SAVE THE SALES RECEIPT!
It is your proof of purchase and required for the guarantee
to apply. The sales receipt also reports the IKEA name and
article number (8 digit code) for each of the appliances you
have purchased.
Do you need extra help?
For any additional questions not related to After Sales of your
appliances please contact your nearest IKEA store call centre.
We recommend you read the appliance documentation carefully
before contacting us.

Sebelum menggunakan perkakas, baca
arahan keselamatan ini. Simpannya
berdekatan untuk rujukan masa depan.
Arahan dan perkakas ini sendiri
memberikan amaran keselamatan yang
penting untuk dipatuhi pada setiap
masa. Pengilang menolak sebarang
tanggungjawab terhadap kegagalan
untuk mematuhi arahan keselamatan ini,
untuk penggunaan perkakas yang tidak
sepatutnya atau penetapan kawalan yang
salah.
Kanak-kanak yang sangat kecil (0-3
tahun) harus dijauhkan dari perkakas.
Kanak-kanak kecil (3-8 tahun) harus
dijauhkan dari perkakas melainkan
diawasi secara berterusan. Kanak-kanak
berusia 8 tahun dan ke atas dan individu
yang kurang keupayaan zikal, deria
atau mental atau tiada pengalaman
dan pengetahuan boleh menggunakan
perkakas ini hanya jika mereka diawasi
atau telah diberikan arahan tentang
penggunaan yang selamat dan memahami
bahaya yang terlibat. Kanak-kanak
tidak patut bermain dengan perkakas.
Pembersihan dan penyelenggaraan
pengguna tidak patut dijalankan oleh
kanak-kanak tanpa pengawasan.
AMARAN!: Sekiranya pintu atau
penutup pintu rosak, ketuhar tidak boleh
dikendalikan sehingga ia dapat diperbaiki -
risiko cedera.
AMARAN!: Cecair dan makanan
tidak boleh dipanaskan di dalam bekas
tertutup - risiko letupan, pemanasan
minuman boleh mengakibatkan kelewatan
pendidihan meletus, penjagaan mesti
diambil semasa mengendalikan bekas -
risiko terbakar.
Ketuhar gelombang mikro bertujuan
Maklumat Keselamatan
Isi Kandungan
untuk memanaskan makanan dan
minuman. Jangan keringkan makanan
atau pakaian atau alas pemanasan
haba, selipar, span dan sejenisnya -
risiko kebakaran. Semasa memanaskan
makanan dalam bekas plastik atau kertas,
tetap berwaspada di atas ketuhar - risiko
kebakaran.
Kandungan botol susu dan balang
makanan bayi mesti dikacau atau
digoncang dan suhunya diperiksa - risiko
terbakar. Jangan panaskan telur di dalam
kulitnya dan telur rebus keseluruhannya -
risiko letupan.
Hanya gunakan perkakas yang sesuai
untuk memasak dengan gelombang mikro.
Jangan gunakan bekas logam - risiko
kecederaan.
Hanya gunakan suhu percubaan
yang disyorkan untuk ketuhar ini - risiko
kebakaran.
Sekiranya asap dikeluarkan, matikan
atau cabut palam perkakas dan tutup pintu
agar dapat menyekat api.
Sekiranya perkakas dipasang 850 mm
atau lebih di atas lantai, berhati-hatilah
untuk tidak menganjak piring putar
semasa mengeluarkan bekas - risiko
kecederaan.
Jangan gunakan ketuhar gelombang
mikro anda untuk menggoreng, kerana
suhu minyak tidak dapat dikawal.
Bekas logam untuk makanan dan
minuman tidak sesuai semasa memasak
dengan gelombang mikro.
Jangan keluarkan plat perlindungan
masuk gelombang mikro di sisi dinding
rongga (model tertentu sahaja). Mereka
menghalang gris dan zarah makanan
memasuki saluran masuk gelombang
mikro.
Maklumat Keselamatan 15
Penerangan Produk 17
Panel kawalan 17
Penggunaan harian 18
Data teknikal 21
Pemasangan 22
Sambungan elektrik 22
Kebimbangan Persekitaran 23
JAMINAN IKEA 24
GB
BAHASA MELAYU

PENGGUNAAN YANG DIBENARKAN
AMARAN: Perkakas ini tidak bertujuan
untuk dikendalikan dengan menggunakan
peranti penukar luaran, seperti pemasa,
atau sistem kendali jarak jauh yang
berasingan.
Perkakas ini bertujuan untuk digunakan
di rumah dan penggunaan serupa seperti:
kawasan dapur kakitangan di kedai,
pejabat dan persekitaran bekerja yang
lain; rumah ladang; oleh pelanggan di
hotel, motel, penginapan & sarapan dan
persekitaran kediaman yang lain.
Perkakas ini bukanlah untuk
penggunaan profesional. Jangan gunakan
perkakas di luar.
PEMASANGAN
Perkakas mesti dikendalikan dan
dipasang oleh dua atau lebih orang
- risiko kecederaan. Gunakan sarung
tangan untuk membuka bungkusan dan
memasang - risiko terluka.
Pemasangan, termasuk bekalan air (jika
ada), sambungan elektrik dan pembaikan
mesti dilakukan oleh juruteknik yang
berkelayakan. Jangan baiki atau gantikan
mana-mana bahagian perkakas melainkan
dinyatakan secara khusus dalam manual
pengguna. Jauhkan kanak-kanak dari
tempat pemasangan. Selepas membuka
bungkusan perkakas, pastikan perkakas
tidak rosak semasa mengangkutnya.
Sekiranya terdapat masalah, hubungi wakil
pengedar atau Perkhidmatan Selepas
Jualan terdekat anda. Selepas dipasang,
sampah pembungkusan (plastik, bahagian
styrofoam dll.) mesti disimpan jauh dari
kanak-kanak - risiko lemas. Perkakas mesti
diputuskan dari bekalan elektrik sebelum
operasi pemasangan - berisiko terkena
kejutan elektrik.
Semasa pemasangan, pastikan perkakas
tidak merosakkan kabel kuasa - risiko
kebakaran atau kejutan elektrik. Hanya
hidupkan perkakas apabila pemasangan
telah lengkap.
Perkakas ini bertujuan untuk digunakan
secara bina dalam.
Jangan gunakannya berdiri bebas atau
letakkan ke dalam kabinet.
Setelah membuka bungkusan perkakas,
pastikan pintu perkakas ditutup
dengan betul. Sekiranya terdapat
masalah, hubungi wakil pengedar atau
Perkhidmatan Selepas Jualan berdekatan
anda.
AMARAN ELEKTRIK
Perkakas mesti boleh dipisahkan
daripada bekalan kuasa dengan mencabut
palam jika palam boleh dicapai atau
dengan suis pelbagai kutub yang dipasang
menentang arus soket dan perkakas mesti
dibumikan, selaras dengan piawaian
keselamatan elektrik kebangsaan.
Jangan gunakan wayar pemanjangan
dan beberapa soket atau adapter.
Komponen elektrik mestilah tidak
boleh dicapai oleh pengguna selepas
pemasangan. Jangan gunakan perkakas
semasa anda basah atau berkaki ayam.
Jangan gunakan perkakas ini jika kabel
atau palam kuasanya rosak, jika perkakas
tidak berfungsi dengan betul, atau
perkakas telah rosak atau terjatuh.
Jika kord bekalan rosak, kord tersebut
mesti digantikan dengan kord yang sama
oleh pengilang, ejen perkhidmatannya
atau individu yang sama bertauliah untuk
mengelakkan bahaya - risiko kejutan
elektrik.

Penerangan Produk
Aksesori
Sokongan piring putar
x1
Piring putar kaca
x1
Pengukus
x1
Umum
Terdapat sebilangan aksesori yang terdapat di pasaran. Sebelum
membeli, pastikan ia sesuai untuk penggunaan gelombang
mikro.
Pastikan perkakas yang anda gunakan tahan kalis ketuhar dan
biarkan gelombang mikro melaluinya sebelum memasak.
Apabila anda memasukkan makanan dan aksesori ke dalam
ketuhar gelombang mikro, pastikan ia tidak bersentuhan
dengan bahagian dalam ketuhar.
Ini amat penting dengan aksesori yang diperbuat daripada
bahagian logam atau logam.
Sekiranya aksesori yang mengandungi logam bersentuhan
dengan bahagian dalam ketuhar, semasa ketuhar sedang
beroperasi, percikan api dapat terjadi dan ketuhar boleh rosak.
Sentiasa pastikan bahawa piring putar boleh berpusing dengan
bebas sebelum memulakan ketuhar.
Sokongan piring putar
Gunakan sokongan piring putar di bawah piring putar kaca.
Jangan sekali-kali meletakkan perkakas lain pada sokongan
piring putar.
- Pasangkan sokongan piring putar di dalam ketuhar.
Piring putar kaca
Gunakan piring putar kaca dengan semua kaedah memasak.
Ia mengumpulkan jus yang menitis dan zarah makanan yang
sebaliknya akan mengotorkan bahagian dalam ketuhar.
- Letakkan piring putar kaca pada sokongan piring putar.
Pengukus
Gunakan pengukus dengan saringan untuk makanan seperti
ikan, sayur-sayuran dan kentang.
Sentiasa letakkan pengukus di atas piring putar kaca.
1Butang berhenti
2Butang kuasa
3Butang memo
4Butang stim
5butang + /-
(gunakan butang ini untuk menetapkan masa atau berat)
6Butang Pencairan Pantas
7Butang mula
8Butang pintu
(gunakan butang ini untuk membuka pintu)
Panel kawalan
864321 75
1Panel kawalan
2Lampu Rongga
3Pintu
1
3
2

Perlindungan mula / Kunci dikunci
Fungsi keselamatan automatik ini diaktifkan satu minit setelah
ketuhar kembali ke “mod sedia”. (Ketuhar berada di “sedia”
ketika jam 24 jam dipaparkan atau jika jam belum ditetapkan,
ketika paparan menunjukkan dua titik kecil di antara digit.
Pintu mesti dibuka dan ditutup cth. memasukkan makanan ke
dalamnya, sebelum kunci keselamatan dilepaskan. Jika tidak,
paparan akan menunjukkan “PINTU”.
Untuk jeda atau berhenti memasak
Untuk jeda memasak:
Masakan boleh dijeda untuk memeriksa, memusingkan atau
mengacau makanan dengan membuka pintu. Tetapan akan
dikekalkan selama 10 minit.
Untuk terus memasak:
Tutup pintu dan tekan butang Mula SEKALI. Masakan disambung
semula dari tempat dijeda.
Menekan butang Mula DUA kali akan meningkatkan masa
sebanyak 30 saat.
Sekiranya anda tidak mahu terus memasak:
Keluarkan makanan, tutup pintu dan tekan butang Berhenti
Bunyi bip akan memberi isyarat satu minit selama 10 minit
apabila selesai memasak.
Tekan butang Berhenti atau buka pintu untuk membatalkan
isyarat.
NOTA: Ketuhar hanya akan menahan tetapan selama 60 saat jika
pintu dibuka dan kemudian ditutup setelah memasak selesai.
Sejukkan
Apabila fungsi selesai, ketuhar menjalankan prosedur
penyejukan. Ini adalah biasa.
Selepas prosedur ini ketuhar mati secara automatik.
Pemasa dapur
Gunakan fungsi ini apabila anda memerlukan pemasa dapur
untuk mengukur masa yang tepat untuk pelbagai tujuan seperti
memasak telur atau membiarkan adunan naik sebelum dibakar
dll.
31
2
1. Tekan butang +/- untuk menetapkan panjang pemasa yang
dikehendaki.
2. Tekan butang kuasa berulang kali untuk menetapkan kuasa
ke 0 W.
3. Tekan butang Mula.
Isyarat akustik akan didengar apabila pemasa selesai untuk
membilang bawah..
Jam
Pastikan pintu terbuka semasa menetapkan Jam. Ini memberi
anda 5 minit untuk menyelesaikan penetapan Jam. Jika tidak,
setiap langkah mesti diselesaikan dalam masa 60 saat.
12 4 3 5
1. Tekan butang Berhenti (3 saat) sehingga angka tangan kiri
(jam) berkelip.
2. Tekan butang +/- untuk menetapkan waktu.
3. Tekan butang Mula. (Dua angkat tangan kanan (minit)
berkelip).
4. Tekan butang +/- untuk menetapkan minit.
5. Tekan butang Mula sekali lagi.
Jam ditetapkan dan beroperasi.
NOTA: Semasa perkakas pertama kali dipasang atau setelah
kegagalan kuasa, paparan adalah kosong. Sekiranya jam
tidak ditetapkan, paparan akan tetap kosong sehingga waktu
memasak ditetapkan.
Sekiranya anda ingin menghilangkan Jam dari paparan setelah
ditetapkan, tekan sahaja butang Berhenti sekali lagi selama 3
saat dan kemudian tekan butang Berhenti sekali lagi.
Untuk mengembalikan Jam, ikuti prosedur di atas.
Masak dan panaskan semula dengan gelombang mikro
Gunakan fungsi ini untuk memasak dan memanaskan semula
biasa, seperti sayur-sayuran, ikan, kentang dan daging.
312
1. Tekan butang +/- untuk menetapkan waktu.
2. Tekan butang kuasa berulang kali untuk menetapkan kuasa.
3. Tekan butang Mula.
Setelah proses memasak dimulakan:
Waktu dapat ditingkatkan dengan mudah dalam langkah 30
saat dengan menekan butang Mula. Setiap tekan meningkatkan
masa dengan 30 saat. Anda juga boleh mengubah waktu
dengan menekan butang +/- untuk menambah atau
mengurangkan waktu.
Menekan butang kuasa juga boleh mengubah tahap kuasa.
Tekan pertama akan menunjukkan anda tahap kuasa semasa.
Tekan butang kuasa berulang kali untuk menukar tahap kuasa.
Semua tetapan boleh diubah semasa memasak jika anda mahu.
Tahap kuasa
Gelombang mikro sahaja
Kuasa Cadangan penggunaan:
750 W
Pemanasan semula minuman, air, sup jernih, kopi, teh atau
makanan lain dengan kandungan air yang tinggi. Sekiranya
makanan mengandungi telur atau krim pilih kuasa yang
lebih rendah.
Memasak ikan, sayur-sayuran, daging dll.
500 W
Masak lebih berhati-hati cth. sos protein tinggi, hidangan
keju dan telur dan untuk menyelesaikan memasak kaserol.
350 W
Rebusan mendidih, mentega cair.
160 W
Pencairan. Melembutkan mentega, keju. Melembutkan Ais
krim.
0 W
Semasa menggunakan Pemasa sahaja.
Mula Pantas
Fungsi ini digunakan untuk pemanasan cepat makanan dengan
kandungan air yang tinggi seperti; sup jernih, kopi atau teh.
Tekan untuk memulakan secara automatik dengan tahap kuasa
gelombang mikro penuh dan masa memasak ditetapkan hingga
30 saat. Setiap penekanan tambahan meningkatkan masa
dengan 30 saat. Anda juga boleh mengubah waktu dengan
menekan butang +/- untuk menambah atau mengurangkan
waktu setelah fungsi dimulakan.
Pencairan manual
Ikuti prosedur untuk “Masak dan panaskan semula dengan
gelombang mikro” dan pilih tahap kuasa 160 W semasa
pencairan secara manual.
Cek dan periksa makanan secara berkala. Pengalaman akan
memberi anda masa yang diperlukan untuk pelbagai jumlah.
Makanan beku dalam beg plastik, saput plastik atau bungkusan
kadbod boleh diletakkan terus di dalam ketuhar selagi
bungkusan itu tidak mempunyai bahagian logam (cth. ikatan
pusingan logam).
Bentuk bungkusan mengubah masa pencairan. Paket nipis
Penggunaan harian

mencair lebih cepat daripada blok dalam.
Pisahkan kepingan semasa mereka mula mencairkan.
Kepingan individu cair dengan lebih mudah.
Lindungi kawasan makanan dengan kepingan kecil kerajang
aluminium jika mula menjadi hangat (cth. kaki ayam dan hujung
sayap).
Pusing sendi besar di tengah proses pencairan.
Makanan rebus, rebusan dan sos daging mencair lebih baik jika
dikacau ketika waktu pencairan.
Semasa pencairan, lebih baik mencairkan makanan dengan
sedikit dan membiarkan prosesnya selesai pada masa berdiri.
Masa berdiri setelah pencairan selalu meningkatkan hasilnya
kerana suhu kemudian akan diedarkan sama rata ke seluruh
makanan.
Pencairan Pantas
Gunakan fungsi ini untuk mencairkan Daging, Ikan & Poltri
SAHAJA. Pencairan-Pantas hanya boleh digunakan jika berat
bersih antara 100 - 2 Kg.
2 31
1. Tekan butang Pencairan Pantas.
2. Tekan butang + / - untuk menetapkan berat makanan.
3. Tekan butang Mula.
Di tengah proses pencairan, ketuhar berhenti dan meminta
anda untuk PUSINGKAN MAKANAN.
- Buka pintu.
- Pusing makanan.
- Tutup pintu dan mulakan semula dengan menekan butang
Mula.
NOTA: Ketuhar menyala secara automatik selepas 2 minit. jika
makanan belum dipusing. Masa pencairan akan lebih lama
dalam kes ini.
Fungsi ini perlu mengetahui berat bersih makanan. Ketuhar
kemudian secara automatik akan mengira masa yang diperlukan
untuk menyelesaikan prosedur.
- Makanan beku:
Sekiranya makanan lebih panas daripada suhu beku dalam
(-18 ° C), pilih berat makanan yang lebih rendah.
Sekiranya makanan lebih sejuk daripada suhu beku dalam
(-18 ° C), pilih berat makanan yang lebih tinggi.
Makanan Petunjuk
Daging
(100g - 2.0Kg)
Daging cincang, potongan daging, stik
atau panggang.
Poltri
(100g - 2.0Kg) Ayam keseluruhan, kepingan atau let.
Ikan
(100g - 1.5Kg) Seluruh, stik atau let.
Untuk makanan yang tidak disenaraikan dalam jadual ini dan
jika beratnya lebih rendah atau lebih besar daripada berat yang
disyorkan, anda harus mengikuti prosedur untuk “Masak dan
panaskan semula dengan gelombang mikro” dan pilih 160 W
ketika pencairan.
Memori
1 2
Fungsi Memori memberi anda cara mudah untuk mengingat
semula tetapan pilihan dengan cepat.
Prinsip fungsi Memori adalah menyimpan apa sahaja tetapan
yang sedang dipaparkan.
Cara mengaktifkan memori yang tersimpan:
1. Tekan butang Memo.
2. Tekan butang Mula.
Cara menyimpan tetapan:
1. Pilih sebarang fungsi
2. Buat tetapan yang diperlukan
3. Tekan dan terus tekan butang Memo selama 3 saat sehingga
terdengar isyarat akustik. Tetapan kini disimpan. Anda boleh
memprogram semula memori seberapa banyak yang anda
mahukan.
Apabila perkakas dipasang atau setelah kegagalan kuasa, fungsi
Memo anda akan disimpan - 1 minit dan 750 W sebagai tetapan
lalai.
Stim
3 4
1 2
Gunakan fungsi ini untuk makanan seperti sayur-sayuran & ikan.
Sentiasa gunakan Pengukus yang disediakan semasa
menggunakan fungsi ini.
1. Tekan butang Stim.
2. Terus tekan butang Stim berulang kali untuk menetapkan
kelas makanan.
3. Tekan butang +/- untuk menetapkan berat makanan.
4. Tekan butang Mula.
Letakkan makanan di atas grid stim.
Masukkan 100 ml (1dl) air di bahagian bawah pengukus.
Tutup dengan penutup.
AMARAN! Pengukus direka untuk digunakan dengan
gelombang mikro sahaja!
Jangan sekali-kali menggunakannya dengan fungsi lain sama
sekali.
Menggunakan pengukus dalam fungsi lain boleh menyebabkan
kerosakan.
Sentiasa pastikan bahawa piring putar boleh berpusing dengan
bebas sebelum memulakan ketuhar.
Sentiasa letakkan pengukus di atas piring putar kaca.

Memasak sayur
Masukkan sayur ke dalam penapis.
Tuangkan 100 ml air ke bahagian bawah.
Tutup dengan penutup dan tetapkan masa.
Sayur-sayuran lembut seperti brokoli dan daun bawang
memerlukan masa memasak selama 2-3 minit.
Sayur-sayuran yang lebih keras seperti lobak merah dan kentang
memerlukan masa memasak selama 4-5 minit.
Makanan Petunjuk
Kentang / Sayur-sayuran akar
(150g - 200g) Gunakan saiz sama.
Potong sayur-sayuran menjadi
beberapa bahagian.
Biarkan selama 1 - 2 minit,
setelah dimasak.
Sayur-sayuran
(Kubis bunga dan Brokoli)
(150g - 500g)
Sayur-sayuran beku
(150g - 500g)
Biarkan selama 1 - 2 minit,
setelah dimasak.
Filet ikan
(150g - 500g)
Sebarkan let rata pada grid
stim. Jalinkan bahagian nipis.
Biarkan selama 1 - 2 minit,
setelah dimasak.
AMARAN: Perkakas dan bahagian boleh capainya
menjadi panas semasa penggunaan. Berhati-hati supaya
tidak menyentuh elemen pemanasan. Anak-anak kecil harus
dijauhkan.
Semasa dan selepas digunakan, jangan sentuh elemen
pemanasan atau permukaan dalaman perkakas - risiko terbakar.
Jangan biarkan alat bersentuhan dengan kain atau bahan
mudah terbakar lain sehingga semua komponen telah sejuk
sepenuhnya.
AMARAN: Jangan panaskan atau masak dengan balang atau
bekas yang tertutup dalam perkakas.
Tekanan yang terhasil di dalam mungkin menyebabkan ia
meletup, merosakkan perkakas.
AMARAN: Sekiranya perkakas dikendalikan dalam mod
gabungan, kanak-kanak hanya boleh menggunakan perkakas di
bawah pengawasan orang dewasa kerana suhu yang dihasilkan.
AMARAN : Panas cecair melebihi titik didih boleh berlaku tanpa
bukti menggelegak. Ini boleh mengakibatkan mendidih cecair
panas secara tiba-tiba. Untuk mengelakkan kemungkinan ini,
langkah-langkah berikut harus diambil:
1. Elakkan menggunakan bekas yang lurus dengan leher yang
sempit.
2. Kacau cecair sebelum meletakkan bekas ke dalam perkakas
dan biarkan sudu teh kekal di dalam bekas.
3. Setelah memanaskan, biarkan berdiri untuk waktu yang
singkat, kacau lagi sebelum mengeluarkan bekas dari perkakas
dengan berhati-hati.
AMARAN: Selepas memanaskan makanan bayi cecair dalam
botol bayi atau dalam balang makanan bayi, sentiasa kacau dan
periksa suhu sebelum disajikan.
Masalah Sebab yang mungkin Penyelesaian
Perkakas tidak berfungsi. Bekalan kuasa utama atau
perkakas tidak disambungkan.
Periksa us anda dan pastikan ada kuasa yang tersedia.
Pintu tidak ditutup. Buka dan kemudian tutup pintu sebelum anda mencuba lagi.
Mesej dipaparkan seperti: F2,
F3C, F7 atau Err2, Err3, Err5.
Ketuhar telah mengesan bahawa
kesalahan berlaku pada salah satu
sensornya atau yang serupa.
Putuskan sambungan dan tunggu 10 minit sebelum
menyambung semula, kemudian cuba gunakan ketuhar
sekali lagi. Sekiranya masalah berterusan: hubungi
perkhidmatan.
Makanan dipanaskan secara
tidak rata.
Bahagian yang sangat nipis
seperti hujung sayap ayam dan
yang lain tidak terlindung.
Tutup bahagian yang lebih nipis dengan kerajang aluminium.
Makanan dipanaskan pada tahap
kuasa terlalu tinggi.
Pilih tahap kuasa yang lebih rendah.
Piring putar telah berhenti. Pastikan piring putar dan sokongan piring putar berada
di tempatnya dan makanan berpusat dengan baik, tidak
menyentuh dinding rongga.ada dan makanan berpusat
dengan baik, tidak menyentuh dinding rongga.
Makanan tidak berputar. Piring putar telah berhenti. Pastikan piring putar dan sokongan piring putar berada di
tempatnya dan bahagian bawah rongga bersih.
Perkara untuk dilakukan jika ...
Other manuals for MATÄLSKARE
17
Table of contents
Languages:
Other IKEA Microwave Oven manuals
IKEA
IKEA VÄRMD User manual

IKEA
IKEA TILLREDA User manual

IKEA
IKEA MAGEBO User manual
IKEA
IKEA IBMS1455XB0 User manual
IKEA
IKEA MATÄLSKARE User manual

IKEA
IKEA FORNEBY 005.569.09 User manual
IKEA
IKEA HUSHALLAFRAMTID MW3 User manual
IKEA
IKEA FRAMTID MW 4 User manual
IKEA
IKEA EFTERSMAK User manual

IKEA
IKEA HUVUDSAKLIG 493.872.03 User manual

IKEA
IKEA Anratta User manual
IKEA
IKEA SNABB User manual
IKEA
IKEA HUSHALLAFRAMTID MW3 User manual
IKEA
IKEA MATTRADITION User manual

IKEA
IKEA IBMS1455WW0 User manual
IKEA
IKEA IMH16 User manual
IKEA
IKEA TILLREDA 504.867.92 User manual
IKEA
IKEA VARMA User manual

IKEA
IKEA MAGEBO 105-570-55 User manual

IKEA
IKEA IMH15XR User manual

