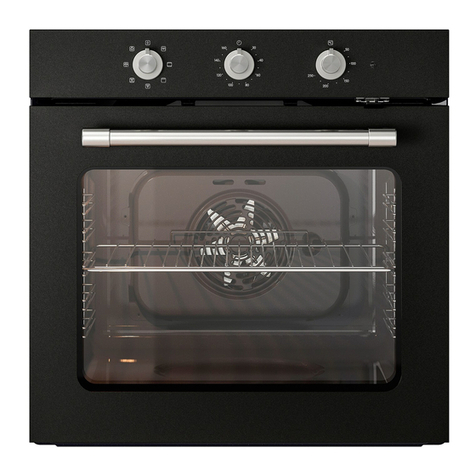
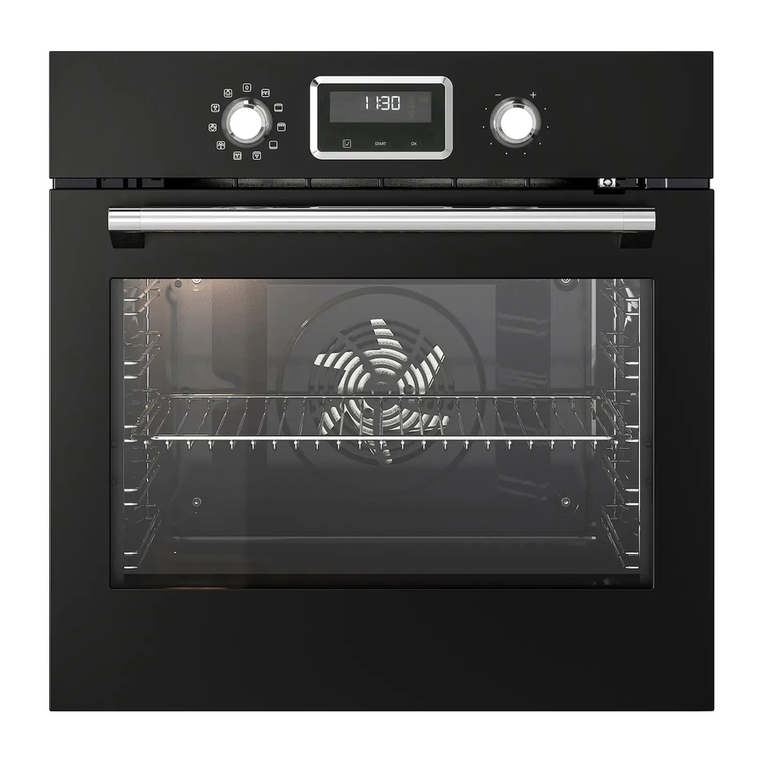
IKEA MATÄLSKARE User manual

MATÄLSKARE
MATTRADITION
GB
FR
DE
IT


ENGLISH 4
DEUTSCH 18
FRANÇAIS 36
ITALIANO 54
Please refer to the last page
of this manual for the full list
of IKEA appointed Authorized
Service Centre and relative
national phone numbers.
Gehen Sie dazu auf die letzte
Seite dieser Broschüre. Dort
nden Sie eine Übersicht mit den
entsprechenden Telefonnummern
und Kontaktdaten unserer
autorisierten Kundendienste.
Consultez la dernière page de ce
manuel pour la liste complète des
centre d’entretien et de réparation
agréés IKEA avec leur numéro de
téléphone respectifs.
Siete pregati di contattare il
numero del Centro Assistenza
Autorizzato incaricato da IKEA
riportato sull’ultima pagina di
questo manuale.

ENGLISH 4
Before using the appliance, read
these safety instructions. Keep
them nearby for future reference.
These instructions and the
appliance itself provide
important safety warnings, to
be observed at all times. The
manufacturer declines any
liability for failure to observe
these safety instructions,
for inappropriate use of the
appliance or incorrect setting of
controls.
SAFETY WARNINGS
Very young children (0-3
years) should be kept away
from the appliance. Young
children (3-8 years) should be
kept away from the appliance
unless continuously supervised.
Children from 8 years old
and above and persons with
reduced physical, sensory or
mental capabilities or lack of
experience and knowledge can
use this appliance only if they
are supervised or have been
given instructions on safe use
and understand the hazards
involved. Children must not play
with the appliance. Cleaning and
user maintenance must not be
carried out by children without
supervision.
WARNING! The appliance
and its accessible parts become
hot during use. Care should be
taken to avoid touching heating
elements. Children less than 8
years old must be kept away
unless continuously supervised.
Never leave the appliance
unattended during food
drying. If the appliance is
suitable for probe usage,
only use a temperature probe
recommended for this oven - risk
of re.
Keep clothes or other ammable
materials away from the appliance, until
all the components have cooled down
completely - risk of re. Always be vigilant
when cooking foods rich in fat, oil or when
adding alcoholic beverages - risk of re.
Use oven gloves to remove pans and
accessories. At the end of cooking, open the
Safety information 4
Product description 7
Control panel 8
Daily use 8
Cooking tables 10
Cleaning and maintenance 12
What to do if ... 14
Technical data 15
Installation 16
Electrical connection 17
Environmental concerns 17
Safety Information
Table of contents

ENGLISH 5
door with caution: allowing hot air or steam
to exit gradually before accessing the cavity
- risk of burns. Do not obstruct hot air vents
at the front of the oven - risk of re.
Exercise caution when the oven door
is in the open or down position, to avoid
hitting the door.
PERMITTED USE
CAUTION: the appliance is
not intended to be operated by
means of an external switching
device, such as a timer, or
separate remote controlled
system.
This appliance is intended
to be used in household and
similar applications such as: staff
kitchen areas in shops, ofces
and other working environments;
farm houses; by clients in hotels,
motels, bed & breakfast and
other residential environments.
Do not install the appliance
behind a decorative door - risk
of re.
This appliance is not for professional
use. Do not use the appliance outdoors.
No other use is permitted (e.g. heating
rooms).
Do not store explosive or ammable
substances (e.g. gasoline or aerosol cans)
inside or near the appliance - risk of re.
INSTALLATION
INSTALLATIONThe appliance must
be handled and installed by two or more
persons - risk of injury. Use protective gloves
to unpack and install - risk of cuts.
Installation, including water supply
(if any) and electrical connections, and
repairs must be carried out by a qualied
technician. Do not repair or replace any
part of the appliance unless specically
stated in the user manual. Keep children
away from the installation site. After
unpacking the appliance, make sure that it
has not been damaged during transport.
In the event of problems, contact the
dealer or your nearest After-sales Service.
Once installed, packaging waste (plastic,
styrofoam parts etc.) must be stored out
of reach of children - risk of suffocation.
The appliance must be disconnected from
the power supply before any installation
operation - risk of electrical shock. During
installation, make sure the appliance does
not damage the power cable - risk of re or
electrical shock. Only activate the appliance
when the installation has been completed.
Carry out all cabinet cutting works
before tting the appliance in the furniture
and remove all wood chips and sawdust.
Do not obstruct the minimum gap between
the worktop and the upper edge of the oven
- risk of burn.
Do not remove the oven from its polystyrene
foam base until the time of installation.
After installation, the bottom
of the appliance must no longer
be accessible - risk of burn.
ELECTRICAL WARNINGS
The rating plate is on the front
edge of the oven (visible when
the door is open).
It must be possible to
ENGLISH 6
disconnect the appliance from
the power supply by unplugging
it if plug is accessible, or by
a multi-pole switch installed
upstream of the socket and the
appliance must be earthed,
in conformity with national
electrical safety standards.
Do not use extension leads, multiple
sockets or adapters. The electrical
components must not be accessible to
the user after installation. Do not use the
appliance when you are wet or barefoot.
Do not operate this appliance if it has a
damaged power cable or plug, if it is not
working properly, or if it has been damaged
or dropped.
If the supply cord is
damaged, it must be replaced
with an identical one by the
manufacturer, its service agent
or similarly qualied persons in
order to avoid a hazard - risk of
electrical shock.
In case of replacement
of power cable, contact an
authorized service center.

ENGLISH 7
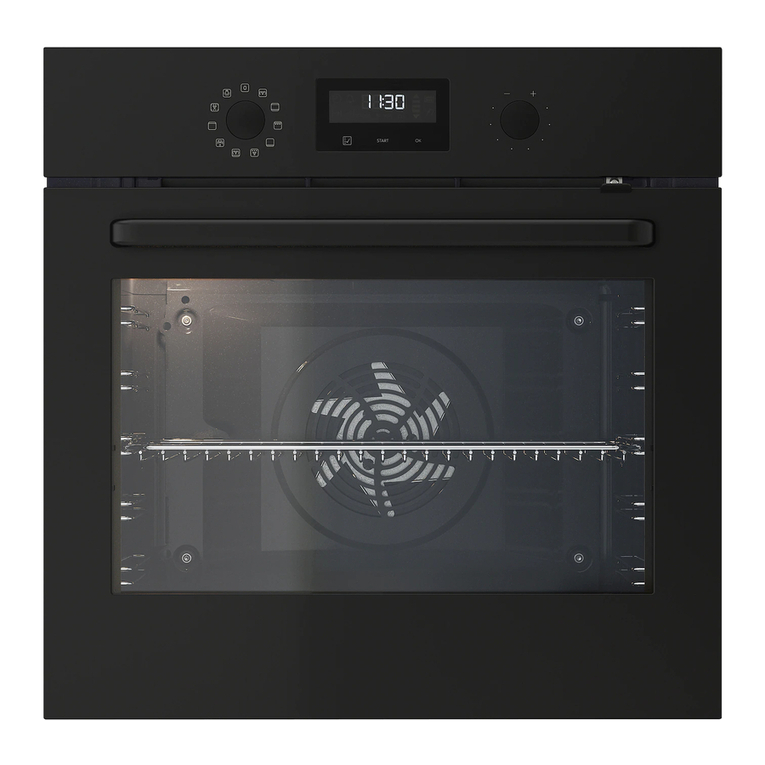
Product description
1Control panel
2Cooling fan (not visible)
3Grill element
4 Oven lamp
5 Oven fan
6 Lower heating element (hidden)
7 Oven door
1
2
3
4
5
7
6
Inserting the wire shelf and other accessories
Insert the wire shelf onto the level you require by holding it tilted slightly upwards and resting
the raised rear side (pointing upwards) down rst. Next, slide it horizontally along the shelf
guide as far as possible.
The other accessories, such as the baking tray, are inserted horizontally by sliding them
along the shelf guides.
If you want to buy an accessory, call the Authorized Service Centre.
Accessories
Baking tray
1x
Wire Shelf
1x

ENGLISH 8
Control panel
ASelection knob
BTime knob
CThermostat knob
D Led thermostat/preheating
•
•
•
•
•
•
•
•
•
AB C D
1. Select a function
To select a function, turn the
selection
knob
to the symbol for the function you
require.
2. Activate a function
MANUAL
To start the function you have selected,
turn the
thermostat knob
to set the
temperature you require.
To interrupt the function at any time,
switch off the oven, turn the
selection
knob
and the
thermostat knob
.
3. Preheating
Once the function has been activated,
the LED thermostat will switch on
signalling that the preheating process
has begun.
At the end of this process, the LED
thermostat switches off indicating
that the oven has reached the set
temperature: At this point, place the
food inside and proceed with cooking.
Please note: Placing the food in the oven
before preheating has nished may have an
adverse effect on the nal cooking result.
4. Setting the timer
This option does not interrupt or activate
cooking but allows you to use the minute
minder both while a function is active
and when the oven is off.
To activate the timer, turn the timer knob
right round in an clockwise direction
and then turn it back in the opposite
direction to the desired duration: an
acoustic signal will warn you when the
count-down is nished.
•
•
•
•
•
•
•
•
•
Daily use

ENGLISH 9
Oven functions table
The oven has 5 cooking levels. Count up from the lower level.
Function Description of function
0OVEN OFF For switching off the oven.
FORCED AIR For cooking different foods that require the same
cooking temperature on several shelves (maximum
three) at the same time. This function can be used to
cook different foods without odours being transferred
from one food to another.
CONVENTIONAL
(Top and Bottom Heat)
For cooking any kind of dish on one shelf only.
It is best to use the 2nd shelf.
GRILL For grilling steaks, kebabs and sausages, cooking
vegetables au gratin or toasting bread. When grilling
meat, we recommend using a drip tray to collect the
cooking juices: position the pan on any of the levels
below the wire shelf and add 200 ml of drinking water.
GRILLING
WITH FAN
For roasting large joints of meat (legs, roast beef,
chicken). We recommend using a drip tray to collect
the cooking juices: position the pan on any of the levels
below the wire shelf and add 500 ml of drinking water.
CONVECTION BAKE For baking cakes with juicy llings on a single shelf. This
function can also be used for cooking on two shelves.
Switch the position of the dishes to cook food more
evenly.
DEFROST For defrosting food more quickly.
Place the food in the center of the cavity, level 3
LIGHT For switching on the light in the compartment.

ENGLISH 10
Cooking tables
Type of food Function Preheating Level
(from the bottom) Temperature
(°C) Cooking time
(min)
SWEETS, PASTRY, ETC
Leavened cakes X 2 150–170 30-90
X4-1 160-180 30-90
Filled pies
(cheesecake,
strudel, fruit pie)
X 2 160-200 35-90
X 4-2 160-200 40-90
Biscuits/tartlets X 2-3 160-180 15-40
X4-2/5-3-1 150 -170 20-45
Choux buns X 2 180-200 40-60
X 4-2 170 -19 0 35-50
Meringues X 2 90 150-200
X4-2/5-3-1 90 140-200
Bread/pizza/
focaccia
X1-2 220-250 10-40
X 4-2 200-240 20-30
Frozen pizza X 2 250 10-30
X 4-2 230-250 10-30
Savoury pies
(vegetable pie,
quiche)
X 2 180-200 30-50
X4-2/5-3-1 180-200 30-60
Vols-au-vent /Puff
pastry crackers
X 2 190-200 20-30
X4-2/5-3-1 180-190 20-40
Lasagne, baked
pasta, cannelloni,
ans X 2 190-200 45-65
Lasagna & Meat X 4-2 200 50-100***
Meat & Potatoes X4-1 190-200 45-100***
Fish & Vegetables X4-1 180 30-50***
Complete meal
Fruit tart (Level 5) /
Lasagna (Level 3) /
Meat (Level 1)
X 5-3-1 180-190 40-120***

ENGLISH 11
Type of food Function Preheating Level
(from the bottom)
Temperature
(°C)
Cooking time
(min)
MEAT
Roast pork with
crackling 2 kg X 2 180-190 110 - 15 0
Lamb/Veal/Beef/
Pork 1Kg X 2 190-200 80 -120
Chicken/Rabbit/
Duck 1Kg X 2 200-230 50-100
Turkey/Goose 3Kg X 2 180-200 150-200
FISH
Baked sh/en
papillote 0.5Kg
(llet, whole) X 2 170 -19 0 30-50
VEGETABLES
Stuffed vegetables
(tomatoes,
courgettes,
aubergines)
X 2 180-200 50-70
Cooking table with GRILL function
Type of food Function Preheating Level
(from the bottom)
Temperature
(°C)
Cooking time
(min)
Toast 5’ 5 250 2-6
Fish llets/slices 5’ 4-3 250 15-30*
Sausages/kebabs/
spare ribs/
hamburgers 5’ 5-4 250 15-30*
Leg of lamb/
knuckle – 3 200-220 60-90**
Vegetable gratin – 3 200-220 30-60**
Roast potatoes – 3 200-220 30-60**
Roast chicken
1-1.3 Kg – 3 200-220 60-90**
Roast beef rare
1Kg – 3 200-220 30-60**
Note: cooking temperatures and times are for guidance only.
* Turn food halfway through cooking
** Turn food two-thirds of the way through cooking (if necessary).
*** Estimated length of time: dishes can be removed from the oven at different times depending on
personal preference.

ENGLISH 12
Cleaning and maintenance
CLEANING
WARNING!
- Never use steam cleaning equipment.
- Only clean the oven when it is cool to
the touch.
- Disconnect the appliance from the
power supply.
Oven exterior
i
IMPORTANT: do not use corrosive or
abrasive detergents. If any of these
products accidentally comes into contact
with the appliance, clean immediately with
a damp cloth.
•Clean the surfaces with a damp cloth.
If it is very dirty, add a few drops of
washing up detergent to the water.
Finish off with a dry cloth.
Oven interior
i
IMPORTANT: do not use abrasive
sponges or metallic scrapers or scourers.
Over time, these can ruin enamelled surfaces
and the oven door glass.
•After every use, allow the oven to cool
then clean it preferably while it is still
warm in order to remove built-up dirt
and stains caused by food residues (e.g.
food with a high sugar content).
•Use proper oven detergents and follow the
manufacturer’s instructions to the letter.
•Clean the door glass with a suitable
liquid detergent. The oven door can
be removed to facilitate cleaning (see
MAINTENANCE). Inner glass is smooth
to facilitate cleaning.
NOTE: during prolonged cooking of foods
with a high water content (e.g. pizza,
vegetables, etc.) condensation may form on
the inside of the door and around the seal.
When the oven is cold, dry the inside of the
door with a cloth or sponge.
Accessories
•Soak the accessories in water with
washing up detergent immediately after
use, handling them with oven gloves if
still hot.
•Food residues can be easily removed
using a brush or sponge.
MAINTENANCE
WARNING!
- Use safety gloves.
- Ensure the oven is cold before carrying
out the following operations.
- Disconnect the oven from the power supply.
To remove the shelf guides
rmly grip the external part of the guide,
and pull it towards you to extract the
support and the two internal pins from the
lodging.
To reposition the shelf guides
position them near the cavity and initially
insert the two pins into their lodgings. Next,
position the external part near
its lodging, insert the support, and rmly
press towards the wall of the cavity to make
sure the shelf guide is properly secured.

ENGLISH 13
To remove the door
1. Open the door fully.
2. Lift the catches and push them forwards
as far as they will go (Fig. 1).
Fig. 1
3. Close the door as far as it will go (A), lift
it up (B) and turn it (C) until it is released
(D) (Fig. 2, 3, 4).
A
Fig. 2
B
B
C
Fig. 3
D
Fig. 4
To ret the door
1. Insert the hinges in their seats.
2. Open the door fully.
3. Lower the two catches.
4. Close the door
Cleaning the glass
1. After removing the door and resting
it on a soft surface with the handle
downwards, simultaneously press the
two retaining clips and remove the
upper edge of the door by pulling it
towards you.
2. Lift and rmly hold the inner glass with
both hands, remove it and place it on a
soft surface before cleaning it.
3. To reposition the internal glass properly,
be sure that the “R” can be seen in the
left corner.
First insert the long side of the glass
indicated by “R” into the support seats,
then lower it into position.

ENGLISH 14
4. Ret the upper edge: A click will indicate
correct positioning. Make sure the seal is
secure before retting the door.
To replace the lamp
1. Disconnect the oven from the power
supply.
Fig. 5
2. Unscrew the lamp cover (Fig. 5), replace
the lamp (see note for lamp type) and
screw the lamp cover back on.
3. Reconnect the oven to the power supply.
NOTE:
- Only use 25W/230 V type G9, T300°C
halogen lamps.
- The lamp used in the appliance is
specically designed for electrical
appliances and it is not suitable
for household room illumination
(Commission Regulation (EC) No
244/2009).
- Lamps are available from IKEA
Authorized Service Centre.
Problem Possible cause Solution
The oven does not work. No presence of mains
electrical power.
Verify the presence of mains
electrical power.
The oven is not
connected to the
electrical supply.
Connect the oven to the
power supply.
The oven selector is
turned to “ ”.
Turn the oven selector and
select a cooking function.
Before calling the Authorized Service Centre:
1. See if you can solve the problem yourself with the help of the suggestions given in the
“What to do if ...” table.
2. Switch the appliance off and back on again it to see if the fault persists.
If after the above checks the fault still occurs, contact IKEA Authorized Service Centre.
Always specify:
•a brief description of the fault;
•the type and exact model of the oven;
•the service number (number after the word Service on the rating plate), located on the
right hand edge of the oven cavity (visible when the oven door is open);
•your full address;
•your telephone number.
If any repairs are required, please contact IKEA Authorized Service Centre (to guarantee
that original spare parts will be used and repairs carried out correctly).
What to do if ...

ENGLISH 15
Technical data
Type of product: Built-in Electrical Oven
Model identication:
MATÄLSKARE 303.687.80,
MATTRADITION 503.687.84
Number of cavities
1
Heat source
Electrical
Number of functions
6
Usable volume. Measured with any side grids and catalytic panels removed l
71
Area of the largest baking sheet cm2
1191
Energy Efciency Class (Lowest Consumption)
A
Energy Efciency Index
95,3
Energy consumption
Conventional function (with a standard load and top + bottom heating)
kWh/cycle
0,99
Energy consumption
Fan Forced function (with a standard load and forced air heating) kWh/cycle
0,81
Top heating element W
150 0
Bottom heating element W
115 0
Grill heating element W
150 0
Fan heating element W
1800
Cooling fan W
15
Oven lamp W
25
Oven Fan Wattage W
22
Total rating W
2750
Dimensions
Width mm
595
Height mm
595
Depth mm
550
Mass of the appliance
MATÄLSKARE stainless steel Kg
MATTRADITION stainless steel Kg
27
29

ENGLISH 16
Door lock device
To open the door with the door lock device
see Fig 1.
Fig. 1
The door safety device can be removed
by following the sequence of images (see
Fig. 2). Fig. 2
Installation
Technical data
The technical informations are situated in
the rating plate inside the appliance.

ENGLISH 17
WARNING! Ensure that the
appliance is switched off and
disconnected from the power
supply before performing any
maintenance operation - risk of
electrical shock. Never use steam
cleaning equipment.
Do not use harsh abrasive
cleaners or metal scrapers to
clean the door glass since they
can scratch the surface, which may
result in shattering of the glass.
Ensure the appliance is cooled down
before any cleaning or maintenance. - risk of
burn.
WARNING! Switch off the
appliance before replacing the
lamp - risk of electrical shock.
DISPOSAL OF PACKAGING MATERIALS
The packaging material is 100% recyclable
and is marked with the recycle symbol.
The various parts of the packaging must
therefore be disposed of responsibility and in
full compliance with local authority regulations
governing waste disposal.
SCRAPPING OF HOUSEHOLD APPLIANCES
This appliance is manufactured with
recyclable or reusable materials. Dispose of
it in accordance with local waste disposal
regulations. For further information on the
treatment, recovery and recycling of household
electrical appliances, contact your local
authority, the collection service for household
waste or the store where you purchased
the appliance. This appliance is marked in
compliance with European Directive 2012/19/
EU, Waste Electrical and Electronic Equipment
(WEEE). By ensuring this product is disposed
of correctly, you will help prevent negative
consequences for the environment and human
health.
The symbol on the product or on the
accompanying documentation indicates that
it should not be treated as domestic waste but
must be taken to an appropriate collection
center for the recycling of electrical and
electronic equipment.
ENERGY SAVING TIPSs
Only preheat the oven if specied in the
cooking table or your recipe. Use dark
lacquered or enamelled baking trays as they
absorb heat better. Food requiring prolonged
cooking
will continue to cook even once the oven
is switched off.
Environmental concerns
Make sure the power voltage specied on
the appliance rating plate is the same as
the mains voltage. The rating plate is on
the front edge of the oven (visible when the
door is open).
Power cable replacement (type H05 RR-F 3
x 1,5 mm2) must be carried out by a qualied
electrician. Contact IKEA Authorized Service
Centre.
Electrical connection

DEUTSCH 18
Diese Sicherheitsanweisungen vor
dem Gebrauch durchlesen. Diese
Anweisungen zum Nachschlagen
leicht zugänglich aufbewahren.
In diesen Anweisungen sowie
auf dem Gerät selbst werden
wichtige Sicherheitshinweise
angegeben, die durchgelesen und
stets beachtet werden müssen.
Der Hersteller übernimmt keine
Haftung für die Nichtbeachtung
dieser Sicherheitshinweise, für
unsachgemäße Verwendung
des Geräts oder falsche
Bedienungseinstellung.
SICHERHEITSHINWEISE
Babys und Kleinkinder (0-3
Jahre) müssen vom Gerät fern
gehalten werden. Jüngere Kinder
(3-8 Jahre) müssen vom Gerät fern
gehalten werden, es sei denn, sie
werden ständig beaufsichtigt.
Dieses Gerät darf von Kindern
ab 8 Jahren sowie Personen
mit herabgesetzten physischen,
sensorischen oder geistigen
Fähigkeiten und Mangel an
Erfahrung und Kenntnissen
nur unter Aufsicht oder nach
ausreichender Einweisung
durch eine für ihre Sicherheit
verantwortliche Person verwendet
werden. Kinder dürfen nicht mit
dem Gerät spielen.
Die Reinigung und Pege des
Geräts darf von Kindern nicht ohne
Aufsicht durchgeführt werden.
WARNUNG!: Das Gerät und
die zugänglichen Teile werden bei
der Benutzung heiß.
WARNUNG!: Die Heizelemente
oder Innenächen während
und nach dem Gebrauch nicht
berühren - Verbrennungsgefahr.
WARNUNG!: Lassen Sie das
Gerät während des Dörrens von
Speisen niemals unbeaufsichtigt.
Eignet sich das Gerät für die
Verwendung von Sonden,
ausschließlich für diesen Ofen
empfohlene Temperatursonden
verwenden - Brandgefahr.
Kleidung oder andere brennbare
Materialien vom Gerät fernhalten, bis alle
Komponenten vollständig abgekühlt sind -
Brandgefahr.
Beim Garen von fett- oder ölhaltigen Speisen
oder bei Zugabe von alkoholischen Getränken
besonders wachsam sein - Brandgefahr.
Sicherheitshinweise 18
Produktbeschreibung 22
Bedienfeld 23
Tägliche Verwendung 23
Gartabellen 25
Reinigung und Pege 27
Störung - Was tun? 30
Technische Daten 31
Aufstellung 32
Anschluss an das Stromnetz 33
Hinweise zum Umweltschutz 33
IKEA GARANTIE 33
Sicherheitshinweise
Inhaltsverzeichnis

DEUTSCH 19
Verwenden Sie Backofenhandschuhe, um
Gargeschirr und Zubehörteile zu entnehmen.
Die Tür am Ende des Garprozesses vorsichtig
öffnen: Dies ermöglicht den gleichmäßigen
Austritt von heißer Luft oder Dampf vor
Zugriff auf den Ofen - Verbrennungsgefahr.
Die Warmluftklappen an der Vorderseite des
Ofens nicht abdecken - Brandgefahr.
Vorsichtig vorgehen, wenn die Ofentür
geöffnet oder heruntergeklappt ist, um zu
vermeiden, dass sie daran stoßen.
WARNUNG!: Wenn die Tür
oder die Türdichtung beschädigt
sind, darf das Gerät erst nach
einer Reparatur wieder verwendet
werden - Verletzungsgefahr.
WARNUNG!: Flüssigkeiten
und Speisen sollten nicht in
geschlossenen Behältern erwärmt
werden - Explosionsgefahr. Das
Erwärmen von Getränken kann
zu verzögertem plötzlichem
Überkochen führen, bei
Verwendung des Behälters muss
besonders vorsichtig vorgegangen
werden – Verbrennungsgefahr.
Keine Kleidungsstücke trocknen
oder Wärmekissen, Hausschuhe,
Schwämme und ähnliches
aufwärmen - Brandgefahr.
Beim Erwärmen von Speisen in
Kunststoff- oder Papierbehältern,
wachsam am Backofen bleiben -
Brandgefahr.
Inhalte von Babyaschen und
Babynahrungsgläsern müssen
gerührt oder geschüttelt und
deren Temperatur geprüft werden
- Verbrennungsgefahr. Keine
Eier in ihrer Schale und ganze
hart gekochte Eier erwärmen -
Explosionsgefahr
Nur mikrowellengeeignetes
Geschirr verwenden. Keine
Metallbehälter verwenden -
Verletzungsgefahr Verwenden
Sie nur einen für diesen Ofen
empfohlenen Temperaturfühler -
Brandgefahr.
Wenn Rauch austritt, schalten
Sie das Gerät aus oder ziehen Sie
den Stecker heraus. Halten Sie die
Tür geschlossen, damit sich die
Flammen nicht ausbreiten können.
Wenn das Gerät in einer
Höhe über 850 cm vom Boden
entfernt installiert wird, muss
darauf geachtet werden, den
Drehteller bei Entfernen des
Behälters nicht zu verschieben -
Verletzungsgefahr.
Verwenden Sie das Mikrowellengerät
nicht zum Frittieren, da die Temperatur des
Frittieröls nicht kontrolliert werden kann.
ZULÄSSIGE NUTZUNG
Dieses Gerät ist für
Haushaltsanwendungen und
ähnliche Anwendungen konzipiert,
zum Beispiel:
Mitarbeiterküchen im Einzelhandel,
in Büros oder in anderen
Arbeitsbereichen; Gutshäuser;
Von Kunden in Hotels, Motels
und anderen Wohnumgebungen;
Bed and Breakfast ähnliche
Umgebungen.

DEUTSCH 20
VORSICHT: Das Gerät ist
nicht für den Betrieb mit einem
externen Schalter, wie Timer, oder
separatem Fernbedienungssystem
konstruiert.
Dieses Gerät ist für
Haushaltsanwendungen und
ähnliche Anwendungen konzipiert,
zum Beispiel: Mitarbeiterküchen
im Einzelhandel, in Büros oder
in anderen Arbeitsbereichen;
Gasthäuser; für Gäste in Hotels,
Motels, Bed-and-Breakfast-
Anwendungen und anderen
Wohnumgebungen.
Das Gerät nicht hinter einer
dekorativen Tür installieren –
Brandgefahr.
Dieses Gerät ist nicht für den
professionellen Gebrauch ausgelegt. Das
Gerät ist nicht für die Benutzung im Freien
geeignet.
Jegliche andere Art der Nutzung (z.B.
Aufheizen von Räumen) ist untersagt.
Keine explosiven oder entzündbaren
Stoffe (z.B. Benzin oder Sprühdosen) in dem
oder in der Nähe des Gerätes lagern -
Brandgefahr.
INSTALLATION
Das Gerät muss von zwei oder mehr
Personen gehandhabt und aufgestellt werden
– Verletzungsgefahr. Schutzhandschuhe zum
Auspacken und zur Installation des Geräts
verwenden – Schnittgefahr.
Die Installation, einschließlich
Wasseranschluss (falls vorhanden) sowie
der elektrische Anschluss und eventuelle
Reparaturen dürfen nur von einem
qualizierten Techniker durchgeführt werden.
Reparieren Sie das Gerät nicht selbst und
tauschen Sie keine Teile aus, wenn dies vom
Bedienungshandbuch nicht ausdrücklich
vorgesehen ist. Kinder vom Installationsort
fern halten. Prüfen Sie das Gerät nach dem
Auspacken auf Transportschäden.
Bei auftretenden Problemen wenden
Sie sich bitte an Ihren Händler oder den
Kundenservice. Nach der Installation müssen
Verpackungsabfälle (Kunststoff, Styroporteile
usw.) außerhalb der Reichweite von Kindern
aufbewahrt werden - Erstickungsgefahr.
Das Gerät vor Installationsarbeiten von der
Stromversorgung trennen - Stromschlaggefahr.
Während der Installation sicherstellen,
das Netzkabel nicht mit dem Gerät
selbst zu beschädigen - Brand- oder
Stromschlaggefahr. Das Gerät erst starten,
wenn die Installationsarbeiten abgeschlossen
sind.
Dieses Gerät ist für den Einbau
vorgesehen. Das Gerät nicht
freistehend oder in einem Schrank
mit Tür verwenden.
Vergewissern Sie sich nach dem Auspacken,
dass die Tür richtig schließt.
Bei auftretenden Problemen wenden
Sie sich bitte an Ihren Händler oder den
Kundenservice.
Den Unterbauschrank vor dem
Einschieben des Geräts auf das Einbaumaß
zurechtschneiden und alle Sägespäne und
Schnittreste entfernen.
Den Mindestabstand zwischen der
Arbeitsäche und der oberen Kante des Ofens
nicht abdecken - Verbrennungsgefahr.
Das Gerät erst unmittelbar vor der Installation
von der Polystyrolunterlage nehmen.
Der Geräteboden darf
nach der Installation nicht
mehr zugänglich sein -
Verbrennungsgefahr.
HINWEISE ZUR ELEKTRIK
Das Typenschild bendet sich
Other manuals for MATÄLSKARE
17
This manual suits for next models
2
Table of contents
Languages:
Other IKEA Oven manuals

IKEA
IKEA KULINARISK 504.210.60 User manual

IKEA
IKEA FINSMAKARE User manual

IKEA
IKEA VALFRI User manual

IKEA
IKEA BRÄNDBO User manual

IKEA
IKEA IBS550PWS00 User manual

IKEA
IKEA Anratta User manual

IKEA
IKEA FINSMAKARE User manual

IKEA
IKEA KULINARISK User manual

IKEA
IKEA VALFRI User manual

IKEA
IKEA BEJUBLAD User manual

IKEA
IKEA Forneby User manual

IKEA
IKEA GÖRLIG User manual

IKEA
IKEA KULINARISK User manual

IKEA
IKEA oven User manual

IKEA
IKEA EXEMPLARISK GENAST User manual

IKEA
IKEA KULINARISK 203.008.75 User manual

IKEA
IKEA MUTEBO User manual

IKEA
IKEA KULINARISK User manual

IKEA
IKEA KULINARISK User manual

IKEA
IKEA KULINARISK 403.824.98 User manual