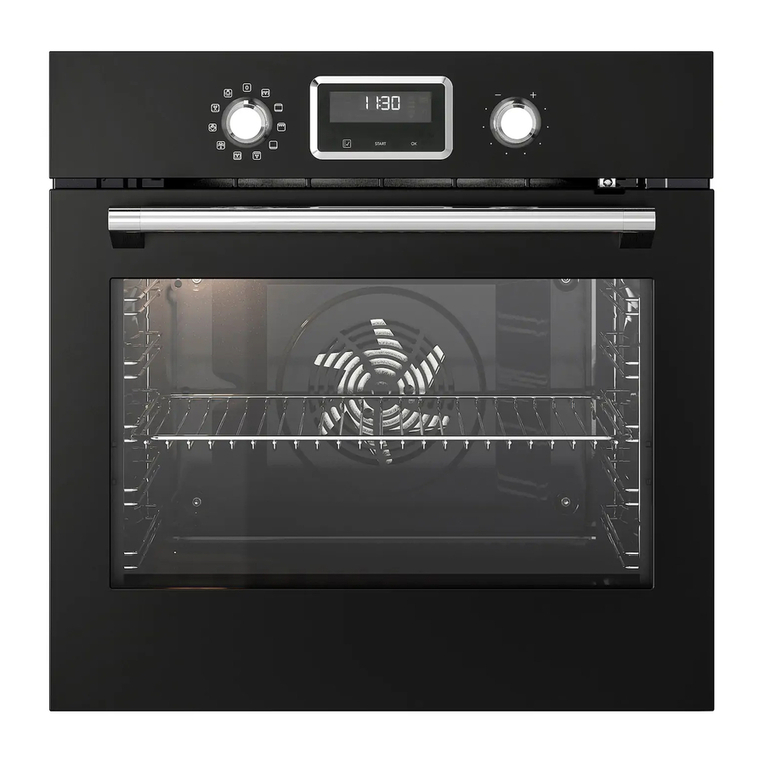
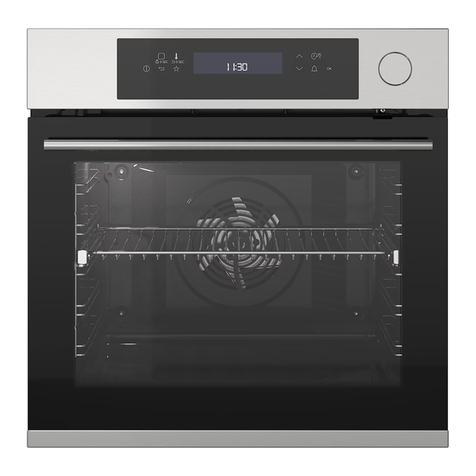
IKEA TANGBY User manual

en
es
fr
TÄNGBY

2
en
Contents
English 3
Español 39
Français 77
Please record your model and serial numbers below for
reference.
Registre su modelo y número de serie a continuación para
referencia.
Veuillez enregistrer vos numéros de modèle et de série ci-
dessous pour référence.
Purchase Date / Fecha de compra / Date d’achat
Model Number / Número de modelo / Numéro de modèle
Serial Number / Número de serie / Numéro de série
Please refer to the last page of this manual for the
full list of IKEA appointed After Sales Service Pro-
vider and relative national phone numbers.
Veuillez vous reporter à la dernière page de ce man-
uel pour obtenir la liste complète des fournisseurs
de services après-vente désignés par IKEA et les
numéros de téléphone nationaux correspondants.
Consulte la última página de este manual para ver
la lista completa de proveedores de servicios pos-
venta designados por IKEA y los números de telé-
fono nacionales correspondientes.
NOTE
Please attach sales receipt here for future refer-
ence.
Adjunte el recibo de compra aquí para referencia
futura.
Veuillez joindre le reçu de vente ici pour référence
future.
Serial Number Location
Serial and Model Number Location /
Ubicación de la placa de serie / Em-
placement de la plaque signalétique

3
en
Read all instructions before using this appli-
ance.
This manual contains important safety
symbols and instructions. Please pay atten-
tion to these symbols and follow all instruc-
tions given.
Do not attempt to install or operate your
appliance until you have read the safety
precautions in this manual. Safety items
throughout this manual are labeled with a
WARNING or CAUTION statement based on
the risk type.
Warnings and important instructions ap-
pearing in this guide are not meant to
cover all possible conditions and situations
that may occur. Common sense, caution,
and care must be exercised with installing,
maintaining, or operating your appliance.
DEFINITIONS
This is the safety alert symbol. It is
used to alert you to potential personal in-
jury hazards. Obey all safety messages that
follow this symbol to avoid possible injury
or death.
WARNING
Indicates a potentially hazardous situation
which, if not avoided, may result in death
or serious injury.
CAUTION
Indicates a potentially hazardous situation
which, if not avoided, may result in minor
or moderate injury.
IMPORTANT
Indicates installation, operation or main-
tenance information which is important
but not hazard-related.
NOTE
Indicates installation, operation, mainte-
nance, or valuable information that is not
hazard related.
WARNING
Tip Over Hazard
• A child or adult can tip the
oven and be killed.
• Install the anti-tip device to
oven and/or structure per
installation instructions.
• Ensure the anti-tip device is re-engaged when
the oven is moved.
• Do not operate the oven without the anti-tip
device in place and engaged.
• Failure to follow these instructions can result in
death or serious burns to children and adults.
Refer to the installation
instructions supplied with your
appliance for proper installa-
tion.
Check for proper installation
with a visual check that the
anti-tip screws are present.
Test the installation with light
downward pressure on the
open oven door. The oven
should not tip forward.
Anti-tip mounting holes
IMPORTANT SAFETY INFORMATION
CONTENTS
Important Safety Information........................ 3
Cooking Recommendations ......................... 8
Before Setting Oven Controls ........................11
Oven Controls...................................16
Care and Cleaning................................29
Before You Call ..................................34
Warranty ......................................37

4
en
IMPORTANT SAFETY INFORMATION
IMPORTANT INSTRUCTIONS FOR
UNPACKING AND INSTALLATION
IMPORTANT
Read and follow the below instructions
and precautions for unpacking, installing,
and servicing your appliance.
Remove all tape and packaging before
uing the appliance. Destroy the carton and
plastic bags after unpacking the appliance.
Never allow children to play with packaging
material. Do not remove the wiring label
and other literature attached to the appli-
ance. Do not remove model/serial number
plate.
Cold temperatures can damage the elec-
tronic control. When using this appliance
for the rst time, or when the appliance
has not been used for an extended period
of time, be sure the appliance has been in
temperatures above 32ºF (0ºC) for at least
3 hours before turning on the power to the
appliance.
All materials used in construction of cabi-
nets, enclosures, and supports surrounding
the product must have a temperature rat-
ing above 194°F (90°C).
Never modify or alter the construction of
the appliance by removing the leveling
legs, panels, wire covers, anti-tip brackets/
screws, or any other part of the appliance.
Be sure to have an appropriate foam-type
re extinguisher available, visible, and eas-
ily accessible located near the appliance.
GROUNDING INSTRUCTIONS
WARNING
• Avoid re hazard or electrical shock.
Failure to follow this warning may
cause serious injury, re, or death.
• Avoid re hazard or electrical shock.
Do not use an adapter plug, use an
extension cord, or remove grounding
prong from the power cord. Failure to
follow this warning may cause serious
injury, re, or death.
Proper Installation—Be sure your appli-
ance is properly installed and grounded by
a qualied technician. In the United States,
install in accordance with the National Fuel
Gas Code ANSI Z223.1/NPFA No. 54, latest
edition and National Electrical Code NFPA
No. 70 latest edition, and local electri-
cal code requirements. In Canada, install
in accordance with CAN/CGA B149.1 and
CAN/CGA B149.2 and CSA Standard C22.1,
Canadian Electrical code, Part 1-latest
editions and local electrical code require-
ments. Install only per installation instruc-
tions provided in the literature package for
this appliance.
For personal safety, this appliance must be
properly grounded. For maximum safety,
the power cord must be securely connected
to an electrical outlet or junction box that
is the correct voltage, is correctly polarized
and properly grounded, and protected by
a circuit breaker in accordance with local
codes.
It is the personal responsibility of the co
sumer to have the appropriate outlet or
junction box with the correct, properly
grounded wall receptacle installed by a
qualied electrician. It is the responsibi
ity and obligation of the consumer to con-
tact a qualied installer to assure that the
electrical installation is adequate and is in
conformance with all local codes and ord
nances.

5
en
IMPORTANT SAFETY INFORMATION
See the installation instructions packaged
with this appliance for complete installation
and grounding instructions.
IMPORTANT INSTRUCTIONS FOR USING
THE APPLIANCE
WARNING
• Storage In or On Appliance—Flam-
mable materials should not be stored
in an oven or microwave, near surface
burners or elements, or in the stor-
age or warmer drawer (if equipped).
This includes paper, plastic, and cloth
items, such as cookbooks, plastic
ware, and towels, as well as ammable
liquids. Do not store explosives, such
as aerosol cans, on or near the appli-
ance.
• Do not leave children alone - Children
should not be left alone or unattended
in the area where appliance is in use.
They should never be allowed to sit or
stand on any part of the appliance, in-
cluding the storage drawer, lower broil-
er drawer, warmer drawer, or lower
double oven.
• Do not store items of interest to chi
dren in the cabinets above the appli-
ance or on the backguards of ranges.
Children climbing on or near the appli-
ance to reach items could be seriously
injured.
• Do not allow children to climb or play
around the appliance. The weight of a
child on an open oven door may cause
the appliance to tip, resulting in seri-
ous burns or other injury. An open
drawer when hot may cause burns.
WARNING
• Stepping, leaning, or sitting on the
door or drawers of this appliance can
result in serious injuries and also
cause damage to the appliance.
• Never cover any slots, holes or pas-
sages in the oven bottom or cover and
entire rack with materials such as alu-
minum foil. Aluminum foil linings may
also trap heat, causing a re hazard.
• Do not use oven or warmer drawer (if
equipped) for storage.
• Never use your appliance as a space
heater to heat or warm the room. Do-
ing so may result in carbon monoxide
poisoning and overheating of the appli-
ance.
CAUTION
• When heating fat or grease, watch it
closely. Grease may catch re if it be-
comes too hot.
• Do not use water or our on grease
res. Smother re or ame or use dry
chemical or foam-type extinguisher.
Cover the re with a pan lid or use
baking soda.
• Use dry potholders. Moist or damp
potholders on hot surfaces may re-
sult in burns from steam. Do not let
potholders touch hot cooking areas. Do
not use towels or other bulky cloths.
• Do not heat unopened food containers
- Build-up of pressure may cause con-
tainer to burst and result in injury.

6
en
IMPORTANT SAFETY INFORMATION
CAUTION
• Wear proper apparel - Loose-tting
or hanging garments should never be
worn while using the appliance. Do not
let clothing or other ammable materi-
als contact hot surfaces.
• Do not touch surface burners or ele-
ments, areas near these burners or el-
ements, interior surfaces of the oven,
or the warmer drawer (if equipped).
Surface burners and elements may
be hot even though they appear cool.
Areas near surface burners and ele-
ments may become hot enough to
cause burns. During and after use,
do not touch, or let clothing or other
ammable materials touch these areas
until they are cool. These areas may
include the cooktop, surfaces facing
the cooktop, oven vent areas, oven
door, and oven window.
• Do not attempt to operate the appl
ance during a power failure. If the
power fails, always turn off the appli-
ance. If the appliance is not turned
off and the power resumes, electric
surface elements may resume opera-
tion when power is restored. Once the
power resumes, reset the clock and
the oven function.
IMPORTANT INSTRUCTIONS FOR USING
YOUR OVEN
Protective liners—Do not use aluminum
foil, aftermarket oven liners, or any other
materials or devices to line oven bottom,
oven racks, or any other part of the appli-
ance. Only use aluminum as recommended
for baking, such as lining cookware or as a
cover placed on food. Any other use of pro-
tective liners or aluminum foil may result
in a risk of electric shock or re or a short
circuit.
Use care when opening oven door, lower
oven door, or warmer drawer (some mod-
els). Stand to the side of the appliance
when opening the door of a hot oven. Let
hot air or steam escape before you remove
or replace food in the oven.
Keep oven vent ducts unobstructed. Touch-
ing surfaces in this area when the oven is
on may cause severe burns. Do not place
plastic or heat-sensitive items on or near
the oven vent. These items can melt or
ignite.
Placement of oven racks - Always place
oven racks in desired location while oven is
cool. If rack must be moved while oven is
hot, do not let potholder contact hot burner
or element in oven. Use potholders and
grasp the rack with both hands to reposi-
tion. Remove all cookware and utensils
before moving the rack.
Do not use a broiler pan without its insert.
Broiler pans and inserts allow dripping fat
to drain away from the high heat of the
broiler. Do not cover the broiler insert with
aluminum foil; exposed fat and grease
could ignite.
Do not cook food on the oven bottom. Al-
ways cook in proper cookware and always
use the oven racks.

7
en
IMPORTANT SAFETY INFORMATION
IMPORTANT INSTRUCTIONS FOR CLEANING
YOUR APPLIANCE
CAUTION
Before manually cleaning any part of the
appliance, be sure all controls are turned
off and the appliance is cool. Cleaning a
hot appliance can cause burns.
Clean the appliance regularly to keep all
parts free of grease that could catch re.
Do not allow grease to accumulate. Greasy
deposits in the fan could catch re.
Always follow the manufacturer’s recom-
mended directions for use of kitchen clean-
ers and aerosols. Be aware that excess resi-
due from cleaners and aerosols may ignite
causing damage and injury.
Clean ventilating hoods frequently - Grease
should not be allowed to accumulate on
hood or lter. Follow the manufacturer’s in-
structions for cleaning vent hoods.
IMPORTANT INSTRUCTIONS FOR SELF
CLEANING OVENS
CAUTION
Before using self clean, remove the broil-
er pan, any food, utensils, and cookware
from the oven, storage drawer or warm-
ing drawer (if equipped). Remove oven
racks unless otherwise instructed.
Do not clean the oven door gasket. The
door gasket is essential for a good seal.
Care should be taken not to rub, damage,
or move the gasket.
Do not use oven cleaners. No commercial
oven cleaner or oven liner protective coat-
ing of any kind should be used in or around
any part of the appliance.
Use the self clean cycle to clean only the
parts listed in this manual.
Some birds are extremely sensitive to the
fumes given off during the self clean cycle
of any oven. Move birds to another well-
ventilated room.
IMPORTANT INSTRUCTIONS FOR SERVICE
AND MAINTENANCE
Do not repair or replace any part of the ap-
pliance unless specically recommended in
the manuals. All other servicing should be
done only by a qualied technician. This re-
duces the risk of personal injury and dam-
age to the appliance.
Always contact your dealer, distributor, ser-
vice agent, or manufacturer about problems
or conditions you do not understand.
Ask your dealer to recommend a qualied
technician and an authorized repair service.
Know how to disconnect the power to the
appliance at the circuit breaker or fuse box
in case of an emergency.
Remove the oven door from any unused
oven if it is to be stored or discarded.
Do not touch a hot oven light bulb with
a damp cloth. Doing so could cause the
bulb to break. Handle halogen lights (if
equipped) with paper towels or soft gloves.
Disconnect the appliance or shut off the
power to the appliance before removing and
replacing the bulb.
WARNING
California Residents: for cancer and re-
productive harm information, visit www.
P65Warnings.ca.gov

8
en
COOKING RECOMMENDATIONS
Bakeware
The material of bakeware affects how evenly and quickly it transfers heat from the pan to the food.
Material Attributes Recommendation
Shiny metal bakeware Shiny, aluminum, and non-
coated bakeware is the best for
even heating. It is suitable for all
baked goods.
Recommended cooking temperatures and
times are based on shiny metal bakeware.
Dark metal bakeware Dark bakeware cooks hotter
than shiny bakeware. Reduce the cooking temperature by 25° F
(13-14° C) when using dark bakeware.
Glass bakeware Glass bakeware cooks hotter
than shiny bakeware.
Glass is convenient, as the same
piece of bakeware can be used
for cooking, serving, and storing
food.
Reduce the cooking temperature by 25° F
(13-14° C) when using glass bakeware.
Insulated bakeware Insulated bakeware cooks cooler
than shiny bakeware.
Insulated bakeware is designed
for baking in gas ovens.
When using insulated bakeware, the recipe
baking time may be longer than usual.

9
en
COOKING RECOMMENDATIONS
Cooking Conditions
Conditions in your kitchen can affect the performance of your appliance when cooking food.
Material Attributes Recommendation
Aging cookware As pans age and become
discolored, cooking times may
need to be reduced slightly.
If food is too dark or overcooked, use the
minimum cook time in the recipe or
packaging.
If food is too light or undercooked, use the
middle to maximum cook time in the recipe
or packaging.
High altitude Air is drier and air pressure is
lower.
Water boils at a lower tem-
perature, and liquids evapo-
rate faster.
Foods may take longer to
bake.
Doughs may rise faster.
Adjust cooking temperature, cooking time, or
recipes as needed.
Increase amount of liquid in baking recipes.
Increase cook time on cooktop. Cover dishes
to reduce evaporation.
Increase bake time or oven temperature.
Reduce amount of baking soda or baking
powder in recipe. Reduce rising time or punch
down dough and allow it to rise twice.
Cooking Results
Small adjustments may help you achieve the best results.
Problems Recommendation
Food too light Use the middle to maximum cook time recommended on packaging or recipe.
Food too dark Use the minimum cook time recommended on packaging or recipe.
Cooking Tips
Use these additional tips to get the best results from your appliance.
Cooking Recommendation
Baking
Rack placement Follow the instructions in particular oven mode starting in “Oven Controls” on
page 16.
Preheat Fully preheat the oven before baking items like cookies, cakes, biscuits and
breads. Insert food immediately after the beep.
Checking food Use the window and oven light when checking food. Opening the door may
reduce baking performance.
Bake or Convection Bake Convection bake is the best function to use for baking on multiple racks. For
best performance, see.”Convection Bake” on page 20.
Food placement Allow at least 2 inches (5 cm) of space between bakeware for proper air cir-
culation.

10
en
COOKING RECOMMENDATIONS
Material Recommendation
Broiling / Roasting
Broiling pan For best results when broiling, use a broil pan with a broil pan insert de-
signed to drain the fat from the food, help avoid spatter, and reduce smok-
ing. The broiler pan will catch grease spills, and the insert helps prevent
grease splatters.
Convection Cooking
Convection attributes Convection cooking uses a fan to circulate hot air around the oven and food.
It browns food more evenly and reduces hot spots in the oven.
Convection saves time when using multiple racks or cooking several food
items at once.
Convection bake Reduce cooking temperature by 25° F (13-14° C) from the recipe unless the
recipe is written for convection baking.
Preheat the oven for best results.

11
en
BEFORE SETTING OVEN CONTROLS
IMPORTANT
Your IKEA wall oven has many features that allow
you to customize the way your oven works.
Take time to read this section for important safety
information and to become familiar with the many
menu option settings starting on page 12.
CAUTION
Always use pot holders or oven mitts when using
the oven. When cooking, the oven interior, oven
exterior, oven racks, and cooktop will become very
hot which can cause burns.
Remove all oven racks before starting a self clean
cycle. If oven racks are left inside the oven during
a cleaning cycle, the slide ability of the oven racks
may be damaged and all of the oven racks will
lose their shiny nish.
To prevent possible damage to the oven, do not
attempt to close the oven door until all the oven
racks are fully positioned back inside the oven
cavity.
Oven Vent Location
The oven is vented as shown below. When the oven
is on, warm air is released through the vent. This
venting is necessary for proper air circulation in the
oven and good baking results. Do not block oven
vent. Never close off the openings with aluminum foil
or any other material. Steam or moisture may ap-
pear near the oven vent. This is normal.
Figure 1: Oven vent
WARNING
Protective Liners — Do not use aluminum foil or
any other material or liners to line the oven bot-
tom, walls, racks or any other part of the range.
Doing so will alter the heat distribution, produce
poor baking results, and possibly cause perma-
nent damage to the oven interior. Improper instal-
lation of these liners may result in risk of electric
shock or re. During self clean, temperatures in
the oven will be hot enough to melt foil
oven rack
Figure 2: Oven rack types
Flat oven racks may be used for most cooking
needs and may be placed in most oven rack posi-
tions.
WARNING
Do not line the oven walls, racks, bottom or any
other parts of the range with aluminum foil. Doing
so will alter heat distribution, produce poor baking
results and may cause permanent damage to the
oven interior. During self-clean temperatures the
oven will be hot enough to melt foil.
IMPORTANT
Remove all oven racks and clean according to in-
structions provided in the Care & Cleaning section
of this manual. Never pick up hot oven racks or
parts.

12
en
BEFORE SETTING OVEN CONTROLS
Using Menu Options to Customize Your
Cooking Experience
When you rst install your appliance, the screen will
prompt you to set your preferences. You can always
change them later using the menu .
1. Touch the Menu Options bars and scroll to nd
the desired option.
2. Select option and set your preference.
3. Save and go back or Save & Close.
You can press the Xto close without saving chang-
es.
Clock
When the appliance is rst plugged in or when the
power supply to the appliance has been interrupted,
the display will show 12:00. It is recommended to
always set the clock for the correct time of day be-
fore using the appliance.
1. Touch Menu Options bars and scroll to Clock.
You will see options to turn off the clock display
when the oven is off , to change from 12- hour
to 24-hour time, and to set the clock.
2. Touch Set Clock and set time using graph.
3. Set AM or PM.
4. Save & Close.
Energy Saving Mode
The oven control has a factory preset built-in 12-
Hour Energy Saving feature that will turn off the
oven if the oven is left on for more than 12 hours.
The control may be programmed to override this
feature to bake continuously.
1. Scroll to Energy Saving Mode and touch.
2. Follow the information to override the Energy
Saving feature if necessary.
3. Save & Close.
General Settings
1. Scroll to General Settings and touch.
2. Different options will appear.
3. Select an option to see how it is set and change
if desired.
Temperature Display
The electronic oven control is set to display °F
when shipped from the factory. The display may be
changed to show either °F or ºC oven temperatures.
Temperature Display > O Fahrenheit
O Celcius
1. Select Fahrenheit or Celcius.
2. Save & Close.
BEFORE SETTING OVEN CONTROLS

13
en
BEFORE SETTING OVEN CONTROLS
Volume
Volume allows the oven control to operate with
strong tones, quiet tones, or no tones. Use the slider
to set the volume.
Screen Brightness
1. Choose brightness and Save & Close.
Language
1. Select desired language.
2. Save & Close.
Favorites
Scroll to Favorites and touch.
• Quick Start Options > Oven 350°F (can change
the default when Quick Start is selected)
1. Change temperature if desired.
2. Save.
• Temperature Options > Adjust Custom Preheat
default.
1. 325°F / 163°C
2. 375°F / 191°C
3. 400°F / 204°C
NOTE
These temperature options are also available in
Custom Preheat menu on the main screen
Cooking Tips
You can switch whether cooking tips are displayed or
not by choosing On or Off .
Oven Temperature Calibration
Your appliance has been factory calibrated and test-
ed to ensure an accurate baking temperature. For
the rst few uses, follow your recipe times and tem-
perature recommendations carefully. If you think the
oven is cooking too hot or too cool for your recipe
times, you can adjust the control so the oven cooks
hotter or cooler than the temperature displayed.
Important: Do not use oven thermometers such as
those found in grocery stores to check the tempera-
ture settings inside your oven. These oven thermom-
eters may vary as much as 20 to 40 degrees from
actual temperatures.
1. Scroll to Oven Temperature Calibration and
touch.
2. Option to adjust is shown.
3. Use slide to increase or decrease default oven
temperature.
4. Save and go back or Save & Close.
The oven temperature may be increased as much as
+35°F (+19°C) or decreased -35°F (-19°C) from the
factory calibrated settings.

14
en
BEFORE SETTING OVEN CONTROLS
Sabbath Mode
1. Scroll to Sabbath Mode.
2. Read and follow all instructions to set and when
nished cancel. See “Setting the Sabbath Fea-
ture for the Jewish Sabbath and Holidays (some
models)” on page 27 for complete details on
how Sabbath mode works with your oven con-
trols.
Factory Reset
1. Scroll to Factory Reset and touch.
2. Follow screen prompts
Note: Your appliance was set with predetermined
(default) oven control settings. Over time, users
may have made changes to these settings. The fol-
lowing options may have been modied since the
appliance was new:
• 12 or 24 hr display mode
• Screen Brightness
• Language
• Favorites
• Show Clock
• All Food Probe settings
• Continuous bake or 12 hour energy savings
mode
• Silent or audible control
• Oven temperature display (Fahrenheit or Cel-
sius)
• Oven temperature adjustments (UPO)
If Reset is touched all the settings will return to
default.
3. Are you sure?
4. Reset.
5. OKAY

15
en
BEFORE SETTING OVEN CONTROLS
Lock Screen
As a safety measure the oven doors and controls
can be locked. Follow screen directions to lock and
unlock.
From the Settings Menu, Select Lock Screen, then
touch and hold LOCK for 3 seconds.
When the doors and controls are locked the screen
will show the time of day, a note that the oven is
locked, and an UNLOCK key. Once the controls and
door are locked, there is no access to any cooking
functions. This ensures that the oven will remain
locked and safe.
To unlock the oven door, press the UNLOCK key,
Once the controls and door are locked, there is no
access to any cooking functions.
To unlock the oven door and control, press UN-
LOCK and follow directions on the screen. You will
be shown a code to use for unlocking the doors and
controls.
About the Appliance
1. Scroll to About the Appliance and touch.
2. Touch headings to see information.
Important information about the appliance such as
the the software version number and contact infor-
mation for support is listed here.

ON / OFF
When ON/OFF is pressed, the display opens to the
Quick Start screen.
Table 1: Minimum and maximum control set-
tings
Feature Mode Min Temp/
Time
Max Temp/
Time
Bake 170°F
(77°C)
550°F (288°C)
Broil 400°F
(205°C)
550°F (288°C)
Conv Bake 170°F
(77°C)
550°F (288°C)
Keep Warm 140°F
(60°C)
200°F (93°C)
Timer 0:01 Min 11:59 Hr./Min.
Clock Time 12 Hr.
24 Hr
1:00 Hr./Min.
0:00 Min
11:59 Hr./Min.
23:59 Hr./Min.
Delay Start 0:01 Min. 1:00 Hr./Min.
Cook Time 12 Hr.
24 Hr
0:01 Min
0:01 Min
11:59 Hr./Min.
11:59 Hr./Min.
Self Clean 2 hours 4 hours
OVEN CONTROLS
Quick Start Oven Modes
Broil
Custom Preheat
START
OVEN
NOTE
In addition to ON/OFF, touching the screen will
also activate the display.
If the oven is on when ON/OFF is pressed, it will
turn off completely, canceling any functions that are
running at the time.
BACK
Pressing the Back key will return to the previous
screen without implementing any changes you may
have selected.
TIMER
Pressing Timer will access the timer function. The
timer will count down the amount of time you spec-
ify, and a tone will sound when the timer reaches
zero. You can set a timer from 1 minute to 11 hours
and 59 minutes.
Enter the desired time and press START. While the
timer is running, you can pause or cancel the count-
down. You can also add or subtract time by pressing
+ or -.
LIGHT
Press the Light key to turn the oven light on or off .
16
en

OVEN CONTROLS
Quick Start
When ON/OFF is pressed the display opens to the
Quick Start screen.
From the Quick Start screen, you can immediately
start the Bake function by pressing START. You can
adjust the temperature by pressing +or -.
Quick Start Oven Modes
Broil
Custom Preheat
START
OVEN
To select other cooking options, touch Oven Modes
and scroll to the desired feature.
Use the scroll bar to nd your oven mode as shown
in the oven mode table on the right. When you select
a cooking mode simply follow the tips for setting the
particular mode.
Important: Valuable tips to help you get the best
results are included in the display and also can be
found in this User Manual.
Modes
• Bake (page 18)
• Convection Bake (page 20)
• Broil (page 21)
• Keep Warm (page 23)
• Self Clean (page 24)
• Delay Start (page 23)
OVEN CONTROLS
17
en

OVEN CONTROLS
Setting Bake
Bake uses heat that rises from the oven bottom for
best baking results.
A reminder tone will sound indicating when the set
bake temperature is reached and to place the food
in the oven.
Bake may be set for any oven temperature between
170°F (77°C) to 550°F (288°C).
CAUTION
Always use pot holders or oven mitts when using
the oven. When cooking the oven interior, oven
racks, and cooktop will become very hot which can
cause burns.
Baking Tips
• Fully preheat the oven before baking items like
cookies, cakes, biscuits and breads.
• For all baking except layer cakes, pans should be
pulled to the front of the rack. Place layer cake
pans as shown.
• Use the convection bake function for best results
when baking cookies or cakes on multiple racks.
• For best results when baking layer cakes using
two oven racks, place racks in positions 2 (at)
and 5 (glide) and place pans centered on each
rack.
• When using any single rack for baking cookies,
cakes, biscuits, or mufns use rack position 3.
• Allow at least 2 inches (5 cm) of space between
bakeware for proper air circulation.
• Leave oven lights off while baking.
To set Bake
1. Press ON/OFF key.
1
2
3
4
5
6
Quick Start Oven Modes
Broil
Custom Preheat
START
OVEN
2. Touch Oven Modes and touch Bake. The de-
fault temperature 350°F will show in the display.
You can also use the controls on the Quick Start
screen.
3. To set the temperature to 375, use the num-
bered keys to program the new temperature of
375 and touch START.
4. The screen shows the current temperature and
Cook Time button.
5. Touch Cook Time to set a cooking time if need-
ed.
NOTE: If a cook time is set the oven will turn off
automatically when the time expires.
6. Touch START.
7. When cooking has ended, Off will be in display.
8. Press ON/OFF to return display to show the time
of day.
To cancel cooking anytime touch CANCEL.
Press ON/OFF to turn off the oven and show time
of day in the display.
To cancel cooking anytime touch CANCEL.
OVEN CONTROLS
18
en

OVEN CONTROLS
Setting Cook Time
Use Cook Time to set the amount of time needed for
most oven functions. The oven will turn on immedi-
ately (or after a specied delay) and stop automati-
cally after the set cook time ends.
In most cases you will see a cooking tip suggesting
to set Cook Time after the oven is preheated.
When the programmed cook time ends:
• Off will appear in the display window
• an alert tone will sound
• the oven will turn off automatically The Off
message and an OKAY button will display until
OKAY is touched.
NOTE: The maximum cook time setting is 11 hours
and 59 minutes unless the oven is set for continuous
cooking.
To change the oven temperature or cook time
after baking has started:
• Touch +or -on either side of the set tempera-
ture.
• Touch TEMP to access the keypad.
19
en

OVEN CONTROLS
Convection Bake
Convection Bake uses a fan to circulate the oven’s
heat uniformly around the oven. This improved heat
distribution allows for even cooking and browning
results. Heated air ows around the food from all
sides.
Convection bake may be set for any oven tempera-
ture between 170°F (77°C) and 550°F (288°C).
To set convection bake with a default oven set
temperature of 325°F (163°C):
1. Select Oven Mode and scroll to Convection
Bake.
2. Touch Convection Bake: Default oven temp of
325° appears.
3. An option for Convection Convert is visible on
the screen. Using it will lower the oven tempera-
ture 25° to account for the increased efciency
of convection. If used, Convection Convert must
be selected before pressing Start.
4. Touch START:
5. Option to set Cook Time.
6. Touch START.
7. Oven will turn off when Cook Time is complete.
8. Cooking has ended and Off will be in display.
9. Press ON/OFF to return display to show the
time of day.
Benets of convection cooking include:
• Multiple rack baking.
Convection baking tips:
• Use Convection Bake for best results when bak-
ing cookies and cakes on 2 racks.
• For best results it is recommended to preheat
the oven before baking items like cookies, bis-
cuits and breads and move pans to front of the
racks.
• If your recipe is not written for convection bak-
ing, reduce the oven temperature by 25° or use
Convection Convert option.
• No special pans or bakeware required.
• For cookies use the following racks:
• Single rack baking use 3 (at rack).
• Two rack baking use 2 (at) and 5 (glide).
• For baking cakes use the following rack positions
and place bakeware as shown in Figure 3. In up-
per rack use position 4 (glide) or 5 (at).
• Cookies and biscuits should be baked on pans
with no sides or very low side to allow heated air
to circulate around the food. Food items baked
on pans with a dark nish will cook faster.
• Leave oven lights off while baking.
Convection Convert
Convection Convert automatically reduces the oven
temperature from what is specied in most baking
recipes to compensate for the increased cooking ef-
ciency of convection baking.
1
2
3
4
5
6
Figure 3: Pan positions for best results when
baking cakes on two racks.
20
en
Table of contents
Languages:
Other IKEA Oven manuals

IKEA
IKEA IBS550PWS00 User manual

IKEA
IKEA Konsistens User manual

IKEA
IKEA NUTID OV 9 User manual

IKEA
IKEA Forneby User manual

IKEA
IKEA EFTERSMAK User manual

IKEA
IKEA REALISTISK TJANLIG User manual

IKEA
IKEA VALFRI User manual

IKEA
IKEA MUTEBO User manual

IKEA
IKEA NUTID OV 9 User manual

IKEA
IKEA 105.570.41 User manual
Popular Oven manuals by other brands

Electrolux Professional
Electrolux Professional Combi TOUCH 6 GN 1/1 user manual

Falcon
Falcon Dominator Plus G3151 Installation and servicing instructions

ILVE
ILVE ILO990X instruction manual

AEG
AEG 7332543534333 user manual

Zanussi
Zanussi ZOB65602XK user manual

Moffat
Moffat WALDORF RN8410G Technical data sheet