Ikegami MKC-704KHD User manual

MKC-704KHD
Digital Process Compact 3CMOS Color Camera
Operation Manual

The software that we have manufactured is copyrighted by IKEGAMI
TSUSHINKI CO., LTD.
You may not reproduce or alter it, in whole or in part, without permission.

1
Safety Precautions
For safe and correct usage
Thoroughly read the “Safety Precautions” and the
operation manual before using the unit. Keep them
carefully after reading and use as ready reference.
Pictorial Symbols
The
“Safety
Precautions”
and
markings
on
the
product
contain various
pictorial
symbols
to
assure
the
safety
use
of
the
product and
prevent
an
injury
to
you
and
other
persons
as
well
as
property damage.
As
each
symbol
has
the
following
meanings,
thoroughly
under- stand them before using the unit.
Please note that some precautions may not be
applicable to the product that you purchased.
WARNING:
Indicates a potentially hazardous
situation that may arise due to improper
handling by taking no notice of this
symbol and could result in a serious
injury or death.
CAUTION:
Indicates a potentially hazardous
situation that may arise due to improper
handling by taking no notice of this
symbol and could result in an injury or
property damage only.
[Note]
ڹmeans a heads-up.
Examples of symbols
Symbol “ ” means a prohibited action.
The content of prohibited matter is
mentioned near or in the figure. (The figure
on the left side represents “Caution for
disassembling”.
Symbol
“
” means a mandatory or directive
content. Practical precautions are shown in
the figure. (The figure on the left side
represents “Pull out power plug from plug
outlet.”)
Symbol “ ” This mark is a symbol of an
operator to advise the annex.
Symbol “㹺” This mark is a symbol
that represents the connection to the
power supply
Symbol “ۑ” This mark is a symbol that
represents the disconnection to the power
supply
CAUTION
When using the unit:
Do not place a receptacle containing water or a
small metallic piece on the unit!
If
water
spills
in
the
unit,
a
fire
or
electric
shock
may
be caused.
Do not use other power supply voltage than
specified!
A fire or electric shock may be caused.
Do not put a metal body or flammable material
into the opening of the unit!
Do not drop in such material!
A
fire
or
electric
shock may be caused.
Do not make alterations to the unit!
A fire or electric shock may be caused.
When installing the unit:
Do not set the unit in an unstable place!
It may drop or turn down, causing an injury.
Do not connect to any other equipment than
specified!
A fire or electric shock may be caused.
When it is installed, please contact the dealer
or salesman.!
When
fixing
the
unit,
do
so
in
accordance
with
the specified procedure; otherwise it may drop
or turn down, causing a fire, electric shock or
injury.
Especially when fixing it to the wall or ceiling,
be sure to ask the dealer or salesman.
When an abnormal state occurs:
If the unit produces smoke, gives out a foul
smell or produces an abnormal sound, turn off
the power switch immediately and pull out the
power plug!
If the unit is used as it is, a fire or electric
shock may be caused. Check that no smoke is
produced, and then contact the dealer or sales
representative.
If water or foreign matter enters the unit, turn
off the power switch and pull out the power
plug!
If the unit is used as it is, a fire or electric
shock may be caused. Check that no smoke is
produced, and then contact the dealer or sales
representative.
If the unit is dropped or the case is broken, turn
off the power switch and pull out the power
plug!
If the unit is used as it is, a fire or electric
shock may be caused. Contact the dealer or
sales representative.
If the unit fails to
operate
properly, turn off the
power switch and pull out the power plug!
If the unit is used as it is, a fire or electric
shock may be caused. Contact the dealer or
sales representative.
Do not use any damaged power cord (exposed
core, broken wire, etc.)!
If the unit is used as it is, a fire or electric
shock may be caused. Contact the dealer or
sales representative.

2
WARNING:
When installing the unit:
Do not place a heavy thing on the unit!
The unit may lose a balance or drop, causing an
injury.
Do not get a leg over the unit or carrying case!
Do not sit down on it!
The unit may break down or turn down, causing
an injury.
When moving the unit, be sure to turn off the power
switch, pull out the power plug and remove the
connecting cable between the unit and equipment
beforehand.
The cord may be damaged, causing a fire or electric
shock.
When the unit is not used for a long period of time,
be sure to pull out the power plug for safety’s sake.
Otherwise, it may cause a fire.
Turn off the power switch, to stop working safely,
and then unplug the power plug.
To avoid the risk of electric shock,this equipment
must only a supply mains with protective earth.
When installing the unit:
Do not block up the ventilating hole of the unit!
If
the
ventilating
hole
of
the
unit
is
blocked
up,
heat will accumulate internally, causing a
fire.
Avoid the following usage:
࣭Turning up or down the unit. Turning it
sideways.
࣭Pushing it in ill-ventilated place.
࣭Placing it on a carpet etc.
࣭Covering it with a table cloth etc.
Do not place the equipment in the way of
difficult disconnecting the power plug.
Hints on proper usage
When using the unit:
࣭
When using the unit in a water-place such as
bathroom, poolside, etc., prevent water from flowing
into the unit and cable; otherwise causing an electric
shock.
When using it in rainy weather, during snowing, on
the seaside or waterside, and in a cooking place, use
care to prevent such an accident.
࣭
When snow comes on, check the surrounding
conditions before use.
Stop using the unit temporarily as necessary and do
not touch it; otherwise causing an electric shock.
࣭
Do not connect any equipment whose required electric
power
exceeds
the
wattage
(W)
that
can
be
supplied
from the AC outlet.
Refer to wattage shown near the AC outlet or in the
operation manual.
࣭
Do not bend (or twist or pull) the power cord and
connecting cable excessively.
The covering material of the cord and cable may
break, causing an electric shock.
࣭
A serviceman exchanges it is possible parts:AC cable.
When exchanging an AC cable of an accessory.
When installing the unit:
A
void installing the unit in a moist place, dusty place or
any other place exposed to oily smoke and vapor;
otherwise causing an electric shock.
Do not place the unit near a cooking table or
humidifier.
࣭
A
s this unit is heavy
(
over
10Kg
)
,
carry
it by 2 or more
persons.
If it is carried by one person, it may turn down or drop,
some- times causing an physical damage to the waist
or hand or a physical injury.
࣭
Take preventive measures against the overturn of the
unitdue to an earthquake or sudden shock.
As the unit may overturn and cause a physical
injury, take preventive measures against the
overturn.
Maintenance
Turn off the power switch and pull out the power plug
before maintenance; otherwise, causing an electric
shock.
In order to keep a long
and
stable
performance,
“Periodical
check” is
recommended.
For
details
of
the
periodical
check,
consult
with the sales representative.
A
s the unit has high-voltage parts in it, an expert who
has the knowledge about the product should perform
these check, maintenance and repair; otherwise
causing an electric shock.
When before and after each use, dirt can be seen,
w
ipe the
dirt/dust off the camera using a dry, soft cloth. If the stain is
stubborn soak the cloth with water or detergent, wring well and
wipe. If you use detergent, wipe off the detergent with a cloth
that was soaked in just water and wring well. When wiping,
always turn the power off, and take care not to spill water in the
camera.
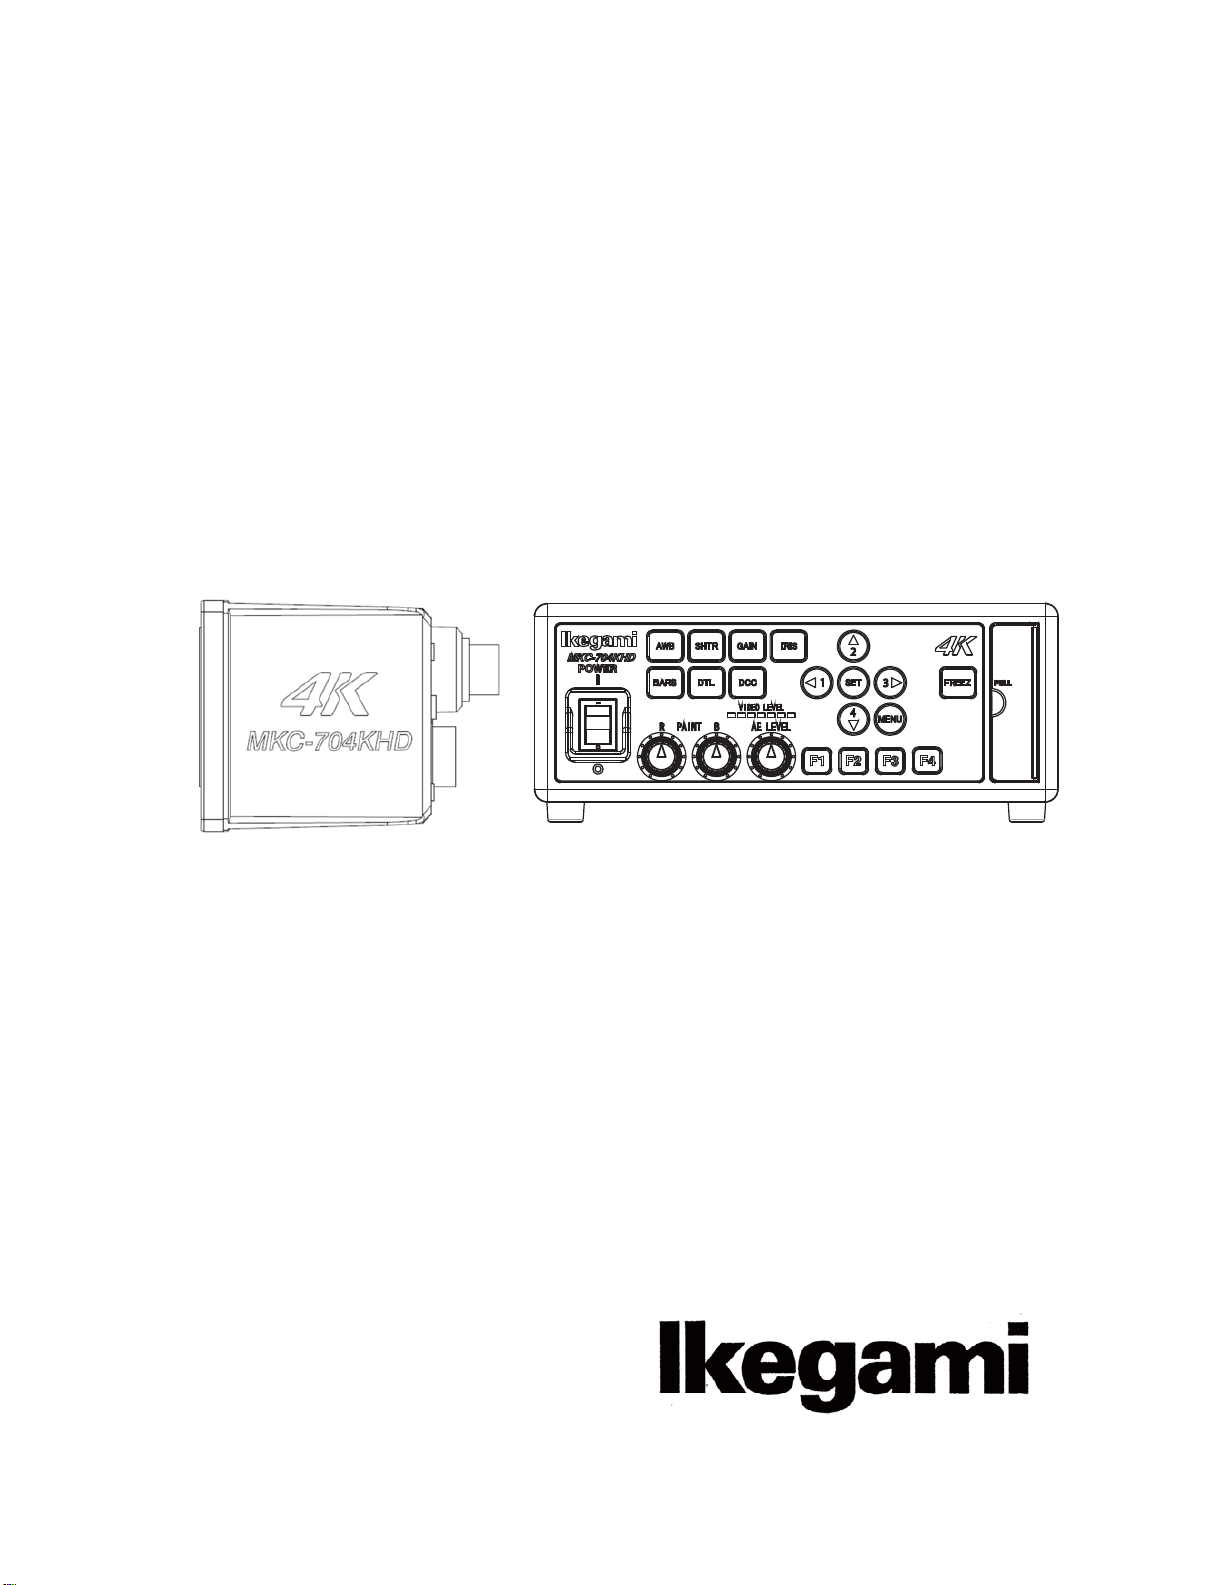
THE MKC-704KHD is authorized AAMI ES60601-1/EN60
601-1 ClassϨIP rating of THE MKC-704KHD is IPX0.
THE MKC-704KHD is a device for continuous operation.
A ₆₆ (㠛ⶊ㣿 ㏷䐋㔶₆㧦㨂)
㧊₆₆⓪ 㠛ⶊ㣿(A ) 㩚㧦䕢㩗䞿₆₆⪲㍲
䕦ⰺ㧦⡦⓪ ㌂㣿㧦⓪ 㧊㩦㦚 㭒㦮䞮㔲₆ ⧒Ⳇ,
Ṗ㩫㣎㦮㰖㡃㠦㍲ ㌂㣿䞮⓪ ộ㦚 ⳿㩗㦒
⪲
NOTE
: This equipment has been tested and found to
comply with the limits for a Class B digital device, pursuant
to Part 15 of the FCC Rules. These limits are designed to
provide reasonable protection against harmful interference
in a residential installation. This equipment generates,
uses and can radiate radio frequency energy and, if not
installed and used in accordance with the instructions, may
cause harmful interference to radio communications.
However, there is no guarantee that interference will not
occur in a particular installation. If this equipment does
cause harmful interference to radio or television reception,
which can be determined by turning the equipment off and
on, the user is encouraged to try to correct the interference
by one or more of the following measures.
-Reorient or relocate the receiving antenna.
-Increase the separation between the equipment and
receiver.
-Connect the equipment into an outlet on a circuit
different from that to which the receiver is connected.

3
-Consult the dealer or an experienced radio/TV
technician for help.
Changes or modifications not expressly approved by the
party responsible for compliance could void the user's
authority to operate the equipment.
Please classify by the material, and dispose of them
according to the law and the ordinance etc. of the country
and the local government when you dispose of the main
body and materials for packing.
The MKC-704KHD is not AP㺃APG equipment.
The BATTERY for BT1 in MKC-704KHD, that should be
used same model as below when you need to
exchange it.
MODEL : CR2032

4
Immunity test IEC 60601 test level compliance level Electromagnetic environment
guidance
Electrostatic㻌
discharge(ESD)
IEC61000-4-2
±6kV contact
±8kV air ±6kV contact㻌
±8kV air Floors should be wood, concrete
or ceramic tile. If floors are
covered with synthetic material,
the relative humidity should be
at least 30%.
Electrical fast
transient/burst
IEC61000-4-4
±2kV for power
supply lines
±1kV for input/output
lines
±2kV for power
supply lines
±1kV for
input/output lines
Main power quality should be
that of a typical commercial or
hospital environment.
Surge
IEC61000-4-5 ±1kV differential
mode
±2kV common mode
±1kV differential
mode
±2kV common mode
Main power quality should be
that of a typical commercial or
hospital environment
Voltage dips, short
interruptions and
voltage variations on
power supply input
lines.
IEC61000-4-11
<5% Ut
(>95% dip In Ut)
for 0.5 cycle
40% Ut
(60% dip In Ut)
for 5 cycle
70% Ut
(30% dip In Ut)
for 25 cycle
<5% Ut
(>95% dip In Ut)
for 5 cycle
<5% Ut
(>95% dip In Ut)
for 0.5 cycle
40% Ut
(60% dip In Ut)
for 5 cycle
70% Ut
(30% dip In Ut)
for 25 cycle
<5% Ut
(>95% dip In Ut)
for 5 cycle
Main power quality should be
that of a typical commercial or
hospital environment. If the user
of the MODEL MKC-704KHD
requires continued operation
during power mains
interruptions, It is recommended
that the MODEL MKC-704KHD
be powered from an
uninterruptible power supply or
battery.
Power frequency
(50/60 Hz)
magnetic field
IEC61000-4-8
3 A/m 3 A/m Power frequency magnetic fields
should be at characteristic of a
typical location In a typical
commercial or hospital
environment.
NOTE It is the a.c.mains voltage prior to application of the test level.
Guidance and manufacturer's declaration - electromagnetic emissions
The Model MKC-704KHD is intended for use in the electromagnetic environment specified below. The
customer or the user of the Model MKC-704KHD should assure that it is used in such an environment.
Emissions test Compliance Electromagnetic
RF emissions㻌CISPR 11 Group 1
The Model MKC-704KHD uses RF energy only for its
internal function. Therefore, its RF emissions are very low
and are not likely to cause any interference in nearby
electronic equipment.
RF emissions㻌CISPR 11 Class B The Model MKC-704KHD is suitable for use in all
establishments, including domestic establishments and
those directry connected to the public low-voltage power
supply network that supplies buildings used for domestic
purposes.
Harmonic emissions
IEC61000-3-2 Class A
Voltage
fluctuations/flicker
emissions IEC61000-3-3 Complies

5
Guidance and manufacturer's declaration - electromagnetic emissions
The Model MKC-704KHD is intended for use in the electromagnetic environment specified below.
The customer or the user of the Model MKC-704KHD should assure that it is used in such an
environment.
Immunity test IEC 60601 test level compliance level Electromagnetic environment guidance
Conducted RF
IEC61000-4-6
Radiated RF
IEC61000-4-3
3 Vrms
150 kHz to 80 MHz
3 V/m
80 MHz to 2.5 GHz
3 Vrms
3 V/m
Portable and mobile RF
communications should be used no
closer to any part of the MODELMKC-
704KHD, Including cables, than the
recommended separation distance
calculated from the equation applicable
to the frequency of the transmitter.
Recommended separation distance
d=1.2¥P
d=1.2¥P 80䡚800 MHz
d=1.2¥P 800 MHz䡚2.5 GHz
where P is the maximum output power
rating of the transmitter lnwatts (W)
according to the transmitter
manufacturer and d is the
recommended separation distance in
meters(m)
Field strengths from fixed RF
transmitters, as determined by an
electromagnetic site survey, *ashould be
less than the compliance level In each
frequency range*b. Interference may
occur in the vicinity of equipment
marked with the following symbol䠖
NOTE 1 At 80 MHz and 800 MHz, the higher frequency range apply.
NOTE 2 These guidelines may not apply in all situations. Electromagnetic propagation Is affected by
absorption and reflection from structures, objects and people.
*a Field strengths from fixed transmitters, such as base stations for radio (cellular/cordless)
telephones and land mobile radios, amateur radio, AM and FM radio broadcast and TV broadcast
cannot be predicted theoretically with accuracy. To assess the electromagnetic environment due to
fixed RF transmitters, an electromagnetic site survey should be considered. If the measured field
strength In the location in which the MODEL MKC-704KHD Is used exceeds the applicable RF
compliance level above, the MODEL MKC-704KHD should be observed to verify normal operation. If
abnormal performance is observed, additional measures may be necessary, such as reorienting or
relocating the MODEL MKC-704KHD.
*bOver the frequency range 150 kHz to 80 MHz, field strengths should be less than 3 V/m.

6
Table of Contents㻌
1. Overview.............................................................................................................................8
2. Names and Functions of Parts ...........................................................................................8
2.1. Camera Head..............................................................................................................8
2.2. CCU Front...................................................................................................................9
2.3. CCU Back..................................................................................................................11
3. Service..............................................................................................................................13
3.1. Connection Example .................................................................................................13
3.2. Powering Up..............................................................................................................15
3.3. Setting a White Balance............................................................................................16
3.4. Adjusting a Paint .......................................................................................................18
3.5. Adjusting an AE Level................................................................................................19
3.6. Outputting a Still Image.............................................................................................20
3.7. Outputting Color Bars................................................................................................21
3.8. Selecting a Scene File...............................................................................................22
4. Menu Operation................................................................................................................23
4.1. Operation Procedure.................................................................................................23
4.2. PICTURE...................................................................................................................24
4.2.1 Exposure..............................................................................................................24
4.2.2 Level.....................................................................................................................25
4.2.3 DTL.......................................................................................................................26
4.2.4 Color.....................................................................................................................27
4.2.5 Scene File ............................................................................................................28
4.3. FUNCTION................................................................................................................29
4.3.1 Function Mode......................................................................................................29
4.3.2 Foot Switch...........................................................................................................30
4.3.3 Function Key ........................................................................................................31
4.4. SYSTEM....................................................................................................................32
4.4.1 Video Output Format............................................................................................32
4.4.2 System/Information...............................................................................................35
4.5. Option........................................................................................................................36
5. Advance Use....................................................................................................................37
5.1. External Synchronization...........................................................................................37
5.1.1 Wiring Example ....................................................................................................37
5.1.2 Setting..................................................................................................................38
5.2. Manually Setting a Metering Frame...........................................................................38
5.2.1 Setting..................................................................................................................38

7
5.3. Scene File .................................................................................................................40
5.3.1 Saving a Scene File..............................................................................................40
5.3.2 Initializing a Scene File.........................................................................................40
5.3.3 Setting a Scene File .............................................................................................41
6. Specification.....................................................................................................................43
6.1. Rating........................................................................................................................43
6.2. Performance..............................................................................................................44
6.3. Function.....................................................................................................................44
7. Appearances ....................................................................................................................45
7.1. Camera Head............................................................................................................45
7.2. CCU...........................................................................................................................45

8
1. Overview
MKC-704KHD is the ultra-small HDTV camera equipped with the 1/3 inch 3CMOS
sensor for medical field, microscope, slit lamp, operation theatre light, especially
Endoscopy. The sensitivity of near infrared light has been improved. And the
fluorescence, such as ICG and 5-ALA can be observed. It equips the 4K signal output
as a standard, and it performs highly image resolution to detail. In addition to the
output of 4K signal, 3G/HD-SDI, DVI, the output of the NTSC/PAL type of VBS and
Y/C is available at the same time. It has high resolution and outputs a good high-quality
picture of the visibility more than a conventional camera by adoption of image
correction function and tone correction function.
㻌
2. Names and Functions of Parts
2.1. Camera Head
䐟
1/3 C-mount
This is a mount for lens.
It accepts various kinds of C-mount lenses and microscope adapters.
䐠
Lens connector
The dedicated microscope adapter or the IRIS cable of a C-mount lens is connected
here.
䐡
Camera connector
The camera connector of a dedicated camera cable is connected here.
Please be aware that the camera connector is different in size between the camera
head and the CCU.
ձ1/3 C-mount ղLens connector
Camera Side
ճCamera connector
Camera Back

9
2.2. CCU Front
㻌
㻌
䐟
Power button
This is the power on/off Switch of the MKC-704KHD.
䐠
White balance button
This executes the automatic white balance function. (Page16)
䐡
Electronic shutter button
This controls electronic shutter speed automatically, and adjusts to the most
suitable output level.
䐢
Automatic sensitivity button
This button controls automatically a sensitivity setting inside the camera and adjusts to the
best outputs level.
䐣
Automatic Iris button
This adjusts to an optimum condition automatically according to video brightness.
䐤
Color bar button
This outputs a color bar signal, included in the camera, to the video-out. It can be
used for adjusting the brightness, contrast, etc. of a color monitor. (Page21)
䐥
DTL button
This will be made an edge enhancement and a video sharper.
䐦
Bright and dark correction
This will be make a clear video of the light and shade by making the light part
lighter and making the dark part darker.
ձ
սվտ
չ
չ պ չ
չջ
ց
ղճմյ
նշո ռ
րւ

10
䐧
Arrow keys
This is used for selecting a menu item. And, it is possible to confirm the scene file
of each key. 㸦Page22㸧
䐨
Set button
This is used for deciding about performance of the function in the menu item
䐩
Menu button
This opens a menu, which a user can set as desired, on a monitor screen. And this
puts out a menu on the monitor screen. For menu items that can be set, please
see Menu Operation. (Page23)
䐪
Freeze button
This can freeze an image.
䐫
Color correction volume (red)
To finely control the red color density on the output picture.
䐬
Color correction volume (blue)
To finely control the blue color density on the output picture
䐭
Brightness volume
This can adjust the brightness of a video.
䐮
VIDEO LEVEL
The level of the video is indicated.
When LED of indication lights up in red,the video level means one octopus beyond
100%.
䐯
Function button
The function key set to F1㹼F4 is executed.㸦Page29㸧
䐰
Maintenance Door
The menu has been taken out in SDI,DVI and VBS/YC or the switch to which it’s
changed whether it isn’t taken out and LED have been installed.I have had the
USB connector which reads and writes data of scene files.

11
2.3. CCU Back
䐟
VBS OUT (SD) connector
AVBS-input-compatible monitor etc. is connected here.
A coaxial cable with a 75 ȍimpedance should be used for connection.㻌
䐠
S-VIDEO OUT (SD) connector
An S-VIDEO-input-compatible monitor etc. is connected here.An S-VIDEO cable (option)
is required for connection. When using An S-VIDEO cable, you must install the ferrite core
to the cable. Contact us if you use An S-VIDEO cable.
䐡
RS-232C connector
The RS-232C cable can be connected here.
㻌
䐢
FOOT SW connector
The extension cable from a foot switch (option) can be connected here. When using the
FOOT SW, you must install the ferrite core to the cable. Contact us if you use FOOT SW .
䐣
Camera connector
The camera connector of a dedicated camera cable is connected here.
Please be aware that the camera connector is different in size between the camera head and
the CCU.㻌
䐤
DVI-D OUT connector
A DVI-D-input-compatible monitor etc. is connected here.ADVI-D cable (option) is
required for connection.㻌
䐥
HD-SDI OUT connector (2 lines)
An HD-SDI-input-compatible monitor etc. is connected here. The same video is output to
two lines.
A coaxial cable with a 75 ȍimpedance should be used for connection.㻌
䐦
GEN LOCK connector
ձղճմյ
նշոչ
պջ
ռ

12
To synchronize the phase of a video with another system, this inputs a synchronizing signal
from that system.A3-value sync (HD) is supported.㻌
䐧
SYNC connector
To synchronize the phase of a video with another system, this outputs a synchronizing signal
to that system.A 3-value sync (HD) is supported.
䐨
Equipotential terminal
This is used to make the potential of a cabinet equal to other equipment.
㻌
䐩
AC inlet
The power cable included with a commercial power (100 to 240 VAC) is connected here.㻌
䐪
4K-SDI OUT connector
䠏
G-SDI (4 lines)
4K-SDI-input-compatible monitor etc. is connected here.
Four coaxial cable with a 75 ȍimpedance should be used for connection.

13
3. Service
3.1. Connection Example
* The output from VIDEO OUT should be 75 ȍterminated at the receiver.
* You should always use the supplied power cable for connection with the power supply.
* 4KHD-SDI-compatible cable consists of four HDSDI cable.
㻌
Precautions During Connection
- Before connection, always power OFF the camera.
- The dedicated camera head should be connected. The other head should not be connected;
otherwise, a failure will occur.
㻌
Attention on the installation
- They seem to install CCU in a well ventilated place and not to close an exhaust port,
please separate and establish more than 2cm from a wall.
- When lining up 2 of CCU, please separate and establish more than 1.5cm.㻌
㻌
Foot switch
MKC-704KHD
camera head
㻌
HDD/DVD recorder
S-VIDEO cable
Camera cable
Supplied
power cable
DVI-D ࢣ࣮ࣈࣝ
DVI-compatible HD-SDI-compatible
HD-SDI-compatible
coaxial cable
MKC-704KHD CCU
4KHD-SDI-compatible
DVI-D cable
4KHD-SDI-compatible
coaxial cable

14
㻌
* Terminate the output from RGB OUT and VIDEO OUT at 75ohms on the receiver side.
* FOOT SW to be connected to this device, it conforms to the IEC60601-1㸸2005
* Equipment connected to this unit except FOOTSW that conform to IEC standards that
apply to the equipment or IEC60601-1:2005
* If you are connecting to a device that is in contact with the patient to make the connection
in accordance with IEC60601-1㸸2005 Annex I Table I.1
* While connected, it is necessary to fit the evaluation and IEC60601-1㸸2005 Section 16.
* When FOOT SW is used in the operating room, you should always use the FOOT SW
which is conformed to the IEC60529-IP6.
* When FOOT SW is used beside the operating room, you should always use the FOOT
SW the IEC60529- IP1.
DVI connector
This connector outputs a digital signal. Connect a DVI cable to this connector.
*Use a DVI cable with a ferrite core at both ends. Contact Ikegami if you are unable to
obtain such a cable.

15
3.2. Powering Up
1. Before power-up, make sure that the external equipment, such as the camera head
and a monitor, is connected properly. Power up the external devices such as a
monitor
2. Turn ON the main power switch on the CCU back.
Ɣ㻌The supplied power cable should always be connected to the AC inlet on the CCU back.
ƔWhen it is powered up, the power button on the front will light up in olive green.
ƔIt can be powered off by pressing the power button or turning OFF the main power switch
with the power button lit.
ƔImmediately after power-up, a loading bar “Please wait䞉䞉䞉” will appear on a monitor
screen. While the gage of the loading bar is filled, the CCU and the camera head will be
initialized automatically.
ƔWhen a loading bar is filled, a loading bar "Please wait䞉䞉䞉" disappears from the monitor
screen automatically.
3. A video from the camera is output
Ɣ㻌It takes about 3 seconds until a picture is output after”Please wait䞉䞉䞉” and a loading bar
disappears, however, this is not a failure.
ƔWhen it is powered off with an image frozen, this state will not be retained even after the
power is turned ON again, but the normal shooting mode will be established.
㻌
* Before relocating the main unit, always turn off the main power, remove the power plug,
and disconnect the cables connected among equipment.
* If any cable is disconnected during use, you should redo the above procedure from the
beginning.
CUTION:
Precautions on Plugging or Unplugging the Camera Cable
Before plugging or unplugging the camera cable that connects the camera head
and the CCU with each other, always power off the main unit.
If the camera cable is plugged or unplugged with the main unit powered ON, a
failure will occur.
Precautions on Video from Camera
This machine uses a CMOS sensor.
Therefore, a video may encounter the following phenomena; however, this is not a
failure.
With higher sensitivity or with still higher temperature, bright spots may appear in a
video.
Under the lighting of a discharge tube, such as a fluorescent lamp, flicker or
horizontal stripes appear on a screen. In this case, when, for a 50 Hz area, a shutter
speed is set to 1/100 s, they will reduce, but not disappear completely.
For the subject moving fast on a screen, distortion may occur on the screen.

16
3.3. Setting a White Balance
When using MKC-704KHD for the first time, or when the light source has been
changed, adjust the White Balance.
The white balance can be adjusted automatically.
㸺Operation㸼
䠍䠊Shoot a white photographic object on the screen largely,㻌and press the white balance
button.
䖃During automatic adjustment, the white balance button lights up.
䖃“AWB” will appear on a monitor screen. When the adjustment is complete successfully,
“AWB COMPLETED” will appear.
White balance button

17
䖃When “AWB ERROR” appears, the white balance is not adjusted successfully. Recheck
the image pickup conditions (a white subject, brightness, etc.), and readjust the white
balance.
ƔIf the image level is too low.
ƔIf the image level is too high.
䠎䠊When the automatic adjustment is complete, the light of the auto white button
will go out automatically.

18
3.4. Adjusting a Paint
After white balance adjustment it is possible with the MKC-704KHD to carry out
fine adjustment of the red level and blue level/density of picture as desire of user.
㸺
Operation
㸼
1. Turn the color correction volume (red) and the one (blue) to make
adjustments.
zTurning it to the right and left raises and reduces the level respectively.
㻌
Color correction volume㸦red㸧Color correction volume㸦blue㸧
This manual suits for next models
1
Table of contents
Popular Medical Equipment manuals by other brands

Symmetry Surgical
Symmetry Surgical Bookwalter Assembly instructions

Arjo
Arjo Rik Overlay Instructions for use

GE
GE Venue 50 Basic service manual

Honeywell
Honeywell SiX Series installation instructions

aidapt
aidapt VY438 Fixing and maintenance instructions

OCULUS
OCULUS Myopia Master Advanced instruction manual

Westmed
Westmed Comfort Soft Plus instruction manual

natus
natus neoBLUE LED Phototherapy Radiometer user manual

Smiths Medical
Smiths Medical CADD Quick Reference Card for Clinicians

Nasco
Nasco Life/form LF03614U instruction manual

Leica Microsystems
Leica Microsystems HM500 user manual

Top shelf Orthopedics
Top shelf Orthopedics Boa Universe Instructions for use