manuals.online logo
Brands
  1. Home
  2. •
  3. Brands
  4. •
  5. Ikelite
  6. •
  7. Camera Accessories
  8. •
  9. Ikelite 6842.35 User manual

Ikelite 6842.35 User manual

Thank you for your purchase of kelite equipment. Please read this
instruction manual completely before attempting to operate or dive with this
product.
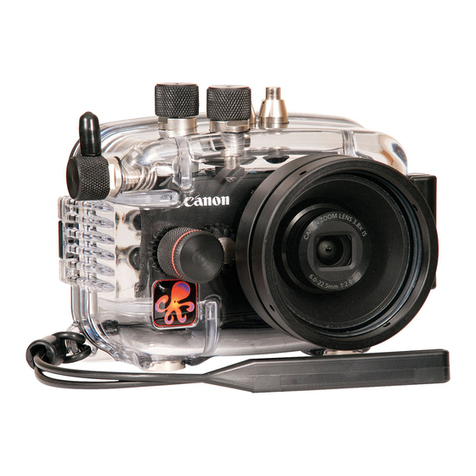
SLR-DC Housing
instruction manual
6842.35 Sony A35
6842.55 Sony A33, A55
Port Lock
IKELITE
Width ................10 in. (250mm) including controls
..........................13.5 in. (343mm) with Tray and Handles
Height ..............7.0 in. (178mm) including controls
..........................7.4 in. (188mm) with Tray and Handles
Depth ................6.5 in. (165mm) including controls
Weight ..............5.3 lb. (2404g) housing only
..........................7.1 lb. (3223g) housing with tray & handles
Buoyancy ..........Neutral to slightly negative in freshwater (dependent on
..........................choice of lens and lens port)
Size and Weight
Table of Contents
Product Registration ........................................................P. 3
ackage Contents ......................................................P. 3
reparation ..................................................................P. 3
Parts of the Housing........................................................P. 4
nitial Camera Setup........................................................P. 6
Opening the Housing ......................................................P. 6
nstalling the Camera ......................................................P. 7
Setting the Conversion Circuitry Strobe D Switch..........P. 7
Attaching the Flash Connection for External Strobes ....P. 8
nstalling Camera in Housing ..........................................P. 8
Closing the Housing ........................................................P. 9
nstalling Zoom Clamp and Gear Sleeve ........................P. 10
nstalling the Port ............................................................P. 15
Housing Conversion Circuitry..........................................P. 17
DS50 and DS125 Substrobe Compatibility ....................P. 18
Using Non- kelite or kelite Non-DS Substrobes ............P. 18
Usage ..........................................................................P. 19
Pre-Dive your System ....................................................P. 19
Lubricants ........................................................................P. 19
Troubleshooting ........................................................P. 20
Replacement arts ....................................................P. 22
Recommended Accessories ....................................P. 22
Accessory Mounting Points / EV-Controller Use ............P. 22
Maintenance ................................................................P. 23
Photo Tips ......................................................................P. 26
Storing the Housing ........................................................P. 27
Technical Support ....................................................P. 27
Limited Warranty ........................................................P. 27
Returning Products for Service ......................................P. 28
2
- SLR-DC Housing
- Envelope containing tray
installation hardware,
maintenance kit, and extra
control end tips.
ackage Contents
- Aluminum Tray & Dual Handles
- Silicone Lubricant
- Std. Zoom Clamp & Sleeve Set
- #5509.28 Large Diameter Zoom
Clamp & Sleeve Set
roduct Registration
Please take a moment to fill out the online Ikelite roduct Registration
form at http://www.ikelite.com/forms/regForm.htm.
This product has been water pressure tested at the factory and is depth
rated to 200 ft. (60m). Thoroughly inspect and immerse the empty
housing completely in water before installing a camera. f any fogging
occurs or droplets of water enter the housing, do not install a camera.
Clean the housing main o-ring and retest to make sure that it is
watertight. Refer to the Troubleshooting section, page 20.
We suggest that you read this instruction booklet thoroughly before use
to have a full understanding of where each camera control is located,
and what function each control provides. Please read your camera
manual thoroughly to have a full understanding of each camera function.
f you are new to underwater photography, be sure to read the Photo
Tips section.
Due to the power required to operate the camera and LCD screen start
each dive with a fully charged camera battery.
reparation
3
Port Lock
IKELITE
4
arts of the Housing - Front View
Handle
Shutter
Release
Mode Dial
Lid
Snap
Side View
Gear
Sleeve
Optional
Port
Port O-ring
Housing O-ring
Camera Tray
Camera Mounting Bolt
Aluminum Tray
Shutter
Release
AEL
Control Dial
Port Lock
Control Dial
Zoom
Control
Tra y Leveling Screw (factory preset)
ort
Opening
Gear Sleeve
Drive Gear
Lid Snap
Power Switch
Finder/LCD
D-Range
Movie Button
4
3
14 15
6
7
1
5
8910
11
12 13
2
5
Back View
Lens
Release Lid
Snap
Quick
Release
Button
1. External Strobe Connector & Cap
2. Menu Button
3. Viewfinder Port
4. Movie Button
5. / AV
6. Fn (Function) Button
7. Display
Power Switch
8. White Balance
9. Control Button (Enter)
10. Drive
11. SO
12. Playback Button
13. Delete
14 & 15. Flash Exposure Buttons
AF Mode Selection
AEL
D-Range
Opening the Housing
Lid Snaps have a Lock. To open,
push Lid Snap Lock forward and lift
as shown. Keep pressure on the Lid
Snap so it does not fly open quickly.
Some Lid Snaps have a lot of spring
tension once they go over center, so
have a firm grip on the Lid Snap. Lid
Snaps may be opened one at a time.
6
Lift
Push Forward
Lid Snap Lock
Initial Camera Setup
- nsert a fully charged battery.
- nsert memory card (2GB or greater capacity recommended).
- Set camera date and time.
- Set the mode dial to “M” manual or “A” aperture priority.
- n “M” mode, set shutter speed to 1/60, or 1/125 second for fast moving
subjects. Shutter speed is automatically locked at 1/60 in “A” mode
when a strobe is connected.
- Set aperture to F8 for general photography or F22 for macro
photography (close-ups).
- Set mage: Size to L: 16M.
- Set Quality to Fine or RAW.
- Set SO to 100.
- Set Metering Mode to “center-weighted.”
- Set Autofocus Mode to “AF-S” and D-Range to “Off.”
- Set White Balance to “AWB.”
- Set Flash Control to “Pre-Flash TTL.”
- Set Red-Eye Reduction and Eye-Start AF to “Off.”
- Set AF illuminator to “Off.”
- Set Flash Mode “Fill-flash” Always fires flash.
- Set AF Area to “Spot.”
- Set Autofocus Mode to “AF-A.”
7
Installing the Camera
Remove the back from the housing. The mounting tray for the camera is
secured to the housing back. Position the camera and lens on the
camera tray, and then
secure it with the Hold down
bolt which threads into the
camera’s tripod socket.
Use a flathead screwdriver
(recommended) or coin to
tighten the Hold down bolt
so the camera bottom is
flush against the tray.
Note: Conversion Circuitry
Strobe D Switch is located
on bottom of camera tray.
Setting the Conversion Circuitry Strobe ID Switch
On the bottom of the camera tray is a switch for setting the DS Substrobe
D. Set the switch to the Model of DS Substrobe being used.
When using dual strobes of different models such as a DS51 and a
DS161, set the D switch to DS51 or the smaller strobe.
TIGHTEN HOLDOWN BOLT
WITH COIN
OR SCREWDRIVER
125
160/161
DS
DS
Set
DS Substrobes
to TTL Mode
50/51
200
80
SONYSONY
3535
SteadyShot
INSIDE
Hold down Bolt
Camera Tray
Strobe D Switch
8
Attaching the Flash Connection for External Strobes
When using an external strobe, connect the housing Hotshoe Connector.
Slide the Connector into the Hotshoe Mount on the camera from the back
of the camera as shown. Slide the Connector forward until it stops. This
can be done
before or after
the camera is
secured with
the Hold-down
bolt.
Caution:
Do not remove the External Strobe Connector’s waterproof cap unless an
external sync cord is going to be plugged in. Do not remove waterproof
cap or sync cord underwater.
Installing Camera in Housing
Before installing the camera, pull out on the controls in the front section of
the housing. This will allow the camera to slide in easier. Once the camera
is installed and the lid snaps have been closed, return the controls to their
operating position.
SONY
External Strobe Connector and
Waterproof Cap
Housing Back
Hotshoe
Connector
Hotshoe
Mount
Closing the Housing
1. Place housing face down in your lap.
2. Check to see that there is an o-ring on
the housing back that is clean and in its
proper location.
3. Guide the back onto the housing. The
o-ring should touch the housing all the
way around. There should
be an even gap all the way around
between the housing and the housing
back.
4. Lift the lid snaps so they are extended
and place the lid snap into the
corresponding hook on the housing back.
5. To close the housing, push down on the
lid snaps until they snap into place.
Lid snaps on opposite sides of
the housing should be closed
at the same time. Be sure they
are down far enough to engage
the lid-snap lock.
Double check - Once the housing is closed,
check the o-ring seal. Check the gap between the housing back and the
housing, it should be even all the way around.
Look through the clear plastic back at the o-ring. You should see a
darkened area where the o-ring is compressed against the housing
back. f you do not see an even black compression seal all the way
around the back, open the lid snaps, reseat the housing back, and then
close the lid snaps. Visually check the seal again.
O-ring
Housing Back
Housing back
Housing
Housing
O-ring
Even gap
all 4 sides
9
reparing to Install Zoom Clamp & Gear Sleeve
Determine the type
of lens being used
on the camera.
Type 1 Lenses have
a lens opening that
is NOT larger in
diameter than the
zoom ring. (Fig. 1).
Type 2 Lenses have a lens
opening that S larger in diameter than the zoom ring. (Fig. 2).
Zoom Clamps & Gear Sleeves Included with Housing
There are 2 different
Zoom Clamps and
Gear Sleeves
provided with the
housing. Start with
the suggested Zoom
Clamp and Gear
Sleeve depending
on the Type of
lens being used.
See (Fig. A or B)
lens
opening
zoom
ring
bayonet
mount
Type 1 lens Type 2 lens
(Figure 1) (Figure 2)
Normally used with
Type 1 lens (Fig.1)
#9059.8 small diameter clamp:
For use with #0073 sleeve
+
#0073 sleeve: Use with
small diameter zoom clamp
#9059.8
Figure A
Normally used with
Type 2 lens (Fig.2)
#5509.28 Package
#9059.9 large diameter clamp:
For use with #0073.1 sleeve
+
#0073.1 sleeve: Use with
large diameter zoom clamp
#9059.9
Figure B
thick ribs thin ribs
wide
grooved
extension
tabs
narrow
grooved
extension
tabs
10
Installing Zoom Clamp & Gear Sleeve (Type 1 Lenses)
The Zoom Clamp has springs so it can be expanded to fit over the
Zoom Ring of the lens - figure C, page 11.
nstall the Zoom Clamp with the extension tabs toward the rear element
of the lens. After installing the Zoom Clamp and Gear Sleeve - figures D
& E, page 12, install the Lens Port and rotate the Zoom Ring on the
lens. f the Zoom Ring and Gear Sleeve do not mesh properly, install the
rubber strips (supplied) to the inside diameter of the Zoom Clamp as
shown in figure F, page 12.
Two thicknesses of rubber strips are provided. Start by installing the
thinnest rubber strips. f the Zoom Clamp still is not tight enough and
meshes improperly with the Gear Sleeve, use the thicker rubber strips.
Reinstall the Zoom Clamp, Sleeve. Mesh Gear Sleeve teeth with Black
Housing Drive Gear, figure G, page 14, and then install the Lens Port.
After installing the port, pages 15 & 16, rotate the housing Zoom Control
Knob to see that the Gear Sleeve is properly rotating the lens Zoom ring.
11
Figure C
Type 1 lens
mounted
to camera
zoom
ring
12
Figure D
Figure E
Align Ribs with
Zoom Clamp
grooved tabs
Apply
rubber strips
to inside of
clamp
Figure F
Type 1 Lenses (cont.)
Gear Sleeve Ribs
TOP OF HOUSING
Installing the Zoom Clamp & Gear Sleeve On Type 2 Lenses
Due to the larger diameter lens opening on Type 2 lenses, the Zoom
Clamp and Gear Sleeve need to be installed from the rear (bayonet end)
of the lens. Use the housing Lens Release Control and remove the
camera lens from the camera body, after the camera and lens have
been installed in the housing.
Place the Gear Sleeve in the housing opening as shown.
nstall the black Zoom Clamp on the Lens Zoom Ring and lower the lens
into the housing opening. Make sure the Zoom Clamp grooved tabs
align with the Gear Sleeve ribs. f necessary, install rubber strips to
expand the Zoom Clamp so it meshes properly with the Gear Sleeve.
Bayonet lens into camera body and align Gear Sleeve teeth with Black
Housing Gear Teeth.
Zoom Clamp
Type 2 lens
Lens Zoom Ring
Align
Zoom Clamp
grooved
tabs with
Gear Sleeve
Ribs
13
Gear Sleeve
Lens Manual
Focus Ring
Manual Focusing Note:
kelite DSLR housings are designed for auto-focus DSLR
cameras and lenses. Manual focusing is not recommended. n some
cases, if you desire to manually focus a lens, the zoom clamp must be
moved onto the lens Manual Focus Ring and you must use the housing
zoom control knob to manually focus. This will result in loss of zoom
capability.
14
Installing Zoom Clamp/Sleeve on Type 2 Lenses (cont.)
Before installing the lens port and checking operation, make sure the
teeth on the Gear Sleeve mesh with the teeth on the housing Drive Gear,
shown below. When the port is installed, pages 15 & 16, it will lock the
Gear Sleeve in place. After installing the port, rotate the housing Zoom
Control Knob to see that the Gear Sleeve is properly rotating the Lens
Zoom ring.
IKELITE
Mesh
Gear Sleeve
teeth with
Black
Housing
Drive Gear
Figure G
15
Installing the ort
There are four port locks on the
front of the housing, see figure
G, page 14. Each port lock has
a Release Button. Lift the
release button and slide each
Port Lock away from the port
opening. n the unlocked
position, the Release Button will
remain in the up position as
shown.
To prepare the port for
installation, remove the port o-ring and lightly lubricate it. The port seal
is a side-to-side seal and requires the o-ring to be lightly lubricated for
easy installation. Put a small amount of lubricant on your fingers and pull
the o-ring through your fingers to lightly lubricate it. Do not stretch the
o-ring. Check that the lip of the port where the o-ring fits and the sealing
surface on the housing are clean. Place the port, with o-ring, into the
housing port opening. Press down on the port firmly and evenly until you
feel the port slide into place. Continue to push down on the port and
push each port lock forward until the lock fully engages. t may help to
slightly rotate the port as you push in on the port lock. Visually inspect
the port lock and confirm that the Port Lock Release Button is seated
flush against the Port Lock Body. Do not rely on an audible "click" to
indicate that the lock is engaged.
Check around the perimeter of the port seal to see that the o-ring is
properly sealed and not extruded, figure 2, page 16.
Port Lock
Release
Button
Lift Release
Button to
Unlock
Pull Back to
Disengage
Port
Locked Position
16
Installing the ort (cont.)
To Remove ort
To remove the port, lift up on each Release Button and slide the port
lock away from the port.
ort Seal Inside View
f the port is installed before the camera is
inserted into the housing, look from the
inside of the housing at the port seal.
Check to see that the o-ring is properly
seated as shown in figure 1 and not
extruded as shown in figure 2.
Fig. 1
Fig. 2
Caution:
After installing the port, turn the Zoom Control knob on the housing. f the
Zoom Control is difficult to turn, the gear sleeve may be warped. f
necessary, reduce or omit any rubber installed on the Zoom Clamp, figure
F, page 12. If the Zoom Clamp is still arped, use of the #5509.28
package may be required, see page 10.
Lens orts
A lens port must be secured to the housing before entering the water.
kelite DSLR housings DO NOT come with a lens port. You must select
the correct port for each lens you will be using underwater. For complete
lens port information and compatibility with your kelite system, go to
http://www.ikelite.com/web_pages/slrport.html
17
Housing Conversion Circuitry
This housing has Conversion Circuitry built into the camera tray, page 7.
When used with kelite DS Substrobes, the Conversion Circuitry
provides real Canon eTTL flash exposure with over and underexposure
compensation of two f-stops in half-stop increments.
The Conversion Circuitry also offers 8 manual power settings in 1/2 stop
increments and is powered by the kelite DS Substrobe when connected
to the housing with the #4103.51 single or #4103.52 dual sync cord.
Using the Conversion Circuitry (Set DS Substrobe to TTL mode)
-Mode and Compensation Buttons
The Conversion Circuitry default is set to TTL. To switch between TTL and
Manual Modes, depress both Mode Buttons at the same time and keep
them depressed until you see the desired Yellow LED Mode illuminate.
-TTL Mode (indicated when the yellow LED directly below TTL is
illuminated). TTL Mode is the default setting. When the DS Substrobe is
powered ON, the yellow TTL LED will illuminate. None of the Red LEDs
will illuminate. This indicates that no (+) plus or (-) minus compensation is
selected. Depress the Mode buttons to select +/- compensation. Note that
the TTL +/- compensation values are in the yellow bar with the heading
TTL.
-Manual Mode (indicated when the yellow LED directly below the M is
illuminated). When the Manual Mode is selected, the Red LED directly
below the F (full power) will illuminate. Note that the Manual minus (-)
compensation values are in the black bar with the heading M. Set DS
Substrobe to TTL mode. This will allow the strobe power to be varied
in manual mode.
18
Using Non-Ikelite or Ikelite Non-DS Substrobes
(Substrobe 50, 100A, 200, 400) with this Housing
The Conversion Circuitry is automatically disabled when used with a
Non- kelite or Non-DS Substrobe. These Substrobes can be used in their
manual mode utilizing any power settings provided on the Substrobe.
DS50 and DS125 Substrobe Compatibility
- Older DS50 Substrobes with Serial Number below 63,850 can NOT be
updated to operate correctly with the latest TTL conversion circuitry.
Older DS50 Substrobes with Serial Number between 63,850 and 69,999
require upgrade of electronics to operate. Cost of update depends on
strobe circuitry. Strobe must be returned to kelite for evaluation to
provide an estimate of upgrade cost.
- Older DS125 Substrobes with Serial Number below 2,500 can NOT be
updated to operate correctly with the latest TTL conversion circuitry.
Older DS125 SubStrobes with Serial Number between 2,500 and 4,999
require upgrade of electronics to operate. Cost of update depends on
strobe circuitry. Strobe must be returned to kelite for evaluation to
provide an estimate of upgrade cost.
Red LEDs (Compensation)
Manual Mode - Yellow LED
TTL Mode - Yellow LED
Mode &
Compensation
Buttons
19
re-Dive Your System
t is recommended that you take the complete system into a swimming
pool before use in open water. This will give you a chance to become
familiar with the handling and operation of your housing and strobe(s).
As soon as you enter the water, take a moment and check the housing
to see that it is properly sealed. Next, check to see if there are any
bubbles on the face of the port. f there are, take your fingers and
remove them. f there are bubbles on the lens port they can produce soft
focus spots in your photographs.
Lubricants
- kelite provides silicone lubricant with the housing. We recommend that
you use only kelite lubricant. Other brands may cause the o-ring to
swell and not seal properly.
- Use only enough kelite lubricant to lightly cover control shafts and
o-rings. Wipe off any excess lubricant with a clean cloth. Lubricant is not
a sealant and is used to reduce friction. Excessive lubricant can collect
sand and dirt which may interfere with proper sealing.
Note: Lubricant is not needed on the main housing o-ring to maintain a
housing seal, however, lightly lubricating this o-ring can extend it’s life
and aid in seeing a good housing seal. Too much lube can attract debris
increasing the potential for a leak.
CAUTION: Never use spray lubricants as the propellant ingredient
can cause the plastic housing to crack. Use ONLY Ikelite lubricant.
Usage
20
Troubleshooting
Push buttons or
controls are sticky
and hard to operate
- Remove the camera and rinse the closed housing
in freshwater. Vigorously press each push button
in and out several times to release any trapped
saltwater or debris.
- Press a sticky push button all the way in and
place a small amount of lube on the small end of
the push button shaft at it’s base. Release and
operate the push button several times to distribute
the lube.
- f a control is sticky, grab the control knob, pull it
out, and then push back in. f still sticky, see the
Control Maintenance section - pages 23 & 24.
- Return housing to kelite for routine maintenance.
roblem Solution
mage is over- or
under-exposed
- Check that the strobe(s) are firing when taking
a picture.
- When using an external strobe, make sure it is
turned on, set properly, and it’s battery is charged.
- Check any corded connection points.
- Adjust camera shutter speed, aperture, and/or
exposure compensation.
- Move closer to or further away from the subject.
Water enters the
housing
- Remove, clean and properly lubricate the main
housing and port o-rings.
- Look for hair, dirt, or foreign debris crossing the
o-ring seal.
- Reassemble the housing without a camera
installed and pressure test or take diving.
- Return housing to kelite for routine maintenance.

This manual suits for next models

1

Other Ikelite Camera Accessories manuals

Ikelite 6870.40 User manual

Ikelite

Ikelite 6870.40 User manual

Ikelite ULTRAcompact 6270.25 User manual

Ikelite

Ikelite ULTRAcompact 6270.25 User manual

Ikelite 6241.13 Owner's manual

Ikelite

Ikelite 6241.13 Owner's manual

Ikelite 6950.13 User manual

Ikelite

Ikelite 6950.13 User manual

Ikelite S610 Owner's manual

Ikelite

Ikelite S610 Owner's manual

Ikelite 6170.30 User manual

Ikelite

Ikelite 6170.30 User manual

Ikelite 6140.54 User manual

Ikelite

Ikelite 6140.54 User manual

Ikelite Canon IXUS 950 IS User manual

Ikelite

Ikelite Canon IXUS 950 IS User manual

Ikelite 6070 Owner's manual

Ikelite

Ikelite 6070 Owner's manual

Ikelite 6280.22 Owner's manual

Ikelite

Ikelite 6280.22 Owner's manual

Ikelite 6060 Owner's manual

Ikelite

Ikelite 6060 Owner's manual

Ikelite LX15 User manual

Ikelite

Ikelite LX15 User manual

Ikelite 6812.61 User manual

Ikelite

Ikelite 6812.61 User manual

Ikelite 6805.1 User manual

Ikelite

Ikelite 6805.1 User manual

Ikelite S95 Owner's manual

Ikelite

Ikelite S95 Owner's manual
Ikelite 6182.71 User manual

Ikelite

Ikelite 6182.71 User manual

Ikelite 6870.80 User manual

Ikelite

Ikelite 6870.80 User manual

Ikelite 6116.18 User manual

Ikelite

Ikelite 6116.18 User manual

Ikelite SLR-DC Housing User manual

Ikelite

Ikelite SLR-DC Housing User manual

Ikelite 6214.30 Owner's manual

Ikelite

Ikelite 6214.30 Owner's manual

Ikelite DLM200 User manual

Ikelite

Ikelite DLM200 User manual

Ikelite Olympus C-8080 User manual

Ikelite

Ikelite Olympus C-8080 User manual

Ikelite 5509.71 User manual

Ikelite

Ikelite 5509.71 User manual

Ikelite 6184.93 User manual

Ikelite

Ikelite 6184.93 User manual

Popular Camera Accessories manuals by other brands

Arca-Swiss monoball p1 Plus quick start guide

Arca-Swiss

Arca-Swiss monoball p1 Plus quick start guide

InnoCigs CUBOID MINI AKKU user manual

InnoCigs

InnoCigs CUBOID MINI AKKU user manual

Fantasea FSD-1100 Operator's manual

Fantasea

Fantasea FSD-1100 Operator's manual

Link L1500 Series manual

Link

Link L1500 Series manual

Godox X1 instruction manual

Godox

Godox X1 instruction manual

Nikon MD-11 instruction manual

Nikon

Nikon MD-11 instruction manual

hager RTN500X manual

hager

hager RTN500X manual

PhaseOne PAS 150 Operation guide

PhaseOne

PhaseOne PAS 150 Operation guide

SKAARHOJ RCP Pro user guide

SKAARHOJ

SKAARHOJ RCP Pro user guide

Vincent Associates UNIBLITZ T132 instruction manual

Vincent Associates

Vincent Associates UNIBLITZ T132 instruction manual

Bioenno Power BLF-1260AS user manual

Bioenno Power

Bioenno Power BLF-1260AS user manual

impact LSA-BAWMBL instructions

impact

impact LSA-BAWMBL instructions

Sony CA4000 Operation manual

Sony

Sony CA4000 Operation manual

Cornwell Tools CSEUH2T operating manual

Cornwell Tools

Cornwell Tools CSEUH2T operating manual

Filmcity FC-02 instruction manual

Filmcity

Filmcity FC-02 instruction manual

Nice PS 124 Instructions and warnings for installation and use

Nice

Nice PS 124 Instructions and warnings for installation and use

Manfrotto Lastolite Ezybalance instructions

Manfrotto

Manfrotto Lastolite Ezybalance instructions

Orflo moxi z quick start guide

Orflo

Orflo moxi z quick start guide

manuals.online logo
manuals.online logoBrands
  • About & Mission
  • Contact us
  • Privacy Policy
  • Terms and Conditions

Copyright 2025 Manuals.Online. All Rights Reserved.