Iluv TimeShaker 5Q Wow User manual

TimeShaker 5Q Wow
(Ver 1.0)
User Manual
Jumbo White LED Display
Dual Alarm Clock with Qi
Certied Wireless Charging
Station, FM Radio, USB
Charging Port and Bed Shaker
English

WARNING AND SAFETY INSTRUCTIONS
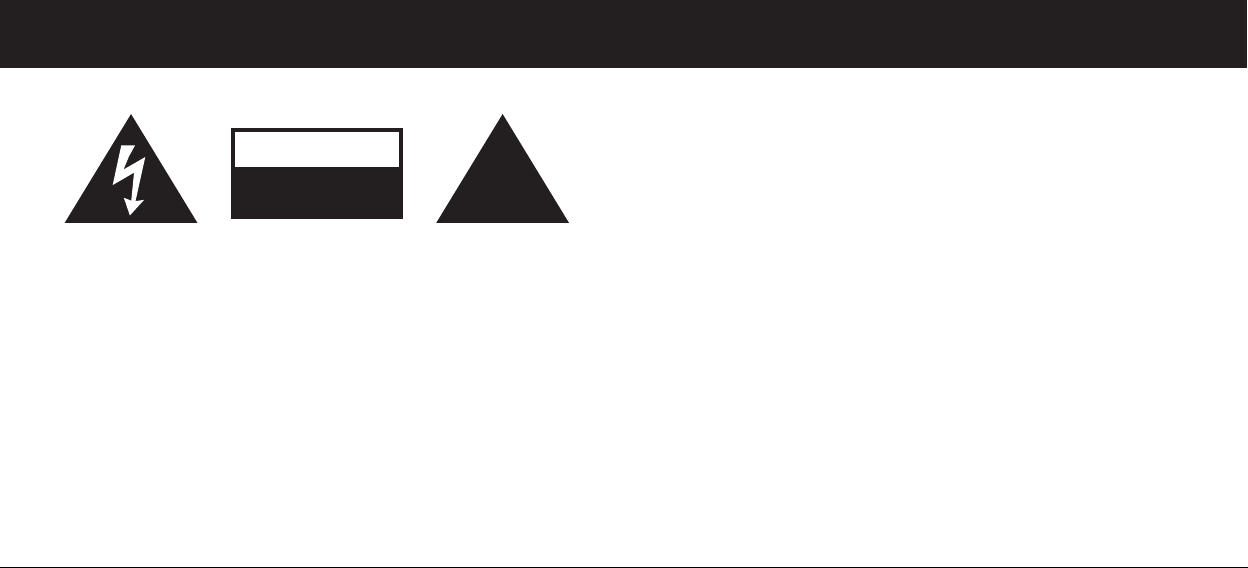
The lightning ash with
arrowhead symbol,
within an equilateral
triangle, is intended to
alert the user to the
presence of
un-insulated
“dangerous voltage”
within the product’s
enclosure that may be
of sucient magnitude
to constitute a risk of
electric shock to
persons.
CAUTION TO REDUCE
THE RISK OF ELECTRIC
SHOCK, DO NOT REMOVE
COVER OR BACK. NO
USERSERVICEABLE
PARTS INSIDE. REFER
SERVICING TO QUALIFIED
SERVICE PERSONEL.
The exclamation point
within an equilateral
triangle is intended to
alert the user to the
presence of important
operating and
maintenance
(servicing) instructions
in the literature
accompanying the
appliance.
CAUTION
RISK OF ELECTRIC SHOCK
DO NOT OPEN
!
1. All the safety and operating instructions should be read before the product is operated
2. The safety and operating instructions should be retained for future reference.
3. All warnings on the product and in the operating instructions should be adhered to.
4. All operating and use instructions should be followed.
5. Use of controls or adjustments or performance other than those specied may result in
hazardous radiation exposure.
6. Do not use this product near water or expose to rain to prevent re or shock hazard, i.e.
bathtub, washbowl, kitchen sink, laundry tub, wet basement, or swimming pool, etc.
7. Cleaning – Unplug this product from the wall outlet before cleaning. Do not use liquid
cleaners or aerosol cleaners. Clean only with a dry cloth.
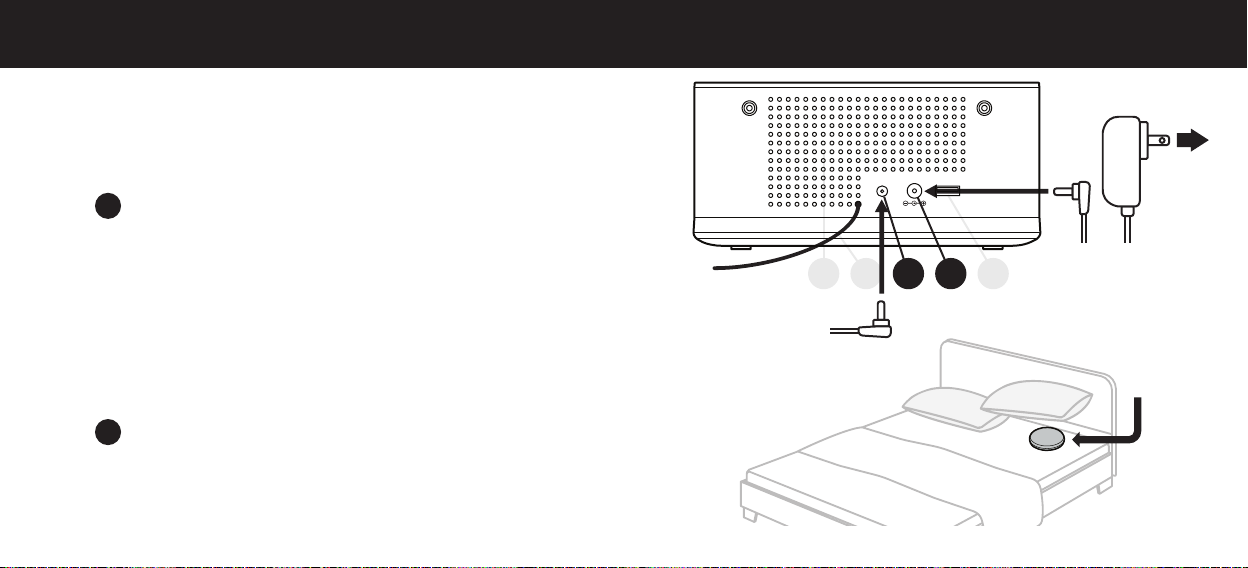
8. Unplug TimeShaker 5Q Wow during lightning storms or when unused for long periods
of time.
9. When main plug is connected, TimeShaker 5Q Wow is operational. In order to
disconnect TimeShaker 5Q Wow completely, the main plug should be disconnected from
the main socket outlet.
10. Battery should not be exposed to excessive heat, such as sunshine or re.
11. If battery is incorrectly replaced, it may cause explosion. Replace only with the same or
equivalent type.
2

User Manual
Morning Call
iLuv
PM
SHAKER
AL 1
SHAKER
BUZZER
RADIO
BUZZER
RADIO
AL 2
TimeShaker 5Q Wow Power AdaptorShaker User Manual
WHAT’S INCLUDED
3

3 4 5 6 71 2
SNOOZE
SLEEP/DIMMERTIME HOUR MIN
PRESET
RADIO/AL OFF
TUN TUN VOLVOL
AL 2AL 1
Wireless Charge
8
Morning Call
iLuv
PM
SHAKER
AL 1
SHAKER
BUZZER
RADIO
BUZZER
RADIO
AL 2
9
10
11
12
13
14
15
16
Top
Front
TIME/PRESET
HOUR/TUN-
MIN/TUN+
SNOOZE/SLEEP/DIMMER
ALARM 1/VOLUME-
ALARM 2/VOLUME+
POWER/RADIO/ALARM OFF
WIRELESS CHARGING PAD
PM INDICATOR
ALARM 1 INDICATOR (SHAKER)
ALARM 1 INDICATOR (BUZZER)
ALARM 1 INDICATOR (RADIO)
WIRELESS CHARGE INDICATOR
ALARM 2 INDICATOR (SHAKER)
ALARM 2 INDICATOR (BUZZER)
ALARM 2 INDICATOR (RADIO)
1
2
3
4
5
6
7
8
9
10
11
12
14
13
16
15
OVERVIEW OF THE PRODUCT
4

USB CHARGINGDC 5V/3ASHAKER
eS ria l No.:1 FE000 0 1
22
TimeShaker 5Q Wow
Jumbo Display Alarm Clock Speaker with
Wireless Charging Station, FM Radio, and Bed Shaker
Model : TimeShaker 5Q Wow
Power : DC 5V 3A
Backup Battery : 2 x AAA
FCC ID : KHKQI1110
iLuv Creative Technology
Designed in New York
2019 2117 18
Back
Bottom
SPEAKER
FM RADIO ANTENNA
SHAKER PORT
DC POWER INPUT PORT
USB CHARGING PORT
BATTERY COMPARTMENT
17
18
19
20
21
22
5

2019 2117 18
USB CHARGINGDC 5V/3ASHAKER
1
CONNECTING TO POWER
POWERING ON
Connect the included AC adapter to the
DC PORT located on the back of the
unit and connect the other end to a
working wall outlet.
20
Connect the included shaker to the
SHAKER PORT located on the back
of the unit.
2
Store the shaker under the pillow.
19
CONNECTING TO SHAKER
6

3 4 5 6 71 2
8
SNOOZE
SLEEP/DIMMERTIME HOUR MIN
PRESET
RADIO/AL OFF
TUN TUN VOLVOL
AL 2AL 1
Wireless Charge
9
10
11
12
13
14
15
16
Morning Call
iLuv
PM
SHAKER
AL 1
SHAKER
BUZZER
RADIO
BUZZER
RADIO
AL 2
1
Press &
HOLD
[TIME] to enter the TIME SET-UP
mode.
Press
[HOUR]
to set the hour and
[MIN]
to set
the minute.
(Press &
HOLD
for faster adjustment)
TIME SETUP
The default time is set at 12:00AM
1
3When nished, press
[TIME]
to conrm and exit
from
TIME SET-UP
mode.
1
2
2 3
7

3 4 5 6 71 2
SNOOZE
SLEEP/DIMMERTIME HOUR MIN
PRESET
RADIO/AL OFF
TUN TUN VOLVOL
AL 2AL 1
Wireless Charge
8
9
10
11
12
13
14
15
16
Morning Call
iLuv
PM
SHAKER
AL 1
SHAKER
BUZZER
RADIO
BUZZER
RADIO
AL 2
Entering ALARM SET-UP Mode:
Press & HOLD [AL 1] to enter the
ALARM SET-UP
mode. When the display is blinking, you have
successfully entered the
ALARM SET-UP
mode.
Press
[HOUR]
to set the hour and
[MIN]
to set
the minute. (Press &
HOLD
for faster adjustment)
Press
[AL 1]
to conrm and proceed to your
Alarm
Sound Source setting.
Setting Your Alarm:
SETTING UP YOUR ALARM:
Alarm Time > Alarm Sound Source > Alarm Sound Volume
(Volume adjust option is only available when setting
the alarm sound source to "RADIO")
1
ALARM SETUP
5
2
23
5
8

3 4 5 6 71 2
SNOOZE
SLEEP/DIMMERTIME HOUR MIN
PRESET
RADIO/AL OFF
TUN TUN VOLVOL
AL 2AL 1
Wireless Charge
8
9
10
11
12
13
14
15
16
Morning Call
iLuv
PM
SHAKER
AL 1
SHAKER
BUZZER
RADIO
BUZZER
RADIO
AL 2
Press
[HOUR]
or
[MIN]
to set wake up
sound volume from
V5
to
V15
.
(Default Volume Level: V8)
Press
[AL 1]
to conrm.
Setting Wake-up Radio Volume:
3
-1
2
3
5
Press
[HOUR]
or
[MIN]
to select either the
BUZZER
or
RADIO
or
SHAKER
or
BUZZER+SHAKER
or
RADIO+SHAKER
as
your desired alarm source.
Press
[AL1]
to conrm.
(To set-up Alarm 2
,
follow the instructions 1-4.
Press [AL 2] to set up Alarm 2
)
Once the alarm setting is complete, the alarm will be
ready with the corresponding alarm indicator on.
(If you select Radio, the last station selected will be played.)
4
5
Selecting Alarm Sound Source :
3
2
12 10
3
11
11 10 12 10
6
9

3 4 5 6 71 2
SNOOZE
SLEEP/DIMMERTIME HOUR MIN
PRESET
RADIO/AL OFF
TUN TUN VOLVOL
AL 2AL 1
Wireless Charge
8
9
10
11
12
13
14
15
16
Morning Call
iLuv
PM
SHAKER
AL 1
SHAKER
BUZZER
RADIO
BUZZER
RADIO
AL 2
To activate/de-activate your alarms, press the
corresponding [AL 1] and/or [AL 2].
When the / Buzzer or / Radio or
/ Shaker indicator light is showing, the
alarm is set to ON and will activate at the
scheduled time. If the indicator light is not
showing, the alarm is set to OFF.
Please remember to Activate/De-activate the
alarm accordingly. If you turn o the alarm,
you must enable it again for the alarm system
to be activated.
ENABLE/DISABLE ALARM
5
6
11 15
10 14
12 16
10

3 4 5 6 71 2
SNOOZE
SLEEP/DIMMERTIME HOUR MIN
PRESET
RADIO/AL OFF
TUN TUN VOLVOL
AL 2AL 1
Wireless Charge
8
9
10
11
12
13
14
15
16
Morning Call
iLuv
PM
SHAKER
AL 1
SHAKER
BUZZER
RADIO
BUZZER
RADIO
AL 2
When the alarm is activated, the corresponding
/ / Alarm 1 or / / Alarm 2
indicator will
blink on the display.
Press [SNOOZE] to temporarily de-activate the
alarm. The snooze function will extend your alarm in
increments of 9 minutes.
The corresponding / / Alarm 1 or
/ / Alarm 2 indicator will blink on the display
during the snooze period.
1
To stop the alarm completely, press [ ]. This will
de-activate the alarm until the next scheduled alarm.
3
2
ALARM SNOOZE/SHUTOFF
7
10 11 12
10 11 12
14 15 16
14 15 16
4
11

3 4 5 6 71 2
SNOOZE
SLEEP/DIMMERTIME HOUR MIN
PRESET
RADIO/AL OFF
TUN TUN VOLVOL
AL 2AL 1
Wireless Charge
8
9
10
11
12
13
14
15
16
Morning Call
iLuv
PM
SHAKER
AL 1
SHAKER
BUZZER
RADIO
BUZZER
RADIO
AL 2
The Sleep Timer Function allows you to set-up
a timer for the radio to turn-o automatically.
Press [SLEEP/DIMMER/SNOOZE] as needed to
cycle to the desired timer limit (in minutes):
10, 20, 30, 40, 50, 60, 70, 80, 90 and 00(o).
To activate the
SLEEP TIMER FUNCTION
,
press [ /RADIO/AL OFF] to turn on the radio.
2
After your selection, wait 3 seconds to allow the
sleep timer function to be set.
3
1
7
4
SLEEP TIMER FUNCTION
12

3 4 5 6 71 2
SNOOZE
SLEEP/DIMMERTIME HOUR MIN
PRESET
RADIO/AL OFF
TUN TUN VOLVOL
AL 2AL 1
Wireless Charge
8
9
10
11
12
13
14
15
16
Morning Call
iLuv
PM
SHAKER
AL 1
SHAKER
BUZZER
RADIO
BUZZER
RADIO
AL 2
4When Set-up is complete, the radio will shut o
automatically depending on your selected timer
setting.
5To check the remaining amount of time left,
simply
press
[SLEEP/DIMMER/SNOOZE]
.
6To turn o the SLEEP TIMER FUNCTION,
press
[SLEEP/DIMMER/SNOOZE]
until 00 is
displayed. The timer will then be set to "OFF"
4
4
13

3 4 5 6 71 2
SNOOZE
SLEEP/DIMMERTIME HOUR MIN
PRESET
RADIO/AL OFF
TUN TUN VOLVOL
AL 2AL 1
Wireless Charge
8
9
10
11
12
13
14
15
16
Morning Call
iLuv
PM
SHAKER
AL 1
SHAKER
BUZZER
RADIO
BUZZER
RADIO
AL 2
Press [ /RADIO /AL OFF] to turn the radio on.
To adjust the radio frequency, press [TUN-] and
[TUN+] respectively.
LISTENING TO YOUR FM RADIO
Unravel and extend the antenna to improve the FM
radio signal reception.
1
2
3
4Press & HOLD [TUN-] or [TUN+] to automatically
tune to the next available FM station.
5To turn the FM radio o, press [ /RADIO /AL OFF].
7
7
2
3
2 3
FM RADIO
14

3 4 5 6 71 2
SNOOZE
SLEEP/DIMMERTIME HOUR MIN
PRESET
RADIO/AL OFF
TUN TUN VOLVOL
AL 2AL 1
Wireless Charge
8
9
10
11
12
13
14
15
16
Morning Call
iLuv
PM
SHAKER
AL 1
SHAKER
BUZZER
RADIO
BUZZER
RADIO
AL 2
STORING PRESET RADIO STATIONS
2Tune to your desired FM Station by pressing or
holding [TUN-] or [TUN+].
3Press & HOLD [PRESET] until the Preset Mode
appears.
5To program the station to its preset, press
[PRESET] to complete the process.
1Press [ /RADIO /AL OFF] to turn on the radio.
7
2
1
1
3
4Toggle through the preset numbers (P01-P10) by
pressing [TUN-] or [TUN+].
2 3
15

3 4 5 6 71 2
SNOOZE
SLEEP/DIMMERTIME HOUR MIN
PRESET
RADIO/AL OFF
TUN TUN VOLVOL
AL 2AL 1
Wireless Charge
8
9
10
11
12
13
14
15
16
Morning Call
iLuv
PM
SHAKER
AL 1
SHAKER
BUZZER
RADIO
BUZZER
RADIO
AL 2
LISTENING TO YOUR PRESET STATIONS
1Press [ /RADIO /AL OFF] to turn on the radio.
2
Press [PRESET]
repeatedly until your desired
preset station appears.
(P01 > P02 > P03 > .... > P10)
7
1
Preset option is only available when the Radio
is on.
16

9
10
11
12
13
14
15
16
Morning Call
iLuv
PM
SHAKER
AL 1
SHAKER
BUZZER
RADIO
BUZZER
RADIO
AL 2
3 4 5 6 71 2
SNOOZE
SLEEP/DIMMERTIME HOUR MIN
PRESET
RADIO/AL OFF
TUN TUN VOLVOL
AL 2AL 1
Wireless Charge
8
Press [SLEEP/DIMMER/SNOOZE] to change the
brightness level of the display: (Low > High > O)
1
Default setting of the dimmer level is “Low”
2
4
DISPLAY DIMMER
To adjust the brightness, Alarm clock must be
on Stand-by Mode.
17

2019 2117 18
USB CHARGINGDC 5V/3ASHAKER
USB CHARGING PORT
1
To charge other devices such as a smartphone
or tablet, connect one end of the USB charging
cable (not included) to the USB charging
port on the back of the main unit.
3
The USB Charging port is compatible to most
smartphones, tablets, portable speakers,
wireless headphones, wearables, etc.
2
The TimeShaker 5Q Wow cannot access the
content of the connected device.
18
18

3 4 5 6 71 2
SNOOZE
SLEEP/DIMMERTIME HOUR MIN
PRESET
RADIO/AL OFF
TUN TUN VOLVOL
AL 2AL 1
Wireless Charge
8
Place your Qi enabled smartphone on the center of
the
Wireless charging pad
.
For best connectivity, align your phone with the
alarm clock.
Compatible Products for Wireless Charging:
iPhone X/Xs, iPhone Xs Max, iPhone XR, iPhone 8/8 Plus,
Samsung Galaxy Note 8/5, Galaxy S9/S9+/S8/S8+, S7/S7
Edge, S6 Edge+, S6/S6 Edge, LG V30, Nexus 7/6/5, other
Qi enabled smartphones/tablets and accessories.
USING QI WIRELESS CHARGING
8
IT IS SUGGESTED TO CHARGE YOUR PHONE WITH A WIRED CABLE INSTEAD OF A WIRELESS CHARGER DURING
PHONE SOFTWARE UPDATE. OTHERWISE, CHARGE YOUR PHONE FULLY BEFORE THE PHONE SOFTWARE UPDATE.
PMA wireless charging system is not supported.
19

9
10
11
12
13
14
15
16
Morning Call
iLuv
PM
SHAKER
AL 1
SHAKER
BUZZER
RADIO
BUZZER
RADIO
AL 2
3 4 5 6 71 2
SNOOZE
SLEEP/DIMMERTIME HOUR MIN
PRESET
RADIO/AL OFF
TUN TUN VOLVOL
AL 2AL 1
Wireless Charge
8
- Check if your device supports Qi wireless charging
- Place mobile device in center of the Wireless
charging pad
- Remove any protective cases containing magnets,
metal, or materials thicker than 0.12" (3mm)
Wireless Charging Indicator light is displayed on
the right top corner of the product display.
Refer to the Light status indicators below:
WIRELESS CHARGE INDICATOR
13
8
O
: Stand-by Mode
1
Solid Blue
: Charging
Blinking Red
: Abnormal
*If the charging indicator blinks red:
2
3
20
Other manuals for TimeShaker 5Q Wow
1
Table of contents
Other Iluv Alarm Clock manuals

Iluv
Iluv iVM153 User manual

Iluv
Iluv TimeShaker Super User manual

Iluv
Iluv IMM153 User manual

Iluv
Iluv TimeShaker Boom User manual

Iluv
Iluv TimeShaker WOW User manual

Iluv
Iluv TimeShaker WOW User manual

Iluv
Iluv TimeShaker Boom Operator's manual

Iluv
Iluv iMM178 User manual

Iluv
Iluv Morning Call 3 User manual

Iluv
Iluv IMM153 User manual