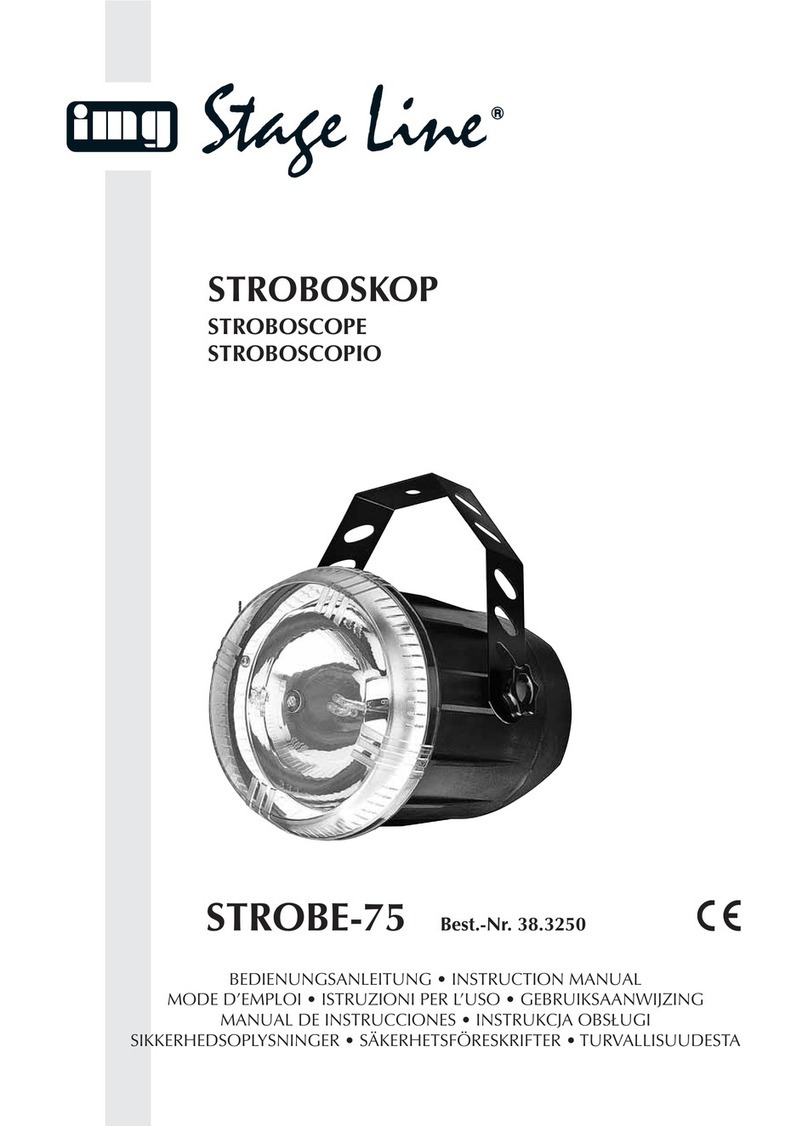
IMG STAGE LINE STROBE-180 User manual

Stroboskop
1Einsatzmöglichkeiten
Dieses Stroboskop ist für eine effektvolle Beleuch-
tung auf der Bühne, in der Diskothek, im Partykeller
oder in einem Schaufenster geeignet. Die Blitzfre-
quenz lässt sich zwischen ca. 2 und 10 Blitzen pro
Sekunde einstellen.
2Hinweise für den sicheren Gebrauch
Dieses Gerät entspricht der Richtlinie für elektro-
magnetische Verträglichkeit 89/336/EWG und der
Niederspannungsrichtlinie 73/23/EWG.
BeachtenSieauchunbedingtdiefolgendenPunkte:
●Das Gerät ist nur zur Verwendung im Innenbe-
reich geeignet. Schützen Sie es vor Tropf- und
Spritzwasser, hoher Luftfeuchtigkeit und Hitze
(zulässiger Einsatztemperaturbereich 0–40°C).
●Die in dem Gerät entstehende Wärme muss durch
Luftzirkulation abgegeben werden. Decken Sie
darumdie LüftungsschlitzedesGehäusesnichtab.
●Stecken Sie nichts durch die Lüftungsschlitze!
Dabei kann es zu einem elektrischen Schlag
kommen.
Achtung! Das Gerät wird mit lebensgefährlicher
Netzspannung (230V~) versorgt.
Nehmen Sie deshalb niemals selbst
Eingriffe im Gerät vor. Durch unsach-
gemäßes Vorgehen besteht die
Gefahr eines elektrischen Schlages.
Außerdem erlischt beim Öffnen des
Gerätes jeglicher Garantieanspruch.
●Nehmen Sie das Gerät nicht in Betrieb bzw. zie-
hen Sie sofort den Netzstecker aus der Steck-
dose, wenn:
1. sichtbareSchäden am Gerät oderan der Netz-
anschlussleitung vorhanden sind,
2. nach einem Sturz oder Ähnlichem der Ver-
dacht auf einen Defekt besteht,
3. Funktionsstörungen auftreten.
Geben Sie das Gerät in jedem Fall zur Reparatur
in eine Fachwerkstatt.
●Eine defekte Blitzröhre oder eine beschädigte
Netzanschlussleitung darf nur durch den Herstel-
ler oder eine autorisierte Fachwerkstatt ersetzt
werden, weil dazu das Gerät geöffnet werden
muss und Spezialwerkzeug benötigt wird.
●Ziehen Sie den Netzstecker nie an der Zuleitung
aus der Steckdose, fassen Sie immer am Stecker
an.
●Verwenden Sie zum Reinigen nur ein trockenes,
weiches Tuch, niemals Wasser oder Chemika-
lien.
●Wird das Gerät zweckentfremdet, falsch bedient
oder nicht fachgerecht repariert, kann keine Haf-
tung für daraus resultierende Sach- oder Perso-
nenschäden und keine Garantie für das Gerät
übernommen werden.
●Soll das Gerät endgültig aus dem Betrieb genom-
men werden, übergeben Sie es zur umweltge-
rechten Entsorgung einem örtlichen Recycling-
betrieb.
3Inbetriebnahme
1) Das Stroboskop mit dem Montagebügel an
geeigneter Stelle festschrauben. Für eine bes-
sere Handhabung zuerst den Montagebügel
abschrauben.
2) Nach der Montage den Netzstecker in eine
Steckdosestecken(230V~/50Hz).Damitist das
Stroboskop eingeschaltet. Für einen besseren
Bedienkomfort das Gerät an eine Steckdose
anschließen, die sich über einen Lichtschalter
ein- und ausschalten lässt.
3) Mit dem Drehregler RATE auf der Geräterück-
seite die Blitzfrequenz einstellen. Das Gerät
kann ca. 2 bis 10 Blitze pro Sekunde abgeben.
Hinweis: Ist der Regler RATE nach links in Rich-
tung SLOW gedreht, gibt das Stroboskop keine
Lichtblitze ab.
4) Zum Ausschalten den Netzstecker aus der
Steckdose ziehen bzw. den zugehörigen Licht-
schalter der Steckdose ausschalten.
4Technische Daten
Blitzfrequenz: . . . . . ca. 2–10Hz
Stromversorgung: . 230V~/50Hz/25VA
Abmessungen
(B x H x T): . . . . . . 95 x 50 x 132mm
Gewicht: . . . . . . . . . 285g
Laut Angaben des Herstellers.
Änderungen vorbehalten.
Stroboscope
1Applications
This stroboscope is suitable for an effective illumi-
nation on stage, in the discothèque, for private par-
ties or in a shop window. The flash rate can be ad-
justedbetweenapprox. 2and10flashesper second.
2Safety Notes
This appliance corresponds to the directive for
electromagnetic compatibility 89/336/EEC and the
low voltage directive 73/23/EEC.
The following points must be observed:
●The unit is suitable for indoor use only. Protect it
against dripping water and splash water, high air
humidity, and heat (admissible ambient tempera-
ture range 0–40°C).
●The heat generated in the unit has to be dissipat-
edbyaircirculation.Therefore, theairventsofthe
housing must not be covered.
●Do not insert anything into the air vents! This
could result in an electric shock.
●Do not take the unit into operation or immediately
take the mains plug out of the mains socket if:
1. there is visible damage at the unit or mains
cable,
Attention! This unit uses dangerous mains volt-
age (230V~). To prevent a shock
hazard do not open the cabinet.
Leave servicing to authorized, skilled
personnel only. Furthermore, any
guarantee claim expires if the unit
has been opened.
2. a defect might have occurred after a drop or
similar accident,
3. there are malfunctions.
The unit must in any case be repaired by author-
ized, skilled personnel.
●Adefective flashtube or a damaged mains cable
must only be replaced by the manufacturer or au-
thorizedpersonnelasforthispurposetheunit has
to be opened and special tool is required.
●Never pull the mains plug out of the mains socket
by means of the mains cable.
●For cleaning only use a dry, soft cloth, by no
means chemicals or water.
●If the unit is used for purposes other than orig-
inally intended, if it is not correctly operated, or
not repaired in an expert way, no guarantee
claims for the unit or liability for any resulting per-
sonal damage or material damage will be accept-
ed.
●If the unit is to be put out of operation definitively,
take it to a local recycling plant for disposal which
is not harmful to the environment.
●Important for U.K. Customers!
The wires in this mains lead are coloured in
accordance with the following code:
blue = neutral
brown = live
As the colours of the wires in the mains lead of
this appliance may not correspond with the co-
loured markings identifying the terminals in your
plug, proceed as follows:
1. The wire which is coloured blue must be con-
nected to the terminal in the plug which is
marked with the letter Nor coloured black.
2. The wire which is coloured brown must be
connected to the terminal which is marked with
the letter Lor coloured red.
3Setting into Operation
1) Screw the stroboscope with the mounting
bracket at a suitable place. For better handling
first screw off the mounting bracket.
2) Aftermountingconnectthemainsplugtoamains
socket (230V~/ 50Hz). Thus, the stroboscope
is switched on. For more convenient operation
connect the unit to a socket which can be
switched on and off via a light switch.
3) Adjust the flash rate with the rotary control RATE
on the rear side of the unit. The unit can deliver
approx. 2 to 10 flashes per second.
Note: If the control RATE is turned to the left in
direction SLOW, the stroboscope does not deliv-
er any flashes.
4) To switch off disconnect the mains plug from the
mainssocket or switch off the corresponding light
switch of the mains socket.
4Specifications
Flash rate: . . . . . . . approx. 2–10Hz
Power supply: . . . . 230V~/50Hz/25VA
Dimensions
(W x H x D): . . . . . . 95 x 50 x 132mm
Weight: . . . . . . . . . 285g
According to the manufacturer.
Subject to change.
STROBE-180
Best.-Nr. 38.1270
wwwwww..iimmggssttaaggeelliinnee..ccoomm
Copyright©by MONACOR INTERNATIONAL GmbH & Co. KG, Bremen, Germany. All rights reserved. A-0077.99.02.08.2003
®
GB
D A CH

Stroboscope
1Possibilités d’utilisation
Ce stroboscope est particulièrement bien adapté à
un éclairage sur scène, en discothèque, dans des
soirées privées ou pour celui d’une vitrine. La fré-
quencedeséclairsserègleentre2et10éclairsenv.
par seconde.
2Conseils d’utilisation
Le STROBE-180 répond aux normes édictées dans
les directives européennes 89/336/CEE sur la
compatibilité électromagnétique et 73/23/CEE sur
les appareils à faible tension.
Respectez scrupuleusement les points suivants:
●L’appareil n’est conçu que pour une utilisation en
intérieur. Protégez-le de tout type de projections
d’eau, des éclaboussures, d’une humidité élevée
et de la chaleur (plage de température de fonc-
tionnement autorisée : 0–40°C).
●La chaleur dégagée dans l’appareil doit être éva-
cuée par une circulation d’air correcte ; n’obturez
jamais les ouïes de ventilation du boîtier.
Attention ! L’appareil est alimenté par une ten-
sion en 230V~. Ne touchez jamais
l’intérieur de l’appareil car, en cas de
mauvaise manipulation, vous pour-
riez subir une décharge électrique
mortelle. En outre, l’ouverture de
l’appareil rend tout droit à la garantie
caduque.
●Ne faites rien tomber par les ouïes de ventilation,
vous pourrez subir une décharge électrique.
●Ne faites pas fonctionner l’appareil et débran-
chez-le immédiatement dans les cas suivants :
1. L’appareil ou le cordon secteur présente des
dommages visibles.
2. Après une chute ou accident similaire, vous
avez un doute sur l’état de l’appareil.
3. Des défaillances apparaissent.
Dans tous les cas, les dommages doivent être
réparés par un technicien spécialisé.
●Tout cordon secteur endommagé ou tout tube
d’éclair défectueux ne doit être remplacé que par
le constructeur ou un technicien habilité parce
que pour cet effet l’appareil doit être ouvert et des
outillages spéciaux sont nécessaires.
●Ne retirez jamais le cordon secteur de la prise en
tirant dessus.
●Pour nettoyer l’appareil, utilisez uniquement un
chiffon sec et doux, en aucun cas de produits chi-
miques ou d’eau.
●Nous déclinons toute responsabilité en cas de
dommages corporels ou matériels résultants si
l’appareil est utilisé dans un but autre que celui
pour lequel il a été conçu, s’il n’est pas correcte-
ment utilisé, s’il n’est pas réparé par une per-
sonne habilitée ; de même, la garantie devien-
drait caduque.
●Lorsque l’appareil est définitivement retiré du
marché, vous devez le déposer dans une usine
de recyclage de proximité pour contribuer à son
élimination non polluante.
3Mise en service
1) Fixez le stroboscope à l’endroit souhaité avec
l’étrier de montage. Nous vous conseillons, pour
un meilleur maniement, de dévisser tout d’abord
l’étrier, de fixer l’appareil puis de revisser l’étrier.
2) Une fois le montage effectué, reliez la prise au
secteur 230V~/50Hz. Le stroboscope est alors
allumé. Pour un meilleur confort d’utilisation,
reliez l’appareil à une prise secteur fonctionnant
avec un commutateur d’éclairage marche/arrêt.
3) Avec le potentiomètre rotatif RATE de la face
arrière, réglez la fréquence des éclairs ; elle va
de 2 à 10 éclairs env. par seconde.
Remarque : si le potentiomètre RATE est tourné
vers la gauche dans le sens SLOW, le strobos-
cope n’émet pas d’éclairs.
4) Pour arrêter l’appareil, retirez la prise du secteur
ou mettez le commutateur d’éclairage sur arrêt.
4Caractéristiques techniques
Fréquence
des éclairs : . . . . . . 2–10Hz environ
Alimentation : . . . . . 230V~/50Hz/25VA
Dimensions
(L x H x P) : . . . . . . 95 x 50 x 132mm
Poids : . . . . . . . . . . 285g
D’après les données du constructeur.
Tout droit de modification réservé.
Stroboscopio
1Possibilità d’impiego
Il presente stroboscopio è adatto per l’illuminazione
ad effetto sul palcoscenico, in discoteca ma anche
per il party privato. La frequenza dei lampi può
essere impostata fra 2 e 10 lampi al secondo.
2Avvertenze di sicurezza
Quest'apparecchio corrisponde alle direttive CE
89/336/CEE sulla compatibilità elettromagnetica e
73/23/CEE per apparecchi a bassa tensione.
Sidevono osservare assolutamente iseguenti punti:
●Lo strumento è previsto solo per l’uso all’interno
di locali. Proteggerlo dall’acqua gocciolante e
dagli spruzzi d’acqua, da alta umidità dell’aria e
dal calore (temperatura d’impiego ammessa fra 0
e 40°C).
●Dev'essere garantita la libera circolazione dell'a-
ria per dissipare il calore che viene prodotto all'in-
terno dell'apparecchio. Non coprire in nessun
modo le fessure di aerazione.
Attenzione! Quest’apparecchio funziona con
tensione di rete di 230V~. Non
intervenire mai al suo interno; la
manipolazione scorretta può pro-
vocare delle scariche pericolose.
Se l'apparecchio viene aperto,
cessa ogni diritto di garanzia.
●Non inserire oggetti nelle fessure di aerazione!
Altrimenti si potrebbe provocare una scarica
elettrica.
●Non mettere in funzione l'apparecchio o staccare
subito la spina rete se:
1. l'apparecchio o il cavo rete presentano dei
danni visibili,
2. dopo una caduta o dopo eventi simili sussiste
il sospetto di un difetto,
3. l'apparecchio non funziona correttamente.
Per la riparazione rivolgersi sempre ad una offi-
cina competente.
●Un tubo lampo o un cavo rete danneggiato deve
essere riparato solo dal costruttore o da un labo-
ratorio specializzato autorizzato, in quanto è
necessarioaprirelostrumento e l’impiego di uten-
sili speciali.
●Staccare il cavo rete afferrando la spina, senza
tirare il cavo.
●Per la pulizia usare solo un panno morbido,
asciutto; non impiegare in nessun caso prodotti
chimici o acqua.
●Nel caso d’uso improprio, d’impiego scorretto o di
riparazione non a regola d’arte non si assume
nessuna responsabilità per eventuali danni a per-
sone o a cose e cessa ogni diritto di garanzia.
●Se si desidera eliminare l’apparecchio definitiva-
mente, consegnarlo per lo smaltimento ad un’isti-
tuzione locale per il riciclaggio.
3Messa in funzione
1) Avvitare lo stroboscopio in un punto adatto ser-
vendosi della staffa di montaggio. Per lavorare
meglio conviene svitare prima la staffa.
2) Dopo il montaggio inserire la spina nella presa di
rete (230V~/50Hz). Lo stroboscopio è così
acceso. Per maggiore comodità conviene colle-
gare lo strumento con una presa comandata da
un interruttore.
3) Conla manopola RATE sul retrosi imposta la fre-
quenza dei lampi. Lo strumento può emettere da
2 a 20 lampi al secondo.
N.B.: Se il regolatore RATE è girato a sinistra in
direzione SLOW, lo stroboscopio non emette
nessun lampo.
4) Per spegnere lo strumento staccare la spina
dalla presa di rete oppure azionare l’interruttore.
4Dati tecnici
Frequenza lampi: . . ca. 2–10Hz
Alimentazione: . . . . 230V~/50Hz/25VA
Dimensioni
(L x H x P): . . . . . . . 95 x 50 x 132mm
Peso: . . . . . . . . . . . 285g
Dati forniti dal produttore.
Con riserva di modifiche tecniche.
STROBE-180
Best.-Nr. 38.1270
wwwwww..iimmggssttaaggeelliinnee..ccoomm
Copyright©by MONACOR INTERNATIONAL GmbH & Co. KG, Bremen, Germany. All rights reserved. A-0077.99.02.08.2003
®
I
F B CH
This manual suits for next models
1
Other IMG STAGE LINE Test Equipment manuals
