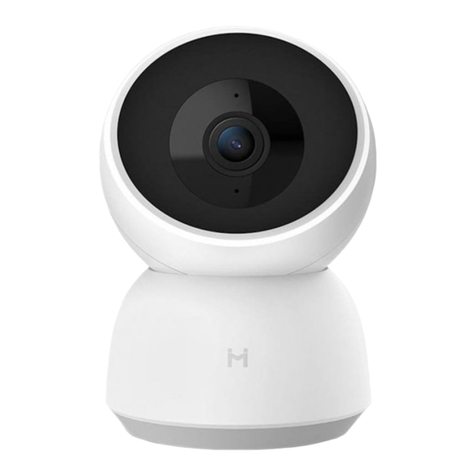
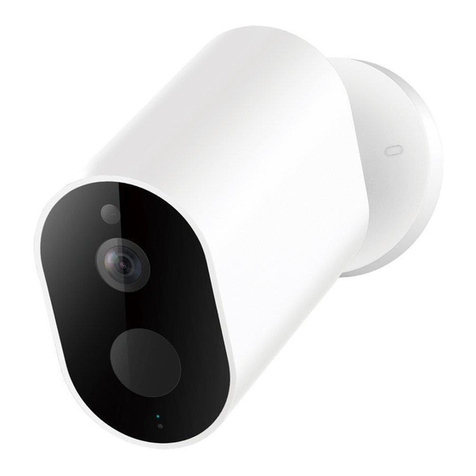
imilab A1 User manual

Read this manual carefully before use, and retain it for future reference.
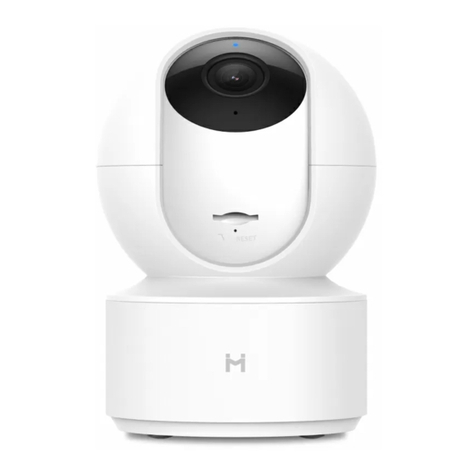
IMILAB Home Security Camera A1
User Manual
EN DE ES FRIT RU CN

CONTENTS
English 01-13
14-26Deutsche
27-39Español
40-52Italiano
53-65Français
66-78Pусский
79-90Chinese

Product Overview
Package Contents: IMILAB Home Security Camera A1, power cable , wall mounting
accessories pack , user manual
MicroSD Slot
(Can be
revealed by
pushing the
lens upward)
Lens
Status
indicator
Loudspeaker
Micro-USB
Charging port
MIC
Reset Button
Front View
Rear View
EN-01

IMILAB Home Security Camera A1 can be placed on a number of horizontal surfaces,
such as a writing desk, dining table, and coffee table. It can also be mounted on the
wall.
Mounted IMILAB Home Security Camera A1 on a Wall
1. Drill two holes on the wall by using the base of the IMILAB Home Security Camera A1
as a template. It is recommended that you mark the locations of the hole with a pencil
before drilling. The diameter of each hole is approximately 6 mm, and the depth is
approximately 25 mm.
2. Insert the two plastic anchors into the holes on
the wall.
Installation
EN-02

3. Make sure to position the base unit so that the
arrow is pointing up. Secure the base unit in place
by tightening the screws into the plastic anchors.
4. Matching the grooves on the bottom of the
camera unit with the raised area on the base unit.
Press down until the two surfaces are flush, then
turn the camera unit in either direction to lock it in
position.
Warning:
To avoid any damages or injuries, the device must be securely fastened to the
Ceiling/wall as specified in the installation instructions.
When mounting the security camera on a wall:
Please note that the wall must be able to support at least triple the product's total
weight.
EN-03

1. If the indicator light is flashing orange, that means the device is activated successfully.
If you do not see a flashing orange light, please press and hold the Reset button to
restart the device to enter pairing mode.
2. Once the IMILAB Home Security Camera A1 is turned on, please do not attempt to
rotate its head by force. If the camera position is incorrect, adjustments can be made
through the app.
Product Instructions
Turning the Device On
IMILAB Home Security Camera A1 will automatically activate once the power cable is
inserted into the Micro-USB charging port.
EN-04

MicroSD
Indicator Light
Steady blue on: connected/device status is normal
Flashing blue: network error
Flashing orange rapidly: waiting for connection
Flashing orange slowly: system upgrade in progress
Installing a MicroSD Card
Make sure that the power to IMILAB Home Security Camera A1 is already disconnected.
Adjust the camera lens upward until the MicroSD slot is revealed, then insert the MicroSD
card into the slot (the side with contact points must be facing down).
Note:
Please turn off the IMILAB Home Security Camera A1‘s power supply before inserting or
removing the MicroSD card. Please use a genuine Micro SD card manufactured by a
qualified supplier, with a reading/writing speed of no less than U1/Class 10. (Maximum
support capacity is 256GB)
Restore Factory Settings
Press and hold the Reset button to restore your device to factory settings.
Data stored on the MicroSD card is not deleted.
EN-05

Install Mi Home app
Connect with Mi Home/Xiaomi Home App. This product works with Mi Home/Xiaomi
Home app. Control your device with Mi Home/Xiaomi Home app.
Scan the QR code to download and install the app. You will be directed to the connection
setup page if the app is installed already. Or search “Mi Home/Xiaomi Home” in the
app store to download and install it. Open Mi Home/Xiaomi Home app, tap “+” on the
upper right, and then follow prompts to add your device.
The app is referred to as Xiaomi Home app in Europe (except for Russia). The name of
the app displayed on your device should be taken as the default.
Note:
The version of the app might have been updated, please follow the instructions
based on the current app version.
EN-06

Real-time Surveillance
Launch the Mi Home/Xiaomi Home app and select a IMILAB Home Security Camera A1
that is already connected to monitor the surroundings in real-time. The camera’ s
control interface allows you to adjust the sharpness of the image,as well as to change
the device’ s vertical and horizontal viewing angles.
Additional features such as screen capture or record and remote communications can
also be performed.
Note:
The diagram is for reference only. Actual displays will vary based on different versions of the
Mi Home/Xiaomi Home app and your smartphone model.
HD
EN-07

Note:
The diagram is for reference only. Actual displays will vary based on different versions
of the Mi Home/Xiaomi Home app and your smartphone model.
Supporting Infrared and Image-intensified Night Vision
The camera will automatically switch to night-vision mode based on changing light
conditions. The 6 built-in infrared night vision lights increase the nightvision distance
up to 10 meters, so the camera can clearly capture video in the dark.
Infrared night vision mode sample
EN-08

Playback
IMILAB Home Security Camera A1’s playback feature is only available after installing a
compatible MicroSD card. Once a MicroSD card has been installed and the security
camera is turned on, videos will be recorded automatically. After entering the user
interface of the Playback feature, simply slide the bar on the timeline to select the time
period you wish to view.
Note:
The diagram is for reference only. Actual displays will vary based on different versions
of the Mi Home/Xiaomi Home app and your smartphone model.
HD
EN-09

Note:
The diagram is for reference only. Actual displays will vary based on different versions
of the Mi Home/Xiaomi Home app and your smartphone model.
Automatic Surveillance
Home surveillance can be enabled or disabled in the Mi Home/Xiaomi Home app.
Available options include 24-hour, daytime, and nightime monitoring. You can also
create your own schedule and set the desired camera angle.
This product is able to detect movements within its field of view. Once movements
are detected, a video is recorded and you will receive a notification.
EN-10

Note:
The diagram is for reference only. Actual displays will vary based on different versions
of the Mi Home/Xiaomi Home app and your smartphone model.
Shared Remote Viewing
Through the IMILAB Home Security Camera A1 control interface in the Mi Home app,
you can set your security camera as a shared device under the general seittngs menu,
and invite your friends to view the camera remotely.
Your friends will be required to download the Mi Home/Xiaomi Home app and log in
with his/her Xiaomi account.
Share with Mi Account
Share with friends
Share with family
Share...
4G
10:19
4G
10:15
General seings
Home surveillance
Manage storage
Automation
Device sharing
Help
EN-11

This device complies with Part 15 of the FCC Rules. Operation is subject to the following
two conditions:
(1) This device may not cause harmful interference, and
(2) This device must accept any interference received, including interference that may
cause undesired operation.
Attention that changes or modification not expressly approved by the party responsible
for compliance could void the user’s authority to operate the equipment.
Note: This product has been tested and found to comply with the limits for a Class B
digital device, pursuant to Part 15 of the FCC Rules. These limits are designed to provide
reasonable protection against harmful interference in a residential installation. This
product generates, uses, and can radiate radio frequency energy and, if not installed
and used in accordance with the instructions, may cause harmful interference to radio
communications. However, there is no guarantee that interference will not occur in a
particular installation. If this product does cause harmful interference to radio or
television reception, which can be determined by turning the equipment off and on, the
user is encouraged to try to correct the interference by one or more of the following
measures:
—Reorient or relocate the receiving antenna.
—Increase the separation between the equipment and receiver.
FCC Statement
Specifications
Name:
IMILAB Home Security Camera A1
Model: CMSXJ19E
Net Weight: 211g
Lens Angle: 110°
Resolution: 2304 x 1296
Power input: 5 V 2 A
Expandable Memory: MicroSD card
Dimensions: 112mm x 76mm x 76mm
Operating Temperature: -10 °C to 50 °C
Compatible With: Android 4.4 or iOS 9.0 or later
Wireless Connectivity: Wi-Fi IEEE 802.11 b/g/n 2.4GHz
EN-12

Hereby, Shanghai Imilab Technology Co., Ltd. declares that the radio equipment type
IMILAB Home Security Camera A1 is in compliance with Directive 2014/53/EU.
Correct Disposal of this product. This marking indicates that product should
not be disposal with other household wastes throughout the EU. To prevent
possible harm to the environment or human health from uncontrolled waste
disposal, recycle it responsibly to promote the sustainable reuse sustainable
reuse of material resources. To return your used device, please use the return and
collection systems or contact the retailer where the product was purchased. They can
take this product for environment safe recycling.
WEEE Disposal and Recycling Information
—Connect the equipment into an outlet on a circuit different from that to which the
receiver is connected.
—Consult the dealer or an experienced radio/TV technician for help.
FCC ID:2APA9-IPC019E
EN-13

Produktübersicht
Lieferumfang: IMILAB Heimüberwachungskamera A1, Netzkabel,
Wandmontage-Zubehör, Bedienungsanleitung
MicroSD-Schlitz
(Es kann durchs
Aufschieben des
Objektivs sichtbar
gemacht werden)
Objektiv
Statusanzeige
Lautsprecher
Micro-USB
-Ladeanschluss
MIC
Rücksetzungstaste
Vorderansicht
Rückansicht
DE-14

Die IMILAB Heimüberwachungskamera A1 kann auf verschiedenen horizontalen
Flächen, wie z.B. Schreibtisch, Esstisch und Couchtisch, aufgestellt werden. Es kann auch
an der Wand montiert werden.
An der Wand montierte IMILAB Heimüberwachungskamera A1
1. Bohren Sie zwei Löcher in die Wand, indem Sie die Bodenplatte der IMILAB
Heimüberwachungskamera A1 als Schablone verwenden. Es wird empfohlen, vor dem
Bohren die Stellen der Bohrung mit einem Bleistift zu markieren. Der Durchmesser eines
jeden Loches beträgt ca. 6mm und die Tiefe beträgt 25mm.
2. Führen Sie die zwei Kunststoffanker in die
Bohrungen an der Wand ein.
Installation
DE-15

3. Stellen Sie sicher, dass die Basiseinheit so
positioniert ist, dass der Pfeil nach oben zeigt.
Befestigen Sie die Basiseinheit, indem Sie die
Schrauben in den Kunststoffankern festziehen.
4. Bringen Sie die Rillen an der Unterseite der
Kamera mit dem erhöhten Bereich der Dichtung
in Übereinstimmung. Drücken Sie es nach unten,
bis die beiden Flächen bündig sind, und drehen
Sie dann die Kameraeinheit in eine der beiden
Richtungen, um sie zu arretieren.
Warnung:
Um Beschädigungen oder Verletzungen zu vermeiden, muss das Gerät gemäß den
Anweisungen in der Installationsanleitung sicher am Decke/Wand befestigt werden.
Für die Montage der Sicherheitskamera an einer Wand gilt:
Wand muss in der Lage sein, mindestens das Dreifache des Gesamtgewichts des
Produkts zu tragen.
DE-16

1. Wenn die Kontrollleuchte orange blinkt, bedeutet dies, dass das Gerät erfolgreich
aktiviert wurde. Wenn Sie kein blinkendes orangefarbenes Licht sehen, drücken und
halten Sie bitte die Reset-Taste, um das Gerät neu zu starten und in den
Kopplungsmodus zu gelangen.
2. Sobald die IMILAB Heimüberwachungskamera A1 eingeschaltet ist, versuchen Sie
bitte nicht mehr, den Kopf mit Gewalt zu drehen. Wenn die Kameraposition nicht
korrekt ist, können Einstellungen über die Applikation vorgenommen werden.
Produkteinführung
Einschalten des Geräts
Die IMILAB Heimüberwachungskamera A1 wird automatisch aktiviert, sobald das
Stromkabel in den Micro-USB-Ladeanschluss gesteckt wird.
DE-17

MicroSD
Anzeigelampe
Konstantes blaues Licht: angeschlossen/Der Gerätestatus ist normal
Blaues Licht blinkt: Netzwerkfehler
Orangenes Licht blinkt schnell: Auf Anschließen wartet
Orangenes Licht blinkt langsam: Systemaktualisierung im Gang
Eine MicroSD-Karte installieren
Stellen Sie sicher, dass die Stromversorgung der IMILAB Heimüberwachungskamera A1
bereits unterbrochen ist. Richten Sie das Kameraobjektiv nach oben aus, bis der
MicroSD-Steckplatz sichtbar ist. Setzen Sie dann die MicroSD-Karte in den Steckplatz ein
(die Seite mit den Kontaktpunkten muss nach unten zeigen).
Hinweis:
Bitte schalten Sie die Stromversorgung der IMILAB Heimüberwachungskamera A1 aus,
bevor Sie die MicroSD-Karte einsetzen oder entfernen. Bitte verwenden Sie eine
Original-Micro-SD-Karte von einem qualifizierten Lieferanten mit einer
Lese-/Schreibgeschwindigkeit von nicht weniger als U1/Klasse 10.
(Die maximale Unterstützungskapazität beträgt 256 GB)
DE-18
Other manuals for A1
1
Table of contents
Languages:
Other imilab Security Camera manuals
