Indexa AN 02 LED User manual

Diese Bedienungsanleitung enthält wichtige Hinweise zur Inbetriebnahme und Hand-
habung. Heben Sie deshalb diese Bedienungsanleitung zum Nachlesen auf.Lesen Sie
vor der ersten Benutzung die Gebrauchsanweisung! Überprüfen Sie das Gerät auf
Beschädigung, bei Beschädigung nicht in Betrieb nehmen!
Sicherheitshinweise
• Gerät ist nur in trockenen Innenräumen zu verwenden.
Nicht in den Regen oder ins Wasser stellen.
• Verwenden Sie nur eine VDE-gerechte Steckdose.
• Das Gerät muss immer voll eingesteckt werden.
• Berühren Sie das Gerät nie mit nassen Händen.
• Gerät nie abdecken
• Brennbares Material fernhalten
• Wird das Gerät nicht gebraucht, so entfernen Sie es aus der Steckdose.
Einleitung
Bequem und Sicher
Licht, wenn Sie es brauchen, wo Sie es brauchen – an so dunklen Plätzen wie Flure, Treppenhäuser, Keller,
Garagen oder Gartenhäuser. Sie brauchen nicht nach Schaltern zu suchen – der eingebaute passive Infra-
rot-Bewegungsmelder (PIR) reagiert auf Körperwärme (oder andere Wärmequellen, z.B. Autos, Tiere) und
aktiviert das eingebaute Licht, sobald Sie in den Erfassungsbereich eintreten.
Energiesparend
Das Licht bleibt solange eingeschaltet, wie Bewegung im Erfassungsbereich registriert wird. Wenn Sie den
Erfassungsbereich verlassen, schaltet das Licht nach ca. 30 Sekunden automatisch ab. Ein eingebauter
Lichtsensor (Fotozelle) sorgt dafür, dass das Licht nur bei Dunkelheit eingeschaltet wird.
Leicht zu installieren
Einfach in eine 230 V Steckdose stecken.
Gerätebeschreibung (siehe Abb. A)
1. Infrarot- Sensor mit Fresnellinse (PIR) 3. Leuchtblende (Diffusor)
2. Schalter EIN/AUS/AUTO 4. Lichtsensor
Technische Daten
Stromversorgung: AC 230 V ~50 Hz
Stromverbrauch: ca. 1 Watt
Lichtquelle: 3 weiße LEDs
PIR Erfassungsbereich: ca. 6 m Entfernung x 90° (bei 1 m Montagehöhe)
Bewegungs- Sensor: Passiver Infrarot- Bewegungsmelder (PIR)
Dämmerungsschalter ca. < 12 Lux
Anwendungsbereich: Nur in trockenen Räumen, vor Nässe und Frost schützen
Betriebstemperatur: 0° C bis +35° C
Optimale Funktion bei Raumtemperatur (20° C).Sehr hohe oder tiefe
Temperaturen können zur Funktionsbeeinträchtigung führen.
Aufstellungsort
Suchen Sie eine geeignet platzierte Steckdose aus, so dass die häufigste Bewegung quer zum PIR-
Sensor stattfindet. Querbewegungen sind schneller erfasst als Bewegungen direkt auf den Sensor zu (siehe
Abb. B).
Optimale Funktion ist bei einer Steckdosenhöhe von 20-100 cm gegeben. Der PIR-Senor reagiert auf
Wärme. Stellen Sie deshalb das Gerät nicht in der Nähe von Heizkörpern oder Lüftungsschächten
auf (oder darauf ausgerichtet), wo es durch Bewegung der warmen Luft aktiviert werden könnte.
Bedienungsanleitung
1. Schalter auf „AUS“ stellen.
2. Mit der Leuchtblende nach oben in eine 230 Volt-Steckdose stecken.
3. Schalter auf „EIN“ stellen. Das Licht muss leuchten.
4. Schalter auf „AUTO“ stellen. Die Aufwärmphase (ca.40 Sekunden) abwarten. Das Licht leuchtet auf,
wenn
– die Umgebung dunkel ist und
– eine Bewegung im Erfassungsbereich registriert wird (Sie selbst!)
Eine Fotozelle sorgt dafür, dass das Licht nur bei Dunkelheit aktiviert wird. Wenn der gewählte
Aufstellungsort zu hell ist, schaltet das Licht nicht ein!
5. Nach Verlassen des Erfassungsbereichs schaltet das Licht nach ca. 30 Sekunden ab. Das Gerät ist
automatisch sofort wieder betriebsbereit.
6. Schalten Sie auf „AUS“, um das Gerät abzuschalten.
Schalten Sie in die „AUS“ Stellung, wenn Sie das Gerät nicht verwenden. Nutzen Sie das Gerät längere
Zeit nicht, so entfernen Sie es bitte aus der Steckdose.
Behebung von Störungen
Verpackungsmaterial und ausgediente Geräte nicht einfach wegwerfen, sondern der Wieder
verwertung zuführen. Den zuständigen Recyclinghof bzw. die nächste Sammelstelle bitte bei
Ihrer Kommunalverwaltung erfragen.
Garantie
Auf dieses Produkt wird gemäß nachstehenden Bedingungen 2 JAHRE GARANTIE ab Kaufdatum (Nach-
weis durch Kaufbeleg) gewährt. Diese Garantiefrist gilt nur für den Gebrauch unter normalen Wohnbedin-
gungen in privaten Haushalten.
Die Garantie gilt nur für Material- und Herstellungsfehler und ist auf Tausch oder Reparatur fehlerhafter Ge-
räte beschränkt. Die Garantieleistung beschränkt sich in jedem Fall auf den handelsüblichen Preis des Gerä-
tes. Diese Garantie gilt nur, wenn die Bedienungs- und Pflegeanleitungen befolgt wurden. Schäden, die auf
Missbrauch, unsachgemäße Handhabung, äußere Einwirkungen, Wasser oder allgemein auf
anomale Umweltbedingungen zurückzuführen sind, sowie Schäden, die durch eine nicht geeignete
Spannungsversorgung verursacht wurden, sind von der Garantie ausgeschlossen. Die Garantie erlischt,
wenn Reparaturen oder Eingriffe von Personen vorgenommen werden, die von uns hierzu nicht bemächtigt
sind, oder wenn dieses Gerät mit Ergänzungs- oder Zubehörteilen versehen oder verwendet wird, die nicht
auf dieses Gerät abgestimmt sind.
Soweit eine Haftung nicht zwingend gesetzlich vorgeschrieben ist, sind weitergehende oder andere Ansprü-
che, insbesondere solche auf Ersatz außerhalb des Gerätes entstehender Personen- oder Sachschäden, aus-
geschlossen.
Description de l’appareil (image A)
1. Capteur infrarouge avec lentille de Fresnel (PIR) 3. Ecran lumineux (diffuseur)
2. Commutateur (EIN = Marche, AUS = Arrêt, AUTO = Automatique) 4. Capteur photosensible
Caractéristiques techniques
Alimentation: AC 230 V ~50 Hz
Consommation: ca. 1 Watt
Source de lumière: 3 LEDs blanches
Domaine d’action du PIR: environ 6 m sur un angle de 90° (à une hauteur de 1 m)
Capteur: Détecteur de mouvements passif à infra-rouges (PIR)
Cellule photosensible (capteur de lumière du jour)
Lieux d’utilisation: Uniquement dans les lieux secs, protéger de l’humidité et du gel
Température: 0° C – 35° C
Fonctionnement optimal à la température de la pièce (20° C). Des
températures très élevées ou très basses peuvent être préjudiciables
au bon fonctionnement.
Installation – Lieu de placement
Placez l’appareil près d’une prise de sorte que les mouvements les plus fréquents à détecter coupent le
«champs de vision» du capteur. Les mouvements transversaux sont détectables plus rapidement que les
mouvements vers le capteur (voir fig. B).
Fonctionnement optimal à une hauteur de 20 –100 cm. Le détecteur à infra-rouges passif (PIR) intégré
réagit à la chaleur des corps. Ne placez donc pas l’appareil dans le voisinage d’une source de chaleur ou
d’un appareil de ventilation d’air, les mouvements de masses d’airs pourraient déclencher le capteur.
Une cellule photosensible veille à ce que la lumière ne se déclenche que dans l’obscurité. Si la pièce
est suffisamment lumineuse, l’appareil n’éclaire pas. Afin d’augmenter la duré de vie des piles, placez
l’appareil sur la position «arrêt» lorsque vous cessez de l’utiliser pendant une longue période.
Mode d’emploi
1. Placez le commutateur sur «AUS» (arrêt)
2. Branchez dans une prise avec l’écran lumineux vers le haut
3. Placez le commutateur sur «EIN» (marche). La lampe doit éclairer.
4. Placez le commutateur sur «AUTO» (automatique). Placez l’appareil dans une pièce sombre
et attendre la phase de préchauffe (env. 40 secondes).
– La lampe s’allume lorsqu’il fait sombre ET
– qu’un mouvement est détecté (le vôtre !)
La cellule photo-sensible ne fonctionne que dans l´obscurité. Lorsque le détecteur est placé
dans un endroit trop éclairé il ne fonctionne pas.
5. Après avoir quitter le champs d’action, la lumière s’éteint au bout de 30 secondes. L’appareil est
automatiquement prêt à fonctionner.
6. Placez le commutateur sur «AUS» (arrêt) pour éteindre l’appareil
Dépistage d´anomalies
Garantie
Le constructeur garantit – en plus des exigences de garanties envers le vendeur – 2 ANS DE GARANTIE
après la date d’achat (sous réserve de présentation de la facture) suivant les conditions décrites ci-après.
Cette durée de garantie ne s’applique que sous réserve d’une utilisation dans des conditions de
logement normales dans le cadre de logements privés.
La garantie ne vaut que pour des erreurs de fabrication ou de matériel et se limite au remplacement ou à la
réparation des appareils défectueux. La prestation de garantie se limite dans tous les cas au prix usuel de
l’appareil. Cette garantie ne vaut seulement lorsque les instructions d’utilisation et de soin ont été suivies.
La garantie ne s’applique pas lorsque des dégradations dues à une utilisation incorrecte, à des causes ex-
térieures, à l’eau apparaissent, ou plus généralement lorsque le matériel subit les effets de conditions exté-
rieures anormales, ou lorsque une tension électrique inappropriée est appliquée.
La garantie est annulée lorsque des réparations ou interventions ont été effectuées par des personnes non
recommandées par nos soins ou lorsque des pièces complémentaires ou des accessoires inadaptés ont été
ajoutés à notre appareil. Des transformations sur nos pièces provoquent l’abrogation du droit de garantie.
Les dépannages n’entraînent ni une prolongation, ni un renouvellement du délai de garantie.
Les autres réclamations, en particulier celles concernant les dédommagements (à l’exclusion de l’appareil)
dues à des dégradations de choses ou de personnes sont exclues, sauf en cas de responsabilité reconnue
par la justice.
AN 02 (LED)
LUMIERE AUTOMATIQUE
AUTOMATISCH NACHTLICHT
AUTOMATIC NIGHTLIGHT
F
INSTRUCTIONS
F
AUTOMATISCHES NACHTLICHT
D
GEBRAUCHSANWEISUNG
D
NL
GB
LUCE NOTTURNA AUTOMATICA
I
Keine Funktion in Schalterstellung AUTO Umgebung ist zu hell (Dämmerungsschalter)
Aufwärmzeit des Sensors abwarten.
Langsame Reaktion des Sensors Position ändern (siehe Aufstellungsort).
Umgebungstemperatur zu hoch.
Sensor schaltet ohne Bewegung Wärmequelle in der Nähe oder im Erfassungsbereich
–> Position ändern
Pas de fonction quand l´interrupteur est sur
«AUTO
Est-ce que le détecteur est placé dans un endroit
trop éclairé?
Attendez 40s pour la mise en marche effective.
3
42
Abb. A
1
empfindlich
Abb. B ✔
✘
weniger empfindlich
Erfassungsbereich
6 m
Le mode d´emploi comporte des instructions importantes relatives á sa mise en service
et son maniement ! Gardez donc ce mode d´emploi pour toute consultation ultérieure !
Ce produit n’est homologué que pour une utilisation en intérieur dans des pièces non humides.
La veilleuse ne doit pas être mouillée ni humide, autrement il y a danger de décharge électrique
motrelle! Ne touchez jamais à ce produit avec des mains mouillées!
Conviviale et sûre
De la lumière, quand vous en avez besoin, où vous en avez besoin – dans des pièces sombres comme les
cages d’escaliers, caves, garages ou maisons de jardin. Ne cherchez pas l’interrupteur, le détecteur
de mouvement infrarouge intégré réagit à la chaleur corporelle (ou autres sources de chaleur comme par
ex. les autos ou les animaux) et active la lumière intégrée, tant que vous êtes dans le domaine d’action.
Economise l’énergie
La lumière reste allumée tant que des mouvements sont enregistrés. La lumière se coupe automatiquement
20 secondes après que vous aurez quitté le domaine de détection. Un capteur photosensible (cellule) s’as-
sure de ne déclencher la lumière que dans l’obscurité.
Facile à installer
Branchez simplement dans une prise secteur 230 V
Deze gebruiksaanwijzing bevat belangrijke wenken m.b.t. ingebruikneming en hante-
ring. U dient deze gebruiksaanwijzing zorgvlding te bewaren voor latere raadpleging!
U mag het product enkel in droge binnenruimtes gebruiken. Het mag niet vochtig of nat worden
om levensgevaarlijke elektrische schokken te voorkomen! Raak het product nooit met natte
handen aan!
GEBRUIKSAANWIJZING
NL
AN02_man080319_print 19.03.2008 11:46 Uhr Seite 1

Questo manuale contiene informazioni importanti per la messa in azione e il maneggio.
Conservare il foglio d’istruzioni per consultazione. Leggere le istruzioni prima di attivare
l'apparecchio. Verificare l'apparecchio e in caso di danneggiamento non attivare.
Indicazione di sicurezza
• Solamente uso interno in luoghi asciutti. Evitare pioggia e acqua.
• Utilizzate solamente una presa di corrente VDE.
• Collegare sempre completamente in una presa di corrente.
• Non toccate mai l'unità con mani bagnati.
• Non coprite mai l'unità.
• Tenere lontano da materiale infiammabile.
• Togliete l'unità dalla presa di corrente quando non viene utilizzata.
Kenmerken
Makkelijk en veilig
Licht wanneer u het nodig heeft, precies daar waar u het nodig heeft – op donkere plaatsen zoals trappe-
huizen,kelders, garages of tuinhuisjes. U hoeft niet naar de schakelaar te zoeken – de ingebouwde passieve
infrarood-bewegingsmelder reageert op lichaamswarmte (of andere warmtebronnen b.v. auto's, dieren) en
activeert de ingebouwde lamp zodra u in het reactieveld komt.
Energiebesparend
Het licht blijft alleen aan zolang er beweging in het reactieveld is. Verlaat u dit veld, wordt het licht na
20 seconden automatisch weer uitgeschakeld. Een ingebouwde lichtsensor (fotocel) zorgt ervoor, dat
hetlicht alleen bij duisternis aan gaat.
Gemakkelijk te installeren
Simpelweg in een 230 volts stopcontact steken.
Componenten (zie afb. A)
1. infrarood-sensor met fresnellens (PIR) 3. diffusor
2. schakelaar (EIN = aan, AUS = uit, AUTO = automatisch) 4. lichtsensor
Technische informatie
Stroomverzorging: AC 230 V ~50 Hz
Stroomverbruik: ca. 1 Watt
Lichtbron: 3 witte LEDs
PIR-reactieveld: 6 meter afstand x 90° hoek (waaier-vormig) (bij een hoogjte va 1m)
Sensor: passieve infrarood-bewegingsmelder (PIR) (ca.<12 Lux)
Daglichtsensor: fotocel
Toepassingsgebied: alleen in droge ruimtes, niet aan vocht en vorst blootstellen
Temperatuur: 0°C – 35° C;
optimale werking bij een kamertempera-tuur van (20°C),
zeer hoge of lage temperaturen kunnen tot storingenleiden.
Waar plaatsen?
Zoek een geschikt geplaatst stopcontact, zodat de meeste bewegingen dwars op de PIR sensor plaats
vinden. Bewegingen overdwars worden sneller geregistreerd dan bewegingen recht op de sensor af.
(zie afb. B).
Optimale werking verkrijgt men bij een stopcontact hoogte van 20 – 100 cm.
De PIR sensor reageert op warmte. Plaats het apparaat daarom niet in de buurt van radiatoren of ventilatie
openingen (of daarop gericht ), waar het door de beweging van warme lucht geactiveerd zou kunnen wor-
den.
Gebruiksaanwijzing
1. Schakelaar op „AUS“ zetten.
2. Met het lichtschermpje naar boven in een 230 volts stopcontact steken.
3. Schakelaar op „EIN“ zetten. Het licht moet nu branden.
4. Schakelaar op „AUTO“ zetten. De opwarmfase (ca. 40 sec.) afwachten.
Het licht gaat aan, als
– de omgeving donker is, en
– er beweging in het werkingsbereik geregistreerd wordt (uzelf!).
Een fotocel zorgt ervoor, dat het licht alleen bij duisternis gaat branden. Wanneer de gekozen
opstellingsplek te licht is, gaat het licht niet branden!
5. Na het verlaten van het werkingsbereik gaat het licht na ongeveer 30 seconden uit. Het apparaat is
direct weer klaar voor gebruik.
6. Schakel op „AUS“ om het apparaat uit te schakelen.
Schakel op „AUS“ wanneer u het apparaat niet gebruikt. Gebruikt u het apparaat langere tijd niet, haal
het dan a.u.b. uit het stopcontact.
Verhelpen va storingen
Garantie
Op dit produkt wordt naast de wettelijke garantie t.o.v. de verkoper 2 JAAR GARANTIE verleend geldend
vanaf koop-datum (tegen overlegging van de aankoopbon). Deze garantie-periode geldt alleen bij het parti-
culier gebruik onder normale woonomstandigheden. De garantie geldt uitsluitend voor eventuele materi-
aal- en fabricagefouten en is beperkt tot het omruilen of reparatie van defecte apparaten. Er wordt in ieder
geval slechts garantie tot de hoogte van de in de handel gebruikelijke koopprijs verleend. Er kan alleen een
beroep op bovenomschreven garantie gedaan worden, indien de gebruiksaanwijzing en onderhouds-voor-
schriften werden nageleefd. Beschadigingen ten gevolge van misbruik, onoordeelkundig gebruik, inwerkin-
gen van buiten, water of abnormale milieuomstandigheden evenals beschadigingen ten gevolge van
aansluiting op verkeerde netstroom vallen buiten de garantie. De garantie vervalt bij reparatie door niet
door ons erkende personen of bij gebruik van niet originele onderdelen. Indien een beroep op de garantie
gedaan wordt, heeft dit geen verlenging of vernieu-wing van de garantietijd tot gevolg. Alle andere claims,
met name op vergoeding van buiten het apparaat opgetreden persoonlijke letsels of materiële schade zijn
uitgesloten van garantie.
USER MANUAL
GB
This manual contains important information on the use and handling of the product.
Therefore, please keep this manual for future reference. Please read this users manual
before using your night light. Check the unit for damage. Do not operate a damaged
unit.
Safety instructions
Only use the night light in dry locations and indoors.
Do not place the unit in the rain or in water, do not handle with wet hands
Comfortable and safe
Light, whenever you need it, wherever you need it – in such dark locations as staircases, basements,
garages etc. You don’t have to look for a switch – the built-in PIR reacts to body heat (or other heat sour-
ces such as cars or animals) and activates the light as soon as you enter the PIR range.
Energy saving
The light will stay on as long as a movement is detected within the PIR range. As soon as you leave the
covered area, the light will go off after approx. 30 seconds. A built-in light sensor (photoelectric cell)
ensures that the light is switched on only during the hours of darkness.
Easy to install
Simply plug the AN 02 into a 230 V socket (European type).
Description (Figure A)
1. PIR with Fresnel lens 3. Transparent light cover (diffuser)
2. Switch (EIN=on, AUS=off, AUTO=auto) 4. Light sensor
Technical features
Power supply: AC 230V ~50Hz
Power consumption: ca. 1 Watt
Light source: 3 white LEDs
PIR range: Approx. 6 m distance x 90° angle (mounting height 1 m)
Sensors: Passive infrared motion detector (PIR), photoelectric cell (light sensor)
Field of application: Use only in dry locations, protect unit from moisture and frost.
Operating temperature: 0°C – 35°C
Optimal function at room temperature (20°C). Very high or low
temperatures can be detrimental to the function of the night light.
Where to locate
Locate the unit at a place where most of the movements are across the PIR. These movements can be
detected more quickly than movements towards the PIR (see figure B). Optimal function is at a socket
height of 20 – 100 cm.
The PIR reacts to changes in temperature. Do not place the night light near heaters or ventilating shafts.
Operating instructions
1. Turn switch to "AUS” (off).
2. Plug the night light into a socket, with the light cover on top.
3. Turn switch to "EIN” (on). The light should go on.
4. Turn switch to "AUTO”. Locate the unit at a dark place. After the warm-up period (40 seconds), the
light will go on as soon as a movement is detected within the PIR range (yourself).
A photoelectric cell ensures that the night light is activated only during the hours of darkness.
If the location is too bright, the light will not go on.
5. Once you have left the PIR range, the light will go off after approx. 30 seconds. The night light is
immediately operative again.
6. Turn the switch to "AUS” (off) to switch the unit off.
Switch the night light "AUS” (off), if you do not use it. If it is not used for a longer period of time,
remove it from the socket.
Troubleshoooting
The device does not work in the position
"AUTO”.
Is the location too bright?
Wait until the warm-up time (40 sec.) has gone by.
Het toestel werkt niet bij de schakelpositie
„AUTO“
De plaats is te licht.
De opwarmtijd van de PIR-sensor abwaarden (40 sec.).
De sensor heeft slechts een geringe reik-
wijdte.
Heeft u de aanbevolen montagehoogte va 1 m in
acht genomen?
ISTRUZIONI PER L'USO
I
Introduzione
Comodo e sicuro
Luce, quando serve e dove serve - in posti bui come la tromba delle scale, la cantina, il garage o la
capanna. Non occorre più cercare l'interruttore - il sensore di movimento passivo infrarosso incorporato
(PIR), reagisce alla temperatura corporea (o altri fonti di calore, p.e. l'automobile, gli animali)
e attiva la luce incorporata appena entrato in raggio d'azione.
Basso consumo d’energia
La luce rimane accesa, finché un movimento viene registrato nel raggio d'azione.
La luce si spegne automaticamente 30 secondi circa dopo aver lasciato il raggio d'azione. L'accensione
della luce si esegue solo al buio per via del sensore di luce incorporato.
Impianto facile
Collegare semplicemente in una presa di corrente a 230 V.
Descrizione dell’apparecchio (Fig. A)
1. Sensore infrarosso con Lente di Fresnel (PIR) 3. Schermo d’illuminazione (Diffusore)
2. Interruttore EIN/ AUS/ AUTO 4. Sensore di luce
Dati tecnici
Distribuzione dell’energia elettrica: AC 230 V ~50 Hz
Consumo di energia: ca. 1 Watt
Lampadina: 3 LED bianchi
Raggio d'azione PIR: ca. 6 metri di distanza x 90° (a 1 m d’altezza di disposizione)
Sensore di movimento: sensore di movimento passivo infrarosso (PIR)
Accensione al crepuscolo: ca. < 12 Lux
Campo di applicazione: Solamente uso interno in luoghi asciutti,
protegere dal bagnato e dal gelo
Temperatura di funzionamento: da 0° C fino a + 35° C
Funzionamento ottimo a temperatura ambiente (20° C).Temperature
massime o minime possono provocare una menomazione.
Luogo di disposizione
Mettere l'apparecchio in modo che il movimento più frequento si effettua traverso al sensore PIR. I movi-
menti traversali vengono centrati più veloce dal sensore che quelli diretti (vedi fig. B). L'altezza di
disposizione di 20 - 100 cm permette una funzionalità ottima.
Non mettere l'apparecchio nei pressi di un radiatore o la presa d'aria, perché il sensore PIR reagisce al
calore e potrebbe attivarsi.
Istruzioni per l'uso
1. Girare l'interruttore su „AUS“.
2. Collegare in una presa di corrente a 230 V con il diffusore in alto.
3. Girare l'interruttore su „EIN“. La luce si accende.
4. Girare l'interruttore su „AUTO“. Attendere il tempo di riscaldamento (40 sec circa). La luce si accende
appena che
– l'ambiente è buio
– un movimento viene registrato nel campo di rilevamento (voi stessi!)
La luce non si accende, se il luogo di disposizione e troppo luminoso!
5. La luce si spegne automaticamente 30 secondi circa dopo aver lasciato il raggio d'azione.
L' apparecchio entra subito automaticamente in servizio.
6. Girare su „AUS“ per spegnere l'apparecchio. Girare su "AUS" quando l´apprecchio non serve.
Se l'unità non viene utilizzata più a lungo togliete la spina dalla presa di corrente.
Rimediare inconvenienti tecnici
Riciclare l'imballaggio e le pile scariche al vostro CENTRO RECUPERO.Per altreinformazioni
rivolgersi all’amministrazione communale.Le pile scariche possonoessere riconsegnate al
commerciante.
La Garanzia
La garanzia per questo prodotto è valida 2 anni a partire dalla data d’acquisto (prova d’acquisto) se-
condo le condizioni seguenti. Questo periodo di garanzia è valido solamente per condizioni d'alloggio
normale in case private. La garanzia protegge contro i difetti del materiale o per causa del processo di pro-
duzione. La garanzia è limitata alla sostituzione o la riparazione degli apparecchi difettosi. In ogni caso la
garanzia è limitata al prezzo dell'apparecchio in commercio. Concediamo la garanzia solamente se ven-
gono seguite l’istruzione per l’uso e per la pulizia. In caso d’uso non regolare, manipolazione errata, effetti
esteriori, acqua o in generale i condizioni ambientali anomali cade la validità della garanzia. Danni che ri-
sultano dalla tensione di rete disadatta, non sono coperti da questa garanzia. In caso di tentativo non auto-
rizzato di riparazione personale o alla sostituzione di pezzi con ricambi inadatti cade la validità della
garanzia. Per quando la legge non esigge la necessità di garanzia assoluta, saranno escluse, in particolare,
esigenze tale, diritti di risarcimento, danni dell’apparecchio o danni personali e materiali.
Indexa GmbH, Paul-Böhringer-Str. 3, D-74229 Oedheim
Se l 'interruttore e su AUTO e non funziona L’ambiente è troppo chiaro (Accensione alcrepuscolo).
Attendere il riscaldamento del sensore(40 sec.).
Reazione rallentata del sensore Cambiare posizione (vedi campo di applicazione).
La temperatura ambiente troppo alta.
Sensore si attiva senza movimento Una fonte di calore vicina o nel campo di rilevamento
–> cambiare posizione.
torres-fuss.de_080312
AN02_man080319_print 19.03.2008 11:46 Uhr Seite 2
Popular Lantern manuals by other brands
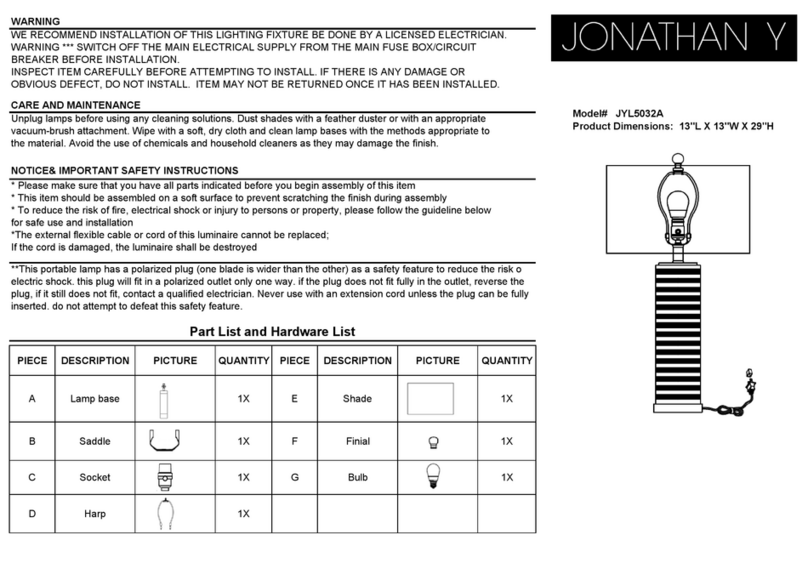
JONATHAN Y
JONATHAN Y JYL5032A quick start guide
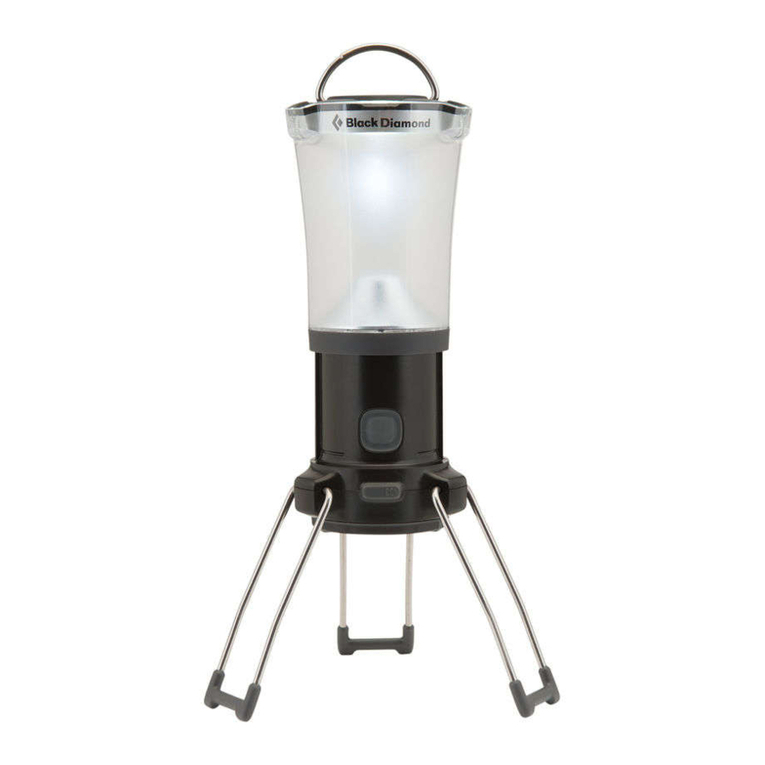
Black Diamond Equipment
Black Diamond Equipment Apollo Lantern user manual
Soitec
Soitec COH-CEN-9-26FW installation guide
Philips
Philips TMFIC Series Installation and operating instructions
Philips
Philips Luma gen 2 Series manual
Ribimex
Ribimex Ribiland Elina PRLUMSOL1/M Instruction and maintenance manual

AEC
AEC ITALO2 MOUNTING AND MAINTENANCE INSTRUCTION
Siteco
Siteco Monsun 41 manual

Oldenbourg group
Oldenbourg group Visa Lighting Serenity CB1934 installation instructions
Teknoware
Teknoware TWS80 Installation and Maintenance
Somogyi Elektronic
Somogyi Elektronic Home MX 625 instruction manual
EcoxGear
EcoxGear GDI-EXLTN400 user guide


