Inel Pilot PIL-99 GP User manual

Pilot PIL-99 GP Remote control unit (RCU)
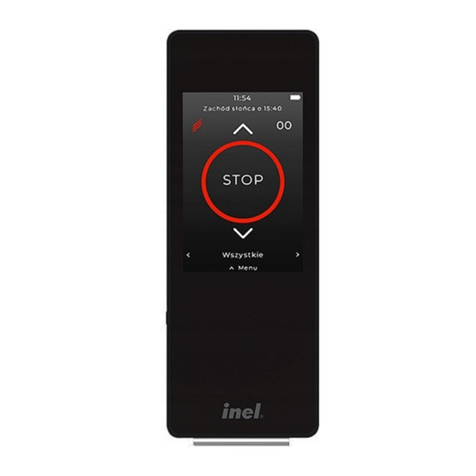
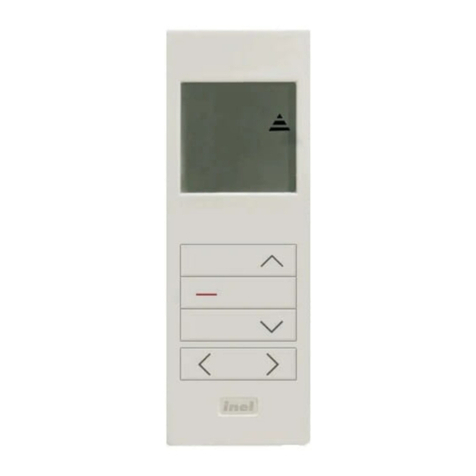
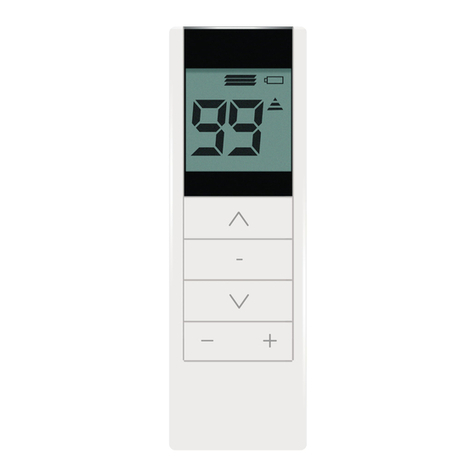
PIL-99GP remote control unit is designed to control roller blinds manually and
fully automatically at any given programmed time and on any given day.
NOTE !!!
The remote control unit is in a stand-by mode to save the battery life. Pressing one of the keys
( , , ◄, ►) will activate the unit. When the unit is on, the last chosen number is shown on the display.
Working mode and working mode change
The remote control unit can work in a full mode which enables to choose any channel number out of 99
available ones, as well as in a simplified mode in which the number of channels is limited to those used.
Press the keys ◄and ►simultaneously to change the mode. Letters ‘P’ and ‘S’ indicate the mode
which is currently used, i.e. full mode and simplified mode respectively. The letter ‘S’ is followed by two
digits showing the maximum channel number which was programmed in this mode.
Activating the slat adjustment mode
Press “OK” button to select roller shutter mode (slat adjustment), letter “L” indicates the slat adjustment, pressing ▲or
▼keys change the slats positions. Another pressing “OK” button returns to the normal mode of operation.
NOTE !!!
Slat adjustment only works when motor is stopped. If slats are not adjusted from RCU first press stop ▀button.
Channel number selection in a full mode
The full mode enables the selection of a single controller number from 01 to 99, which is done in the
following way:
•Shortly press the left key ◄to choose a left digit change function or to confirm the left digit.
To change the digit, use the keys ▲or ▼.
•Shortly press the right key ►to choose a right digit change function or to confirm the right
digit. To change the digit, use the keys ▲or ▼.
•If no digit is changed, the keys ▲, ▼and ▀are used to send opening, closing or stop signal to
a single controller or a group of controllers.
•To send the signal to the controller and enter a learning mode of the controller,
press the keys ▲and ▼simultaneously. The display will show PROG.
Channel number selection in a simplified mode
In the simplified mode the number of available controller numbers is limited (usually a few or from 10 to 20), however,
the selection is easier:
•Shortly press the left or right key ◄,►to decrease or increase the number of the selected
controller (form 0 up to a programmed maximum number).
•Use the keys ▲, ▼and ▀to send opening, closing or stop signal to a single controller.
•To set a maximum number in the simplified mode, select the required number while still in the
full mode and then enter the simplified mode.
•To send the signal to the controller and enter a learning mode of the controller,
press the keys ▲and ▼simultaneously. The display will show PROG.
NOTE !!!
After battery change you have to set the simplified mode.

PROGRAMMING
Press the keys and simultaneously to enter „OPTIONS” menu.
•"Programs" – programmes used for automatic operation at set time;
•„Names” – name edition;
•„Clock” – clock settings (date and time).
•,,Partial” – gapping settings (partial opening)
•,,Other” – display settings
To select menu position use „▲” and „▼”. To confirm press or press to cancel.
Setting names of drives or drive groups
A text consisting of up to 16 characters (capital letters or digits) in two lines (8 characters in each line)
can be assigned to each channel number. To enter an edition mode, press the keys simultaneously.
Underlining (cursor) indicates the character position which can be changed with the keys ▲and ▼. The
keys ◄, ►change the cursor position. Press STOP to delete a character in a given position. The edition
is finished after pressing , which will save the changes, or ,which will cancel the changes.
Clock setting
After entering the option „Zegar” (clock) the display will show programme name, weekday, date(day,
month and year) and time (hour, minutes and seconds). Use „▲” and „▼” to change (set) the position
which is showed by cursor (underlined). The keys ◄,►change the cursor position. You can set a day of
the week, calendar day, month, year, hour and minutes. Changes are confirmed with .
As soon as changes are confirmed, seconds are set to zero. Change can be cancelled with .
Programme setting
The option “Progr” is used to set and change programmes for automatic opening and/or closing of
specified roller blinds or roller blind groups at defined time and on defined weekdays. There are 32
programmes available with numbers from 00 to 31, which can be set as “active” or “not active”.
Weekdays during which a given programme is to be active are set by entering starting day and last day
inclusive. For example: Mon-Mon means only Monday, Sat-Sun means Saturday and Sunday, while
Mon-Sun means all weekdays. The time of programme operation is set by entering hour and minutes.
Minutes can be set only as a multiple of 5. In order to fully set the programme specify the number from
00 to 99 and the task which is to be performed opening “Up”, closing “Dn” or partial ”Part”. Settings are
made using „▲” and „▼” keys. You can change the position which is indicated by cursor (underlined).
Cursor position is changed using „◄” and „►”. Press „STOP” to move cursor to the programme number.
By changing the programme number, all changes introduced in the current programme are saved. By
pressing changes are saved in the programme and the programming mode is closed. When you press
the programming mode is closed without saving the changes introduced in a previously displayed
programme.
NOTE!!!
Times of sets programs have to be different (time of closing or opening two or more roller blinds
cannot be the same). If we want to set the same time to many roller blinds then we have to create
from them a group.
Partial
Partial is a function allowing for automatic partial opening of roller blind.
Settings:
Numb.:00 (number of roller blind or group from 00 to 99)
Value.:00 (time of work from 00s. to 15s.)
Display settings
Bright. 08 (brightness setting from 00 to16)
Flash 30 (frequency of display blinking from 00 to 60 s. –blinking is visible only when RCU is in sleep
mode)
NOTE!!!
After the battery replacement the unit looses all simplified mode settings (which should be
reprogrammed), however, texts under controller/group numbers are saved.

Remote control registration
Controlling from remote control is possible after registering one of his channels to the drive or controller.
There are three ways of getting into the programming mode in our receivers:
•First programing after every connection to power supply(radio drive, ST-01RL).
•Programming ST-01R controller.
•Programing with a previously registered remote control.
First programming in case of radio drives and ST-01RL controller:
•Select on RCU channel number desired to be registered,
•Connect to the drive or controller AC power supply,
•push the buttons "▲" and "▼" simultaneously on the RCU,
•the drive will move up and down,
•in the next 10 seconds press shortly the button "▲",
•a short move up and down will confirm the registration right.
CAUTION: This procedure will cause the drive memory to erase all the channels that were previously
registered.
Programming ST-01R controller:
•Press programming switch S1 on the ST-01R controller,
•press shortly the button "▲",
•controller will confirm the registration with diode blinking green and red.
When a registered remote control is at disposal, other channels of the same or other remote
control must be registered without cutting off the power.
The programming mode must be initiated on a drive with the use of a registered remote control.
•press shortly the buttons "▲" and "▼" simultaneously on a registered remote control,
•the roller blind will move up and down, next it will make a short series of moves up and down equal to the
number of registered channels,
•during the next 10 seconds the drive will remain in the programming mode,
•in these 10 seconds the button "▲" must be pressed shortly on a new remote control.
With this method any channel can be registered to any drive, but only in case there is an already registered remote
control.
Change of the movement direction of the roller blind.
If it is necessary to change the direction of movement of the roller blind (the movement is opposite to the directions on
the remote control), the drive must be set in the programming mode (using a registered remote control) and next the
stop button ▀needs to be pushed.
Replacing the batteries
The remote control is powered by two 1,5 V batteries type AAA and one 12 V battery type A23. To replace the
batteries, remove the four screws on the back and lift the back lid.
P. I. E. INEL Sp. z o. o.
ul. Mostowa 1 www.inel.gda.pl
POLAND
Table of contents
Other Inel Remote Control manuals
