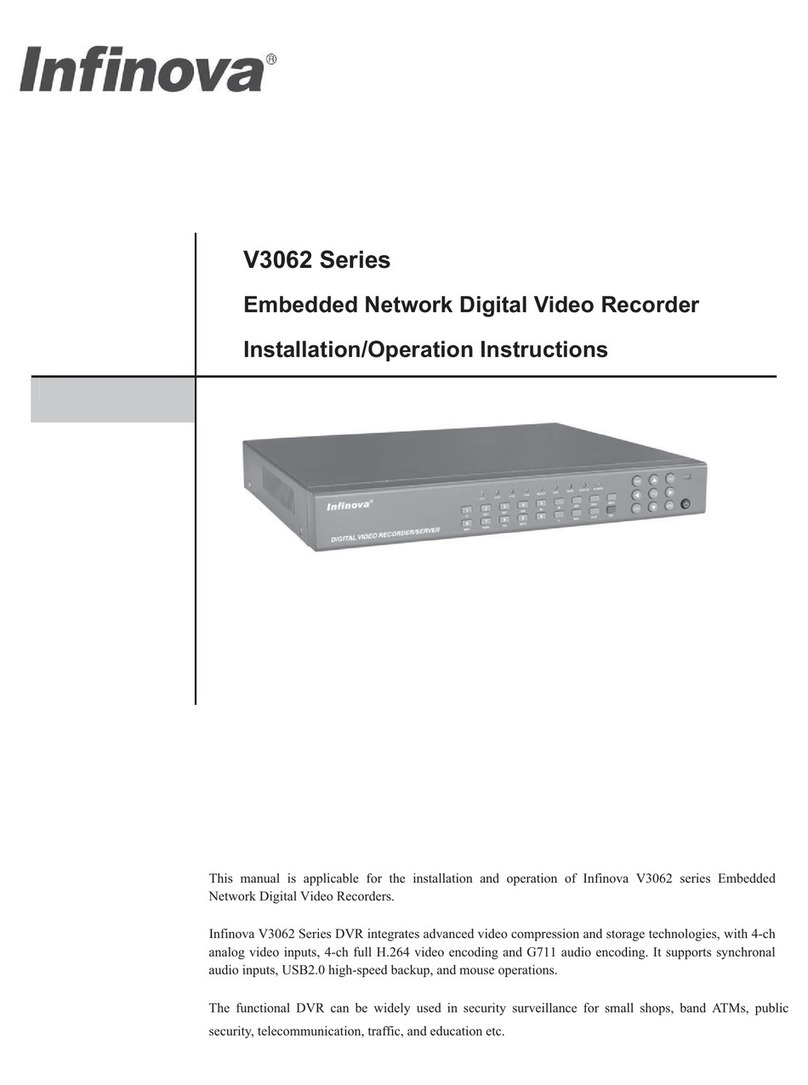
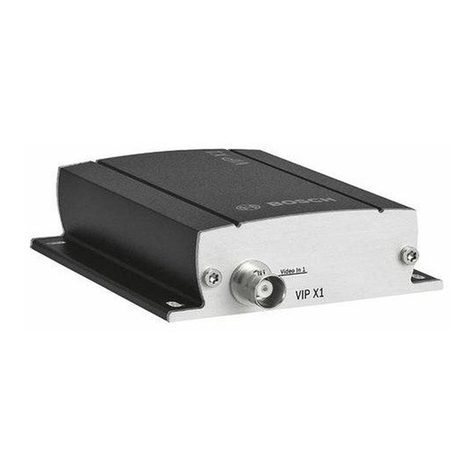
Infinova V3070-8 Series User manual

V3070-8 Series
Network Video Recorder
User Manual
This manual addresses the operation procedures of Infinova’s V3070-8 series Network Video Recorder
(NVR).
V3070-8 series are high performance NVR which features local preview, video multi-screen display, and
real-time local storage of the records. The NVR supports easy operations via mouse and tele-controller, with
remote management and control functions. V3070-8 series can be widely used in public security, water
conservancy, traffic, education etc. fields.


Notice
Copyright Statement
This manual may not be reproduced in any form or by any means to create any derivative such as translation, transformation, or adaptation
without the prior written permission of Infinova.
Infinova reserves the right to change this manual and the specifications without prior notice. The most recent product specifications and user
documentation for all Infinova products are available on our website www.infinova.com
Trademarks
Infinova
®is a trademark of Infinova.
Copyright © 1993-2014 Infinova. All rights reserved
All other trademarks that may appear belong to their respective proprietors.
FCC Warning
V3070-8 series Network Video Recorders all comply with Part 15 of the FCC rules.
Operation is subject to the following two conditions.
yThis device may not cause harmful interference.
yThis device must accept any interference received, including interference that may cause undesired operation.
V3070-8 series Network Video Recorders have been tested and found to comply with the limits for Class A digital device, pursuant to Part 15
of the FCC rules. These limits are designed to provide reasonable protection against harmful interference when the equipment is operated in a
residential environment. This equipment generates, uses, and can radiate radio frequency energy and, if not installed and used in accordance
with the instructions, may cause harmful interference to radio communications. However, there is no guarantee that interference will not
occur in a particular installation.

Read this manual carefully before installation. This manual should be saved for future use.
Important Safety Instructions and Warnings
zElectronic devices must be kept away from water, fire or high magnetic radiation.
zClean with a dry cloth.
zProvide adequate ventilation.
zUnplug the power supply when the device is not to be used for an extended period of time.
zOnly use components and parts recommended by manufacturer.
zPosition power source and related wires to assure they will be kept away from ground and access way.
zRefer all service matters to qualified personnel.
zSave product packaging to ensure availability of proper shipping containers for future transportation.
Indicates that the un-insulated components within the product may carry a voltage harmful to humans.
Indicates operations that should be conducted in strict compliance with instructions and guidelines contained in this manual.
Warning: To avoid risk of fire and electric shock, keep the product away from rain and moisture!

Install Environment and Notes
Install Environment
zWorking temperature of NVR: 0ć~ 50ć.
zNVR should be placed flatly during installtion or operation, avoid slantways or inversed placement.
zAvoid placement and installation in high temperature and high humidity.
zFor better heat-radiation, cooling fan is designed inside the NVR. Further, install the device in the place with good ventilation condition.
zTo ensure a better heat-radiation, the distance between the NVR back panel and the other NVR or the wall should be more than 6CM.
zDo not move NVR in the place with sharp temperature contrast to avoid condensation inside the device which will shorten the lifespan
of the machine.
zInstall the thunder protection devices for the NVR applied in thundery areas to prevent the thunder-caused hardware damages.
Notes
zDon’t touch the power button or NVR with wet hands or wet stuff.
zAfter the installation, to avoid the interference of the video/audio signals and the damages caused by the static electricity, please make
sure that NVR and the housing are well grounded (refer to the grounding interface on the rear panel).
zMake sure that the voltage of the power supply is stable. Do not close the NVR directly by turning off the general switch.
zAvoid splashing down the liquid or metal on NVR, which may cause short circuit even fire inside NVR.
zInstall the harddisk correctly before use, or else, you can’t make any record operation.
zThe dust of the mainboard may cause short circuit after being damped, therefore, to maintain a long life usage of the device, please clean
the mainboard, inserts, housing and cooling fan regularly with the brush.
zDo not conduct the hardware hot-swapping operation with electricity. (Except the hardware supporting hot-swapping)
zChange the damaged harddisk to insure the integrality of the record data. (The information of the harddisk error is in the log)


Table of Contents
Chapter I Features and Specifications..............................................1
1.1 Overview...............................................................................1
1.2 Features.................................................................................1
1.3 Specifications........................................................................2
Chapter II Front Panel and Rear Panel ...........................................3
2.1 Front Panel............................................................................3
2.2 Rear Panel .............................................................................4
2.3 Alarm Connection .................................................................5
2.4 Bidirectional talk...................................................................5
2.4.1 Device-end to PC-end....................................................5
2.4.2 PC-end to the device-end...............................................6
2.5 Mouse Operation...................................................................6
Chapter III HDD Installation...........................................................7
Chapter IV Network Connection .....................................................8
Chapter V GUI Operation ...............................................................9
Chapter V GUI Operation ...............................................................9
5.1 Login.....................................................................................9
5.2 Right Click Menu................................................................10
5.3 Main Menu..........................................................................10
5.4 Search & Playback ..............................................................11
5.5 Information .........................................................................15
5.5.1 HDD Information ........................................................15
5.5.2 BPS..............................................................................16
5.5.3 Log ..............................................................................16
5.5.4 Version.........................................................................17
5.5.5 Online Users................................................................17
5.5.6 Remote Device Information ........................................17
5.5.7 Network Info ...............................................................18
5.6 Setting.................................................................................19
5.6.1 General ........................................................................19
5.6.2 Encode.........................................................................20
5.6.3 Schedule ......................................................................22
5.6.4 RS232..........................................................................22
5.6.5 Network.......................................................................23
5.6.6 Alarm...........................................................................31
5.6.7 Detect ..........................................................................34
5.6.8 PTZ..............................................................................36
5.6.9 Display ........................................................................37
5.6.10 Default.......................................................................38
5.7 Advanced ............................................................................38
5.7.1 HDD Management ......................................................38
5.7.2 Abnormality.................................................................40
5.7.3 Alarm Output...............................................................40
5.7.4 Manual Record ............................................................40
5.7.5 Account .......................................................................42
5.7.6 Auto Maintenance........................................................43
5.7.7 Config Backup.............................................................43
5.8 Shutdown ............................................................................43
Chapter VI Quick Configuration Tool...........................................44
6.1 Overview.............................................................................44
6.2 Operation ............................................................................44
Chapter VII Web Operation..........................................................46
7.1 General Introduction ...........................................................46
7.1.1 Preparation ..................................................................46
7.1.2 Log in ..........................................................................46
7.2 LAN Mode..........................................................................48
7.2.1 Monitor Channel Menu Tree .......................................48
7.2.2 System Menu...............................................................49
7.2.3 Monitor Window Switch .............................................49
7.2.4 PTZ Control.................................................................49
7.2.5 Color and More Setup .................................................50
7.3 WAN Login.........................................................................51
7.4 Configuration......................................................................52
7.4.1 System Information .....................................................52
7.4.2 System Configuration..................................................53
7.4.3 Advanced.....................................................................63
7.4.4 Additional Function.....................................................67
7.5 Search .................................................................................69
7.6 Alarm ..................................................................................70
7.7 About...................................................................................71
7.8 Log out................................................................................71
FAQ...............................................................................................72
Appendix A HDD Capacity Calculation.........................................75
Appendix B Compatible SATA HDD.............................................76
Appendix C Compatible USB2.0 List.............................................79
Appendix D Compatible Displayer List..........................................79
Appendix E Toxic or Hazardous Materials or Elements ................80


1
Chapter I Features and Specifications
1.1 Overview
This series NVR is a high performance network video recorder.
This series product support local preview, multiple-window display,
recorded file local storage, remote control and mouse shortcut menu
operation, and remote management and control function.
This series product supports centre storage, front-end storage and
client-end storage. The monitor zone in the front-end can be set in
anywhere. Working with other front-end devices such as IPC, NVS,
this series product can establish a strong surveillance network via
the CMS. In the network system, there is only one network cable
from the monitor centre to the monitor zone in the whole network.
There is no audio/video cable from the monitor centre to the
monitor zone. The whole project is featuring of simple connection,
low-cost, low maintenance work.
This series NVR can be widely used in many areas such as public
security, water conservancy, transportation and education.
1.2 Features
User
Management
•Each group has different management
powers that can be edited freely. Every user
belongs to an exclusive group.
Storage
•Via corresponding setup (such as alarm
setup and schedule setup), you can backup
related audio/video data in the network
video recorder.
•Support Web record and record local video
and storage the file in the client end.
Alarm
•Respond to external alarm simultaneously
(within 200MS), based on user’s
pre-defined relay setup, system can process
the alarm input correctly and prompt user
by screen and voice (support pre-recorded
audio).
•Support central alarm server setup, so that
alarm information can remotely notify user
automatically. Alarm input can be derived
from various connected peripheral devices.
•Alert you via EMAIL.
Network
Monitor
•Through network, sending audio/video
data compressed by IPC or NVS to
client-ends, then the data will be
decompressed and display. If bandwidth is
big enough, latency is less than 500ms
•Support max 10 connections
•Transmit audio/video data by HTTP, TCP,
UDP, MULTICAST, RTP/RTCP and etc.
•Transmit some alarm data or alarm info by
SMTP.
•Support WEB access in WAN.
Window Split
•Adopt the video compression and digital
process to show several windows in one
monitor. Support 1/4/8/9/16-window
display.
Record
•Support schedule record function. Save the
recorded files in the HDD, client-end PC,
or network storage server. You can search
or playback the saved files at the local-end
or via the Web.
Backup
•Support network backup, USB2.0 record
backup function, the recorded files can be
saved in network storage server, peripheral
USB2.0 device, burner and etc.
Network
Management
•Supervise NVR configuration and control
power via Ethernet.
•Support management via WEB.
Peripheral
Equipment
Management
•Support peripheral equipment management
such as protocol setup and port connection.
•Support transparent data transmission such
as RS232 (RS-422), RS485 (RS-485).
Auxiliary
•Support switch between NTSC and PAL.
•Support real-time system resources
information and running statistics display.
•Support log file.
•Local GUI output. Shortcut menu
operation via mouse.
•IR control function. Shortcut menu
operation via remote control.
•Support IPC or NVS remote video preview
and control.

2
1.3 Specifications
Parameter Specifications
System
Resources
Max support 16-channel 720P, with the
transmission rate of 4Mbps for each
channel;
8-channel 1080P, with the transmission
rate of 8Mbps for each channel;
Support 20 online users at the same time,
The image delay time of each channel is
under 500ms.
Operation
System
Embedded Linux real-time operation
system
Operation
Interface WEB/Local GUI
Video
Compression H.264/MPEG4
Encode Capacity For H.264, it max supports 16-channel
720P, 8-channel 1080P
Audio
Compression G.711a
Video Output 1-channel VGA analog video output.
Video Input 8/16-ch network compression video input
HDMI 1-ch HDMI output.
Audio Input 1-ch bidirectional audio input
Audio Output 1-ch bidirectional talk output.
Window Split 1/4/8/9/16/25/36-window
Multiple-channel
Playback Max 16-channel playback.
Alarm Input 16-ch alarm input
Alarm Output
6-chalarmoutput
Relay output. Relay (DC 30V 1A, AC
125V 0.5A (Activation output))
Including one controllable DC +12V
output.
Storage 8 built-in SATA ports.
1 peripheral eSATA port
RS232 Port
(RS-422)
One RS232 port to debug transparent
COM data.
RS485 port
(RS-485)
One RS485 port to control PTZ. Support
various protocols
USB2.0 Port 4 peripheral USB2.0 ports
Network
Connection
Two RJ45 10/100M/1000Mbps
self-adaptive Ethernet ports
Power Port One power port. AC100-240V, 50-60Hz,
1.9A
Power Button One power button in the rear panel
Power Button One power button in the front panel
IR Remote
Control Receiver Support IR remote control
Clock Built-in clock.
Indicator
z16 record status indicators
zOne system running status indicator
zOne remote control button indicator
Power
Consumption <40W (Exclude HDD)
Working
Temperature 0ć~ +50ć
Working
Humidity 10% ~ 90%
Air pressure 86kpa ~ 106kpa
Dimension 440mm × 460mm × 89mm
Weight 5.5 ~ 6.5 KG (Exclude HDD)
Installation Desk installation

3
Chapter II Front Panel and Rear Panel
2.1 Front Panel
The front panel is shown as in Figure 2-1.
Figure 2-1
Please refer to the following sheet for front panel button
information.
Name Icon Function
Power button
Power button, press this button for
three seconds to boot up or shut
down NVR.
Number
button
Number
0-9 and
etc
zInput Arabic number
zSwitch channel
Input number
more than 10 -/--
If you want to input a number more
than 10, please click this button and
then input.
Shift
zIn textbox, click this button to
switch between numeral, English
(Small/Capitalized), donation and
etc.
zEnable or disable tour.
Fast play
Various fast speeds and normal
playback.
Slow play Multiple slow play speeds or normal
playback.
Play/Pause
f
zIn normal playback click this
button to pause playback
zIn pause mode, click this
button to resume playback.
Reverse/Pause
W
zIn normal playback or pause
mode, click this button to reverse
zplayback
zIn reverse playback, click this
button to pause playback.
Play previous WIn playback mode, playback the
previous video
Play Next XIn playback mode, playback the next
video
Up/
Down
S
,
T
zActivate current control,
modify setup, and then move up and
down.
zIncrease/decrease numeral.
zAssistant function such as PTZ
menu.
Left/
Right
W
,
X
zShift current activated control,
and then move left and right.
zWhen playback, click these
buttons to control playback bar.
ESC ESC
zGo to previous menu, or
cancel current operation.
zWhen playback, click it to
restore real-time monitor mode.
Enter ENTER
zConfirm current operation
zGo to default button
zGo to menu
Assistant Fn
zOne-window monitor mode,
click this button to display assistant
function: PTZ control and image
color.
zBackspace function: in
numeral control or text control,
press it for 1.5 seconds to delete the
previous character before the cursor.
zIn motion detection setup,
working with Fn and direction keys
to realize setup.
zIn text mode, click it to switch
between numeral, English character
(small/capitalized) and etc.
zIn HDD management
interface, you can click it to switch
HDD record information and other
information (Menu prompt)
zRealize other special
functions.
Record REC
Manually stop/start recording,
working with direction keys or
numeral keys to select the recording
channel.
Window
switch Mult Click it to switch
one-window/multiple-window.
Shuttle
(outer ring)
zIn real-time monitor mode it
works as left/right direction key.
zIn playback mode, counter
clockwise to forward and clock wise
to backward.

4
Jog
(inner dial)
zUp/down direction key.
zPlayback mode, turn the inner
dial to realized frame by frame
playback. (Only applies to some
special versions.)
USB2.0 port To connect USB2.0 storage device,
USB2.0 mouse, burner and etc.
Record light 1-16
For 4/8/16 channel device: indicator
on means that the channel is in
recording.
Remote
control
indicator
ACT Remote control indicator.
Status
indicator Status If there is Fn indicator, current status
indicator is null.
Remote
Control IR
Indicator
IR
When control the device by
tele-controller, the indicator will
flicker.
Power
indicator PWR Power indicator
2.2 Rear Panel
The 58 series rear panel is shown as below. See Figure 2-2 below.
Figure 2-2
Please refer to the following sheet for detailed information.
Port Name Connection Function
Power
button / / Power on/off
button.
Power input
port / / Input AC 220V
power.
MIC IN Audio input
port /
Bidirectional talk
input port. It is to
receive the analog
audio signal output
from the devices
such as mike phone,
pickup.
MIC OUT Audio
output port /
Audio output port.
It is to output the
analog audio signal
to the devices such
as the sound box.
Port Name Connection Function
1-16 Alarm input
port 1-16.
I/O port
zThere are four
groups. The first
group is from port 1
to port 4, the second
group is from port 5
to port 8, the third
group is from 9 to
12, and the fourth
group is from 13 to
16. They are to
receive the signal
from the external
alarm source. There
are two types; NO
(normal open)/NC
(normal close).
zWhen your
alarm input device
is using external
power, please make
sure the device and
the NVR have the
same ground.
Ground end Alarm input ground
end.
NO1 to
NO5
5-ch alarm
output port
z5 groups of
alarm output ports.
(Group 1: port
NO1~C1, Group 2:
port NO2~C2,
Group 3: port
NO3~C3, Group 4:
port NO4~C4,
Group 5: port NO5,
C5, NC5). Output
alarm signal to the
alarm device. Please
make sure there is
power to the
external alarm
device.
zNO: Normal
open alarm output
port.
zC: Alarm output
public end.
zNC: Normal
close alarm output
port.
C1 to C5
NC5

5
Port Name Connection Function
A
RS485
(RS-485)
communicat
ion port
RS485_A port. It is
the cable A. You
can connect to the
control devices such
as speed dome PTZ.
B
RS485_B.It is the
cable B. You can
connect to the
control devices such
as speed dome PTZ.
CTRL 12V / /
Controller 12V
power output. It is
to control the on-off
alarm relay output.
It can be used to
control the device
alarm output. At the
same time, it can
also be used as the
power input source
of some devices
such as the alarm
detector.
+12V / /
+12V power output
port. It can provide
the power to some
peripheral devices
such as the camera
or the alarm device.
Please note the
supplying power
shall be below 1A.
Network
port /
Two
10M/100M/1000M
self-adaptive
Ethernet ports.
Connect to the
network cable.
eSATA eSATA port /
External SATA
port. It can connect
to the device of the
SATA port. Please
jump the HDD
when there is
peripheral
connected HDD.
USB port. Connect to USB
mouse.
Port Name Connection Function
RS232
(RS-422)
RS232
debug
COM.
It is for general
COM debug to
configure IP address
or transfer
transparent COM
data.
HDMI
High
Definition
Media
Interface
High definition
audio and video
signal output port. It
transmits
uncompressed high
definition video and
multiple-channel
data to the HDMI
port of the display
device.
VGA VGA video
output port
VGA video output
port. Output analog
video signal. It can
connect to the
monitor to view
analog video.
2.3 Alarm Connection
Please refer to the steps listed below.
zConnect the alarm input device to the alarm input port.
zConnect the alarm output device to the alarm output port. The
NO and NC alarm output device can connect to the NO/C/NC
port. For the NO alarm device, please connect to the NO/C
ports. For the NC alarm device, please connect to the NC/C
ports. Please note the NO/C ports are for NO alarm device
only.
zOpen Web, and go to the Alarm setup interface to set the
alarm input and output. The alarm 01 is corresponding to the
first channel of the device I/O port and so on. Please set the
NO/NC type according to the high/low level the alarm input
device generated when an alarm occurred
zSet the alarm output on the Web. The alarm output 01 is
corresponding to the first group of alarm out put port.
2.4 Bidirectional talk
2.4.1 Device-end to PC-end
Device Connection
Please connect the speaker or the pickup to the first audio input port
in the device rear panel. Then connect the earphone or the sound

6
box to the audio output port in the PC.
Login the Web and then enable the corresponding channel real-time
monitor.
Please refer to the following interface to enable bidirectional talk.
See Figure 2-3 below.
Figure 2-3
Listening Operation
At the device end, speak via the speaker or the pickup, and then you
can get the audio from the earphone or sound box at the pc-end. See
Figure 2-4.
Figure 2-4
2.4.2 PC-end to the device-end
Device Connection
Connect the speaker or the pickup to the audio output port in the PC
and then connect the earphone or the sound box to the first audio
input port in the device rear panel.
Login the Web and then enable the corresponding channel real-time
monitor.
Please refer to the above interface (Figure 2-3) to enable
bidirectional talk.
Listening Operation
At the PC-end, speak via the speaker or the pickup, and then you
can get the audio from the earphone or sound box at the device-end.
See figure below.
Figure 2-5
2.5 Mouse Operation
Please refer to the following sheet for mouse operation instruction.
Left click
mouse
When you have selected one menu item, left click
mouse to view menu content.
Modify checkbox or motion detection status.
Click combo box to pop up dropdown list
In input box, you can select input methods. Left
click the corresponding button on the panel you
can input numeral/English character
(small/capitalized). Here stands for backspace
button. ˻stands for space button.
In English input mode: _stands for input a
backspace icon and stands for deleting the
previous character.
In numeral input mode: _ stands for clear and
stands for deleting the previous numeral.
Double left
click mouse
Implement special control operation such as
double click one item in the file list to playback
the video.
In multiple-window mode, double left click one
channel to view in full-window.
Double left click current video again to go back to
previous multiple-window mode.
Right click
mouse
In real-time monitor mode, pops up shortcut
menu.
Exit current menu without saving the
modification.
Press middle
button
In numeral input box: Increase or decrease
numeral value.
Switch the items in the check box.
Page up or page down
Move mouse Select current control or move control
Drag mouse Select motion detection zone
Select privacy mask zone.

7
Chapter III HDD Installation
Important:
Please turn off the power before you replace the HDD.
The pictures listed below for reference only.
For the first time install, please be aware that whether the HDDs
have been installed.
You can refer to the Appendix for recommended HDD brand.
Please use HDD of 7200rpm or higher. Usually we do not
recommend the PC HDD.
Please follow the instructions below to install hard disk.
(1) Use the screwdriver to loose the screws of the rear panel
and then remove the front cover.
(2) Put the HDD to the HDD bracket in the chassis and then
line up the four screws to the four holes in the HDD. Use
the screwdriver to fix the screws firmly to secure HDD
on the HDD bracket
(3) Connect to the HDD data cable to the main board and the
HDD port respectively. Loosen the power cable of the
chassis and connect another end of the power cable to
the HDD port.
(4) After connect the cable, put the front cover back to the
device and then fix screws of the rear panel.

8
Chapter IV Network Connection
Please refer to the figure below for connection sample.

9
Chapter V GUI Operation
Connect the device to the monitor and then connect a mouse and
power cable. Click the power button at the rear panel and then boot
up the device to view the analog video output. You can use the mouse
to implement some GUI operation.
5.1 Login
After device booted up, the system is in multiple-channel display
mode. See Figure 5-1 below. Please note the displayed window
amount may vary. The following figure is for reference only.
Figure 5-1
System consists of four accounts:
zUsername: admin. Password: admin. (administrator, local and
network)
zUsername: 888888. Password: 888888. (administrator, local
only)
zUsername: 666666. Password: 666666 (Lower authority user
who can only monitor, playback, backup and etc.)
zUsername: default. Password: default (hidden user)
You can use USB2.0 mouse to input. Click to switch between
numeral, English character (small/capitalized) and denotation.
Note: For security reason, please modify password after you first
login.
Within 30 minutes, three times login failure will result in system
alarm and five times login failure will result in account lock!
Figure 5-2
You can overlay the corresponding date, time and channel name on
each screen. You can refer to the following sheet for channel record or
alarm status information.
1 Recording status 3 Video loss
2 Motion
detection 4 Camera lock
Preview Control
The preview control function has the following features.
zSupport preview playback.
In the preview desktop, system can playback previous 5-60
minutes record of current channel. Please go to the Main
Menu->General to set real-time playback time.
Support drag and play function. You can use your mouse to
select any playback start time.
Support playback, pause and exit function.
Right now, system does not support slow playback and
backward playback function.
zSupport digital zoom function.
zSupport real-time backup function.
You can follow the contents listed below for the operation
instruction.
Preview control interface
Move you mouse to the top centre of the video of current channel,
you can see system pops up the preview control interface. See
figure below. If your mouse stays in this area for more than 6
seconds and has no operation, the control bar automatically hides.
Figure 5-3
1 2 3 4 5 6 7

10
You can refer to the following sheet for detailed information.
SN Name Function
1 Realtime playback
It is to playback the previous 5-60
minutes record of current channel.
Please go to the Main
Menu->General to set real-time
playback time.
System may pop up a dialogue
box if there is no such record in
current channel.
2 Digital zoom
It is to zoom in specified zone of
current channel. It supports zoom
in function of multiple-channel.
The selected area has an icon as
and the free area is shown as
an icon as .
3 Real-time backup
function
It is to backup the video of current
channel to the USB2.0 device.
System can not backup the video
of multiple-channel at the same
time.
Current selected backup channel
has an icon as and the free
channel is shown as an icon as .
Once the backup started, you can
see the free channel is shown as
an icon as .
4 Manual Snap Click it to snap manually.
5 Remote device
add shortcut
It is to go to the remote device
connection interface.
6 Bidirectional talk
Support bidirectional talk function
with the front-end device.
7 Exit
Playback control
The playback control has the following features.
zSupport play, pause, and exit and drag function.
zDuring the preview playback process, you can not see the
channel title and record status of current channel. It will
display the channel title and the record status once you exit
the preview playback.
zDuring the preview playback, you can not switch the
displayed channel or change current window-display mode.
zPlease note, the tour function has the higher priority than the
preview playback. System automatically exits the preview
playback function and its corresponding interface when the
tour function started. You can not control the preview
playback until the tour function ended.
5.2 Right Click Menu
After you logged in the device, right click mouse, you can see the
short cut menu. Please see Figure 5-4.
Here you can set local playback window, PTZ control, video color,
search records, remote device and etc. The local playback window
includes 1/4/8/9/16. You can set the detail channel amount in
1/4-window.
Figure 5-4
5.3 Main Menu
After you logged in, the system main menu is shown as below. See
Figure 5-5. There are total seven icons: search, Information, setting,
remote device, backup, advanced and shutdown. Move the cursor to
highlight the icon, then double click mouse to enter the sub-menu.
Figure 5-5

11
5.4 Search & Playback
Click search button in the main menu, search interface is shown as below. See
Figure 5-6.

12
Figure 5-6
Please refer to the following sheet for more information.
SN Name Function
1 Display
window
zHere is to display the searched picture or file.
zSupport 1/4/9/16-window playback.
2 Search type
zHere you can select to search the picture or the recorded file.
zYou can select to play from the read-write HDD, from peripheral device or from redundancy HDD.
zBefore you select to play from the peripheral device, please connect the corresponding peripheral
device. You can view all record files of the root directory of the peripheral device. Click the Browse
button; you can select the file you want to play.
Important
Redundancy HDD does not support picture backup function, but it supports picture playback function. You
can select to play from redundancy HDD if there are pictures on the redundancy HDD.
3 Calendar
zThe blue highlighted date means there is picture or file. Otherwise, there is no picture or file.
zIn any play mode, click the date you want to see, you can see the corresponding record file trace in
the time bar.
Table of contents
Other Infinova Network Hardware manuals
