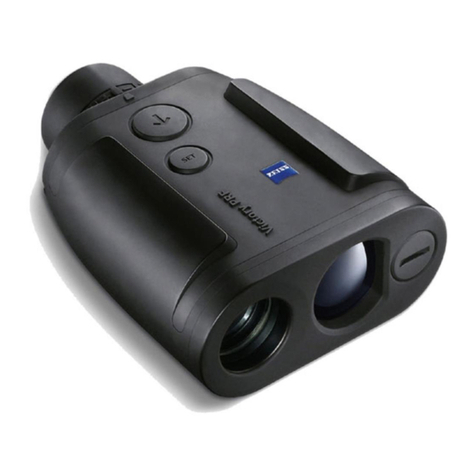
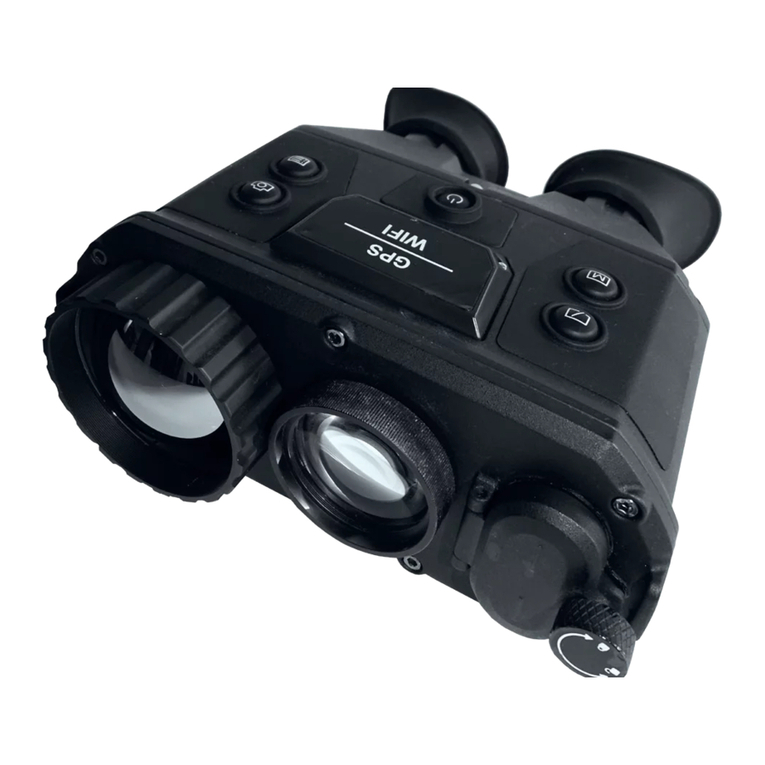
InfiRay DUAL User manual

DUAL
HANDHELD MONOCULAR
OPERATING MANUAL

Important safety information
Environmental influences
WARNING! Never point the lens of the device directly at intense heat
sources such as the sun or laser equipment. The objective lens and
eyepiece can function as a burning glass and damage the interior
components. The warranty does not cover damage caused by improper
operation.
Risk of swallowing
Caution: Do not place this device in the hands of small children.
Incorrect handling can cause small parts to come loose which may be
swallowed.
Safety instructions for use
● Handle the device and Battery Pack with care: rough handling may
damage the Battery Pack.
● Do not expose the device to fire or high temperatures.
● Only use the battery charger included in the delivery package.
● The battery capacity decreases when operated in a cold ambient
temperature. This is not a fault and occurs for technical reasons.
● Always store the device in its carrying bag in a dry, well-ventilated
space. For prolonged storage, remove the batteries.
● Do not expose your device to extreme temperatures lower than -
40°C and higher than + 50°C.
● The product shall only be connected to a USB Type C interface.
If the device has been damaged, send the device to our after-sales
service for repair.

For further information and safety instructions, please refer to the
Operation Instructions provided. This is also available on our website in
the download center: www.infirayoutdoor.com.
Disposal of batteries
Safety instructions for the power supply unit
● Check the power supply unit, cable and adapter for visible damage
before use.
● Do not use any defective parts. Defective components must be
replaced.
● Do not use the power supply unit in wet or humid environments.
● Only use the original cable provided with the battery charger.
● Do not make any technical modifications.
By depositing empty batteries at a recycling facility, you are contributing
to the protection, maintenance and improvement of the quality of our
environment.
Please only return discharged batteries.
The battery used does not contain mercury, cadmium or lead in
quantities exceeding the limits defined in Directive 2006/66/EC.
In the European Union, this symbol
indicates that the battery used in this
product may not be disposed of in
domestic waste and must be collected for
disposal separately. When returning used
batteries, please use a collection system
that may exist in your country.The
materials and substances in the batteries
may have a detrimental impact on health
and the environment.

More detailed information on your nearest collection point is available
from your local authority. In accordance with state legislation, penalties
may be imposed for the improper disposal of this type of waste.
For business customers within the European Union
Please contact your dealer or supplier regarding the disposal of
electrical and electronic devices. He will provide you with further
information.
Information on disposal in other countries outside of
the European Union
This symbol is only applicable in the European Union. Please contact
your local authority or dealer if you wish to dispose of this product and
ask for a disposal option.
User information on the disposal of electrical and
electronic devices (private households)
to your local retailer when you purchase a corresponding new product.
The proper disposal of this product serves to protect the environment
and prevents possible harmful effects on human beings and their
surroundings, which may arise as a result of incorrect handling of waste.
The WEEE symbol on products and/or
accompanying documents indicate that
used electrical and electronic products
must not be mixed with ordinary
household waste. For proper treatment,
recovery and recycling, take these
products to the appropriate collection
points where they will be accepted
without charge. In some countries, it may
also be possible to return these products
For further information and safety instructions, please refer to the
Operation Instructions provided. This is also available on our website in
the download center: www.infirayoutdoor.com.

IRay Technology Co., Ltd. thus declares that the
handheld monocular device complies with the
directives 2014/53/EU and 2011/65/EU. The
full text of the EU declaration of conformity as
well as additional information are available at:
www.infirayoutdoor.com.This device may be
operated in all member states of the EU.
Intended use
You purchase a corresponding new product. The proper disposal of this
product serves to protect the environment and prevents possible
harmful effects on human beings and their surroundings, which may
arise as a result of incorrect handling of waste.
The device is intended for displaying heat signatures during nature
observation, remote hunting observations and for civil use. This device is
not a toy for children.
Use the device only as described in this instruction manual. The
manufacturer and the dealer accept no liability for damages which arise
due to non-intended or incorrect use.
Function test
● Before use, please ensure that your device has no visible damage.
● Test to see if the device displays a clear, undisturbed image.
● Check that the settings for the device are correct.
Installing/removing the battery
The handheld monocular supports USB C power supply.

Labeling requirements
This device complies with part 15 of the FCC Rules. Operation is subject
to the following two conditions: (1) This device may not cause harmful
interference, and (2) this device must accept any interference received,
including interference that may cause undesired operation.
Information to the user
Any Changes or modifications not expressly approved by the party
responsible for compliance could void the user's authority to operate
the equipment.
Note: The manufacturer is not responsible for any radio or TV
interference caused by unauthorized modifications to this equipment.
Such modifications could void the user’s authority to operate the
equipment.
Note: This equipment has been tested and found to comply with the
limits for a Class B digital device, pursuant to part 15 of the FCC Rules.
These limits are designed to provide reasonable protection against
harmful interference in a residential installation. This equipment
generates uses and can radiate radio frequency energy and, if not
installed and used by the instructions, may cause harmful interference to
radiocommunications. However, there is no guarantee that interference
will not occur in a particular installation. If this equipment does cause
harmful interference to radio or television reception, which can be
determined by turning the equipment off and on, the user is
encouraged to try to correct the interference by one or more of the
following measures:
● Reorient or relocate the receiving antenna.
● Increase the separation between the equipment and receiver.
● Connect the equipment into an outlet on a circuit different from that
to which the receiver is connected.
● Consult the dealer or an experienced radio/TV technician for help.
This equipment complies with FCC RF radiation exposure limits set forth
for an uncontrolled environment.
Body-worn Operation
This device was tested for typical body-support operations. To comply
with RF exposure requirements, a minimum separation distance of
0.5cm must be maintained between the user's body and the handset,
including the antenna. Third-party belt-clips, holsters, and similar
accessories used by this device should not contain any metallic
components. Body accessories that do not meet these requirements
may not comply with RF exposure requirements and should be avoided.
Use only the supplied or an approved antenna.

Specications
Model
Type
Resolution,pixels
Pixel size,μm
NETD,mK
Frame rate,Hz
Objective Lens,mm
Field of View(H×V),°
Field of View,°
Eye Relief,mm
Exit pupil Diameter,mm
Diopter,D
Type AMOLED
1920×1080
Green
3600mAh
5V (USB C)
Support
(InfiRay Outdoor)
Support
16
IP67
-20 ~ +55
460
135×46×93
Magnesium Alloy
8
Resolution, pixels
Color
Battery
Max. operating Time(22℃)*,h
External Power Supply
Wi-Fi/APP
Photo/Video Recorder
Memory Capacity,GB
IP rating
Operating Tempeture,℃
Weight,g
Dimension,mm
Body Material
Detector
Specifications
Optical
Specifications
(IR Channel)
Optical
Specifications
(Day Channel)
Physical
Specifications
Display
Specifications
Battery Power
Supply
Vox
256×192
12
≤ 25
50
DP19/6×24WRG
Linear Field of View(H×V),m at 100m
Magnification, ×
Magnification, × 6
24
7
25
4
-4 ~ +4
Objective Lens Diameter,mm
Detection Range,m(Target size:
1.7m×0.5m,P(n)=99%)
19
9×6.7
15×12
2~8
980

1500
Yes
±60
±1m,±1°
905
Laser rangefinder
Measuring Range, m
Measuring Angle, °
Measurement Accuracy
Wavelength, nm
Functions
The actual service time depends on the use frequency of functions like Wi-Fi, video
recording, etc.
Improvements may be made to the design and software of this product to enhance
its features without prior notice;
You can download this User Manual at our official website: www.infirayoutdoor.com.
※

I. Package Contents
II. Description
III. Product Features
• Dual Handheld Monocular
• Power adapter
• USB C charging data cable
• Dual device portable strap
• Dual device bag
• Lens cleaning cloth
• Quick start guide
• Quality card
• Thermal+ stickers
• Functions of daytime monocular, laser rangefinder, and thermal
monocular are integrated.
• It supports laser rangefinding, with a maximum measuring distance
of 820m for deer, and the function is available both day and night.
• It adopts excellent 6× magnification and 7° FOV.
• Ergonomic design, comfortable to hold and easy to operate.
• Support Wi-Fi, photographing/recording, etc.
• The product supports rangefinding mode, thermal mode, and target
highlighting mode.
• The multi-spectral and common-optical-path optical fusion
technology is adopted to realize the fusion of daylight, laser, and
infrared.
Dual Monocular (hereinafter referred to as "Dual") is a multi-spectral
and multi-function monocular integrating thermal monocular,
daytime monocular laser rangefinder, electronic compass, and other
functions. The product mainly features that the direct-view day
channel combines with thermal channel for target enhancement. By
expanding thermal imaging applications based on traditional daylight
monocular, this product is advantageous in both the degraded use
and the enhanced search capability in the daytime, as well as the
ability to find targets quickly at night. Hence, it is a distinctive
monocular in the market.

IV. Device Composition
1 Rangefinding button
2 Menu button
3 Capture button
4 Power button
5 Eyepiece
6 Eyepiece adjusting ring
7 Direct-view day channel lens cap
8 Direct-view day channel
9 Laser port
10 Thermal channel
11 Thermal channel adjustment ring
12 USB C interface
• Magnesium alloy shell, metallic texture, solid and durable.
• Up to 9 laser reticle styles and 2 laser reticle colors.
• 3600mAh rechargeable battery, 8h ultra-long battery life.
1
4
6
2
3
8
9
10
12
7
5
11

V. Button Operation
Button Current Mode
Powered off --
--
--
--
--
Power on the device
Shutdown
Enable sleep mode
Return to the upper menu
without saving changes
Powered on
Infrared
observation
interface
Photo Record
End the recording
and save the video
Quickly move the
cursor
Quickly adjust
parameters
Return to the home
screen/submenu
Quickly move the
cursor
Quickly adjust
parameters
Photo
Move up/right
Move up/right
Single ranging
Move down/left
Move down/left
Shutter calibration Background
calibration
Open the menu option
Confirm the parameter
Recording
Home screen
Submenu
Menu option
Menu
Parameter
interface
Infrared
observation
interface
Infrared
observation
interface
Switch between
electronic zoom settings
Any
observation
interface
Enter the menu
Scanning
Menu
Menu
Parameter
interface
Main menu
interface
Switch between
observation modes
Press and HoldPress
Capture button
Menu button
Laser
Rangefinding
button
+
+
• Press and hold the Menu + Power buttons for 10s to open the interface for
adjusting the laser reticle position.
• Press and hold the Menu + Capture + Laser Rangefinding buttons for 10s to
open the interface for adjusting the image moving position.

Dual is powered by a battery with a built-in cell, a rechargeable
lithium-ion battery pack that provides battery power for up to 8 hours
of normal operation. The battery should be fully charged before the first
use.
VI. Battery Charging
13
17
16
14
15
• Open the USB C waterproof cover (16);
• Insert the USB C end of the data cable (15) into the USB C socket (17)
on Dual;
• Connect the other end of the data cable to the power adapter (14), and
insert the adapter into a 100–240V power socket (13) for charging;
• When charging, a lightning charging icon appears on the battery
icon, flashing alternately with the current battery level, and the LED
indicator on the device is in red. When the LED indicator turns green, it
indicates that the charging is completed.
• During use, when displaying inside the icon, it indicates that the
power is higher than 20%, with sufficient power. If the battery icon turns
empty and flashes, it indicates a low battery level. Please charge the
battery in time to avoid the reduced service life of the device due to
battery over-discharging.

Safety Precautions
• When charging, please use the 5V2A power adapter compatible with
the device. Using any other type of power adapter may cause
irreversible damage to the battery or the adapter itself;
• If the device is not in use for a long time, the battery should be partially
charged, not fully charged or discharged.
• Do not charge the device immediately after it is moved to a warm
environment from a cold environment. Wait for 30 to 40 minutes for
preheating.
• Do not use the charger if it is modified or damaged;
• The device should be charged at a temperature of 0°C to +40°C.
Otherwise, the battery life will be significantly reduced.
• When charging, please do not leave the battery unattended;
• Do not connect the battery to the power supply for more than 24
hours after it is already fully charged;
• It is better not to connect the device to third-party devices that
consume more energy than the allowed value.
• The device is equipped with a short circuit protection system, but
conditions that may lead to a short circuit should be avoided.
• The recommended operating temperature for the device is from
-20°C to +50°C. Do not use the device beyond this temperature range,
or else, it may shorten the battery endurance.
• When the device is used under sub-zero temperature, the battery
capacity drops. This is normal and does not indicate a defect.
Dual supports external power supplies, such as the portable power
source for a mobile phone (5V).
• Connect an external power supply to the USB C port (12) of Dual;
• Then, the device automatically switches to the external power supply
and charges the internal battery pack at the same time;
• When the external power is turned off, the device will switch to the
battery pack for the power supply.
VII. External Power Supply

Notes for Use
WARNING: The lens of the thermal imaging scope must not be pointed
at any sources of intense radiation energy, such as laser-emitting
devices or the sun. This may damage the electronic components in the
device. Damage caused by failure to comply with the operating manual
is not covered under warranty.
Power-on and Settings
• Open the lens cap; if the outdoor sunlight is strong, make sure the lens
does not face the sunlight to avoid burns;
• Press and hold the Power button for 3s to power on the device;
• Rotate the eyepiece diopter ring until the icon on the screen is clear;
• Rotate the focus ring of the infrared objective lens to adjust the focal
length until the infrared image is clear
• Set the image palette: On the infrared mode, press and hold the M
button and press Camera and Rangefinding buttons to set the image
palette, of which the options include black hot – green hot in sequence,
and the icon on the top status bar is updated in real-time;
• Set the screen brightness: On the menu, select the "Screen Luminance"
option, and screen brightness can switch between 6 levels from 0 to 5;
• Set image parameters: After operating according to the rules, enter the
main menu to set image parameters (image brightness, image contrast,
and image sharpness);
• Press the Power button and the device will enter standby mode. Press
the Power button again to wake it up.
• After use, press and hold the Power button for 3s, and an interface of
a shutdown confirmation is displayed. After confirming by pressing the
button, the display turns black and the device is powered off when the
data is saved. When the device is powering off and saving data, do
not disconnect it from the power source. Otherwise, data cannot
be saved.
VIII. Usage

X. Wake
XI. Observation Mode
Dual can perform 1×, 2×, and 4× digital zoom on images.
• On the home screen, press both Mand Capture buttons to zoom
in/out on the image;
• The magnification is displayed at the status bar of the display area in
real time.
In the power-on status, press the Power button and the device enters
sleep mode, with the screen going black; in the sleep status, press any
button to light up and awaken the screen. If the screen in sleep mode is
not lit up for more than 1h, the product will power off automatically.
On the home screen, press the Menu button to switch the observation
mode quickly and circularly. There are 3 observation modes available for
users to choose from, including thermal , fusion highlighting ,
and direct-view . The default mode after startup is the thermal
mode.
IX. Digital Zoom
IR

There are 2 calibration methods for infrared images: shutter calibration
and background calibration.
Manual shutter calibration: Press both Menu + Rangefinding buttons
to complete image calibration;
Background calibration: Close the infrared lens cap, and press and hold
both Menu + Rangefinding buttons to complete the background
calibration. Before calibration, there will be a text prompt
for closing the lens cap, and
background calibration will be carried out after 2s. After calibration,
remove the lens cap.
Dual is equipped with a built-in 16GB memory space, which allows
photo taking and video recording of an observed target. The image and
video files will be named after time, so it is recommended to set the
system date and time settings in the advanced menu before using the
photographing and video recording functions (refer to "Main
Menu-Settings-Date/Time Setting").
Photo
• On the home screen, press the Capture button to take a photo, and a
photo icon appears on the right side of the status bar ;
• The images taken are saved in the internal memory space.
Record
• On the home screen, press and hold the Capture button to start the
video recording;
• A recording icon and a prompt box showing the recording time will
appear in the upper right corner of the display , with the
time format as 00:00 (minute: second);
• During recording, you can also take a photo by pressing the Capture
button;
• Press and hold the Capture button again to stop the recording and
save the video;
• The videos and images captured are saved in the internal memory
space.
XII. Image Calibration
XIII. Photo Taking/Video Recording
08:15
Cover lens when calibration.

Note:
• You can open and operate the menu during video recording;
• All images taken and videos recorded will be saved in the built-in
memory card in the formats of IMG_YYYYMMDDhmmss_XX.jpg
(photos) and VID_YYYYMMDDhmmss_XX.mp4 (videos), of which
YYYYMMDDhhmm refers to year/month/day/hour/minute/second, and
XX the serial number of the two-bit multimedia file;
• The serial number of the multimedia file can not be reset;
Notes:
• The maximum duration of a video recording file is 5 minutes. When the
duration is more than 5 minutes, the video will be automatically
recorded onto a new file;
• The number of files is fixed and limited by the memory space of the
device. Each device can store 1,650 photos and 850 videos. If it is
beyond this amount, the oldest photos or videos will be automatically
replaced. Please regularly transfer the material and photos to other
media to free up the space on the memory card.
• The interface icon information is not displayed on the captured video
or image.
Memory Access
When the device is powered on and connected to a computer, it will be
recognized by the computer as a flash memory card. Then, you can
access the memory of the device and copy images and videos.
• Connect the device to a computer through the USB cable;
• Power on the device;
• Double-click "My Computer" on the desktop of the computer, find the
device named "U disk" and double-click to open folders named
"VIDEO-CIF" and "PHOTO-CIF" to access photos and videos;
• Open the memory file, and there are different folders named after time
in the format of xx (day)xx (month) xxxx (year) in it;
• Select required files or folders to copy or delete.

In the observation mode, there are two modes of laser rangefinding:
single ranging and continuous ranging. The target distance is displayed
as 0000 m by default.
Single ranging mode: Align the center of the laser rangefinding reticle
with the target, press the Rangefinding button on the laser
rangefinding module, and the target range information is displayed on
the screen;
Continuous ranging mode: Align the center of the laser rangefinding
reticle with the target, press and hold (3s) the Laser Rangefinding
button to enable the continuous ranging mode, and the target distance
information is displayed on the screen and updated continuously, with a
1-second update time. Press the Rangefinding button to exit the
continuous ranging mode.
Note:
• After the device is connected to the computer, it prompts that only
part of the memory is available. This is because the storage algorithm
mechanism adopted by the device is different from that of the computer
and does not represent the actual memory occupation. Please check the
actual memory in Dual's device file management.
• After connecting the computer, do not use the computer's formatting
tool to format the device, because this operation will clear the program
inside the device!
XIV. Laser Rangending

The shortcut menu enables quick adjustments to the basic settings of
some common functions, including screen brightness, Wi-Fi settings,
polarity switching, image brightness, image contrast, image sharpness,
reticle type, reticle color, and analog video. Press the M button to
confirm saving, or press the Power button to exit and return to the
previous level without saving.
• On the home screen, press and hold the Mbutton to enter the main
menu;
• Switch the following function options by pressing the Capture button
and Rangefinding button, and the selected item will be highlighted:
The status bar is located at the top, right, and bottom of the image
interface and displays information related to the current operating
status of the device. From the top down and left to right, there are:
Top: Image mode, polarity, Wi-Fi status, analog video status, azimuth
angle, video recording, photo taking, digital zoom, battery level, and
current time.
Right: Angles of pitch and inclination.
Bottom: The value of the target distance and angle measurement after
laser rangefinding is enabled.
XV. Status Bar
XVI. Main Menu
Table of contents
Other InfiRay Monocular manuals

InfiRay
InfiRay Mini Series User manual

InfiRay
InfiRay Tube Series User manual

InfiRay
InfiRay Xclip User manual

InfiRay
InfiRay EYE III User manual

InfiRay
InfiRay EYE III User manual

InfiRay
InfiRay Rico Series User manual

InfiRay
InfiRay EYE III User manual

InfiRay
InfiRay Affo AP09 User manual

InfiRay
InfiRay AFFO Series User manual

InfiRay
InfiRay AP13 User manual