InfiRay Rico Series User manual

Rico Series User Guide
V1.0
InfiRay Technologies Co., Ltd.
Specification
Model
RL42
RH50
Microbolometer
Type
Uncooled
Resolution, pixels
384x288
640x512
Pixel Size, um
12
NETD, mk
≤50
Frame Rate, Hz
50
Optical Characteristics
Objective Lens
F42mm /1.0
F50mm /1.2

Field of View, degrees
6.3°x 4.7°
5.3°x 4.0°
Magnification, x
4~16
2.8~11.2
E-zoom, x
4 / 8 / 12 / 16
2.8 / 5.6 / 8.4 / 11.2
Eye relief, mm
55
Exit pupil diameter, mm
6
Diopter Adjustment, D
-4~+4
Detection Range, m
(Target size: 1.7mx0.5m, P(n)=99%)
2197
2594
Display
Type
AMOLED
Resolution, pixels
1024*768
Size, inch
0.39
Power Supply
Battery Type / Capacity / Output
Voltage
Li-Ion Battery Pack IBP-1 / 3600mAh / DC3.7V
Power Supply
3V~4.2V
External Power Supply
5V (Type C USB)
Operational Characteristics
Max. Operating Time (at t=22℃), h★
6
Max. Recoil Power on Rifled
Weapon, g/s²
1000
Degree of protection, IP code
IP67
Amount of built-in memory, Gb
32
Operating Temperature Range, ℃
-20~+50
Laser Rangefinder
Optional
Weight, g
820
830
Dimension, mm
250x65x58
250x61x58
Characteristics of Rangefinder
Wavelength, nm
905
Max. Measuring Range, m/y★★
1000/1094
Measurement Accuracy, m
±1
* The actual operating time depends on the intensity of using Wi-Fi, video recorder, laser
rangefinder.
** Depends on the characteristics of the object under observation and environmental conditions.

1. Package Contents
● Rico series Infrared Sight
● IPB-3 Bag
● IRM-030-205-Q1 Picatinny rail
● IBP-1 Battery pack
● IBC-1 Charger
● Power Adapter
● Two in One data cable
● Wiping Cloth
2. Product Overview
Different with night vision devices, Rico series infrared scope, based on infrared thermal image theory,
operating without external lighting, not affected by strong lights. No matter in daytime with bad weather
condition (rain, snow, fog or smog) or at night, users can observe objects hiding behind barriers (tree
branches, tall grass and shrub) with Rico scope. Powerful, high scalability, optional high precision laser range
finder (Maximum ranging 1000m), Rico series scope can be widely used in night hunting, observation,
terrain navigation, search and rescue etc.
一、产品特点 3. Product feature
⚫Patented 12μm sensor
Digital Zoom: ×1/×2/×3/×4
⚫High image quality
⚫Build-in 32GB storage, supports photographing
and video recording
⚫aluminum alloy shell
⚫Build-in Wi-Fi module, supports Apps
⚫Maximum detection range 2600m
⚫Build-in Digital compass and Gravity Sensor
⚫Optional Laser Rangefinder
⚫Many reticle types and color to choose
⚫Quick replacing recharging battery pack
⚫Ultra-Clear Mode
⚫AMOLED screen:1024*768
⚫Include PIP and pixel calibration functions
⚫High frame frequency: 50Hz
⚫User Friendly interfaces
⚫Three save sort for rifle types

4. Components and buttons
1. Lens Cover
2Object Lens Focusing
Ring
3Power Button
4 Up button/Zoom in
5. Menu/M button
6. Down
Button/Photographing
Button
7. Eye piece focusing ring
8. Eye Cup
9. Laser Rangefinder
(Optional)
9a. Laser launch port
9b. Laser receive port
9c. Laser indicator port
10. TypeC port
11. Battery pack
12. Battery pack ring-pull
13. Battery pack jar
Button function Description
Button
Status/
Current
operation
mode
Press
Hold Down
Power Button
OFF
——
Switch On

ON
Calibration
Turn Off
Stand by
Exit Stand by
——
Single Ranging
Mode
Show range value
——
Advance Manu
Exit to Main Menu
without saving
——
Pixel
Calibration
Add/Delete defect
pixcel
↑button/Digital
Zoom
Home Screen
Digital Zoom
Turn On/Off PIP
function
Main Menu
Scroll up menu options
——
Menu Button
Home Screen
Enter Shortcut Menu
Enter Advance Menu
Shortcut Menu
Adjust parameters of
one function
Save and exit to Home
Screen
Advance Menu
Enter next
level/Confirm option
parameters
Save and exit to Home
Screen
Pixel
Calibration
Confirm Selection/Save
pixel Position
Save and exit to Home
Screen
Button/Photography
Home Screen
Photographing
Turn ON/OFF video
recording
Main Menu
Scroll down
——
Video
Recording
Photographing
Save video
Up Button + Down
Button
Main Menu
——
Turn ON/OFF Ranging
Mode
Ranging Mode
Switch
Single/Continuous
Ranging Mode
——
M button + Down
Ranging Mode
——

6. Battery Pack
There is a rechargeable lithium-ion Battery pack IBP-1, operation duration: 6 hours. Please fully
charge the battery pack before first time using.
How to charge the battery pack:
➢Align the pins of battery pack (A) with the groove (B) of battery pack jar (13), insert battery pack
into the jar;
➢Insect type C cable to the port in battery pack jar (C);
➢Connect anther port of type C cable with adapter.
➢Plug in the adapter to 100-240V socket
to charge battery pack;
➢Once installation complete, the LED on
battery pack (D) will glow or blink;
-;When LED continuously Red,
indicating the charging is
progressing;
-;When LED turn to continuously
Green, means battery fully
charged;
-When LED blinking with Red color,
indicates charging jar connected
to power supply but no battery
pack installed.
➢When fully charged, plug out and take battery pack from jar
Battery pack installation
➢Pull out the Battery pack ring-pull (12), rotate the ring clockwise until it parallel with battery pack
horizontally.
Button
Turn ON/OFF Laser
indicating

➢Install the battery pack by aiming the pin of battery pack to the groove of battery pack jar.
➢When the battery pack is fully embedded into the shell of Rico, rotate the ring of battery pack
anticlockwise (12) to lock the battery pack;
➢Then the ring (12) is now vertical with battery pack, flip down the ring. When the raised part of
ring pointing to the sign “CLOSE” on battery pack, the installation of battery pack complete.
➢Rico series only supports charging provided battery pack. Charging with unofficial battery pack
may cause damage to the device and fire, lead to extensive losses.
Safety Masures
⚫Partial charging the battery is necessary if the battery is planned to be idled for long time. Avid
fully charged or discharged.
⚫Don’t charge the battery instantly while bring the battery from cold environment to warm
environment. Leave 30-40 mins before charging;
⚫Don’t leave battery unsupervised when charging;
⚫Don’t charge with broken or modified charger;
⚫Charge the battery in temperature range 0℃~+45℃, otherwise that may cause
short service life of battery.
⚫Don’t charge over 24 hours;
⚫Avoid battery contacting high temperature or fire;
⚫Keep battery away from water;
⚫Don’t charge with charger that has exceed rated current;
⚫Avoid short circuit even though short circuit protection already included in battery pack;
⚫Don’t disassemble and replace parts of battery pack; don’t hit the pack or fall it on the ground;
⚫The battery capacity may decrease when operating in temperature below 0 ℃,that is normal,
not defect.
⚫Avoid operating in temperature above 50℃, may lead to shorter battery service life.
⚫Leave the battery pack to somewhere children can not access to.
7.External Power Supply
Rico series can be charged with external power supply, such as power bank.
➢Plug in external power supply to the Type C port in Rico series scope;
➢The device will switch to external power supply meanwhile charge battery pack.

➢The icon of battery on the screen will turn into charging icon ;
➢If connected with external power supply but without battery pack, the icon of battery turns into
USB icon ;
➢While disconnect with external power supply, the Rico series will switch to internal power supply:
battery pack, instead of Turn OFF the scope.
Caution:
Charging IBP-1 pack in temperature blow 0℃with power bank may lead to shorter
battery service life.
8. Operating
Picatinny Rail Installation
。
Before using the Rico series infrared scope, you need to install the Picatinny Rail on the bottom of
scope. Depend on the types of rifle, there are multiple screw locations to choose. Adjust to suitable
eye-relief distance.
➢Fix Picatinny rail on bottom of the scope with M5 screws;
➢Mount the scope on rifle and adjust to suitable location;
➢When the location is set, demount the scope and unscrew the screws, spread sealant on the
thread of screws, then screw them back. Leave the sealant to dry.
➢While the sealant is dry, mount the scope to rifle and start set zeroing;
➢Follow Step 9 as below to zeroing, if that is your first time to mount on rifle.
Warning! Don’t point the lens towards any intense light source, such as laser or solar. This may
break the scope and damaged devices in that case are not covered by warranty.
Turn On
➢Open the lid of lens, hold down the power button to turn on the scope. Wait for seconds
before the scope finish starting up.
➢Rotate diopter regulation knob until images in eyepiece are clear. When next time the same
user using the scope, there is no more adjustment required once the regulation was set.
➢Rotate the focusing ring of object lens until the object is focused and clear.
➢Refer to shortcut menu instructions of this manual to set the following parameters:

brightness of screen, contrast of image, image modes, digital zoom and etc.
➢Hold on Power Button for about 0.5 seconds, there will be prompts of standby and count
down of switch off. While count down over, release Power Button to switch off the scope. If
you release the button before counting down finalize, the scope will turn into standby mode.
➢In standby mode, press Power Button to wake up the scope.
9. Zeroing
Rico series require zeroing in “Freeze” method, follow zeroing steps below in operating temperature:
➢Mount the scope on rifle;
➢Set a target on the distance that already known;
➢Refer to instructions in Step 8 about turn on the scope, adjust the scope;
➢Select Correction Type (Refer to “Reticle - Zeroing Profile” in Main Menu);
➢Hold down M button to enter Advanced Menu, select “Zeroing”; press M button to enter
submenu.
➢Base on pre-set distance to target, select or add new distance for zeroing (Refer to Advanced
Menu function: “Zeroing - Zeroing Range - Set Zeroing Distance “);
➢Press M button to enter Zeroing interface (Refer to Advanced Menu function: “Zeroing - Zeroing
Range - Set Zeroing Distance “), the cross reticle will reveal in the center of screen, and the
location of reticle will appear in the top left corner of screen.
➢Aim and shoot the target;
➢Once shooting done, watch the location of impact; if the location of impact and aiming (The
center dot of cross reticle) are not aligned:
➢Keep the Scope still, hold down both ↑button and ↓button, then image freezes, meanwhile
a symbol of freeze will appear on the left of the screen.

➢Press ↑button or↓button to switch moving directions on X or Y-axis. Press M button to
confirm and selected icon blinks;
➢On the screen, move the reticle via press or hold down ↑button or↓button on X-axis or Y-axis.
Press↑button to move reticle right or up, press ↓button to move reticle left or down. Press once
to move the reticle 1 pixel while Hold Down to move reticle 10 pixels every time.
➢After moving reticle, press M button to save the position, icon stop blinking. User can switch
between X and Y-axis.
➢When reticle moved to the position of real impact, hold down M button to save the position of
reticle and exit to the first level of Advanced Menu.
➢Repeat previous steps until the position of aiming aligned with position of impact.
Tips: When zeroing set, you can switch zeroing ranges in shortcut menu.
10.Calibration
When image degrades or nonuniform, calibration will solve these issues. Calibration could balance
the background temperature of sensor and remove the defects in images.
There are three modes of calibration: Shutter Calibration(A), Manual Calibration(M) and
Background Calibration(B).
Select Calibration mode in Main Menu – Calibration.
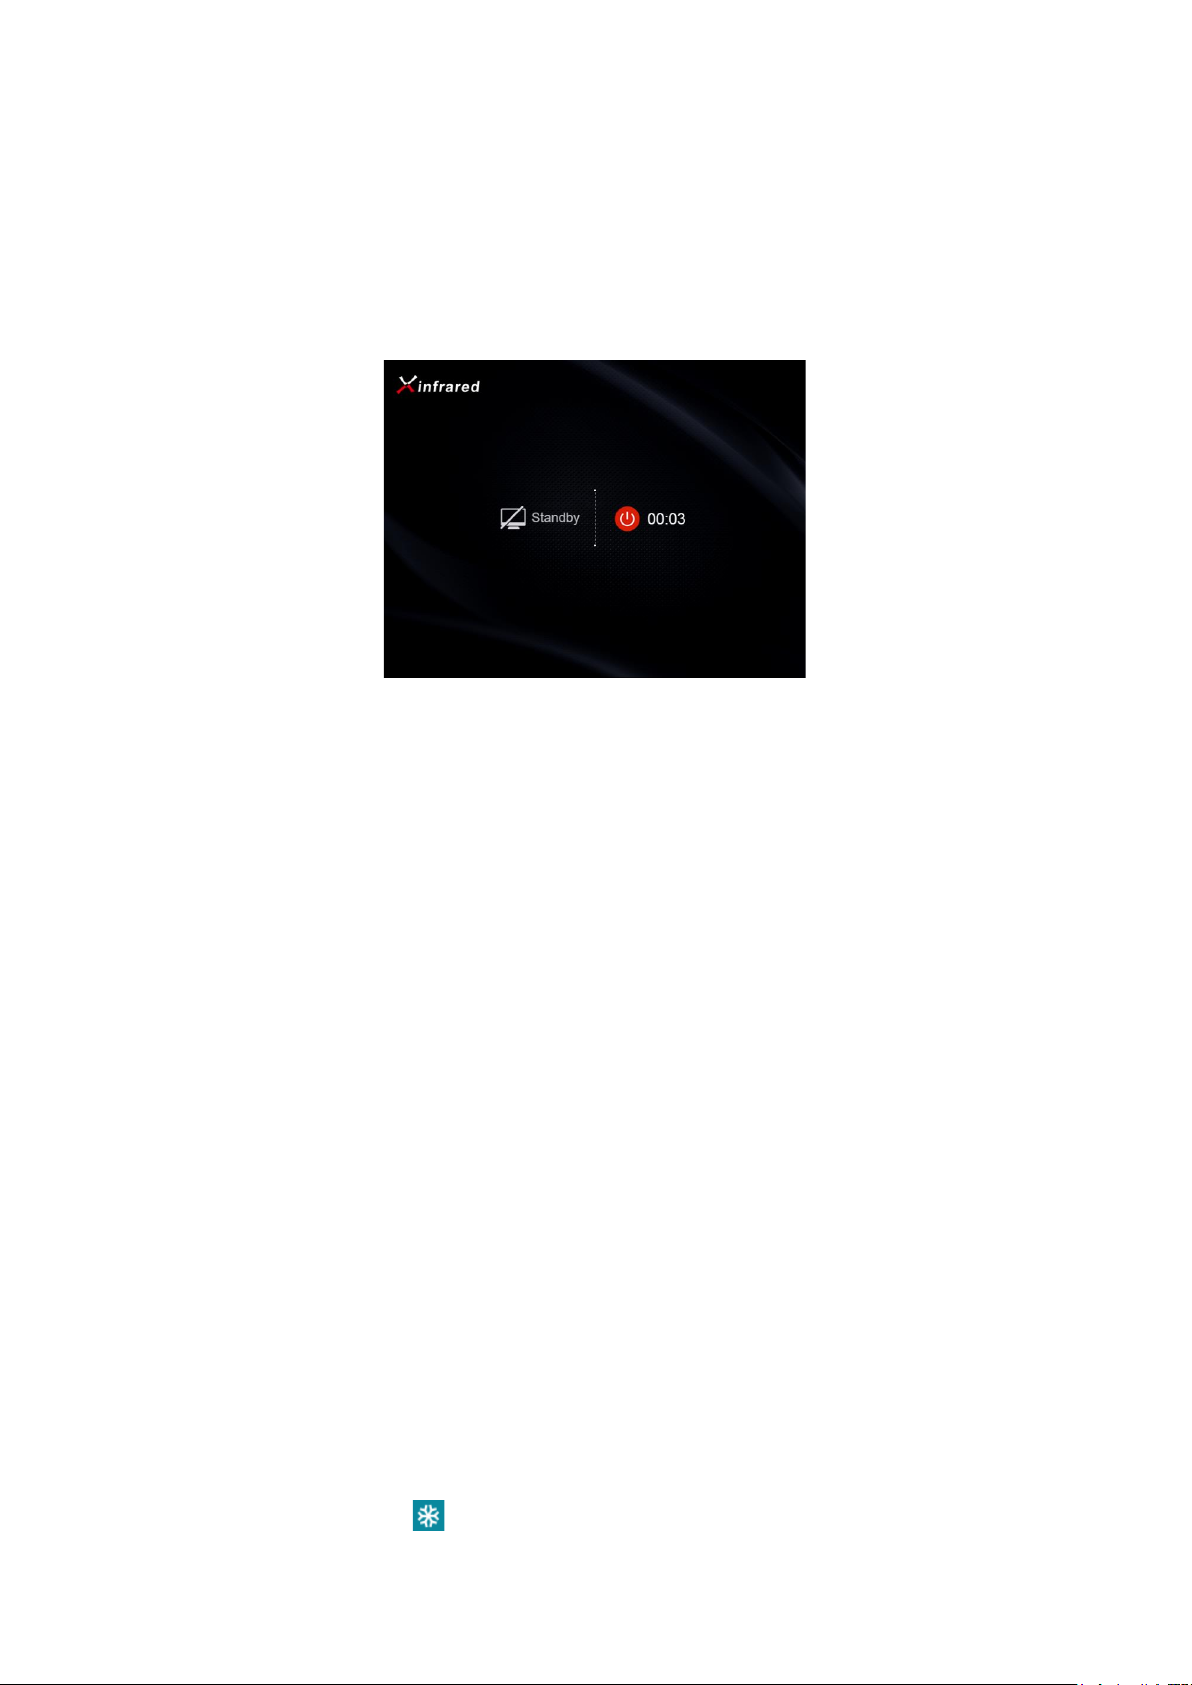
➢Auto Shutter Calibration (A): the device calibrate shutter automatically, without covering lens
lid (sensor shut down the inner shutter). Before automatic calibration begins, there will be a
prompt of 5 seconds count down beside the icon of shutter. Press M Button to cancel the
calibration during the countdown. In the auto calibration mode, users can press Power
Button to calibrate shutter manually.
➢Manual Shutter Calibration (M): Press Power Button in Main Menu to calibrate shutter
manually, without covering the lens lid.
➢Background Calibration (B): Cover the lens with lid, press Power Button to calibrate. There is
a prompt as “cover lens during calibration” appear on the screen, then the scope start
calibrate after 2 seconds. Remove the lid from lens when calibration finished.

10.Digital Zoom
Rico series support 2 times, 3 times, 4 times digital zoom as function to provide visual amplification.
In Main Menu, press↑button in loop to switch magnification times and the status reveal on the top
status bar.
For RL42, 1-4 times magnification means: 4×,8×,12×,16×; for RH50, means 2.8×,5.6×,
8.4×,11.2×.
Photographing and Video Recording
Rico Series infrared thermal imaging scope built-in 32GB storage to provide
photographing and video recording functions. All photos and videos will be named as current
time. So, we suggest synchronize time and date via App before photographing and video
recording. For more details about App, refer to instructions in InfiRay official website.
Photographing
➢Press Photograph Button in Main Menu to take photo graphs. The image will be ‘freezed’ and an
icon of camera appear on the top left corner of the screen. The icon will disappear while
photographing finalized.
➢All photos are saved in the build-in storage.
Video Recording
➢Hold down Photography Button in Main Menu to record video.
➢An icon of video recording and recording time duration appear on the top left corner of screen,
the format of time is HH:MM:SS (Hours: Minutes: Seconds);
➢When video recording in progress, the red dot on time duration prompt will be flashing
continuously;
➢When video recording in progress, press Photography Button to take photographs;
➢Hold down Photography Button to save recordings and exit video recording progress;
➢All videos and photos are saved in the build-in storage.
Tips:
-You can still manipulate the Menu while recording;
-Photos and videos will be saved as following formats in built-in storage:
IMG_HHMMSS_XXX.jpg(Photo) 、VID_HHMMSS_XXX.mp4(Video). HHMMSS means

hours/minutes/seconds and XXX means three digits serial numbers.
-Can’t reset the serial numbers of media files.
Caution:
-The maximum duration of a video file is 5 minutes. Once the duration exceeds 5 minutes, footage
will be saved to a new file.
-The number of files is limited by the volume of storage. Remember to clean up the storage or
move media files into other devices to release spaces for new files.
Access to build-in storage
➢While the scope is turned ON and connect to PC, it will be recognized as SD card for copy photos
and videos in the build-in storage.
➢Connect scope and PC with data cable;
➢Turn on the scope;
➢Double click the ‘This PC’ icon on your Windows OS, find and double click the device named
“Infiray” to access to built-in storage.
➢In the storage, there are some folders named with different names. They are named as
xxxx(Year)xx(Month)xx(Day);
➢What’s inside the folders are photos and videos with the labelled date. Photos are in
IMG_HHMMSS_XXX.jpg format while videos in VID_HHMMSS_XXX.mp4 format. All these media
files are saved in built-in storage. The HHMMSS means hours/minutes/seconds and XXX are three
digits serial numbers.
➢Select file or folder to copy or delete.
13. Status Bar
Status bar in the top of screen, demonstrates the status of scope. From left to right are:
1. Current image mode ( :White Hot; :Black Hot; :Red Hot; : Target
Highlighting mode; :Pseudo color mode)
2. Current zeroing type and distance (such as A100m)
3. Ultra-clear mode( : Ultra-clear OFF; :Ultra-clear ON);

4. Current zoom in ratio (such as 2.8╳)
5. Calibration Mode (in automatic shutter calibration mode (A), while 5 seconds before calibration,
there will be an icon of countdown replaced letter ‘A’ right behind the icon of calibration, as )
6. Compass (will not reveal when this function switched OFF)
7. Standby setting (default OFF)
8. Video output status (icon will not reveal while video output OFF)
9. Wi-Fi Status ( :Wi-Fi OFF; :Wi-Fi ON and Connected)
10. Clock (set clock in the App “InfiRay Outdoor”)
Battery status(When the icon is in green color, as , indicates its capacity is more than 40%; when the
icon is in yellow color, as , indicates its capacity is less than 40%; when the icon is in red color, as ,
indicates its capacity is low, please charge instantly; when there is a flash icon in the icon, as ,
indicates it is charging; when using external power supply, the icon reveals as );
14. Shortcut Menu
For setting commonly used modes easier, shortcut menu includes: image mode, screen brightness,
image sharpness and zeroing range.
➢Press M button in Main Menu to enter Shortcut Menu;
➢Press ↑button and ↓button to switch options in following modes;
⚫Image Mode: press M button to switch image modes in loop, as White Hot, Black Hot, Red
Hot, Pseudo Color and Target Highlighting;
⚫Screen Brightness: Press M button to change brightness, level 1 – 5;
⚫Image Sharpness: Press M button to change sharpness, level 1 – 5;
⚫Zeroing range: Press M button to switch zeroing range info in current zeroing mode (if
select Rifle A, in this mode, you can only switch saved range values of Rifle A)
➢Hold down M button to save and exit to Main Menu.
Tips: in shortcut menu, scope will automatically save and exit to Main Menu while idled 5 seconds.

15. Advenced Menu
➢Press M button in Main Menu to enter Advanced Menu
➢Press ↑button and↓button to switch options;
➢Options in Main Menu are in loop: following the last option in first page, is
the first option in second page. Press ↑button in the first option in first
page will switch to the last option in second page.
➢Press M button to modify parameters in current menu or enter next level menu;
➢In second and third level menu, press ↑button and ↓button to select parameters
or functions; press M button to confirm selection. Icon blinks indicates saving
and exit to previous menu or enter submenu;
➢Press Power Button in all menu interfaces to exit to previous menu without
saving, or back to Home Screen; Hold on M button to save and exit to main screen
(except zeroing).
➢In all menu, while idled 15 seconds, the scope will exit to Main Menu without
saving.
➢When scope is operating, exited from Advanced Menu, the cursor will remain on
the previous position. After rebooting the scope, the first time in Advanced
Menu, the cursor will be placed on the first option.

Main Menu Options and Descriptions
Ultra-Clear
Turn ON/OFF Ultra-Clear mode
⚫Hold down M button to enter Advanced Menu;
⚫Select ‘Ultra-clear’ (cursor will remain on this option when first time in Main
Menu);
⚫Press M button to Turn ON or OFF this mode, along with the sound of shutter
calibration;
⚫When Turn ON/OFF, the icon changes either. When there is a slash on icon,
means it is OFF; otherwise, without slash, means ON.
Wi-Fi
Select Wi-Fi status
⚫Hold down M button to enter Advanced Menu;
⚫Select “Wi-Fi” function via pressing ↑button and ↓button;
⚫Press M button to turn ON/OFF Wi-Fi;
⚫When Turn ON/OFF, the icon changes either. When there is a slash on icon,
means it is OFF, otherwise, without slash, means ON.
Video
Output
Turn ON/OFF video output
⚫Hold down M button to enter Advanced Menu
⚫Select ‘Video Output’ via pressing ↑button and ↓button;
⚫Press M button to switch ON/OFF video output;
⚫While output of video begins, an icon will reveal in the top status bar.
Calibration
Select calibration mode
Rico series has three calibration modes: Automatic(A), Manual (M) and Background
(B).
⚫Select ‘Calibration’;
⚫Press M button to submenu of calibration;
⚫Press ↑button and ↓button to select one mode from the following
three modes:
-Automatic shutter calibration (Automatic): controlled by programs, will
calibrate automatically.

-Manual shutter calibration (Manual): users can calibrate when they want,
based on the imaging quality.
-Background Calibration (Background) need to seal the lens with lid.
⚫Press M button to confirm, while the icon in the status bar changes either.
Compass
Turn ON/OFF Compass function
⚫Select “Compass”
⚫Press M button to Turn ON/OFF compass;
⚫When compass is turned on, it will reveals in the center of top status bar.
Gravity
Sensor
Turn ON/OFF gravity sensor
⚫Select “Gravity Sensor” function;
⚫Press M button (12) to Turn ON/OFF gravity sensor;
⚫Both left and right sides of screen will layout relevant functions when turned on;
⚫The scale plate on the left means tilt angle, and the right one represents pitch
angle.
Reticle
Setting zeroing profile, reticle type and color.
⚫Select ‘Reticle’;
⚫Press M button to enter submenu, set
as below:
Zeroing Profile
Select Zeroing Profile
⚫Press M button to enter submenu

⚫Select ‘Zeroing Profile’ and press M button to enter
submenu;
⚫Select one of Profile A/B/C via pressing↑button and ↓
button;
⚫Press M button to confirm.
Reticle Type
Select Reticle type
⚫Press M button to enter submenu of Reticle Type
⚫Select “Reticle Type” then press M button to enter submenu;
⚫Select one of seven reticle types via pressing ↑button and
↓button;
⚫Reticle type changes while reticle moves.
⚫Press M button to confirm.
Reticle Color
⚫Press M button to enter submenu of Reticle Color
⚫Select ‘Reticle Color’ then press M button to enter submenu
of reticle color;
⚫Press↑button and ↓button to choose one of four

reticle colors, from top to bottom are
Black/White, White/Black, Red and Green.
⚫Reticle color changes while reticle moves.
⚫Press M button to confirm.
Zeroing
Set zeroing profile and range before zeroing.
Rico series support zeroing in ranges 1-999 meters.
⚫Select “Zeroing” in Main Menu;
⚫Press M button to enter submenu of zeroing, reveal zeroing ranges, default
values are 100m, 200m, 300m;
⚫Press ↑and ↓button to select
zeroing ranges, based on the
ranges of target;
⚫Press M button to confirm zeroing
ranges then enter submenu of
zeroing ranges;
Zeroing
⚫Press M button to enter zeroing menu, reticle changes to
cross cursor. The top left reveals the X and Y coordinates;
⚫Aim the center of reticle with target’s bull’s-eye. Shot and
observe the real impact location;
⚫ Keep the scope still, hold down ↑and ↓button
simultaneously, image freeze and icon of freeze
reveals on the screen.

⚫ Press ↑or ↓button to switch moving directions:
X or Y-axis. Press M button to confirm, selected
icon blinks;
⚫Press or Hold Down ↑and ↓button to move cursor,
press↑button to move cursor right or up and ↓
button to move left or down. Press once, the
reticle moved one pixel while hold down once to
move reticle 10 pixels.
⚫When reticle in the right position, press M button to save its
position, icon stops blinking. Users can switch X or Y-axis
again;
⚫Move cursor to the real impact location, hold down M button
to save the position of reticle and exit to Main Menu;
Setting Zeroing
Range
⚫Select ‘Zeroing Range’;
⚫Press M button to enable resetting zeroing range;
⚫Press ↑and ↓button to set every digits of range
values, press M button to switch among numbers;
⚫While finished setting, hold down M button to save and exit
to zeroing settings, while ranges changed either.

Standby
Set standby time and status
⚫Select “Standby settings”;
⚫Press M button to enter standby settings, four options: 2min/4min/6min/off;
⚫Press ↑button and ↓button to select option;
⚫Press M button to confirm selection and reveal in the top status bar;
⚫OFF means turn off standby mode;
Caution:
Device will wake up from standby mode when: tilt up >70°, tilt down >70°,tilt
left >30°,tilt right >30°;
Scope will not standby while mounted rifle shots fire.
Rangefinder
When the pointed position of laser on target is not aligned with the position of reticle
on the screen, users can zeroing the pointed position of laser in this mode
(Rangefinder module required).
⚫Select “Rangefinder”;
⚫Press M button to enter rangefinder zeroing menu, meanwhile the laser
switched on.
⚫Prompt appear on the top left of screen, as show in the picture:
-X means X-axis, horizontal;
-Y means Y-axis, vertical;
-center means cursor return to center of the screen;
-Default means cursor reset to default.
⚫Press ↑and ↓button to switch between options; press M button to
confirm;
This manual suits for next models
2
Table of contents
Other InfiRay Monocular manuals

InfiRay
InfiRay Mini Series User manual

InfiRay
InfiRay Tube Series User manual

InfiRay
InfiRay DUAL User manual

InfiRay
InfiRay Affo AP09 User manual

InfiRay
InfiRay EYE III User manual

InfiRay
InfiRay EYE III User manual

InfiRay
InfiRay Xclip User manual

InfiRay
InfiRay FINDER FL25 User manual

InfiRay
InfiRay EYE III User manual

InfiRay
InfiRay AP13 User manual