2. Before installation
Installation checks
Before installation, make sure of the following:
•Location for the electric vehicle charging station is already
agreed with the property owner or supervisor
•The power supply cabling is rated according planned
installation and local regulations
•Needed parts and accessories of the product are available
•Appropriate tools and accessories needed during installation
are available
•Power supply is disconnected
•For current leakage protection, a Type-A, ≤ 30mA
RCD (Residual Current Device) is required for vehicle
charging supply. If not already available, it must be
installed
•For short circuit protection, a separate circuit breaker must
be installed. Circuit breaker breaking current should be
selected according to local regulations and configured
maximum charging current at charging station (DIP switch
configuration)
Needed tools
•Comprehensive hand tool set including insulated screwdrivers
•Informative warning tags during the separation of the power
supply, and preventive lock or other preventive measure for
circuit breakers
•Power tools; an electrical power drill with drill bits
•Electrical testing tools:
◦Standard compliant multimeter (with accessories)
◦Standard compliant earth resistance meter (with
accessories)
•Charging station installation template (included in the product
sales package)
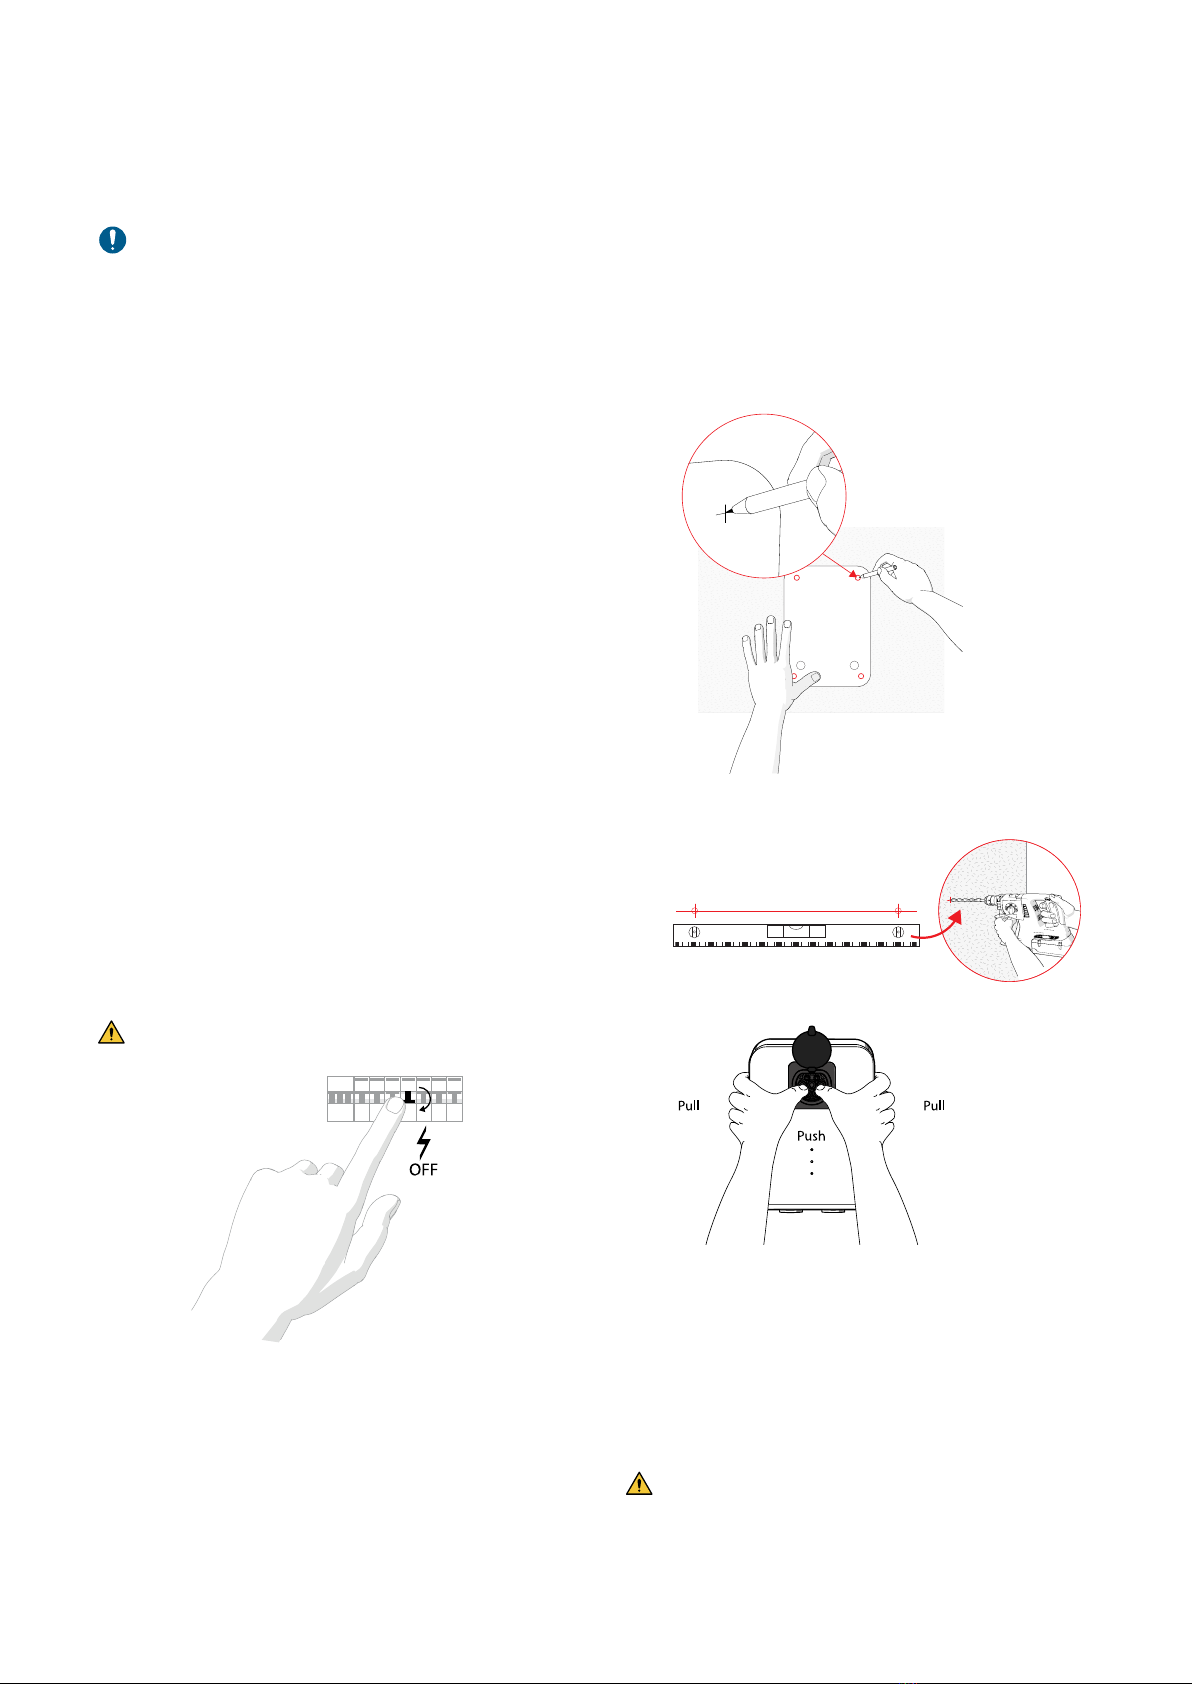
Disconnecting power supply
To avoid both personal and equipment hazards, follow these
installation steps:
1. Make sure that the power supply is disconnected by opening
the circuit breaker (power supply OFF).
a. Lock the circuit breaker to open position (power supply
OFF) by using a dedicated lock accessory or use other
preventive means for reconnection prevention.
b. Place a prohibition sign stating "Do not connect" to the
locked switch.
2. Make sure there is no power supply at the power supply
cabling. Measure with multimeter.
3. Installation
Note: Before the installation, the location for the charging station
must have been agreed with the property owner or manager.
The appropriate power supply cabling must also be available.
Note: Assure that wall material is capable to handle weight of
charging station. In special materials please use appropriate
fastening measures.
1. Select the correct installation height for the charging station.
Mark the screw locations on the wall using the installation
template included in the package.
2. Make sure the marked spots line up horizontally and drill
holes according to the hole markings.
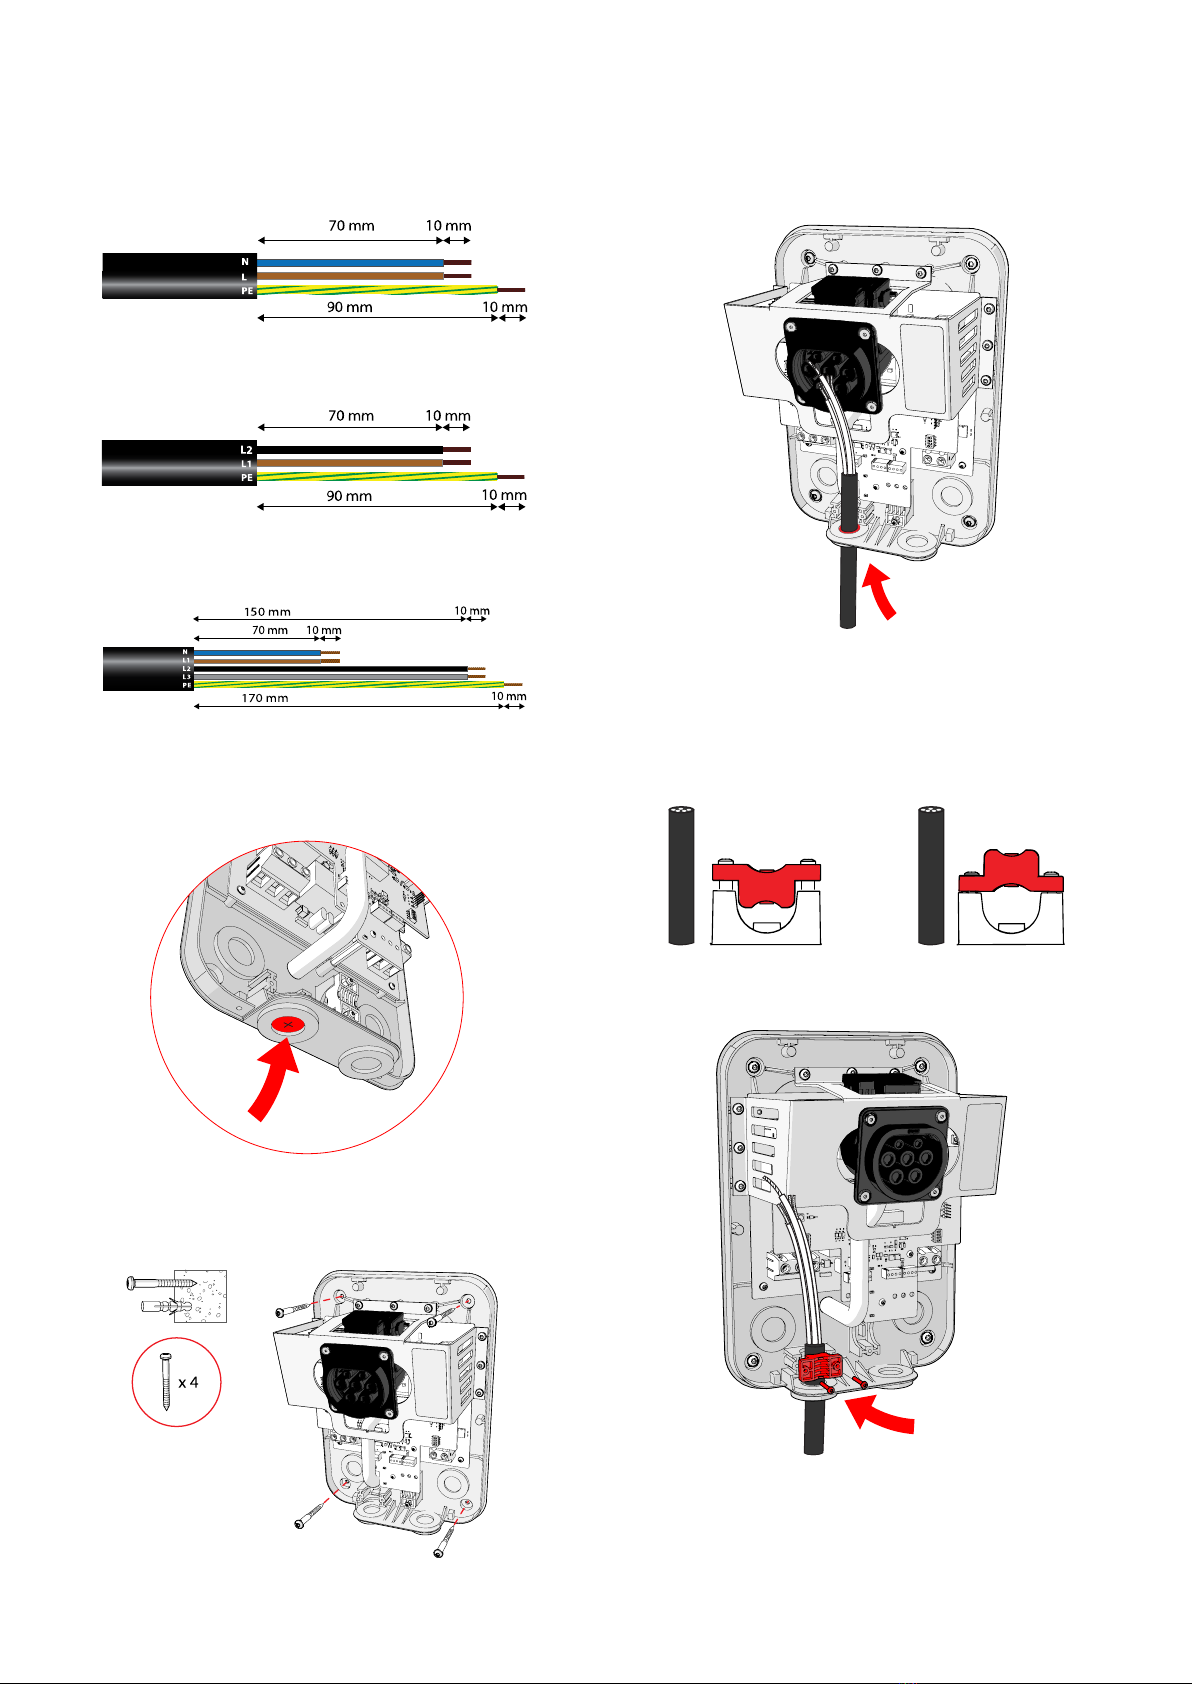
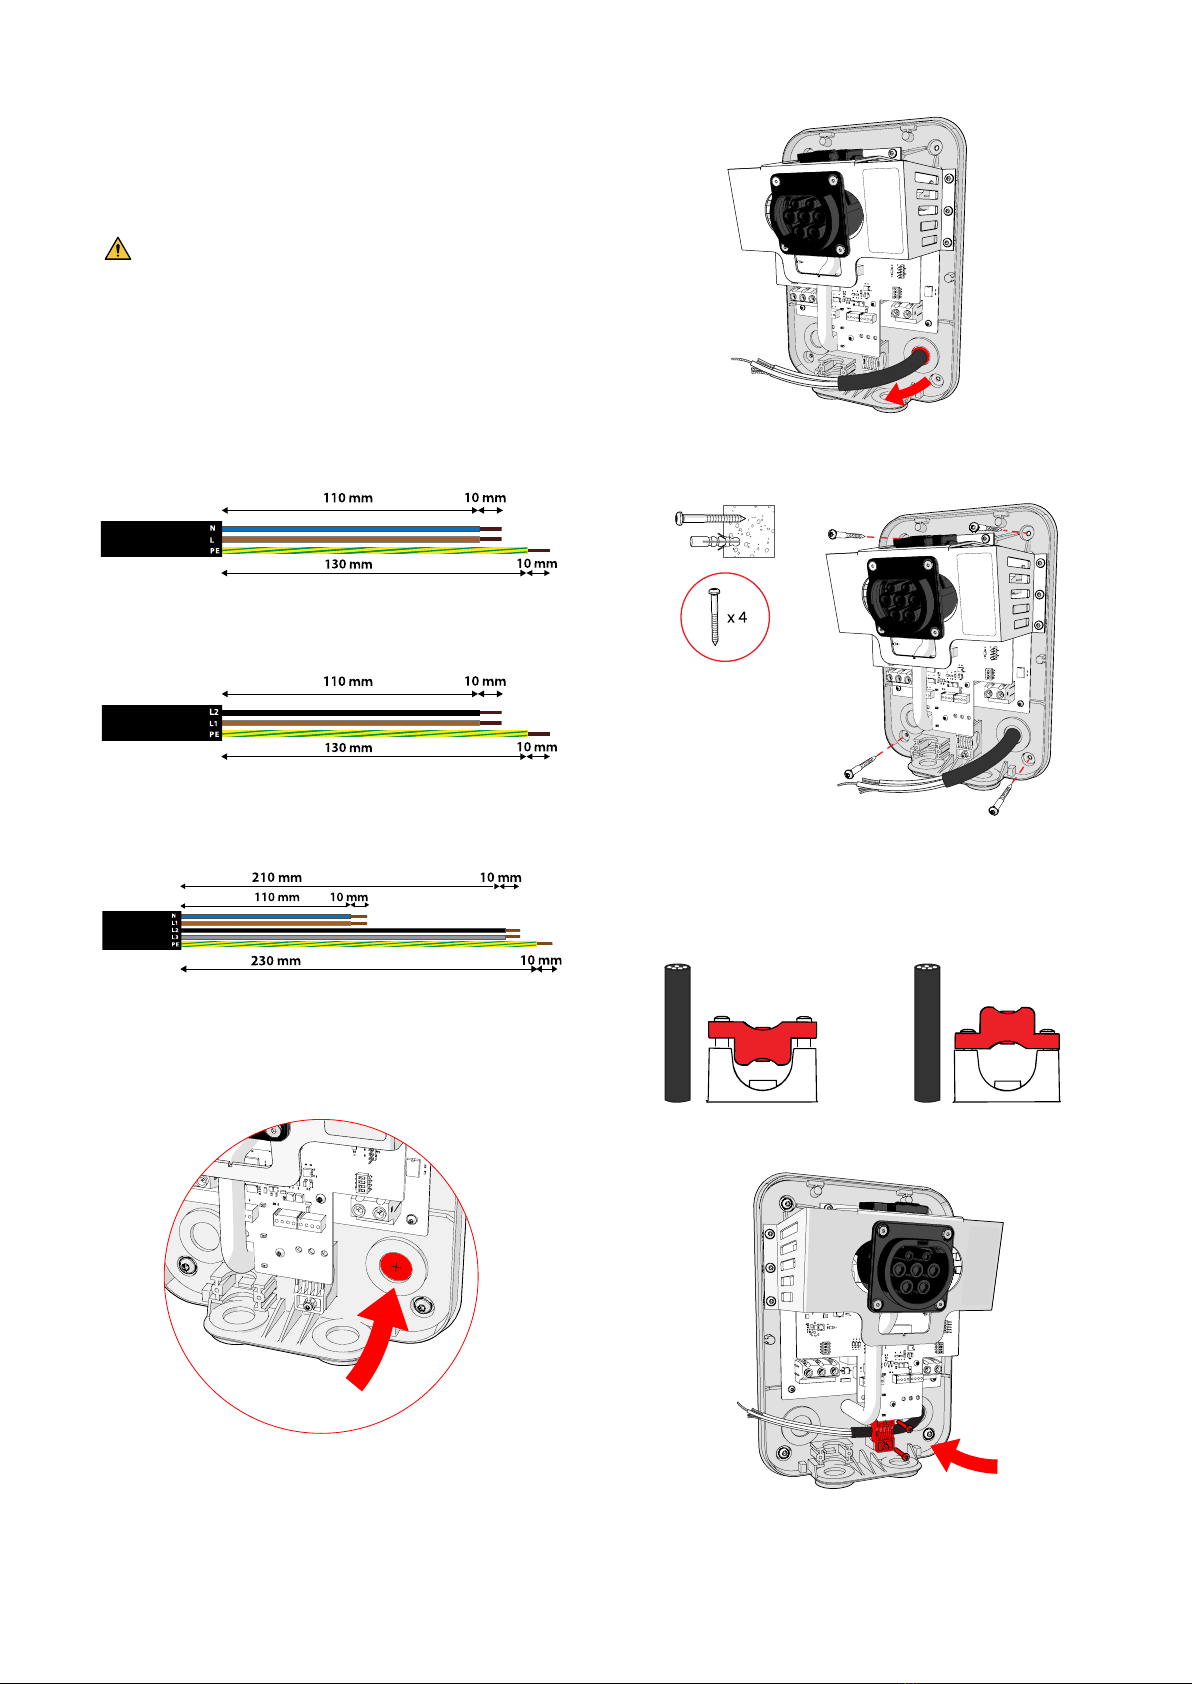
Installing the charging station - Wiring
Option A
When the cabling is installed through the bottom-side cable inle
1. Before installation of the charging station, it is recommended
that the power supply cabling is prepared at first.
Danger: Make sure the power supply for the charging
station is disconnected before starting the installation.
Danger: Make sure the power supply for the charging
station is disconnected before installation. Do not turn
power on until electrical wiring is finished.
Innohome | Charlie electric vehicle charging station | Installation and User Guide
4. Install the charging station following the option A) or option
B) depending on the cable inlet.
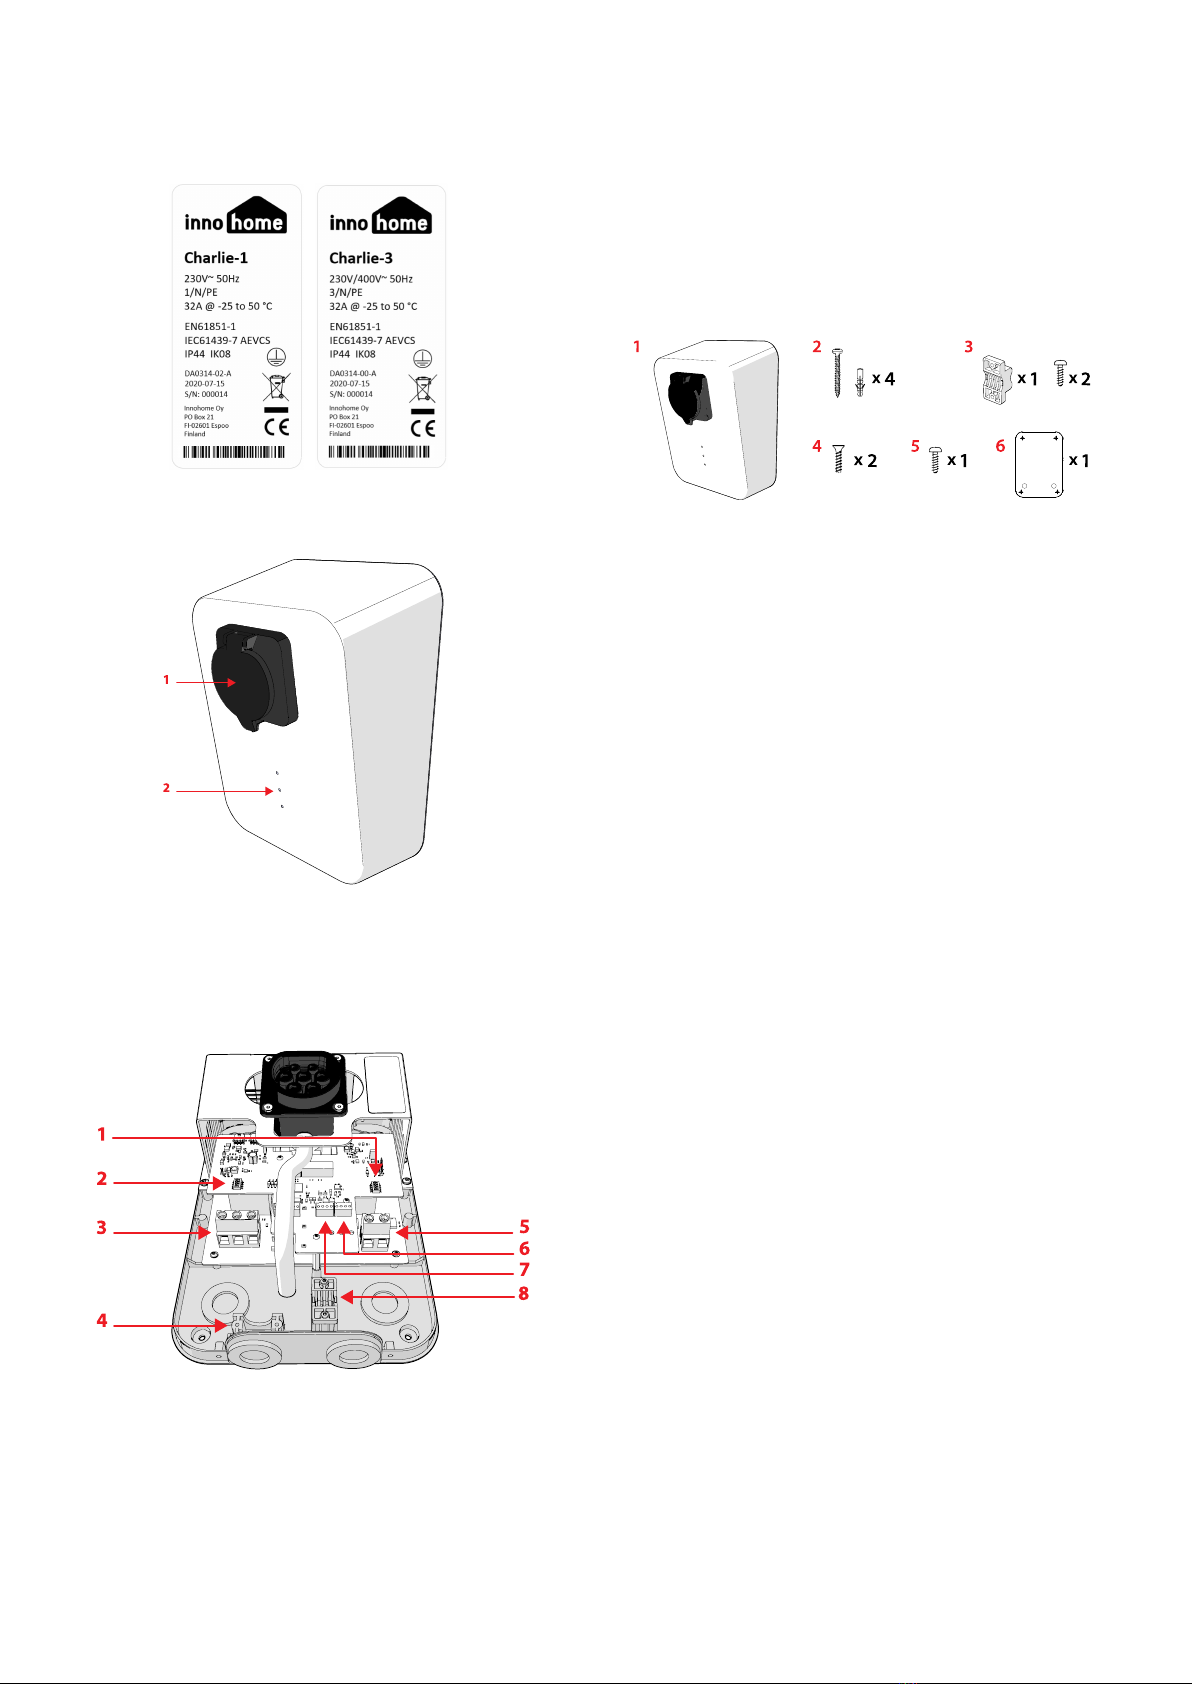
3. Remove the charging station cover.