manuals.online logo
Brands
  1. Home
  2. •
  3. Brands
  4. •
  5. Innova
  6. •
  7. Boat
  8. •
  9. Innova SEAWAVE User manual

Innova SEAWAVE User manual

1
Owner’s Manual
Kayak SEAWAVE
USA
VERSION 2/2019
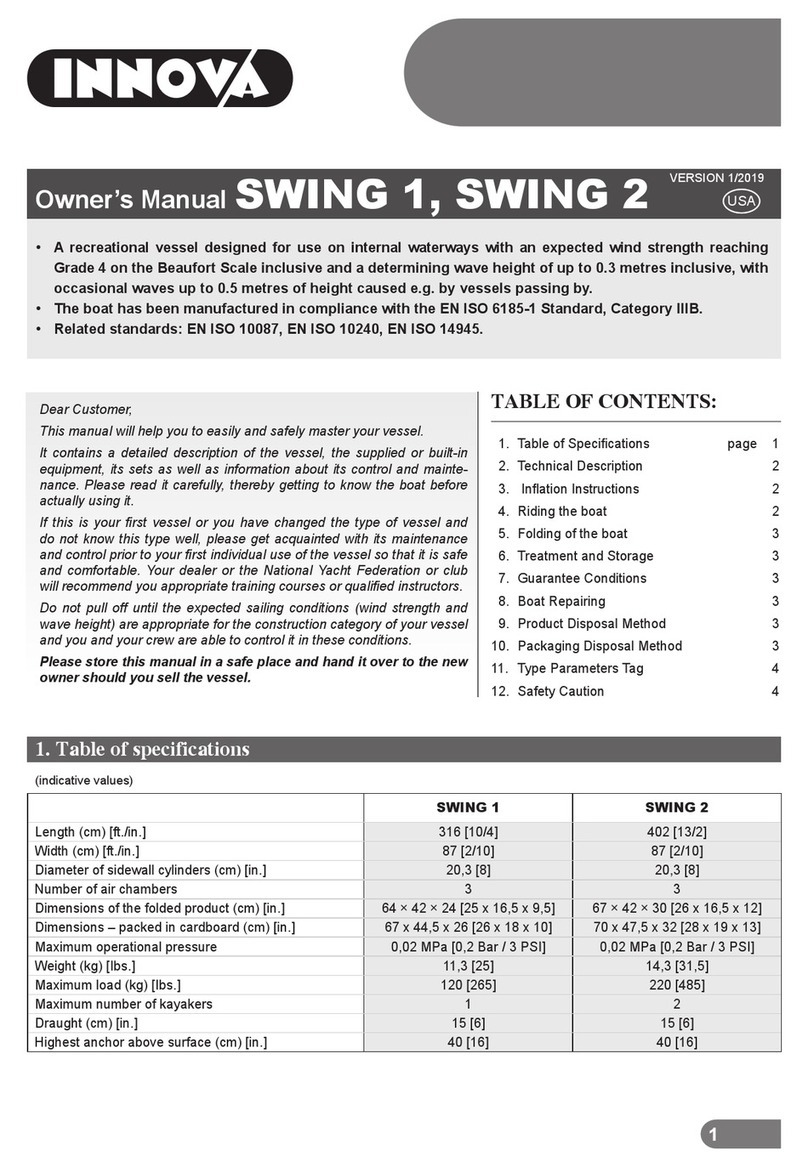
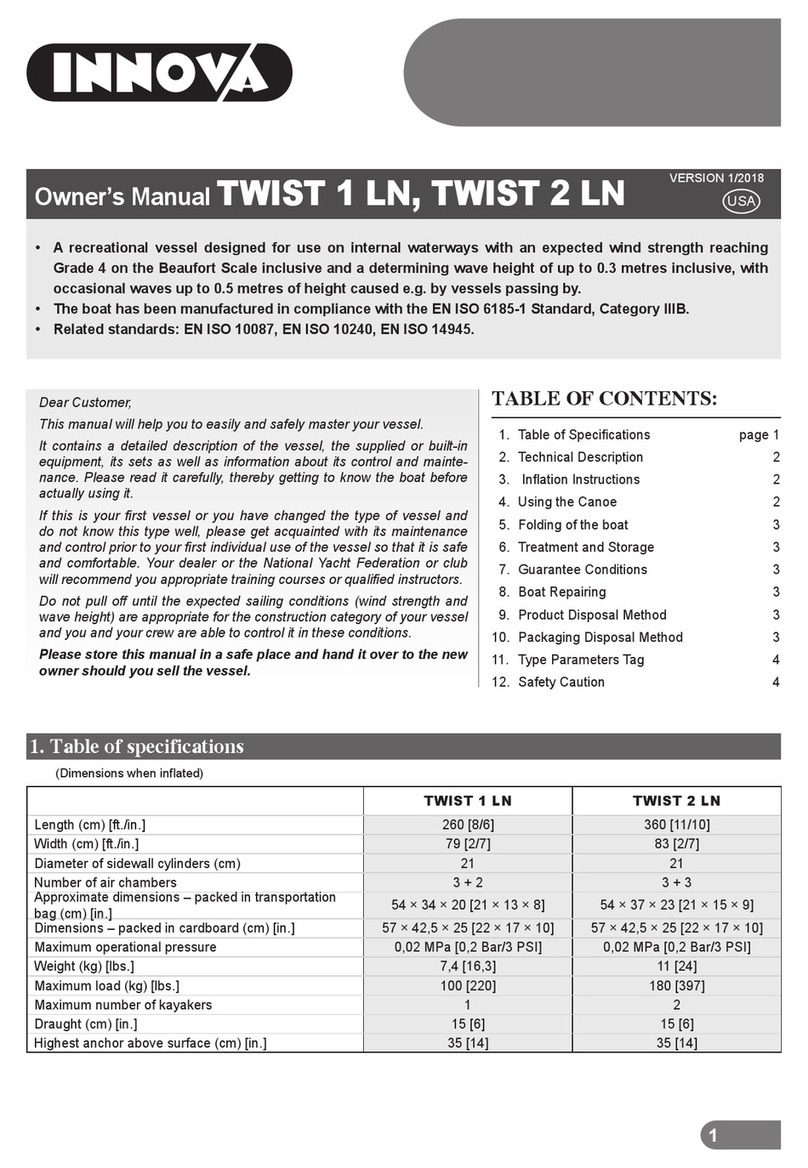
1. Table of Specifications
(Indicative values)
SEAWAVE
Length (cm) [ft./in.] 455 [14/11]
Width (cm) [ft./in.] 83 [2/9]
Number of air chambers 3 + 3 + 2
Dimensions – packed in carry bag (cm) [ft./in.] 68 × 43 × 30 [27 × 17 × 12]
Dimensions – packed in cardboard (cm) [ft./in.] 70 × 47,5 × 32 [28 × 19 × 13]
Maximum operational pressure 0,025 MPa [0,25 Bar/3,75 PSI]
Weight (kg) [lbs.] 17,5 [39]
Load (kg) [lbs.] 250 [551]
Maximum number of people 3
Draught (cm) [in.] 15 [6]
The highest anchor above surface (cm) [in.] 28 [11]
• A recreational vessel designed for use on internal waterways with an expected wind strength reaching
Grade 4 on the Beaufort Scale inclusive and a determining wave height of up to 0.3 metres inclusive, with
occasional waves up to 0.5 metres of height caused e.g. by vessels passing by.
• The boat has been manufactured in compliance with the EN ISO 6185-1 Standard, Category IIIB.
• Related standards: EN ISO 10087, EN ISO 10240, EN ISO 14945.
1. Table of Specifi cations Page 1
2. Technical Description 2
3. Infl ation Instructions 2
4. Using the Boat 2
5. Storage of the Boat 3
6. Treatment and Storage 3
7. Guarantee Conditions 3
8. Boat Repairs 3
9. Product Disposal Method 3
10. Packaging Disposal Method 3
11. Manufacturer’s Label
– legend of symbols used 4
12. Safety Caution 4
TABLE OF CONTENTS:
Dear Customer,
This manual will help you to easily and safely master your vessel.
It contains a detailed description of the vessel, the supplied or built-in
equipment, its sets as well as information about its control and mainte-
nance. Please read it carefully, thereby getting to know the boat before
actually using it.
If this is your first vessel or you have changed the type of vessel and
do not know this type well, please get acquainted with its maintenance
and control prior to your first individual use of the vessel so that it is safe
and comfortable. Your dealer or the National Yacht Federation or club
will recommend you appropriate training courses or qualified instructors.
Do not pull offuntil the expected sailing conditions (wind strength and
wave height) are appropriate for the construction category of your vessel
and you and your crew are able to control it in these conditions.
Please store this manual in a safe place and hand it over to the new
owner should you sell the vessel.
2
2. Technical Description
– See Picture 1
1. Sidewall cylinder
2. Bottom
3. PUSH/PUSH valve
– for infl ating/defl ating the kayak, regulating pressure and
measuring pressure using a manometer
4. Relief valve
5. Manufacturer’s label
6. Yellow “WARNING” label
7. Infl atable seat
8. Front footrest sized 34x16 mm
9. Rear footrest sized 45x19 cm
10. Screw valve for small chambers
(seats, footrests etc.)
11. Board
12. Handle
13. Weep hole
14. Safety rope
15. Skeg-fi n attachment
16. Seat and footrest (bottom) attachment anchor point
17. Seat attachment chamber anchor point (chamber anchor
points are marked with numbers 1, 2 and 3 for one-,
two- or three-seat version, respectively)
18. Strut anchor point
19. Seat mounting strap
20. Seat plastic buckle
ACCESSORIES SUPPLIED WITH THE KAYAK:
Transportation bag, compression belt for folded kayak,
User’s Manual with Warranty Certifi cate, foam sponge in
a mesh bag, gluing set containing glue, patches and valve
adapter, Skeg-fi n.
SPECIAL ACCESSORIES: (These may be bought with the kayak)
- Three-seat version infl atable seat
- Covering board
4. Using the Boat
The Seawave kayak is designed for recreational use and wa-
ter tourism.
Whenever the kayak is used on waterways, Waterway Traffi c
Rules should be observed. Operation of the Seawave a infl at-
able canoe does not require any licence provided the people
who operate the canoe know the techniques of small boat op-
eration within the scope necessary for its operation, as well as
the valid navigation rules of the particular country.
The Seawave kayak can be used on still or gently fl owing wa-
ters up to Diffi culty Grade WW 2. Use double-bladed kayak
paddles with a length of approx. 210 cm. People travelling
in the kayak should sit in their seats and wear fl otation life-
jackets.
ATTENTION
Prior to every use of the boat, check whether it is neces-
sary to observe any special regulations, restrictions or
rules connected with the river, surface of water or area
in which you aim to operate.
The boat is not designed to be towed behind motor-
boats, nor may it be otherwise towed, dragged or in any
way subject to unusual stress. Sharp edged and pointed
items carried in the boat must be safely wrapped.
Place all valuables into a waterproof container and fas-
ten it to the boat.
Over time, sunlight adversely aff ects the rubber coating
of the boat; therefore, it is advisable to store the boat in
shade each time after use.
3. Inflation Instructions
Roll out the kayak. Slip the tracking fi n into the bottom anchor
point (15) Infl ate seats and footrests before assembling. Fig. 2
shows the valve (10) handling. Assemble seats and footrests
on the defl ated kayak.
Thanks to its design, the Seawave kayak may be used in one-,
two-, or three-seat versions - Refer to Fig. 1.
One-seat version assembly:
Fix the seat (7) into the bottom anchor point (16). Pull the seat
backrest straps (19) through the seat anchor points (17) on
side chambers marked as <1>. Pull the strap ends through
the plastic buckle (20) - Refer to Detail A. Fix the footrest sized
34x16 mm (8) to the second position in the bottom anchor
point (16), pull the strap through the bottom plastic buckle
and tighten it. Correct pulling of the strap through the buckle
is shown in Detail B.
Two-seat version assembly:
Fix the front and rear seats (7) in the bottom anchor point (16).
Pull the seat backrest straps (19) through the seat anchor
points (17) on side chambers marked as <2>. Pull the strap
ends through the plastic buckle (20) - Refer to Detail A. Fix the
footrest sized 34x16 mm (8) to the fi rst position in the bottom
anchor point (16), fi x the footrest sized 45x19 mm (9) to the
third position in the bottom anchor point (16), pull the strap
through the bottom plastic buckle and tighten it. Correct pulling
of the strap through the buckle is shown in Detail B.
Three-seat version assembly:
Fix the seats (7) into the bottom anchor point (16). Pull the
seat backrest straps (19) through the seat anchor points (17)
on side chambers marked as <3>. Pull the strap ends through
the plastic buckle (20) - Refer to Detail A. In this version, use
the front footrest sized 34x16 mm (8) only fi x it to the fi rst posi-
tion in the bottom anchor point (16), pull the strap through the
bottom plastic buckle and tighten it. Correct pulling of the strap
through the buckle is shown in Detail B.
Infl ate the air chambers in sequence: Side chambers (1), the
bottom (2). Use a foot-pump or piston pump with valve adap-
tor for infl ating - Refer to Fig. 2b (the adaptor is included in the
kayak bonding set). Check the condition of the valves before
infl ating. Set the valves to the OFF position. Valve handling -
Refer to Fig. 2. Infl ate the air chambers until they are fi rm but
not completely stiff . The air chambers should provide a feeling
comparable to squeezing a ripe orange. You can check the
exact operating pressure by using a suitable pressure gauge
(optional accessory) – see Figure 2a. The valve handling tool
- Refer to Fig. 2c - is the optional accessory.
For transferring the kayak, use the handle (12) on the front
and rear board.
ATTENTION
The maximum operational pressure in air chambers is
0,025 MPa. The operational pressure at the bottom is
limited by the overpressure valve. If the ambient tem-
perature increases (e.g. owing to sunlight), the pressure
in the air chambers of the canoe can rise rapidly. We
recommend releasing some air from all air chambers of
the canoe after pulling it out of the water. This will pre-
vent possible destruction of the air chambers. However,
do not forget to continuously check air pressure in the
chambers afterwards, too. A corresponding reduction in
perating pressure is up to 20 % within 24 hours.
ATTENTION
When using the boat, always seal the valves with their
valve caps. This will keep dirt out of the valves. Dirt can-
cause leaky valve seals.
3
7. Guarantee Conditions
The guarantee period is 24 months and is calculated from the
date of sale.
The producer provides cost-free repairs or replacement of
faulty components for material faults or production faults.
The warranty does not cover damage to air chambers due
to higher pressure than the required operational pres-
sure!!!
8. Boat Repairs
You can easily repair a damaged boat yourselves by means of
the accompanying gluing set.
Gluing:
 mark out the damaged area on the boat and choose an
appropriately sized patch;
 the surfaces of both patch and place to be glued must be
clean, dry and without traces of old glue;
 we recommend degreasing both surfaces with acetone in
order to achieve a perfect bond;
 spread a thin layer of glue on both surfaces to be glued
and repeat this step once the fi rst layer has dried;
 after the second layer has dried, press the patch fi rmly on
the damaged place, weigh down or use a rolling pin on
a fl at surface.
For minor repairs (punctures), it is possible to re-infl ate the
boat and continue using it after waiting for approx. 30 minutes;
after more serious repairs, you should wait for 24 hours before
using the repaired boat. Complicated repairs should be per-
formed by the manufacturer or at authorized service stations.
Guarantee repairs and post-guarantee repairs are pro-
vided by the manufacturer:
GUMOTEX coating, s.r.o., Mládežnická 3062/3a, 690 02 Břeclav
Czech Republic
Or in North America by INNOVA:
Innova Kayaks by Gumotex USA
1 Chestnut Street, Suite 222, Nashua, NH 03060, USA
Tel: (360) 707-2855, E-mail: [email protected]
9. Product Disposal Method
The product should be disposed of at municipal waste dis-
posal sites.
10. Packaging Disposal Method
Cardboard – recycle as the indicated symbol directs.
PE bubble foil – recycle as the indicated symbol directs.
5. Storage of the Boat
- Refer to Fig. 3
Remove dirt and dry the kayak before rolling up. The weep
hole (13) in the rear may be used for faster draining of water
from the kayak. Defl ate seats and footrests. Open valves and
release air from the main chambers.
The defl ation may be sped up by rolling the boat towards the
valves. No sharp object may remain in the boat. Once the air
is fully forced out, roll the kayak out so that the bottom lies on
the ground and the side chambers are folded into the kayak’s
inside, and fold it one more time half-and-half outwards. Fold
the kayak’s board and roll the kayak towards the valves so that
the kayak can be put into the transport bag. Tighten the rolled
up kayak with the compress strap provided and place it into
the bag. Force the air out of the bag, roll the end of the bag
and tie it with buckles.
6. Treatment and Storage
The rubber surface coating of the boat is sensitive to oils, gas-
oline, toluene, acetone, kerosene and similar thinning agents.
Prior to storing a dirty boat, wash it down with warm soapy
water. Rinse the boat with fresh water after using the boat in
seawater. It is recommended to check the state of the infl ation
valves and the safety relief valves. If a valve is not airtight, it is
possible to unscrew the valve body from the boat with the use
of a special valve-key and clean its membrane with a strong jet
of water or compressed air. Prior to storage, it is recommend-
ed to rub the surface of the canoe with an agent intended for
the treatment of such surfaces, which has cleaning properties,
and which impregnates the material to prevent further dirtying,
or which is capable of forming a protective UV-fi lter. Never use
agents containing silicon when treating your boat. Store the
cleaned and dried boat in a dark, dry place at a temperature
of (15–35) °C, at least 1.5 m from any radiant heat source
and out of the reach of rodents. During longterm storage, it
is recommended to infl ate the boat for 24 hours from time to
time to avoid fatiguing the fold lines. It is also recommended
to have the boat serviced by the manufacturer’s authorized
service station at least once every two or three years.
Proper care and treatment of the boat will increase its
service life.


CAUTION:
On large surfaces of water (seas, lakes) pay atten-
tion to water currents and off -shore breezes. Cur-
rents and breezes may make it impossible to return
to shore.
The Seawave kayak should not be used in poor
conditions, such as In reduced visibility (night, fog,
rain).
Specifi cations of the WW 2 diffi culty grade - moderately
diffi cult:
• irregular waves and currents, rapids of moderate diffi culty,
weak eddies and whirls, low gradients, small rapids in hea-
vily meandering or badly transparent watercourse
• regular current and low regular waves, small rapids, simple
obstacles, frequent meanders with rapidly fl owing water.
Subjective requirements for WW 2 white-water kayaking:
• knowledge of all basic forward and backward strokes, stee-
ring and command of the boat.
Ability to evaluate the diffi culty and water condition.
Knowledge of simple rescue. Physical training during long
tours, swimming
Technical equipment for WW 2:
• agile open boats (of a slalom type), covered boats more
suitable, life jacket with a minimum displacement 7.5 kg.
ATTENTION
Pay extra attention to your choice of fl otation life-jacket.
The fl otation life-jacket should have a tag bearing de-
tails of its fl otation capabilities and safety certifi cation.
Pay
extra attention t
o y
our choice of fl otation lif
e-j
acket.
The
The
fl
fl
ota
ota
ti
ti
on
on
lif
lif
ej
e-j
ack
ack
et
et
sho
sho
uld
uld
ha
ha
ve
ve
at
a t
ag
ag
bea
bea
rin
rin
gd
g d
e
e-
ta
il
s
o
f i
ts
fl
otat
i
o
n
capab
ili
t
i
es
a
n
d
sa
f
ety
ce
r
t
ifi
cat
i
o
n
.
4
Innova Kayaks by Gumotex
European Inflatable Touring Kayaks
1 Chestnut Street, Suite 222, Nashua, NH 03060, USA
Tel.: (360) 707-2855, E-mail: info@innovakayak.com
www.innovakayak.com
maximum operational pressure
maximum number of people
maximum load
Explanation of the symbols used: USA
12. SAFETY CAUTION
Boating sports can be very dangerous and physically deman-
ding. The user of this product must realise that boating sports
activities can cause serious injuries or even death. When
using this product, follow the safety standards specifi ed below:
• Learn how to use this type of boat.
• Undergo certifi ed fi rst-aid training, obtain a fi rst-aid kit and
always carry rescue/safety equipment with you.
• Always use certifi ed fl otation life-jackets.
• Always wear an appropriate helmet if the specifi c conditi-
ons require it; wear proper clothes according to the specifi c
weather conditions; cold water and/or cold weather can
cause hypothermia.
• Prior to every use, check your equipment to make sure
it is not damaged.
• Never use the boat on water alone.
• Never use the boat on rivers with apparently high water
level.
• Pay attention to inspecting the water level, dangerous cu-
rrents and weather changes; when on the sea, pay attenti-
on to changes in the incoming/outgoing tide.
• Inspect all unknown sections of rivers on which you want
to use the boat; carry the boat over all places where it is
necessary.
• Do not overestimate your abilities when on the water; be
careful.
• Prior to setting off on the water, consult your state of health
with your doctor.
• Follow the manufacturer‘s recommendations concerning
the use of this product.
• Prior to using this product, never drink any alcohol or use
any drugs.
• If other boat accessories are available, use only the mate-
rials approved by the manufacturer.
• Prior to using this product, read the User‘s Manual.
The user of this product must master basic boating skills and
be aware of the risks related to this kind of sport.
The Guarantee Certifi cate is attached to this manual.
11. Manufacturer’s Label
– legend of symbols used
Each boat is provided with its own Type Parameters Tag which
displays the most important technical parameters. Please
follow these values. Above all, do not overload the boat and
maintain the recommended maximum pressures in the air
chambers.

Other Innova Boat manuals

Innova Safari 330 User manual

Innova

Innova Safari 330 User manual

Innova TWIST I User manual

Innova

Innova TWIST I User manual

Innova THAYA User manual

Innova

Innova THAYA User manual

Innova SWING 1 User manual

Innova

Innova SWING 1 User manual

Innova TWIST 1 LN User manual

Innova

Innova TWIST 1 LN User manual

Innova SEAWAVE User manual

Innova

Innova SEAWAVE User manual

Innova Solar 410C User manual

Innova

Innova Solar 410C User manual

Popular Boat manuals by other brands

Hewes 18 Redfisher owner's manual

Hewes

Hewes 18 Redfisher owner's manual

Gumotex Ruby XL user manual

Gumotex

Gumotex Ruby XL user manual

Polaris Virage TX 2000 Service manual

Polaris

Polaris Virage TX 2000 Service manual

Arey's Pond 14' Cat owner's manual

Arey's Pond

Arey's Pond 14' Cat owner's manual

Darfin Yachts BENETEAU OCEANIS 400 manual

Darfin Yachts

Darfin Yachts BENETEAU OCEANIS 400 manual

Sevylor Coral Sea STK290 owner's manual

Sevylor

Sevylor Coral Sea STK290 owner's manual

Vega ALB1N MARIN AB Handbook

Vega

Vega ALB1N MARIN AB Handbook

Rondar K6 owner's manual

Rondar

Rondar K6 owner's manual

komodo KX2 user guide

komodo

komodo KX2 user guide

Nortik Scubi 1 Assembling Instruction

Nortik

Nortik Scubi 1 Assembling Instruction

Nortik Scubi 3 Assembly instruction

Nortik

Nortik Scubi 3 Assembly instruction

Clear Blue Hawaii Boat instructions

Clear Blue Hawaii

Clear Blue Hawaii Boat instructions

PURSUIT OS 235 owner's manual

PURSUIT

PURSUIT OS 235 owner's manual

Cobalt Digital Inc CS3 owner's manual

Cobalt Digital Inc

Cobalt Digital Inc CS3 owner's manual

Yamaha WaveRunner SUPERJET 700 2002 Owner's/operator's manual

Yamaha

Yamaha WaveRunner SUPERJET 700 2002 Owner's/operator's manual

Hobie Wave Parts guide

Hobie

Hobie Wave Parts guide

GOLDFISH 28 tender owner's manual

GOLDFISH

GOLDFISH 28 tender owner's manual

grabner TRAMPER owner's manual

grabner

grabner TRAMPER owner's manual

manuals.online logo
manuals.online logoBrands
  • About & Mission
  • Contact us
  • Privacy Policy
  • Terms and Conditions

Copyright 2025 Manuals.Online. All Rights Reserved.